
Subscribe to Our Youtube Channel
Related Manuals for GRAUPNER 33575


Summary of Contents for GRAUPNER 33575
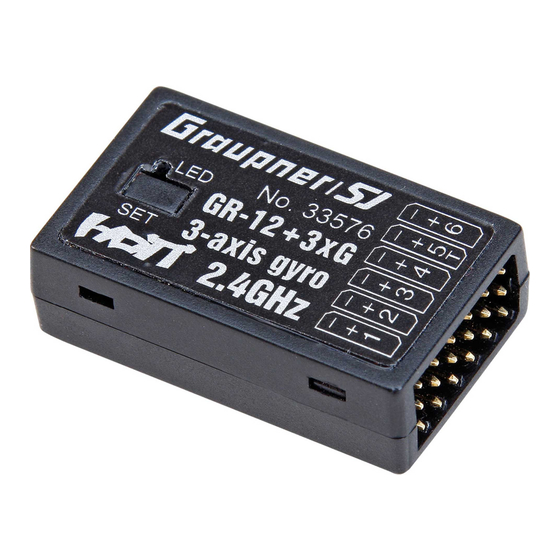
- Page 1 Manual GR-12 HoTT 2.4 GHz receiver with 3 axis gyro Firmware with Heading lock and Rate mode No. 33575 / 33576 / 33577 (Vario)
- Page 2 2 / 24 33576_jp_V1...
-
Page 3: Table Of Contents
Index Introduction ................4 Service Centre ..............4 Intended use ................5 Target group ................5 Package content ..............5 Technical Data ..............5 Symbols explication ............6 Safety notes .................6 Installation ................8 Binding .................8 Connections .................9 Power supply ..............9 Programming the receiver settings .........10 Receiver settings menu .............10 Free mixers ...............11 Gyro assignment ...............14 Programming the regulation ..........16... -
Page 4: Introduction
Introduction Thank you very much for purchasing the Graupner Receiver GR-12 HoTT 2.4 GHz 3 axis gyro. This receiver is extremely versatile. Read this manual carefully to achieve the best results with your receiver and first of all to safely control your models. If you expe- rience any trouble during operation, take the instructions to help or ask your dealer or Graupner Service Centre. -
Page 5: Intended Use
Read through this entire manual before you attempt to install or use the receiver. Graupner/SJ constantly works on the development of all prod- ucts; we reserve the right to change the item, its technology and equipment. -
Page 6: Symbols Explication
Symbols explication Always observe the information indicated by this warning sign. Particularly those which are additionally marked with the CAU- TION or WARNING. The signal word WARNING indicates the poten- tial for serious injury, the signal word CAUTION indicates possibil- ity of lighter injuries. - Page 7 Only use the components and spare parts that we recom- mend. Always use matching, original Graupner plug-in con- nections of the same design and material. Make sure that all of the plug-in connections are tight. When disconnecting the plug-in connections, do not pull the cables.
-
Page 8: Installation
Installation The receiver must be aligned at right angles to the model on the receiver platform. The lower surface of the receiver must always be parallel to one of the model sides. Prior to installation, remove the sticker on the back of the receiver. We recommend using double-sided tape No.: S8376 for Gr-18 to fix the receiver in place. -
Page 9: Connections
The polarity is also printed on the receiver; the negative wire (-) is brown, the positive (+) red and the signal orange. The servo sockets of Graupner/SJ HoTT 2.4 receivers are numbered sequentially. The socket for channel 6 can also be programmed to deliver a (digital) sum signal (see receiver settings section). -
Page 10: Programming The Receiver Settings
Programming the receiver settings The receiver can be programmed with a suitable HoTT transmit- ter or in connection with the SMART-BOX. Receiver settings menu The receiver setup menu appears in the “Telemetry“ menu under SETTINGS / DISPLAYS or if you are using a SMART-BOX under RECEIVER 2.0 <... -
Page 11: Free Mixers
The HoTT receiver configured as SUMD constantly generates a digital sum signal from 8 control signals from the transmitter and makes this signal available at the specified servo socket, which is receiver-specific. At the time this manual was revised, this type of signal was being used by several of the latest electronic applications of flybarless systems, power supplies, etc. - Page 12 MIXER: Up to four mixers can be contemporaneously programmed . You can switch between Mixer 1, Mixer 2, … and mixer 4 in the “Mixer” line. The following settings only affect the mixer selected in this line. FROM CHANNEL: The signal source (or source channel) is mixed in to the target channel (TO CHANNEL) with a programmable amount.
- Page 13 Delta with aileron differential (1 aileron) FREE MIXER < > FREE MIXER < > FREE MIXER < > >MIXER: >MIXER: >MIXER: FROM CHANNEL: FROM CHANNEL: FROM CHANNEL: >TO CHANNEL: >TO CHANNEL: >TO CHANNEL: >TRIM: >TRIM: >TRIM: TRV - : -100% TRV - : +60% TRV - :...
-
Page 14: Gyro Assignment
However, if your model is fitted with programmable servos (e.g. Graupner DES, HVS or HBS types - see the instructions for the update program ‘Firmware_Upgrade_grStudio - then it is possible to reverse the direction of rotation at the servo itself. - Page 15 The gyro axis 1, 2 or 3 is now displayed in the ‘Aileron / Ele- vator / Rudder’ display; a negative prefix will appear if servo reverse is activated. Once all three axes are defined, the display automatically reverts to ‘New setting: no’.
-
Page 16: Programming The Regulation
Note Before you start entering settings for a new model, it is essential to select the number of aileron servos in the Aileron servos menu point, and to define the gyro axes and orientation in the New settings menu point. Programming the regulation Gyro setting display MODE... - Page 17 Note If the model is too agile in mode 3, it is then recommended to set in the transmitter DUAL RATE and/or EXPO for this mode. Thus the model will react in a more docile way. In the Rate mode the model tries to reach the controlled rate.
-
Page 18: Programming The Axes Sensitivity
Some transmitters allow the corrective factors to be altered during a flight using the proportional controls, whereas others allow fixed values only. Flight phase specific settings It is possible to use a channel to control the factor value by set- ting up flight phase specific transmitter control settings, but only with mx-20 / mc-20 / mc-32 / MZ-24PRO;... -
Page 19: Initialization Of The Gyro
Programming by transmitter without proportional controls GYRO SETTINGS < > 1. Move the cursor to the appropriate line, in this case “Ail” for MODE AI/EL (2)CH7 MODE RUDD (2)CH7 aileron. >Aileron: 2. Press the SET button to activate the Channel field, select the >Elevator: appropriate value (1 - 10 of OFF), then press the SET button Rudder :... -
Page 20: Firmware Update
The programs and files required can be found in the Download area for the corresponding products at www.graupner.de. Receiver Receiver GR-12+3xG HoTT/ (No. 33576/33577): Receiver GR-12SH+3xG HoTT (No. 33575): it will be necessary an accessory adapter cable No. 33565.1. 333576/33577 333575 Connect the adapter lead to the USB interface No. -
Page 21: Declaration Of Conformity
Please refer to the detailed update instructions for the item in question in the Download area at www.graupner.de. Declaration of conformity 33575/33576/33577 Receiver GR-12 HoTT 2.4 GHz 3 axis gyro Graupner/SJ declares that the product is conform to EU norms. EN 301 489-1 V1.9.2 EN 301 489-17 V2.2.1 EN 300 328 V1.8.1... -
Page 22: Notes On Environmental Protection
The present construction or user manual is for informational pur- poses only and may be changed without prior notice. The cur- rent version can be found on the Internet at www.graupner.de on the relevant product page. In addition, the company Graupner has no responsibility or liability for any errors or inaccuracies that may appear in construction or operation manuals. - Page 23 NOTES NOTES NOTES NOTES NOTES NOTES NOTES NOTES NOTES NOTES NOTES NOTES NOTES 23 / 24 33576_jp_V1...
Need help?
Do you have a question about the 33575 and is the answer not in the manual?
Questions and answers