
Related Manuals for JAI TM-9730CL


Summary of Contents for JAI TM-9730CL
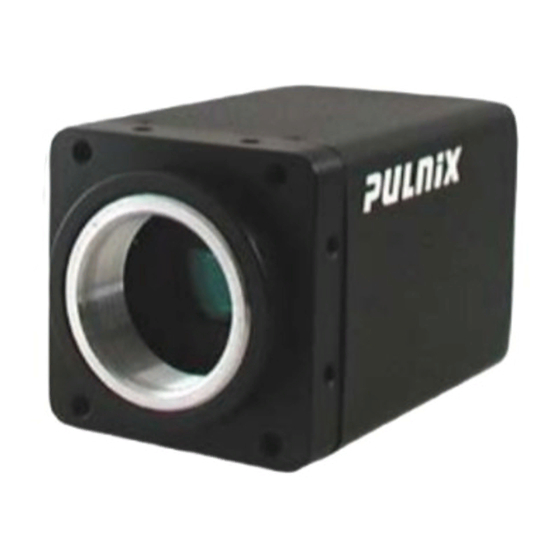
- Page 1 TM-9730CL TMC-9730CL Digital Monochrome/Color Progressive Scan, Interline-Transfer CL Camera Document Version: D Document P/N: 10310...
- Page 3 The material contained in this manual consists of information that is proprietary to JAI Inc., and may only be used by the purchasers of the product. JAI, Inc. makes no warranty for the use of its product and assumes no responsibility for any errors which may appear or for damages resulting from the use of the information contained herein.
- Page 4 Changes or modifications to this unit not expressly approved by the party responsible for FCC compliance could void the user’s authority to operate the equipment. TM-9730 Series Operation Manual JAI Inc. 625 River Oaks Parkway San Jose, CA 95134 Tel:(408) 383-0300...
-
Page 5: Table Of Contents
TM/TMC/RM/RMC-9730CL Table of Contents Disclaimer Notice ....................iii Table of Contents ....................v List of Figures ....................... vii List of Tables ......................ix Introduction ..................... 1 Product Description ................... 1 Features ....................1 System Configuration .................. 2 ... - Page 6 TM/TMC/RM/RMC-9730CL Physical Dimensions .................. 20 Spectral Response ..................21 Introduction ................... 23 Software Installation ................. 23 6.1.1 Before Installing the AccuPiXEL Series Camera-Control Software ......23 6.1.2 Installing the Software ................23 ...
- Page 7 TM/TMC/RM/RMC-9730CL List of Figures Figure 1. TM-9730CL System Configuration..............2 Figure 2. The 26-pin connector................. 4 Figure 3. TM-9730CL BNC connector ................5 Figure 4. Camera Link Cable ..................6 ...
-
Page 8: List Of Tables
TM/TMC/RM/RMC-9730CL List of Tables Table 1 Hirose power and signal integration..............4 Table 2 26-pin Connector Pin Outs................5 Table 3 Software Controllable Shutter Speed and Times Table ......... 6 Table 4 12P-02S Interface Cable ................8 ... -
Page 9: Introduction
− The CCD for the TM-9730CL has built-in micro-lens. Unless specifically mentioned, all information in this manual is relevant to all cameras in the TM-9730CL series, including the TM-9730CL (monochrome) and the TMC-9730CL (color) and all RoHS versions, which are designated RM-9730CL and RMC-9730CL. -
Page 10: System Configuration
TM/TMC/RM/RMC-9730CL Note: The Kodak KAI -0373 imager used in the TM-9730CL is packaged using a clear coverglass that does not have anti-reflective (AR) coatings. This is because the imager is not available from the manufacturer, Kodak, with AR coating on the coverglass. -
Page 11: Installation
2.2.1 Heat Dissipation The TM-9730CL camera is a compact camera. Since all the electronics have been packed in a very small package, the outer case of the camera gets hot due to heat dissipation. The TM-9730CL will operate “stand alone”, but the following suggestions are recommended for optimum performance. -
Page 12: Connector Pin Configurations
The TM-9730CL has a 12-pin Hirose connector for power input and signal integration. Pin #1 is Ground and pin #2 is +12V DC. The pinout table is shown below. For the TM-9730CL, serial communication camera control is done by means of the MDR26 Camera Link connector on the rear... -
Page 13: Figure 3. Tm-9730Cl Bnc Connector
SerToFG: Differential Serial Communication to framegrabber. 2.2.2 (c) Analog Output Connector The TM-9730CL has a BNC connector on the rear panel to output non-standard progressive analog video or RS-170 analog video (optional OP27-1) or NTSC analog video (optional OP27-2). Figure 3. -
Page 14: Camera Link Cable
Figure 4. Camera Link Cable Note: For TM-9730CL, serial communication for camera control is done by means of the Camera Link connector on the rear panel of the camera. Cable assemblies and board mount receptacles can be ordered from Intercon 1. -
Page 15: Power Supplies And Power Cable Setup
JAI Inc. Power Cables If you are using JAI Inc. power cables such as the 12P-02S, please refer to the 12-pin connector pin- out diagram in “Hirose power and signal integration.” on page 4. The cable pin-out diagram is shown in Figure 5 below. -
Page 16: Attaching The Analog Video Output
2.2.5 Attaching the Analog Video Output When connecting the TM-9730CL to an analog frame grabber or a multisync monitor, use the BNC connector on the rear panel of the camera. The input of the monitor should be balanced for 75Ω... -
Page 17: Adjustable Back-Focus
TM/TMC/RM/RMC-9730CL 2.2.7 Adjustable Back-Focus Before cameras are shipped, back focus is carefully set using a collimator, oscilloscope and other specialized equipment. While the factory-set focus serves well in most cases, an adjustable back focus makes it possible to improve image sharpness when using lower-cost zoom lenses, custom optics, or in unusual parameters. -
Page 18: Operation
Refer to Section 2.2.2 on page 4 for Camera Link information. 3.1.2 Analog Output Connector The TM-9730CL camera has a BNC connector on the rear panel to output analog video data. 3.1.3 Power and External Sync Connector Refer to Table 2 on page 5 for information on the power and external sync. connectors. -
Page 19: Electronic Shutter
TM/TMC/RM/RMC-9730CL The TM-9730CL outputs the progressive scan image with an electronic shutter in two different formats: • Progressive scanning digital and analog output The CCD signal goes through A/D and D/A converters and through 10-bit in, 8-bit out look-up table (LUT). -
Page 20: External Sync
TM/TMC/RM/RMC-9730CL External Sync The TM-9730CL accepts an external sync of standard HD and VD at TTL level for general locking to a system sync and clock. The external sync frequency requirement is as follows: 30 FPS fHD = 15.73 KHz ±2% fVD = 29.97 Hz ±... -
Page 21: Figure 9. The 3G Stagger Pattern
4 x 4 interpolation color matrix, white balance capability, etc. All AccuPiXEL color cameras are carefully designed for maximum color performance. JAI Inc. strongly suggests that you use digital output for the best performance. -
Page 22: Starting Pixel Configuration
R/G start or G/R start, as well as G/B start and B/G start. Once the correct scanning is configured, the rest of the interpolation will be exactly the same. Please contact JAI Inc. for further information regarding CCD manufacturers. -
Page 23: Camera Functions
TM/TMC/RM/RMC-9730CL Figure 12. Example of the TMC-9730CL (progressive scan output). It is important to meet the exact starting pixel at LDV and the starting line of FDV. If the starting pixel or line is shifted due to the image capture configuration, then the interpolation software can be adjusted for the correct starting point. -
Page 24: Camera Timing Charts
TM/TMC/RM/RMC-9730CL Camera Timing Charts Operation... - Page 25 TM/TMC/RM/RMC-9730CL Operation...
-
Page 26: Troubleshooting
Following are troubleshooting tips for common problems. In general, problems can easily be solved by following these instructions. If the following remedies fail to offer a solution to your problems, please contact a JAI Inc. representative. 4.1.1 Symptom: No Video Remedies: Check that the following are properly connected and operational. -
Page 27: Camera Specifications
Standard camera with tripod mount: 183.2 g, 6.5 oz. (TM-9730CL) Weight Digital Zoom camera without tripod mount: 184.4 g, 6.5 oz. (TM-9730CL), Digital Zoom camera with tripod mount: 197.2 g, 7.0 oz. (TM-9730CL) Auto Level Control (ALC[EE & AGC])(OP1-5): Imager Blemish Map (OP2-1):... -
Page 28: Physical Dimensions
TM/TMC/RM/RMC-9730CL Physical Dimensions Figure 13. Physical Dimensions Caution: When mounting the camera to any fixture, do not use screws that extend more than 5 mm into the camera housing to avoid possible damage to the internal circuitry. For attaching the tripod mounting plate, only the supplied screws should be used. -
Page 29: Spectral Response
TM/TMC/RM/RMC-9730CL Spectral Response Figure 14. Monochrome Spectral Response Figure 15. Color Spectral Response Camera Specifications... -
Page 31: Introduction
(non-interlace) format, producing a full frame of electronic shutter images, as well as normal images. This document addresses the AccuPiXEL version 5.0.0 software, last modified in 2007 and available for download at www.jai.com. Software Installation Following are instructions to install the AccuPiXEL series camera-control software on a PC. -
Page 32: Figure 16. Use Save To Download A Copy Of The Software
TM/TMC/RM/RMC-9730CL Note: If you go to software and download based on the camera description, for example, TM-9730CL, the software download is the correct, and latest released version. Figure 16. Use Save to download a copy of the software. The software is compressed, and it may be necessary to install decompression software if you are using an older operating system. -
Page 33: Installing The Camera Link Api Dll (Clserxxx.dll)
To install the Camera Link control software with frame grabber software, please consult the frame grabber company or JAI Inc. The AccuPiXEL software does not function if a frame grabber can not be located. The current JAI Cam2Net software installs the frame grabber dll “clsrc2n.dll”. For more details on compatible frame grabbers see the “ReadMe”... -
Page 34: Accessing The Accupixel Software
TM/TMC/RM/RMC-9730CL Figure 19. Use Add/Remove to uninstall AccuPiXEL software. 6.1.5 Accessing the AccuPiXEL software Once the software has installed go to the “Start” menu on the main screen to run AccuPiXEL. Click on All Programs>AccuPiXEL Camera V5.0.0>AccuPiXEL Camera. This opens the small selection dialog box used to configure the camera to run AccuPiXEL. -
Page 35: Camlink 1.0
When you choose the CamLink 1.0 version it is necessary for you to locate and double-click to link the framegrabber DLL. Once the DLL is linked choose the matching camera series. In this case the TM-9730CL. Figure 22. Choose the matching configuration file for the software. -
Page 36: Camlink 1.1
TM/TMC/RM/RMC-9730CL 6.1.9 CamLink 1.1 If you select CamLink 1.1 the software searches for all CamLink 1.1 compliant frame grabbers. The AccuPiXEL software displays available frame grabber DLL’s. Choose the framegrabber the camera is connected to and click on the GO! button. Figure 23. -
Page 37: Gui Features
TM/TMC/RM/RMC-9730CL GUI Features The AccuPiXEL series Camera Link software communicates through the Camera Link connector on the back panel of the camera. Menu Bar Camera Output Protocol About Most of these menu bar options are set up in the process of opening the main screen. They are detailed later on in this document. -
Page 38: Operating The Control Software
Operating The Control Software 7.3.1 Exposure Control In Exposure Control, you can specify the shutter mode. Scan mode is deactivated for the TM-9730CL. 7.3.1 (a) Shutter Mode In the Shutter Mode drop-down list box you can select No Shutter mode, Manual, or Direct shutter. -
Page 39: Gain Control
TM/TMC/RM/RMC-9730CL Figure 27. Setting Direct Exposure Control 7.3.2 Gain Control This control is available when the on/off checkbox in the Auto Level Control is not checked. Auto Level Control; Gain Control. The Gain Control box allows you to change the Gain value from 0 to 255 (integer). -
Page 40: Auto Level Settings
TM/TMC/RM/RMC-9730CL Figure 29. Blemish Correction Radio Buttons 7.3.4 Auto Level Settings Verify the on/off checkbox is checked to activate the Auto Level Control if the camera has the ALC option. Figure 30. Auto Level Control 7.3.4 (a) Setting the ALC Click the Configure button. -
Page 41: Figure 32. Look Up Table Options
TM/TMC/RM/RMC-9730CL Figure 32. Look Up Table options. 7.3.5 (a) Knee Selection The Knee Selection box allows you to select the pre-set knee control Look Up Table (LUT). The AccuPiXEL series cameras have eight preset knee control LUTs. Note: The use of the Knee LUT may interfere with the Auto Level Control (ALC). Figure 33. -
Page 42: Eeprom Settings
TM/TMC/RM/RMC-9730CL Figure 34. Graphical Knee Selections 7.3.5 (c) Table The A and B designations access two different memory locations for loading knees from a table. 7.3.5 (d) X1, X2, Y1, Y2 The X and Y controls left of the graphical knee control allow LUT configuration by entering numbers instead of dragging on the graphical control. -
Page 43: Figure 36. Eeprom Access From The Main Menu
TM/TMC/RM/RMC-9730CL already exists it is overwritten, with certain exceptions. Info provides the details about a configuration, but does not load the configuration. Default opens the settings used for camera startup from a new boot. Figure 36. EEPROM access from the main menu GUI Menu Bar... -
Page 44: Gui Menu Bar
TM/TMC/RM/RMC-9730CL GUI Menu Bar The “Load” option in the menu bar allows you to restore the Gain Table setting from EEPROM. Click on “Load” and select “From Gain Table” in the menu to restore the setting from four user memory pages and four preset setting memory pages. -
Page 45: Accupixel Series Camera Customer And Serial Commands
TM/TMC/RM/RMC-9730CL AccuPiXEL Series Camera Customer and Serial Commands The AccuPiXEL series cameras can be controlled by serial command either by means of RS-232 or Camera Link. The Start character is always “:” and the End character is always <CR> (return). For example, to set Asynchronous Pulse Width Mode, send the command :SA9<CR>... -
Page 46: Table 7 Serial Commands Table
TM/TMC/RM/RMC-9730CL Table 7 Serial Commands Table First Second Third Character Character Character Response Functions “S” (Shutter) “M” (Manual) “0” – “9” Mode Manual Shutter Mode “X” “000” – “419” Direct Shutter Mode “G” (Gain) “M” “00” – “FF” Gain Control “V”... -
Page 47: Table 8 16 Bytes Status Report
TM/TMC/RM/RMC-9730CL Table 8 16 Bytes Status Report Byte 1 MGCL (1 byte) CDS Gain Byte 2 Vtop(1 byte) A/D reference voltage Top Byte 3 Vbtm(1 byte) A/D reference voltage Bottom Byte 4 XA1 (1 byte) X-Coordinate of right knee for table A Byte 5 YA1 (1 byte) Y-Coordinate of right knee for table A... -
Page 48: Table 10 Function Flag Description 2
TM/TMC/RM/RMC-9730CL Table 10 Function Flag Description 2 FUNC- RS-170 TSELFLG Resv LUTB2FLG LUTB1FLG Resv LUTA2FLG LUTA1FLG FLAG #2 TSELFLG (Bit4) -- 0 - Select table A, 1 - Select table B LUTB2FLG (Bit3) -- 00 - Linear mode; 01 - Knee mode (for table B) LUTB1FLG (Bit2) --10 - Gamma mode;... -
Page 49: 10 Configurable Order Options
10.3 OP2-5 Blemish Correction (monochrome only) In an attempt to provide blemish free images the TM-9730CL has a built-in blemish correction feature. Through a calibration process, all blemished pixels are detected and their positions are stored in an EEPROM in the camera. The known blemished pixels are corrected by replacing the value of the nearest neighbor pixels. -
Page 50: Figure 39. Frame Timing Chart
TM/TMC/RM/RMC-9730CL Figure 39. Frame Timing Chart Figure 40. Line Timing Chart Configurable Options... -
Page 51: Op27-2 Ntsc (Color Only)
TM/TMC/RM/RMC-9730CL 10.9 OP27-2 NTSC (color only) NTSC composite video. Active video is 708 (H) x 480 (V). Figure 41. NTSC Composite Video Levels Configurable Options... -
Page 52: Op27-3 Ntsc Y/C Output (Color Only)
Information from the CCD pixels not used for the digital zoom is discarded. The TM-9730CL is capable of a maximum of 3x zoom, which uses one third (256 x 162 pixel area) of the CCD. This option is offered for monochrome cameras only. - Page 54 Europe, Middle East & Africa Phone +45 4457 8888 Fax +45 4491 8880 Asia Pacific Phone +81 45 440 0154 Fax +81 45 440 0166 Americas Phone (Toll-Free) 1 800 445-5444 Phone +1 408 383-0301 www.jai.com...
Need help?
Do you have a question about the TM-9730CL and is the answer not in the manual?
Questions and answers