Table of Contents
Advertisement
Advertisement
Table of Contents

Related Manuals for Harmonic Omneon MediaDeck


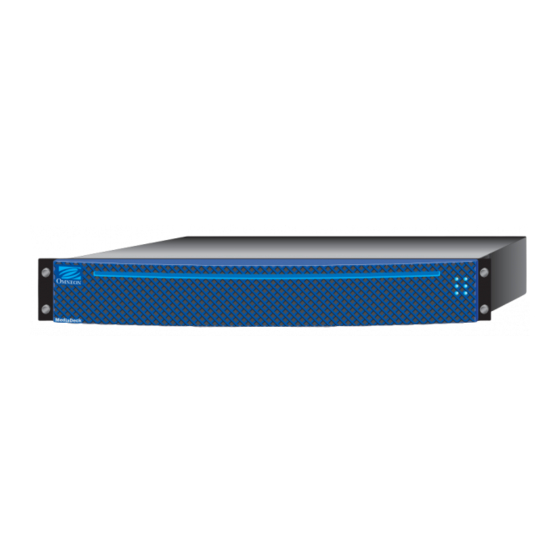
Summary of Contents for Harmonic Omneon MediaDeck
- Page 1 Omneon MediaDeck™ Component Replacement Guide Part Number: 28-0136, Revision L...
- Page 2 Copyright and Trademarks Copyright © 2000—2011 Harmonic Inc. All rights reserved. Omneon and the Omneon logos are trademarks of Harmonic Inc. All other trademarks are the property of their respective holders. May be covered by one or more of U.S. Patents No. 6,571,351; 6,696,996; 6,545,721; 6,574,225;...
- Page 3 Le prèsent appareil numérique n’émet pas de bruits radioélectriques dèpassant les limites applicables aux appareils numériques de la classe A prescrites dans le Règlement sur le brouillage radioélectrique édicté par le ministère des Communications du Canada. Omneon, Now Part of Harmonic...
- Page 4 EU Manufacturer’s Declaration of Conformity We: Harmonic Inc. Declare under our sole responsibility that the products identified below comply with the following EU Directives and Harmonized Standards stated. Applicable EU Directives for the Omneon MediaDeck: Parameter Specification Detail Low Voltage Directive...
- Page 5 Safety For the Omneon MediaDeck, the 5000 Series SD MPEG-2/DV MediaDeck Module (MDM-5001), the 5220 Series SD MPEG-2 Dual I/O MediaDeck Module (MDM-5221), and the 5320 Series HD/SD MPEG-2 Dual I/O MediaDeck Module (MDM-5321), the 5400 Series HD/SD MPEG-2/DV Simulcast MediaDeck Module (MDM-5401), the 5500 Series HD/SD MPEG-2 Playback MediaDeck Module (MDM-5501): •...
- Page 6 The product is marked with this symbol when it is necessary to refer to the manuals to prevent damage to the product. Warnings Please observe the following important warnings: • Any instructions in this guide that require opening the chassis, changing a power supply, or removing a board should be performed by qualified service personnel only.
- Page 7 Slots and openings in the chassis are provided for ventilation. Do not block them. Leave the back of the frame clear for air exhaust cooling and to allow room for cabling — a minimum of 6 inches (15.25 cm) of clearance is recommended. Omneon, Now Part of Harmonic...
- Page 8 Component Replacement Guide...
-
Page 9: Table Of Contents
Verifying Which I/O Module to Remove ....24 Winking the Omneon MediaDeck ..... . 25 Winking the I/O Module . - Page 10 Installing the Replacement Processor Module ....37 Winking the Omneon MediaDeck ..... . 38 Upgrading the MediaDeck Firmware.
-
Page 11: Introduction
Introduction This document provides the following component replacement instructions for the Omneon MediaDeck: • Replacing the Bezel • Replacing a Disk Drive • Replacing a Power Supply • Replacing the Drive Cage • Replacing an I/O Module • Replacing the Processor Module •... -
Page 12: Technical Support
Technical Support Omneon provides many ways for you to obtain technical support. In addition to contacting your Distributor, System Integrator, or Omneon Account Manager, you can contact the Omneon Technical Support department as follows: For support in the Americas: • Telephone (Toll Free): +1(888) OVN SPT1 (686 7781) •... - Page 13 For support in Asia Pacific (other territories): • Telephone: +65 6671 1499 • Fax: +65 6671 1454 • Email: apacsupport@omneon.com • http://www.omneon.com/service-support • ftp://ftp.omneon.com/Updates/Omneon/Current/ Company Address Harmonic Inc. 4300 North First Street San Jose, CA 95134 U.S.A. Omneon, Now Part of Harmonic...
- Page 14 Component Replacement Guide...
-
Page 15: Replacing The Bezel
This section provides instructions for replacing the front bezel of the Omneon MediaDeck. CAUTION: Observe all conventional ESD precautions when handling Omneon MediaDeck components. Avoid contact with backplane components and connectors To remove the front bezel: 1. Loosen the four captive thumb screws that secure the bezel to the chassis. - Page 16 Replacing the Bezel To install the new bezel: 1. Unpack the bezel. 2. Align the bezel in front of the chassis so that the Omneon logo appears in the top-left corner, and the metal corners of the bezel are level with the rack ears of the chassis. 3.
-
Page 17: Replacing A Disk Drive
HAPTER Replacing a Disk Drive This section provides instructions for replacing an Omneon MediaDeck disk drive. The Omneon MediaDeck contains high- performance SATA disk drives that can be hot-swapped during operation without interrupting the use of the system. NOTE: To avoid potential audio/video disruption stemming from hot- swapping a disk, the disk in question should be removed from the RAID set using SystemManager prior to removing it from the disk enclosure. - Page 18 Host Name • Serial Number Tip: To view MediaDeck Properties, from the System Diagram page of the Configuration tab, click the icon for your Omneon MediaDeck. Then, from the Physical Configuration page, click the icon for your Omneon MediaDeck. •...
- Page 19 30 seconds to ensure that the drive has stopped spinning To replace (hot swap) a disk drive in the Omneon MediaDeck: 1. Ensure that you have a replacement drive from Omneon on hand.
- Page 20 3. In SystemManager, from the Drive Properties page for the drive, click Fail drive to fail the drive. View the Disk Utilities page for the Omneon MediaDeck to verify that the drive state is reported as Dead, Failed. 4. From the Disk Utilities page, find the physical location of the drive and note the state of the LEDs for this drive as follows: a.
- Page 21 Disk Utilities page. Tip: To open the Add/Remove Drives page, click Disk Utilities in the left-hand column, and then click the icon for the Omneon MediaDeck with the required disk drive(s) to display the associated drive views. Click the link that begins with RaidSet to open the RAID utilities page.
- Page 22 Utilities page on the SystemManager application. Verify that the drive is reported as Alive by the Omneon MediaDeck. Continue to Step If the drive is not reported as Alive by the Omneon MediaDeck, bypass the drive (following the instructions in Step 3), remove the drive, and replace with another drive if available.
- Page 23 Omneon for analysis. Contact Omneon Technical Support for a Return Authorization Number (RA) before Technical Support shipping the drive back to Omneon. Refer to contact information and a shipping address. Omneon, Now Part of Harmonic...
- Page 24 Replacing a Disk Drive Component Replacement Guide...
-
Page 25: Replacing A Power Supply
Replacing a Power Supply This section provides instructions for replacing a power supply for the Omneon MediaDeck. The Omneon MediaDeck is equipped with two hot-swappable power supplies, each with an independent AC connector. If one supply fails, the load is transferred to the remaining supply without interruption to service. - Page 26 Replacing a Power Supply 2. Press the release lever to the right and pull the handle to remove the power supply as shown Figure Figure 6 Removing the Power Supply To install a new power supply: 1. Unpack the power supply. 2.
-
Page 27: Replacing The Drive Cage
This section provides instructions for replacing the drive cage for the Omneon MediaDeck. CAUTION: Observe all conventional ESD precautions when handling Omneon MediaDeck components. CAUTION: Make sure the Omneon MediaDeck is powered down Powering completely before replacing the drive cage. Refer to Down the Omneon MediaDeck for instructions on powering down. - Page 28 Replacing the Drive Cage 1. From the Configuration tab in SystemManager, click the Disk Utilities icon in the left-hand column. The Disk Utilities page displays all MediaDecks or MediaDirectors on the network and the status of their file systems. 2. Click on the name of the MediaDeck you wish to power down. The Disk Utilities page for that MediaDeck appears.
-
Page 29: Removing The Drive Cage
Stop FS button to stop the file system (see Figure 5. Verify that the status has changed to Stopped. 6. Remove power from the Omneon MediaDeck by disconnecting each of the attached AC cords from their power sources. Removing the Drive Cage To remove the drive cage: 1. - Page 30 Replacing the Drive Cage 3. Using a screwdriver, loosen the left and right-hand captive screws located on the inside of the drive cage, as shown in Figure Figure 10 Loosening the Drive Cage Screws CAUTION: Do not bend or damage the LED card located below the right-hand screw.
-
Page 31: Installing The Drive Cage
Replacing a Disk Drive instructions. 5. Install the front bezel. Refer to Replacing the Bezel instructions. 6. Apply power to the Omneon MediaDeck by connecting the AC power cords to the separate, isolated power sources. Omneon, Now Part of Harmonic... - Page 32 From the Configuration tab in SystemManager, click the Disk Utilities icon in the left-hand column to display the Disk Utilities page. b. Click the icon for the Omneon MediaDeck which contains the file system you want to start. The Disk Utilities page for that MediaDeck appears.
-
Page 33: Replacing An I/O Module
This section provides instructions for replacing an I/O module (Omneon MediaDeck Module). CAUTION: Observe all conventional ESD precautions when handling Omneon MediaDeck components. NOTE: The procedures in this section apply to SystemManager version 5.19. If you are running a different version of SystemManager, some steps may vary. -
Page 34: Verifying Which I/O Module To Remove
Verifying Which I/O Module to Remove If you are using more than one Omneon MediaDeck, use the Wink function to identify the Omneon MediaDeck that contains the I/O module to be replaced, and then wink the I/O module to identify the correct one. -
Page 35: Winking The Omneon Mediadeck
1. From SystemManager, click the Configuration tab to display the Configuration page and System Diagram. 2. Click the icon for the Omneon MediaDeck you wish to wink. The MediaDeck Properties page appears. 3. Scroll down to the General Properties section of the page to view the Wink State. -
Page 36: Removing The I/O Module
Replacing an I/O Module Removing the I/O Module Removing the I/O Module from the Chassis To remove an I/O module from the chassis: 1. Disconnect any cables from the I/O module. 2. Using a screwdriver, loosen the three screws on the rear panel of the I/O module as shown. -
Page 37: Deleting The Removed I/O Module From Systemmanager
Remove Device icon to display the Remove Device page. 3. Scroll to the MediaPorts section of the page and locate the I/O module you wish to remove. NOTE: In SystemManager, MediaDeck Module information is sometimes displayed as MediaPort information. Omneon, Now Part of Harmonic... -
Page 38: Installing The New I/O Module
4. From the Configuration tab of SystemManager, view the System Diagram page and verify that the new I/O module appears. 5. Connect any necessary cables to the I/O module. Refer to the Omneon MediaDeck™ Installation Guide for instructions. Attaching the I/O Module to the Existing Players... - Page 39 Replacing an I/O Module To attach the new I/O module to existing players: 1. Open the Player List for the Omneon MediaDeck, and then click the Edit link for any player that will use the new I/O module. Tip: To open the Player List, click the Player Configuration icon in the left-hand column, and then click the icon for your Omneon MediaDeck.
-
Page 40: Activating Players
2. From the Player Configuration window, click the icon for the Omneon MediaDeck. The Player List window appears, showing a list of players that reside on the selected Omneon MediaDeck. 3. Click the check boxes next to the Players you wish to activate and then click the Activate Selected button. -
Page 41: Replacing The Processor Module
This section provides instructions for replacing the Omneon MediaDeck processor module. The SystemManager uses IP addresses to uniquely identify an Omneon MediaDeck processor module. If you need to replace a processor module (for example, because of unit failure), SystemManager requires that the new processor module automatically assume different IP addresses from the replaced unit. -
Page 42: Powering Down The Omneon Mediadeck
SystemManager. Powering Down the Omneon MediaDeck Before removing power to your Omneon MediaDeck, Omneon recommends that you first stop the file system. Once you reconnect power to your MediaDeck, you must then start the file system again. - Page 43 Replacing the Processor Module Figure 15 Opening the File System Utilities Page 3. Click on the link to the file system (fs0) to open the Filesystem utilities page (see Figure 16). Omneon, Now Part of Harmonic...
- Page 44 Stop FS button to stop the file system (see Figure 16). 5. Verify that the status has changed to Stopped. 6. Remove power from the Omneon MediaDeck by disconnecting each of the attached AC cords from their power sources. Component Replacement Guide...
-
Page 45: Removing The Processor Module
Replacing the Processor Module Removing the Processor Module To remove the Omneon MediaDeck processor module: 1. Disconnect any cables from the processor module. 2. Loosen the three screws on the rear panel of the processor module as shown. The screws are captive and will not come out completely. - Page 46 Replacing the Processor Module SAS Cable Figure 18 Locating the SAS Connector 5. Press down on the top latch of the SAS connector and disconnect the SAS cable, as shown in Figure Connector Figure 19 Disconnecting the SAS Cable Component Replacement Guide...
-
Page 47: Installing The Replacement Processor Module
5. Tighten the three screws on the rear panel of the processor module. NOTE: Do not over-tighten the screws. 6. Reconnect all network and ethernet cables to the processor module. Refer to the Omneon MediaDeck™ Installation Guide for instructions. 7. Power up the Omneon MediaDeck. Omneon, Now Part of Harmonic... -
Page 48: Winking The Omneon Mediadeck
1. From SystemManager, click the Configuration tab to display the Configuration page and System Diagram. 2. Click the icon for the Omneon MediaDeck you wish to Wink. The MediaDeck Properties page appears. 3. Scroll down to the General Properties section to view the Wink State. -
Page 49: Upgrading The Mediadeck Firmware
MediaDecks and MediaDeck Modules in your system are running the same version of firmware. If necessary, follow the instructions in “Upgrading Firmware” in the Omneon MediaDeck™ User’s Guide to upgrade your MediaDeck and MediaDeck Module firmware. After the upgrade, the new MediaDeck will need to be restarted. Once... - Page 50 Replacing the Processor Module Figure 20 Opening the File System Utilities Page 3. Click on the link to the file system name listed (fs0) to open the Filesystem utilities page (see Figure 21). Component Replacement Guide...
- Page 51 Start FS button to start the file system. • If the Status field shows Not started, click the Start FS button to start the file system. IMPORTANT: Do not click ‘Initialize FS’. This will wipe out the entire file system. Omneon, Now Part of Harmonic...
-
Page 52: Moving Players To The New Mediadeck In Systemmanager
MediaDeck. Tip: From the left-hand column, click Player Configuration, and then click the icon for your Omneon MediaDeck. 2. Scroll to the bottom of the window and select the source Omneon MediaDeck that is being replaced from the drop-down box. Then click Select Players to display the Select Players... - Page 53 5. Click Done to complete and return to the new Omneon MediaDeck Player List. 6. From the Player List, select the recently moved player(s) and click Activate Selected. 7. Verify the players are usable by recording or playing material using those players. Omneon, Now Part of Harmonic...
-
Page 54: Removing The Original Mediadeck From Systemmanager
Replacing the Processor Module Removing the Original MediaDeck from SystemManager Now that you have moved the players to the new MediaDeck, remove the original MediaDeck from SystemManager by doing the following: 1. In SystemManager, click the Diagnostic tab, and then from the left-hand column, click the Remove Device icon. -
Page 55: Clearing Alarms
Clearing Alarms Since the new MediaDeck has just been connected, there will probably be Error Alarms in the system. To clear the alarms from the SystemManager, click on the word ALARM that is flashing in Omneon, Now Part of Harmonic... -
Page 56: Replacing A Processor Module Using The Same Ip Addresses
“Changing vDHCP Settings” before beginning this procedure. To replace the processor module using the same IP addresses: 1. If you are using static IP addresses on the Omneon MediaDeck (not assigned by a DHCP server), contact Omneon Technical Support for help with the replacement steps. - Page 57 6. Power up the Omneon MediaDeck processor module. It should receive the original IP addresses from the DHCP server. 7. The new Omneon MediaDeck processor module will appear on the System Diagram page of SystemManager. It should display the original IP addresses and the original Players. You may modify the host names to match those given to the original Omneon MediaDeck processor module.
- Page 58 Replacing the Processor Module Component Replacement Guide...
-
Page 59: Replacing The Chassis
Powering Down the Omneon MediaDeck Before removing power to your Omneon MediaDeck, Omneon recommends that you first stop the file system. Once you reconnect power to your MediaDeck, you must then start the file system again. Omneon MediaDeck™... - Page 60 Replacing the Chassis 1. From the Configuration tab in SystemManager, click the Disk Utilities icon in the left-hand column. The Disk Utilities page displays all MediaDecks or MediaDirectors on the network and the status of their file systems. 2. Click on the name of the MediaDeck you wish to power down. The Disk Utilities page for that MediaDeck appears.
-
Page 61: Removing The Omneon Mediadeck Chassis
Stop FS button to stop the file system (see Figure 25). 5. Verify that the status has changed to Stopped. 6. Remove power from the Omneon MediaDeck by disconnecting each of the attached AC cords from their power sources. Removing the Omneon MediaDeck Chassis NOTE: When replacing the chassis, Omneon Customer Service may instruct you to leave certain components installed. -
Page 62: Installing The Omneon Mediadeck Chassis
7. Remove the power supplies. Refer to Replacing a Power Supply for instructions. 8. If your Omneon MediaDeck is currently rack mounted, remove the chassis from the rack. Refer to the instructions provided with the rack kit or the Omneon MediaDeck™ User's Guide. - Page 63 8. Install the power supplies. Refer to Replacing a Power Supply instructions. 9. Apply power to the Omneon MediaDeck by connecting the AC power cords to the separate, isolated power sources. 10. Start the file system. To start the file system: a.
- Page 64 Replacing the Chassis On the Filesystem utilities page, the Mode field should now indicate Read/Write, the Sharing with other MediaDirectors field should indicate Off, and the Mountpoint field should indicate /fs0. g. From the Configuration tab, click the Disk Utilities icon and verify that the file system status for this MediaDeck is shown as Started.
Need help?
Do you have a question about the Omneon MediaDeck and is the answer not in the manual?
Questions and answers