Table of Contents
Advertisement
Quick Links
Advertisement
Table of Contents

Subscribe to Our Youtube Channel
Related Manuals for Hytera PD79X Ex


Summary of Contents for Hytera PD79X Ex
- Page 1 Thanks for your favor in our product. To derive optimum performance from the product, please read this manual and the supplied Safety Information Booklet carefully before use. This manual is applicable to the following model: PD79X Ex (X may indicate 2, 5, 6 or 8)
- Page 2 Instructional Icons The following icons are available through this manual: Alert Icons Caution: indicates situations that could cause damage to your product. Note: indicates tips that can help you make better use of your product. Function Icons : indicates functions that are available on digital channel only. : indicates functions that are available on analog channel only.
-
Page 3: Copyright Information
Copyright Information Hytera is the trademark or registered trademark of Hytera Communications Co., Ltd. (the Company) in PRC and/or other countries or areas. The Company retains the ownership of its trademarks and product names. All other trademarks and/or product names that may be used in this manual are properties of their respective owners. - Page 4 RF ENERGY EXPOSURE AWARENESS AND CONTROL INFORMATION, AND OPERATIONAL INSTRUCTIONS FOR FCC OCCUPATIONAL USE REQUIREMENTS BEFORE USING YOUR PORTABLE 2-WAY RADIO, READ THIS IMPORTANT RF ENERGY AWARENESS AND CONTROL INFORMATION AND OPERATIONAL INSTRUCTIONS TO ENSURE COMPLIANCE WITH THE FCC’S RF EXPOSURE GUIDELINES NOTICE: This radio is intended for use in occupational/controlled conditions, where users have full knowledge of their exposure and can exercise control over their exposure to meet...
- Page 5 Compliance with RF Exposure Standards Hytera’s 2-way radio is designed and tested to comply with a number of national and international standards and guidelines (listed below) for human exposure to radio frequency electromagnetic energy.
- Page 6 Antenna should be kept away from eyes. • When worn on the body, always place the radio in a Hytera’s approved clip, holder, holster, case, or body harness for this product. Using approved body-worn accessories is important because the use of Hytera’s or other manufacturer’s non-approved accessories may result in exposure levels,...
-
Page 7: Fcc Regulations
RF Radiation Information RF Radiation Profile Radio Frequency (RF) is a frequency of electromagnetic radiation in the range at which radio signals are transmitted. RF technology is widely used in communication, medicine, food processing and other fields. It may generate radiation during use. RF Radiation Safety In order to ensure user health, experts from relevant industries including science, engineering, medicine and health work with international organizations to develop standards for safe exposure to RF radiation. -
Page 8: Safety Instructions
EU Regulatory Conformance As certified by the qualified laboratory, the product is in compliance with the essential requirements and other relevant provisions of the Directive 1999/5/EC. Please note that the above information is applicable to EU countries only. Safety Instructions To protect you against any property loss, bodily injury or even death, be sure to observe the following safety instructions: Use only the Ex-battery BL1807-Ex specified by the Company. -
Page 9: Table Of Contents
Contents Safety Instructions..........................7 Checking Items in the Package ....................... 10 Product Overview..........................11 Product Controls ..............................8 Programmable Keys .............................12 Before Use ............................13 Charging the Battery............................13 Assembling Accessories .............................14 Status Indication ..........................14 LCD Icon ................................17 LED Indicator ..............................18 Basic Operations .......................... - Page 10 Accessories .................................33 Functions and Operations....................... 34 Home Screen...............................34 Scan ..................................34 Talk Around ................................35 Monitor ..............................35 Squelch Off ............................35 Roam ...............................36 One Touch Call ..............................36 Telemetry ..............................37 Emergency ................................37 Lone Worker ...............................41 Man Down (optional) ............................42 Battery Strength Indicator...........................42 Scrambler /Encrypt ..........................43 Busy Channel Lockout ............................43 Time-out Timer (TOT)............................44...
-
Page 11: Checking Items In The Package
Checking Items in the Package Please unpack carefully and check that all items listed below are received. If any item is missing or damaged, please contact your dealer. Radio Unit Battery Charger Power Adapter Antenna Belt Clip Strap Manuals Note: The antenna may vary with different frequency bands. And the frequency band is marked on the label of antenna;... -
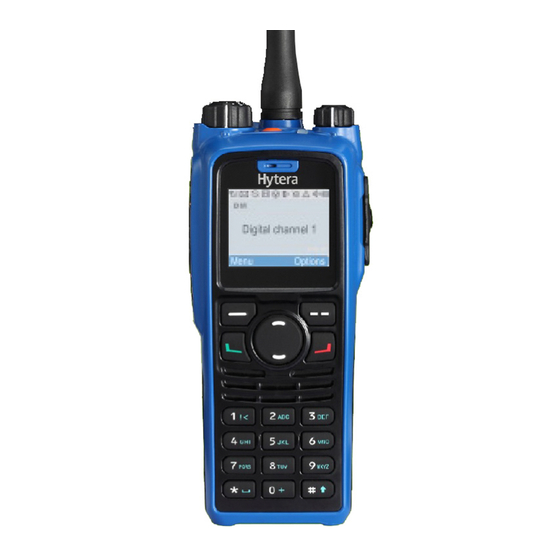
Page 12: Product Overview
Product Overview Product Controls Part Name Part Name SK1 (Side Key 1) LED Indicator ○ ○ PTT Key Antenna ○ ○ SK2 (Side Key 2) Radio On-Off/Volume ○ ○ Control Knob TK (Top Key) Accessory Jack ○ ○ Channel Selector Knob Back Key ○... -
Page 13: Programmable Keys
Speaker Belt Clip ○ ○ Numeric Keypad Battery ○ ○ Programmable Keys For enhanced convenience, you may request your dealer to program the keys SK1, SK2, TK, as shortcuts to the functions listed below: Shortcut Key Function Zone Up To select a desired zone quickly Zone Down Keypad Lock To lock or unlock the keypad quickly... -
Page 14: Before Use
Scrambler: To encrypt your voice so as to guarantee privacy of your communication Scrambler /Encrypt Encrypt: To encrypt your voice and message guarantee privacy your communication Lone Worker To protect the operators from accidents One Touch Call 1-5 To make appropriate services quickly To access the menu “Status List”... -
Page 15: Assembling Accessories
Procedures Connect the power adapter to AC socket. See arrow ①. Plug the power adapter into the rear jack of the charger. See arrow ②. Place the radio with the battery attached, or the battery alone, into the charger. The charging process begins when the charger LED glows red. When charging is complete, the charger LED glows green. - Page 16 Open the battery latch and hold it down until the metal lock goes into the battery housing completely. Push the battery until it is fully fitted into the slot, and then release the battery latch. To remove the battery, please power off the radio first. Then open the battery latch, and slide the battery out while holding down the battery latch.
- Page 17 To remove accessories, loosen the screw. Caution: Please attach the accessory properly; otherwise, waterproof performance of the radio may get affected.
-
Page 18: Status Indication
Status Indication LCD Icon Status Icon Icon Name Icon Radio Status No signal RSSI More bars indicate better signal strength New message/unread message Message Icon InBox is full Scanning is in progress Scanning pauses on a non-priority channel Scan Icon Scanning pauses on Priority Channel 1 Scanning pauses on Priority Channel 2 Low TX power for the current channel... -
Page 19: Led Indicator
Missed Call Icon A call is missed DTMF Keypad Icon The DTMF keypad is enabled Roam Icon Roaming is in progress Operation Mode Icons Icon Name Icon Operation Mode Direct Mode: Under this mode, radios Operation Mode communicate with each other directly Icons Repeater Mode: Under this mode, radios communicate with each other via a repeater... -
Page 20: Basic Operations
Basic Operations Turning the Radio On/Off Rotate the Radio On-Off/Volume Control knob clockwise/counter-clockwise until a click is heard to turn the radio on/off . Adjusting the Volume After turning the radio on, rotate the Radio On-Off/Volume Control knob clockwise to increase the call volume, or counter-clockwise to decrease it. -
Page 21: Locking/Unlocking The Keypad
Locking/Unlocking the Keypad When the keypad is not in use, you can lock the keypad to prevent accidental keypad operation. The following methods are available for you to lock or unlock the keypad: 1. Through key combination Use “OK+ ” to lock or unlock the keypad. 2. -
Page 22: Call
Call To ensure an optimal volume of the receiving radio, hold the radio approximately 2.5 to 5 centimeters away from your mouth. Private Call Transmitting a Private Call You may transmit a Private Call through any of the following methods. When transmitting a Private Call, the icon will appear. -
Page 23: Group Call
Receiving and Responding to a Private Call When a Private Call is received, your radio will display the icon You may hold down the PTT key within the preset time period to call back. If you do not respond to a received Private Call, your radio will provide appropriate indications. -
Page 24: All Call
Call number in the home screen, and then hold down the PTT key to transmit the Group Call. However, if the DTMF keypad is enabled, the number entered in the home screen is a phone number. You can dial the Group Call number through the menu “Manual Dial” only. Receiving and Responding to a Group Call When a Group Call is received, your radio will display the icon You may hold down the PTT key within the preset time period to call back. - Page 25 Press the programmed DTMF Keypad key. Go to “Menu -> Phone -> DTMF Keypad”, and then select “Enable". The number entered via the keypad in the home screen is the DTMF code. Access the phone system. When the phone system is accessed successfully, the radio goes to the DTMF keypad mode again.
-
Page 26: Menu Navigation
Menu Navigation This radio supports menu reset function, that is, if you do not operate the menu for a predefined time period, the radio will automatically return to the home screen. Contact To access this item, press the Menu key in the home screen and then select “Contact”. Contact List You can save up to 512 entries in the list. - Page 27 You can view details of each contact. Deleting a Contact You can delete a Private Call contact. However, please note that you can not delete the contact when there is only one entry left in the list. In addition, the Private Call contact preset on the currently used channel cannot be deleted.
-
Page 28: Message
Message To access this item, press the Menu key in the home screen and then select “Message”, or press the shortcut key for Message directly. New Msg You can create your desired text message (256 characters at most) and send it to an individual user or to a talk group. -
Page 29: Call Logs
For each message, you can choose to perform any of these operations: Send, Save and Delete. To delete all messages in the Drafts, select “Message -> Drafts -> Delete All”. Call Logs To access this item, press the Menu key in the home screen and then select “Call Logs”, or press the shortcut key for Call Logs directly. -
Page 30: Scan
Scan To access this item, press the Menu key in the home screen and then select “Scan”. Scan On/Off The Scan feature allows you to listen to communication activities on other channels so that you can keep a close track of your team members. This option is used to enable or disable the function. Scan List You can request your dealer to create a scan list for each channel. -
Page 31: Settings
This radio supports up to 64 zones. You can use this menu to select your desired zone. Settings To access this item, press the Menu key in the home screen and then select “Settings”. Radio Set You can optimize your radio performance by customizing related parameters according to actual needs and your preferences. - Page 32 used in low noise environment. And generally, “Tight” is used in high noise environment. It requires stronger signal for the radio to unmute. If the squelch level is set to Open, the speaker will keep unmuted irrespective of the satisfaction of decoding conditions. Scrambler To set whether to enable the Scrambler feature.
- Page 33 To set the language in which all interface information is displayed. Backlight To set the backlight parameters. There are three options available: On, Off and Timer. The timer is programmed by your dealer. Available range: 5-60 seconds. Brightness This option allows you to set the display brightness. You can raise or lower it using the Up/Down key. Keypad Lock This option allows you to set whether to enable this function.
-
Page 34: Accessories
Channel Selector knob. Currently, the available channel notifying languages are Chinese (for Chinese menu only) and English (for menus in languages other than Chinese). Signaling Side: To set whether the radio will sound continuous tone during signaling transmission. It is available for call in HDC1200/5-Tone/2-Tone system. Man Down (optional) To set whether to enable the Man Down feature. -
Page 35: Functions And Operations
3. Press the OK key to send the GPS message to the selected contact. Time Zone You can choose your time zone to correct the received GPS time. We recommend you to set the time zone before your initial use of this feature. You can select a desired time zone via the User Define method as per your actual needs. -
Page 36: Talk Around
If you don’t want to hear activities on the channel, press the programmed Nuisance Temporary Delete key to remove the channel from the scan list temporarily. If you want to continue staying on the channel, press the programmed Monitor or Squelch Off key during scan stay. -
Page 37: Roam
Hold down the programmed Squelch Off Momentary key to enable the feature. Then the radio displays the icon and sounds background noise. To disable the feature, release this key. Roam This feature allows the radio to communicate between sites in the IP Multi-site Connect system. If enabled, the radio can communicate via any site in the IP Multi-site Connect system, thus ensuring seamless communication in the system. -
Page 38: Telemetry
Telemetry This feature allows you to remotely supervise the device connected with a radio. With this feature, you can control the device and view its status in the case that you are away from the device. The method for supervising the device is programmable by your dealer. The available methods are: To supervise the device via the radio If a device is connected with a radio, you can use another radio to supervise the device. - Page 39 Your radio supports two Emergency ID types. You can select one of them via your dealer: Emergency Description Type None No signaling is used when the radio sends alarm information. HDC1200 HDC1200 signaling is used when the radio sends alarm information.
- Page 40 2. Long press the programmed Emergency key. 3. Hold down the PTT key. The radio will transmit on the channel on which the radio operates before entering the Emergency mode. (HDC1200) Alarm with Call (None & HDC1200) Operation: Press the programmed Emergency key to send alarm information. The radio displays the icon and text information “Sending Alarm”, with red LED glowing.
- Page 41 appears. 4. If the preset Voice Cycles expire, you can hold down the PTT key to make the emergency call again (the radio displays the icon , with red LED glowing). After the emergency call is transmitted, release the PTT key to receive (the radio displays the icon , with LED flashing orange rapidly).
-
Page 42: Lone Worker
And when a call is received, the icon appears. To exit the Emergency mode, long press the programmed Emergency key. Call Only Operation: 1. Press the programmed Emergency key to go to the Revert Channel, and the radio displays the icon 2. -
Page 43: Man Down (Optional)
Turn on the radio if the feature is enabled via the programming software.If you cannot operate your radio within a preset response period, your radio will give alerts before this period expires (dependent on the settings by your dealer). At this time, you can terminate such alerts by rotating a knob or pressing a key. -
Page 44: Scrambler /Encrypt
to represent the current battery strength. Release this key to exit. Indication Battery Strength Icon Battery Strength Green LED glows. High Orange LED glows. Medium Red LED glows. Red LED glows and the low Insufficient battery alert sounds. Scrambler /Encrypt The Scrambler/Encrypt feature can encrypt your audio signals to prevent eavesdropping. -
Page 45: Time-Out Timer (Tot)
Time-out Timer (TOT) The purpose of TOT is to prevent any user from occupying a channel for an extended period. If the preset time expires, the radio will automatically terminate transmission and keep beeping. To stop beeping, please release the PTT key. You must wait for a certain time period (preset by your dealer) to initiate another transmission. -
Page 46: Hdc1200
Signaling Introduction The radio supports the following signaling. You can ask your dealer to make appropriate settings on your radio. For detailed information, please consult your dealer. HDC1200 The HDC1200 signaling is compatible with the MDC1200 signaling, and realizes functions such as PTT ID (Encoding &... -
Page 47: 5-Tone
5-Tone This radio can realize various types of calls through 5-Tone signaling. Encoding: Request your dealer to configure the correct format and type for the encoding contents. When the format consists of fields for variable information, you need to fill in such fields by manual entry or menu operation. -
Page 48: Troubleshooting
expires. Decoding: Your radio can automatically decode the 2-Tone signaling when receiving any matched one. During decoding, the LED glows green. After successful decoding, the LCD displays the call icon and the call type (selective call, alert call w/voice, alert call) below the icon according the decoding type. -
Page 49: Care And Cleaning
You may be interrupted by Irrelevant products using the same Change the frequency, or adjust the squelch level. communication or frequency. noise is heard on The product may be set with Set signaling for all member products to avoid the channel. no signaling. -
Page 50: Optional Accessories
preparations, so as to avoid surface case damage. Make sure the product is completely dry before use. Caution: Power off and remove the battery before cleaning. -
Page 51: Specifications
Specifications Frequency Range FCC: 136-174MHz IC:138-174MHz 1024 Channel Capacity (64 zones, each with a maximum of 16 channels) Operating Voltage DC 7.4V Channel Spacing 25/12.5KHz Ex-protection Degree Ex ib IIC T4 Gb Ex ib D21 T4 Weight (with standard antenna About 498g &... -
Page 52: Appendix
Appendix Input Method You can enter aliases, numbers or messages using the keypad. The radio supports the following input methods: Chinese Pinyin (simplified) English and Number. Chinese Pinyin (Simplified) Operation: 1. Press to switch to Chinese Pinyin mode. 2. Enter the pinyin through alphanumeric keys; then a list of possible combinations and corresponding characters will appear.
Need help?
Do you have a question about the PD79X Ex and is the answer not in the manual?
Questions and answers