Table of Contents
Advertisement
Quick Links
Preface
Thanks for your favor in our product. This manual provides guidance for you to quickly know how to use
the product. For detailed features and operations, see the corresponding Hytera TETRA Terminal Series
Basic Feature Book.
To help you ward off bodily injury and property loss resulting from improper operation, please read the
Safety Information Booklet before using the product.
This manual is applicable to the following product:
PT790Ex F4 Intrinsically Safe Portable Terminal
Advertisement
Table of Contents

Related Manuals for Hytera PT790


Summary of Contents for Hytera PT790
- Page 1 Preface Thanks for your favor in our product. This manual provides guidance for you to quickly know how to use the product. For detailed features and operations, see the corresponding Hytera TETRA Terminal Series Basic Feature Book. To help you ward off bodily injury and property loss resulting from improper operation, please read the Safety Information Booklet before using the product.
-
Page 2: Copyright Information
Copyright Information Hytera is the trademark or registered trademark of Hytera Communications Corporation Limited. (the Company) in PRC and/or other countries or areas. The Company retains the ownership of its trademarks and product names. All other trademarks and/or product names that may be used in this manual are properties of their respective owners. -
Page 3: Fcc Statement
EU Regulatory Conformance As certified by the qualified laboratory, the product is in compliance with the essential requirements and other relevant provisions of the following directives: 1999/5/EC or 2014/53/EU 2006/66/EC 2011/65/EU 2012/19/EU Please note that the above information is applicable to EU countries only. FCC Statement Any Changes or modifications not expressly approved by the party responsible for compliance could void the user’s authority to operate the equipment. - Page 4 IC statement The device has been tested and compliance with SAR limits, users can obtain Canadian information on RF exposure and compliance Après examen de ce matériel aux conformité aux limites DAS et/ou aux limites d’intensité de champ RF, les utilisateurs peuvent sur l’exposition aux radiofréquences et la conformité...
-
Page 5: Table Of Contents
Contents 1. Intrinsically Safe Terminal Information .................... 3 1.1 No Misoperations ..........................3 1.2 Safety Instructions .......................... 3 1.3 Compliance Standards ........................4 2. Items in the Package .......................... 6 3. Product Overview ..........................7 3.1 Product Controls ..........................7 3.2 LCD Icon ............................ - Page 6 9. Care and Cleaning ..........................26 10. Optional Accessories ........................27 11. Specifications ..........................28 ...
-
Page 7: Intrinsically Safe Terminal Information
1. Intrinsically Safe Terminal Information Caution Observe the following safety instructions when using the product, so as to ensure safe and reliable operations. Failure to observe the instructions may result in danger or violation of applicable regulations. To avoid possible interference with blasting operations, turn off the product before entering an ... -
Page 8: Compliance Standards
Charge the battery using the designated charger in a non-hazardous atmosphere with a maximum ambient temperature of 40 ºC. Do not carry any backup battery in a hazardous atmosphere. Do not use the product if its housing is damaged or cracked. ... - Page 9 Class I,Zone 0 AEX ia IIC T3B Ta= -20ºC to +55ºC Class I,Zone 0 AEX ia IIC T3C Ta= -20ºC to +50ºC IP5X Class I,Zone 1 AEX ib IIC T4 Ta= -20ºC to +50ºC IP5X Class II,III Zone 0 AEX ia IIIC T160 ºC Ta= -20ºC to +50ºC IP5X Class II,III Zone 1 AEX ib IIIC T120 ºC Ta= -20ºC to +50ºC IP5X Class I,Div 1,Group A,B,C,D T3B Ta= -20ºC to +55ºC Class I,Div 1,Group A,B,C,D T3C Ta= -20ºC to +50ºC IP5X...
-
Page 10: Items In The Package
2. Items in the Package Please unpack carefully and check if all items listed below are received. If any item is missing or damaged, please contact your dealer. Portable Terminal Antenna Belt Clip Strap Charger Battery Power Adapter Documentation Kit Note The pictures in this manual are for reference only. -
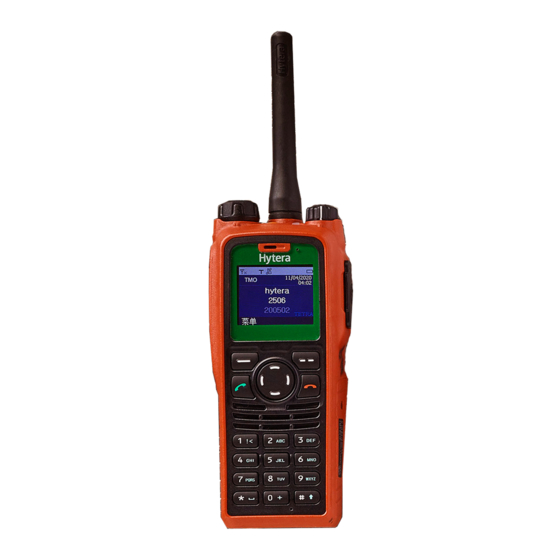
Page 11: Product Overview
3. Product Overview Product Controls Part Name Part Name Side Key 1 (SK1) Power On-Off/Volume Control Knob Push-to-Talk (PTT) Key Upper Microphone Side Key 2 (SK2) Accessory Connector Cover Emergency Key Options/Back Key... -
Page 12: Lcd Icon
For enhanced convenience, you may request your dealer to program the keys (SK1, SK2, navigation keys, Answer/Call key, numeric keys 1–9, , and ) as shortcuts to certain menus and features. For the detailed introduction, see the corresponding Hytera TETRA Terminal Series Basic Feature Book. LCD Icon Icon Terminal Status The terminal is not registered with the system (applicable to TMO only). - Page 13 Icon Terminal Status The terminal is operating in DMO. The terminal is operating in fallback mode. The scan feature is enabled in TMO. The scan feature is enabled in fallback mode. The terminal is operating in silent mode. The terminal is operating in normal (ring and vibration) mode. The terminal is operating in vibration mode.
-
Page 14: Led Indicator
Flashes red slowly Please replace or recharge the battery. The terminal detects an invalid battery. Flashes red Please replace the battery with a Hytera-supplied intrinsically safe battery. Glows green The terminal is in receiving status. Flashes green slowly The channel is idle in DMO. -
Page 15: Before Use
4. Before Use Attaching the Antenna Caution Do not hold the terminal by its antenna; otherwise, the performance may be lowered and the life span of the antenna may be shortened. Installing the SIM Card If a SIM card is required to implement the E2EE feature, please prepare it separately and install it as follows: Step 1 Remove the battery. -
Page 16: Attaching The Battery
Attaching the Battery Step 1 Align the battery slots with the guide rails on the terminal as shown below. Step 2 Open the battery latch and exert force on it to retract the metal lock into the battery housing completely as shown below. Step 3 Push the battery as shown below until it is fully fitted into the slot, and then release the battery latch. -
Page 17: Attaching The Belt Clip
Note To remove the battery, power off the terminal, open the battery latch, and slide the battery out while exerting force on the battery latch. Step 4 Tighten the two screws on the back of the terminal as shown below. Attaching the Belt Clip Step 1 Remove the two screws on the back of the terminal. -
Page 18: Attaching The Accessories
Attaching the Accessories Caution To ensure the waterproof and dustproof performance of the terminal: Do not scrape the silicone waterproof pad surrounding the screw hold of the accessory connector. Do close the accessory connector cover and fasten the screw after removing the accessory. ... -
Page 19: Charging The Battery
Charging the Battery Caution Use the charger and battery specified by the Company only. You are advised to power off the terminal and read the Safety Information Booklet for necessary safety information before charging the terminal with battery attached. The LED indicator on the charger indicates the charging status. -
Page 20: Basic Operations
5. Basic Operations Powering On/Off the Terminal Switching the Operation Mode The terminal can operate in either TMO or DMO. On the home screen, press to enter the menu, select "Mode", and then select "TMO" or "DMO" to switch the operation mode. -
Page 21: Adjusting The Call Volume
Adjusting the Call Volume Selecting a Group Inputting via Keypad You can enter user alias, call numbers and messages via the keypad. In the editing mode, you may do as follows: Press to switch the input method between alphabetic mode and numeric mode. ... -
Page 22: Pin Code Protection
On the home screen, press and then press to lock or unlock the keypad. PIN Code Protection PIN code can prevent an unidentified user from using your terminal. Enable or disable the PIN Code feature On the home screen, press and go to "Settings ->... -
Page 23: Tmo Services
6. TMO Services TMO supports either half-duplex or full-duplex operation and allows terminals to communicate via the TETRA network. For successful voice and data services in TMO, the terminal must register with the network at first, and then operates within the network coverage. Individual Call An individual call is a half-duplex or full-duplex call initiated by an individual user to another individual user. -
Page 24: Group Call
Ending an Individual Call Press to end the call. Group Call A group call is a half-duplex call initiated by an individual user to a group. You can initiate a group call to the default group, and receive group calls from other members in the group. Initiating a Group Call On the home screen, rotate the Group Selector knob to select a group, and hold down the PTT key to initiate a call to this group. -
Page 25: Message
Initiating an Emergency Call Press the Emergency key to initiate an emergency call to the predefined contact that can be an individual user, a group, or a PABX/PSTN user. Answering an Emergency Call You can answer an emergency call without any operation. As for an emergency PABX/PSTN call, you need to press the PTT key to answer the call. -
Page 26: Dmo Services
7. DMO Services DMO supports half-duplex operation only and allows terminals to communicate directly. Individual Call An individual call is a half-duplex call initiated by an individual user to another individual user. You can initiate or receive an individual call to or from an individual contact. Initiating an Individual Call Step 1 On the home screen, press and go to "PhoneBook"... -
Page 27: Message
Message The message operation in DMO is similar to that in TMO. For details, see Message. -
Page 28: Troubleshooting
8. Troubleshooting Phenomenon Analysis Solution The terminal cannot The battery power gets too low to Charge the battery. be powered on. supply the terminal. The terminal is operating in DMO. Switch to TMO. Check the signal strength. Make Network registration The terminal gets out of the network sure the terminal is within the fails or no network is... - Page 29 to other services due to overloaded available and try again. network. Check the signal strength. Make The terminal gets out of the network sure the terminal is within the coverage. network coverage. Abnormal terminal operates disconnection occurs unfavorable position where during a call.
-
Page 30: Care And Cleaning
9. Care and Cleaning To guarantee optimal performance as well as a long service life of the product, please follow the tips below. Product Care Do not pierce or scrape the product. Keep the product far away from substances that can corrode the circuit. ... -
Page 31: Optional Accessories
10. Optional Accessories Contact your local dealer for the optional accessories of the product. Caution Use the accessories specified by the Company only; otherwise, we shall not be liable for any losses or damages arising out of use of unauthorized accessories.
Need help?
Do you have a question about the PT790 and is the answer not in the manual?
Questions and answers