Table of Contents
Advertisement
Advertisement
Table of Contents

Related Manuals for Hytera PT580


Summary of Contents for Hytera PT580
-
Page 2: Table Of Contents
Service Manual Contents Revision History .............................. 1 Copyright Information ............................. 1 Disclaimer................................. 1 Introduction..............................2 Product Controls ............................. 3 Circuit Description............................4 Tuning Description ............................17 Interface Definition ............................18 Troubleshooting Flow Chart......................... 23 Disassembly and Assembly ......................... 43 Exploded View ............................... 48 Parts List 1.............................. -
Page 3: Revision History
Initial Release Copyright Information Hytera is the trademark or registered trademark of Hytera Communications Co., Ltd. (the Company) in PRC and/or other countries or areas. The Company retains the ownership of its trademarks and product names. All other trademarks and/or product names that may be used in this manual are properties of their respective owners. -
Page 4: Introduction
Service Manual Introduction Intended User This manual is intended for use by qualified technicians only. -
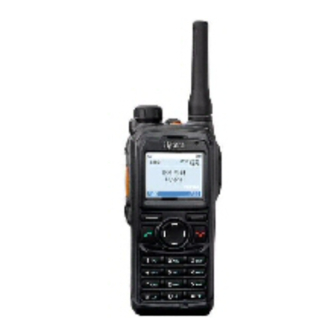
Page 5: Product Controls
Service Manual Product Controls Part Name Part Name SK1 (programmable) PTT Key ○ ○ SK2 (programmable) Emergency Key ○ ○ LED Indicator Antenna ○ ○ Multi-function Control Knob Receiver ○ ○ Display Function Keypad ○ ○ Speaker Numeric Keypad ○ ○... -
Page 6: Circuit Description
Circuit Description 1. RF Section The frequency range for PT580 F5 is 806~870MHz (in TMO mode, the frequency range for TX is 806~825MHz, while the frequency range for RX is 851~870MHz; in DMO mode, the frequency range for both TX and RX is 851~870MHz). The block diagram for the RF section is shown below. - Page 7 Service Manual 3V6_RF 3V_Tx 3V_TxD 3V_TxA RF_SW Antenna Tx_LO Cartesian IC TxI+ TxI- attenuator TxQ+ TxQ- RF_FB DCMEAS RF_SCLK RF_DIN RF_DOUT 3V_A RF_FB PA_BIAS1 Temperature PA_BIAS2 Sensor TMP_ALERT Figure 2 Diagram of TX Circuit The TX circuit consists of PA, harmonic filter, pre-amplifier, duplexer, coupler, temperature sensor, TX/RX switch, antenna and etc.
- Page 8 Service Manual outputs low level during normal operation, and outputs high level to notify the baseband to reduce the PA power if the temperature exceeds the preset level. (2) PA_BIAS1 (same as PA_BIAS2) This interface is used by the baseband to set the bias status of the PA. In TX status, the level is 2.47V. (3) RF_SW This interface is used to transfer the TX/RX switch signal output by the baseband.
- Page 9 Service Manual 3V_Rx IF BPF Diplexer ANT Switch Mixer IF Amplifier Rx_LO1 Rx_LO2 Buffer Rx PLL RX Q+ RX I+ RX Q- RX I- IQ Processor Figure 3 Diagram of RX Circuit The working principle of the RX circuit is described below: The RX signals pass through the RF switch.
- Page 10 Service Manual demodulator. The AGC voltage varies within 0.2V~1.2V. When the AGC control voltage is 0.2V, the gain gets to its maximum value. (6) Rx I+/ - and Rx Q+/- These interface are used to transfer the differential I/Q signals output by the I/Q demodulator. 1.3 FGU FinIF 5V_ SYN...
- Page 11 Service Manual This interface is used to transfer the charging voltage signal from the PLL to the RX IF VCO. (5) FLout IF This interface is used to transfer the charging voltage lock signal from the PLL to the RX IF VCO. (6) FLout RF This interface is used to transfer the charging voltage lock signal from the PLL to the TX/RX VCO.
- Page 12 Service Manual (3) TVO SWITCH: This interface is used to supply power to the TX VCO. (4) RX LO OUTPUT: This interface is used by the RX LO to output signal to the RX mixer. (5) TX LO OUTPUT: This interface is used by the TX LO to output signal to the Cartesian IC. 1.5 Power Supply Module 3V3_RF 3V3D...
- Page 13 Service Manual Cartesian IC, TX VCO, RX VCO, pre-amplifier and other RX parts respectively. The V_PA is supplied by the battery directly. The SYN control signal is open while the portable terminal is operating. 2. Baseband Section 2.1 Power Section TO RF PART 1V8D 1V6D...
- Page 14 Service Manual 2.2 Control Section 2.2.1 MCU MCU ( ARM+DSP ) 16 bit LCD( WITH PIXEL≤160 * 128 , UART 1 Reserve CONTROL) COLOR=262K UART 3 16 bit Reserve 128Mbit FLASH 16 bit EMIFS UART 2 FLASH .CS and FPGA GPIO 16 bit 128 Mbit SDRAM...
- Page 15 Service Manual 2.2.2 FPGA CONTRAL EMIFS 9. 216M_FPGA MEMORY /VCO _UP 9. 216MHz VCO _DOWN 9 .216M_VCO _ON FPGA /RST .OUT /RST _OUT MCBSP2. FSX 12MHz CMX_IRQ2 CMX_ BITCLK PROCESSOR SYMCLOCK CODER SWITCH MANOUTX Acceleration SIM _RST Sensor SIM_CLK MANOUTY SIM CARD SIM_DATA SIM_SUPPLY...
- Page 16 Service Manual The MCU is connected with a 128Mbits NOR FLASH (for program or data storage) and a 128Mbits SDRAM (for temporary data storage). 2.2.4 CLOCK The 32K clock, also called real-time clock (RTC), is used for system starting, timing, sleeping and etc. The generation of the 9.216MHz clock is controlled by the FPGA.
- Page 17 Service Manual 2.2.6 UART The MCU has 3 UART interfaces: UART1, UART2 and UART 3. The communication rate can be up to 1.5Mbps. The UART connection is shown in Figure 13. The UART2 interface is connected to the accessory jack for upgrading and programming, while the UART1 and UART3 interfaces are reserved. U2001 UART1.TX J2502...
- Page 18 Service Manual 2.3 Audio Section MIC1 MCBSP 1 MIC2 FSB1 MCBSP 2 FSB2 CODEC FSB3 MCBSP 3 FPGA CLOCK Baseband CLOCK Processor RESET RESET Figure 15 Diagram of Audio Processing Circuit 2.3.1 Audio input The audio signal from the MIC goes to the baseband processor for amplification, A/D conversion, encoding and filtering.
-
Page 19: Tuning Description
Service Manual Tuning Description For details about tuning, please refer to the help file for appropriate tuner software supplied by us. The test standard for current is described in the table below: Test Item Test Value Test Condition Power-off current Test value≤2mA Mean stand-by current in TMO 140mA≤test value≤170mA... -
Page 20: Interface Definition
Service Manual Interface Definition The interfaces on the main board contain those for data, keyboard, side key, LED, receiver, MIC, speaker motor, encoder switch and etc. J7001: 70-Pin Interface Pin No. Name Function Valid Level 69, 70 Power supply: ground (analog) UP_MIC+ Upper MIC interface UP_MIC-... - Page 21 Service Manual Pin No. Name Function Valid Level ALARM Alarm signal 32, 33 VBAT Battery voltage RECEIVER Receiver signal LED1 LED control signal LED2 KB-R0 KB-R1 KB-R2 Keyboard row KB-R3 KB-R4 KB-C0 KB-C1 KB-C2 Keyboard column KB-C3 KB-C4 PTT key detection OPT_SEL1 OPT_SEL2 Accessory identification...
- Page 22 Service Manual Pin No. Name Function Valid Level /LCD_CS LCD_RST LCD_BACKLIGHT I2C-SCL I2C-SDA Reserved L_INT AUDIO_PA_ON Audio control INT/EXT AUDIO ON/OFF Power-on/off control ENC_S ENC_A Encoder switch signal ENC_B ACC_DET Reserved KEY_LIGHT Key light control IN-SPK- Internal speaker IN-SPK+ SPK- Speaker audio SPK+ J7004: 30-Pin LCD Interface...
- Page 23 Service Manual Pin No. Name Function Valid Level Data and command Write signal Read signal 3V3D Power supply: 3.3V LEDA Power supply for backlight LEDK1 LEDK2 Backlight control LEDK3 J7007: 21-Pin Keyboard Interface Pin No. Name Function Valid Level Ground (analog & digital) LOW-MIC+ Lower MIC interface LOW-MIC-...
- Page 24 Service Manual Pin No. Name Function Valid Level KB-R4 KEY_LED LED control 3V3D 3.3V power supply VBAT Battery voltage ON/OFF Power-on/off control...
-
Page 25: Troubleshooting Flow Chart
Service Manual Troubleshooting Flow Chart TX Circuit Abnormal power output If the current is over Select the test mode and supply 3.7V 500mA, it indicates voltage. Then check whether the standby the PA is damaged. current (240mA) is normal. Please replace the PA (U4102). - Page 26 Service Manual Description: [1] The lock range for the TX VCO is 1612~1740MHz, and the output amplitude is over -15dBm. [2] The output power is 27~30dBm during normal open-loop transmission. [3] The spring plate is flexible and is securely connected with the antenna connector. [4] When U4103 is normal, Pin4=6.5V, Pin6=0V [5] When U4102 is supplied normally, Pin15/Pin16=2.8V, Pin9/Pin10/Pin11/Pin12=3.7V, Pout=28~...
- Page 27 Service Manual RX Circuit Abnormal reception Replace U6501. Test TP5001 and Check the power Check whether 3.3V input Check the TP5002 to check supply for the receiver voltage is available at Pin1 enable signal and whether the I/Q signal is and whether U6501 of U6501 and 3.3V enable power supply via the...
- Page 28 Service Manual Description: [1] The I/Q signals detected by the oscilloscope are modulation signals above 100mV. [2] Apply -40dBm dot-frequency signal at the RF antenna connector (the -40dBm dot-frequency signal will be applied at the antenna connector for the following signal amplitude detections unless otherwise specified), and the amplitude of the signal at Pin5 of U4103 is -40~-50dBm when the receiver is working.
- Page 29 Service Manual FGU Circuit Abnormal FGU CP voltage for TX/RX LO [1] Check whether Replace Q6504 and Q6506. Q6504 is normal. [8] Check whether Check Q6502 and Check whether Replace Q6503 and Q6502 is normal. [5] Q6504. Q6503 is normal. [2] Q6506.
- Page 30 Service Manual RF POWER Circuit Abnormal power supply Check whether Check the 3V3D(TP6001) outputs 3.3V baseband. voltage. Power supply for Power supply for TX Power supply for If soldered Check whether Check whether If soldered properly, properly, replace 3V_RX is normal. [1] 3V_TX is normal.
- Page 31 Service Manual Description: [1] The output voltage by U6501 is 3V. [2] The output voltage by U6505 is 6.5V. [3] The output voltage by U6506 is 6.1V. [4] The output voltage by Q6505 is 5V. [5] The output voltage by Q6506 is 5V. [6] The output voltage by Q6502 is 5V.
- Page 32 Service Manual Abnormal Power-on The terminal cannot work after power-on. The main Check whether the power- The MMI board board cannot work. on indication is normal. [1] cannot work. Check the Check whether Check the Check whether the power supply VBAT is normal? [8] battery.
- Page 33 Service Manual Description: [1] The LED will flash green once if the terminal is powered on normally. [2] The 3.3V and VBAT voltages are available for the MMI board. [3] Check whether the connector for the LCD or MMI board is damaged or properly connected. [4] Use a normal LCD to check whether the problem is caused by the LCD.
- Page 34 Service Manual No Audio from Speaker No audio from the speaker Refer to the section Check whether the “No Audio during transmitter is normal. [1] Talk”. Refer to the Check whether section“RF Check whether the main the I/Q signal is board is damaged.
- Page 35 Service Manual Description: Note: During checking, the terminal should work in normal mode rather than the silent mode. [1] Check by making the transmitter communicate with a normal receiver. [2] Check by placing the main board for the receiver into a normal terminal. [3] Please refer to the section “RX Circuit”...
- Page 36 Service Manual No Audio during Talk No audio from the receiver during talk Check whether the Refer to the section “No receiver is normal. [1] Audio from Speaker”. Refer to the section “RF Check whether the main Check whether the I/Q POPWER board is normal.
- Page 37 Service Manual Description: [1] Check by making the receiver communicate with a normal transmitter. [2] Check by placing the main board for the transmitter into a normal terminal. [3] Please refer to the section “TX Circuit” in this chapter. [4] The voltage at Pin5 of U7211 is 2.5V. [5] U7209 is turned on if it is normal.
- Page 38 Service Manual Encoder Switch Abnormal encoder switch Check whether Replace the the 10-pin connector on the connector. MMI board is normal? [1] Check whether the Replace the FPC for the encoder FPC. switch is normal. [2] Check whether Repair the the 70-pin connector on connector.
- Page 39 Service Manual Description: [1] Check whether the connector is properly fastened, connected and soldered. [2] Check whether the FPC is shorted or the wire is broken. [3] Check whether the 70-pin connector is properly connected and soldered. [4] Check whether the FPC connector is properly fastened. [5] Check whether the 70-pin connector is properly connected and soldered.
- Page 40 Service Manual Front Case Abnormal KEYPAD Check whether the Replace the front functions of the front panel. panel are normal. [1] Check whether Replace the front the gold finger for the panel. KEYPAD is normal. [2] Check whether the gold finger socket on Replace the MMI the MMI board is board.
- Page 41 Service Manual Accessory Jack Abnormal serial port at the accessory jack Check whether the Replace the front small board for the case. earpiece is normal. [1] Check whether the Replace the FPC for the accessory is FPC. normal. [2] Check whether the Repair the connector on the MMI connector.
- Page 42 Service Manual Description: [1] Use a normal front case to check whether the connection between the earpiece board and the earpiece connector is normal. [2] Check whether the FPC is assembled and connected properly. [3] Check whether the connector is properly connected and soldered. [4] Check whether the 70-pin connector is properly connected and soldered.
- Page 43 Service Manual Abnormal Earpiece Abnormal earpiece at the accessory jack Check whether the Re-assemble the earpiece is assembled earpiece. properly. [1] Check whether the Replace the FPC for the accessory is FPC. normal. [2] Check whether the Replace the front small board for the panel.
- Page 44 Service Manual Description: [1] The connector with cable should face upwards. [2] Check whether the FPC is assembled and connected properly. [3] Use a normal front case to check whether the connection between the earpiece board and the earpiece connector is normal. [4] Test the audio signals before and after the analog switch.
-
Page 45: Disassembly And Assembly
Service Manual Disassembly and Assembly Note: If the terminal is disassembled, its waterproof performance may get affected. Disassembling the Battery ○ 1. Turn off the terminal and remove the battery Disassembling the Antenna ○ 1. Rotate the antenna counter-clockwise to remove it Disassembling the Chassis... - Page 46 Service Manual ○ 1. Remove the four screws ○ 2. Take the chassis out Disassembling the Shielding Mask ○ 1. Remove the three screws ○ 2. Remove the shielding mask Disassembling the Main Board ○ 1. Remove the screw ○ 2.
- Page 47 Service Manual Disassembling the Middle Shielding Case ○ 1. Remove the antenna nut ○ 2. Remove the two screws 10 . ○ 3. Remove the two screws 11 . ○ 4. Remove the board-to-board connector 12 . ○ 5. Take the middle shielding case out 13 .
- Page 48 Service Manual ○ 2. Remove the FPC 15 . Disassembling the MMI Board ○ 1. Pull out the FPC for keys 16 . ○ 2. Pull out the speaker socket 17 . ○ 18 . 3. Remove the board-to-board connector ○...
- Page 49 Service Manual ○ 2. Remove the nut 22 . ○ 3. Take the encoder switch down 23 . Note: There is a waterproof O-ring on the encoder switch. Disassembling the Motor ○ 1. Remove the motor 24 . Precautions for Assembly 1.
-
Page 50: Exploded View
Service Manual Exploded View... - Page 51 Service Manual...
-
Page 52: Parts List 1
Service Manual Parts List 1 Part No. Description Qty. 7102006000100 Machine screw (RoHS) 6300069001000 Magnesium shielding case (RoHS) 410P5801000H0 PCB for main board (RoHS) 7500325000000 Heat sink pad for PA (RoHS) 7300051000010 Metal dome for PTT (RoHS) 13000P5800090 Semi-finished FPC for PTT (RoHS) 7102007020020 Self-tapping screw (RoHS) 6100316000000... - Page 53 Service Manual Part No. Description Qty. 6201808100000 Special shape washer (RoHS) 6001277000000 Accessory jack cover (RoHS) 7102802010310 UK screw (RoHS) 7102004001100 Machine screw (RoHS) 7500367000000 PORON pad for PTT (RoHS) 6201677000000 PTT bracket (RoHS) 5402000000100 Motor (RoHS) 7500328000000 Board-to-board connector for earpiece (RoHS) 6100334000000 O-ring for encoder switch (RoHS) 4316030000020...
-
Page 54: Packing Guide
Service Manual Packing Guide... -
Page 55: Pcb View
PCB View PT580 F5 PCB View (Main Board) Top Layer... - Page 56 PT580 F5 PCB View (Main Board) Bottom Layer...
- Page 57 PT580 F5 PCB View (MMI Board) Top Layer...
- Page 58 PT580 F5 PCB View (MMI Board) Bottom Layer...
-
Page 59: Schematic Diagram
Schematic Diagram PT580 F5 Schematic Diagram (Main Board) PT580 F5 MAIN BOARD SCH BB_TOP RF_PA PA_BIAS1 PA_BIAS1 REV_PWR REV_PWR RF_FB TX_ON TX_ON RF_SW RF_SW PA_IN RF_TX TX_I+ TX_I+ TX_I- TX_I- TX_Q+ TX_Q+ TX_Q- TX_Q- INSTAB INSTAB DCMEAS DCMEAS PA_IN RF_FB... - Page 60 PT580 F5 Schematic Diagram (Main Board_RF PA) PT580 F5 MAIN BOARD SCH(RF_PA) R4104 3V_A RF_SW L4109 V_PA C4140 R4105 C4145 L4116 C4119 6.5V R4101 PA_BIAS1 C4102 C4108 C4115 R4106 C4117 C4144 C4105 Q4101 L4101 C4116 C4101 C4104 C4107 R4107 C4109...
- Page 61 PT580 F5 Schematic Diagram (Main Board_RF TX) PT580 F5 MAIN BOARD SCH(RF_TX) R4009 3V_A SPI_DIN R4004 3V_TX SPI_DOUT C4002 C4004 SPI_SCK R4007 3V_A R4001 BVREF R4008 R4002 TX_Q+ R4003 TX_Q- C4005 C4006 C4007 C4008 R4005 INSTAB R4019 R4021 BVREF C4001...
- Page 62 PT580 F5 Schematic Diagram (Main Board_RF FGU) PT580 F5 MAIN BOARD SCH(RF_FGU) 3V_RVCO R1063 R1020 RX_VCO_ON R1057 L1020 R1005 L1003 SYN_ON C1035 C1045 3V_A 5V_SYN C1080 C1047 C1060 C1083 C1036 C1048 C1005 R1001 R1002 R1003 R1004 L1022 R1017 Q1001 C1049...
- Page 63 PT580 F5 Schematic Diagram (Main Board_RF RX) PT580 F5 MAIN BOARD SCH(RF_RX) Z5001 C5001 U5001 RF IN GND2 C5005 Z5002 GND1 RF OUT D5001 3V_RX L5001 R5001 3V_RX C5007 C5002 C5003 C5004 C5006 C5018 U5002 C5022 L5004 Z5003 C5049 L5002...
- Page 64 PT580 F5 Schematic Diagram (Main Board_RF Power) PT580 F5 MAIN BOARD SCH(RF_POWER) L6501 3.3V_RF U6501 3V3D Vout 3V_RX C6501 C6510 RX_ON RX_ON C6505 U6502 Vout 3V_TX C6502 C6511 TX_ON TX_ON C6506 U6503 Vout 3V_A C6503 C6512 C6507 U6504 3V_B Q6501...
- Page 65 PT580 F5 Schematic Diagram (MMI Board_Audio) PT580 F5 MMI BOARD SCH. AUDIO B7201 C7210 VBAT RECEIVER L7207 RECEIVER 3V3D L7208 C7224 C7225 C7218 L7212 D7201 C7211 R7206 R7205 Q7104 SPK- C7203 L7205 R7241 L7211 C7207 C7222 C7257 C7223 C7208 C7204...
- Page 66 PT580 F5 Schematic Diagram (MMI_Interface) VBAT 3V3D TP7001 TP7002 PT580 F5 MMI BOARD SCH. INTERFACE C7051 C7001 C7002 C7052 C7017 3V3D J7001 C7019 ON/OFF ON/OFF R7018 Key_light 3V3D 3V3D Key_light ENC_S ENC_S USB.PUEN ENC_A ENC_A OPT_SEL3 ENC_B C7022 ENC_B UART2.TX...
- Page 67 PT580 F5 Schematic Diagram (MMI Board_Key) PT580 F5 MMI BOARD SCH. KEY 3V3D U7003 ENC_S 3V3D ENC_S R7236 D7104 3V3D 3V3D U7004 J7005 R7109 L7101 R7110 ENC_A L7102 ENC_A L7103 Q7105 D7121 D7122 D7119 D7210 D7211 D7212 R7237 LED1 LED1...
- Page 68 PT580 F5 Schematic Diagram (Main Board_BB) PT580 F5 MAIN BOARD SCH.(BB PART) FPGA Interface FPGA.SCH Interface.Sch FP_TMS FP_TMS FP_TDI FP_TDI FP_TCK FP_TCK FP_TDO FP_TDO BT_REST BT_REST BT_WAKE BT_WAKE HOST_WAKE HOST_WAKE GPS_ON GPS_ON ENC_A ENC_A ENC_B ENC_B ENC_S ENC_S D[0:15] SDRAM A[0:22] SDRAM.Sch...
- Page 69 PT580 F5 Schematic Diagram (Main Board_Interface) PT580 F5 MAIN BOARD SCH.(Interface) 3V3D U2001E C2501 CAM.D7 CAM.D[7]/ETM.D[7]/UWIRE.CS0/MMC2.DAT2/GPIO35 KB.R4 CAM.D6 KB.R[4]/MPUIO15 CAM.D[6]/ETM.D[6]/UWIRE.CS3/MMC2.CMD/GPIO34 KB.R3 CAM.D5 J2501 KB.R[3]/MPUIO13 CAM.D[5]/ETM.D[5]/UWIRE.SDI/GPIO33 KB.R2 CAM.D4 KB.R[2]/MPUIO10 CAM.D[4]/ETM.D[4]/UART3.TX/GPIO32 KB.R1 CAM.D3 GPS_ON KB.R[1]/MPUIO9 CAM.D[3]/ETM.D[3]/UART3.RX/GPIO31 GPS_ON KB.R0 CAM.D2 CAM.D7 MCSI2.DOUT KB.R[0]/MPUIO8 CAMERA CAM.D[2]/ETM.D[2]/UART3.CTS/GPIO30...
- Page 70 PT580 F5 Schematic Diagram (Main Board_CPU Clock) PT580 F5 MAIN BOARD SCH.(CPU_CLOCK) 3V3D R2016 U2001B 1V6D 12MHz_CPU OSC1_IN MPU_RST/MPUIO14 C2024 OSC1_OUT PWRON_RESET /RESET 1V6D CLOCK RESET AA20 OSC32K_IN RST_OUT/GPIO41 /RST_OUT TO CLOCK AA13 OSC32K_OUT R2008 12MHz_CPU 12MHz_CLK EMU1 EMU1 U2002...
- Page 71 PT580 F5 Schematic Diagram (Main Board_CPU IO) PT580 F5 MAIN BOARD SCH.(CPU_IO) U2001G MPUIO GPIO MOT_ON/OFF UWIRE.SCLK/KB.C[7]/MPUIO1/UART3.CTS CMX981 LCD.P[12]/GPIO33 CMX_RST R2063 POWERACK MPUIO3/MMC2.DAT1 LCD.P[15]/GPIO2 CMX_IRQ2 LCD_ON GPIO1/UART3.RTS FLASH.CS2U/GPIO5 CMX_IRQ1 INT_B MMC.DAT2/MPUIO11 AUDIO CLK32K_OUT/MPUIO0/USB1.SPEED/UART1.TX/GPIO36 AUDIO_PA_ON UART1.CTS/UART1.IRSEL/GPIO38 INT/EXT_AUDIO R2064 LCD.P[9]/GPIO30 LCD.P[10]/GPIO31 /ALARM LCD.P[4]...
- Page 72 PT580 F5 Schematic Diagram (Main Board_Flash) PT580 F5 MAIN BOARD SCH.(Flash) 3V3D A[0:22] C2082 C2083 C2081 U2003 U2001D Vccps Vccf FLASH.A[25] FLASH.A[24] FLASH.D[15] FLASH.A[23] DQ15 FLASH.D[14] FLASH.A[22] DQ14 FLASH.D[13] FLASH.A[21] DQ13 FLASH.D[12] FLASH.A[20] DQ12 FLASH.D[11] FLASH.A[19] DQ11 FLASH.D[10] FLASH.A[18] DQ10 FLASH.D[9]...
- Page 73 PT580 F5 Schematic Diagram (Main Board_Power BB) PT580 F5 MAIN BOARD SCH.(Power_BB) C6007 3V3D R6028 R6002 CHG_DET ISENSE ADC1 ACC_DET 3V3D ADC2 TOUT USBPWR TP6001 3V3D USBSUSP R6001 L6005 USBISEL VBBOUT C6009 VBBFB BAT_ID BAT_ID STAT L6001 VBBL1 C6010 C6008...
- Page 74 PT580 F5 Schematic Diagram (Main Board_FPGA) U2401B 2V5D PT580 F5 MAIN BOARD SCH.(FPGA) VCCAUX C2401 C2402 C2403 VCCAUX VCCAUX VCCAUX 1V2D VCCINT 3V3D C2405 C2406 C2407 VCCINT R2423 R2426 VCCINT U2401A R2424 R2427 VCCINT R2425 R2428 VCCINT IO_L11P_2/VS0/A17 VCCINT D[0:15]...
- Page 75 PT580 F5 Schematic Diagram (Main Board_SDRAM) PT580 F5 MAIN BOARD SCH.(SDRAM) 1V8D C2071 C2072 C2073 C2074 C2075 U2004 VDDQ VDDQ U2001C VDDQ VDDQ SDRAM.D15 SDRAM.D[15] SDRAM.A[13] SDRAM.D14 SDRAM.A12 SDRAM.D15 SDRAM.D[14] SDRAM.A[12] NC/A12 DQ15 SDRAM.D13 SDRAM.A11 SDRAM.D14 SDRAM.D[13] SDRAM.A[11] DQ14 SDRAM.D12 SDRAM.A10...
- Page 76 PT580 F5 Schematic Diagram (Main Board_Clock) PT580 F5 MAIN BOARD SCH.(CLOCK) 3V_TCXO 3V_TCXO R2301 R2302 TP2302 C2301 C2302 U2301 X2301 R2304 C2303 12MHz_REF VCTL R2305 12MHz_CLK R2303 R2309 9.216M_VCO_ON R2315 3V3D 9.216M_FPGA C2310 C2311 R2316 C2304 C2305 9.216M_CLK 9.216M_CLK U2302...
- Page 77 PT580 F5 Schematic Diagram (Main Board_Module) PT580 F5 MAIN BOARD SCH.(Module) INSTAB 2V5D 2V5A L2101 REV_PWR DCMEAS R2123 R2121 C2129 C2136 C2135 C2110 C2111 C2112 C2114 3V3D 3V_TCXO 5V_SYN R2128 3V3D C2134 R2124 U2102 R2125 L2110 R2138 R2101 R2102 R2103...
-
Page 78: Parts List 2
Service Manual Parts List 2 PT580 F5 Parts List 2 (Main Board) Ref. No. Print No. Part No. Description 6201840000000 Heat sink C1001 3101052000020 20PF C1002 3101051040010 0.1UF C1003 3101051040010 0.1UF C1004 3101051040010 0.1UF C1005 3101051040010 0.1UF C1006 3101051040010 0.1UF... - Page 79 Service Manual Ref. No. Print No. Part No. Description C1047 3101052490010 2.4PF C1048 3199052290000 2.2PF C1049 3101055690000 5.6PF C1050 3199052290000 2.2PF C1051 3101052240030 220nF C1052 3101051020010 1000PF C1055 3101051040010 0.1UF C1056 3101071050010 C1057 3101051530010 0.015UF C1058 3199051290000 1.2PF C1059 3101052490020 2.4PF C1060 3101051000020...
- Page 80 Service Manual Ref. No. Print No. Part No. Description C2017 3101062250000 2.2UF C2018 3101051040010 0.1UF C2019 3101051040010 0.1UF C2020 3101062250000 2.2UF C2021 3101062250000 2.2UF C2022 3101051040010 0.1UF C2023 3101051050000 C2024 3101051040010 0.1UF C2025 3101051040010 0.1UF C2026 3101051040010 0.1UF C2071 3101064750010 4.7UF C2072 3101051040010...
- Page 81 Service Manual Ref. No. Print No. Part No. Description C2129 3101064750010 4.7UF C2130 3101051050000 C2131 3101051050000 C2132 3101053300000 33PF C2133 3101051030020 0.01UF C2134 3101051040010 0.1UF C2135 3101053310030 330PF C2136 3101053310030 330PF C2301 3101051040010 0.1UF C2302 3101051040010 0.1UF C2303 3101051020010 1000PF C2305 3101051040010 0.1UF...
- Page 82 Service Manual Ref. No. Print No. Part No. Description C4001 3101051030020 0.01UF C4002 3101051030020 0.01UF C4003 3101057500000 75PF C4004 3101057500000 75PF C4005 3101057500000 75PF C4006 3101051030020 0.01UF C4007 3101057500000 75PF C4008 3101051030020 0.01UF C4009 3101053330000 0.033UF C4010 3101053330000 0.033UF C4011 3101051010030 100PF C4012...
- Page 83 Service Manual Ref. No. Print No. Part No. Description C4046 3101051020010 1000PF C4047 3101057500000 75PF C4049 3101051030020 0.01UF C4050 3199056890000 6.8PF C4051 3199056890000 6.8PF C4052 3101050200050 C4053 3199052790000 2.7PF C4054 3101053990060 3.9PF C4055 3199052790000 2.7PF C4056 3199052790000 2.7PF C4101 3101051030020 0.01UF C4102 3101051030020...
- Page 84 Service Manual Ref. No. Print No. Part No. Description C4143 3101051390010 1.3PF C4144 3101057500000 75PF C4145 3101057500000 75PF C5001 3101057500000 75PF C5002 3101051030020 0.01UF C5003 3101057500000 75PF C5004 3101057500000 75PF C5005 3101051000020 10PF C5006 3101051030020 0.01UF C5007 3199053390001 3.4PF C5008 3101051020010 1000PF C5009...
- Page 85 Service Manual Ref. No. Print No. Part No. Description C5045 3101064750010 4.7UF C5046 3101051020010 1000PF C5047 3101051040010 0.1UF C5048 3101051020010 1000PF C5049 3101051020010 1000PF C5050 3101051100010 11PF C5051 3101050200050 C6001 3101051020010 1000PF C6002 3101071060010 10UF C6003 3101051050000 C6004 3101071060010 10UF C6005 3101071060010 10UF...
- Page 86 Service Manual Ref. No. Print No. Part No. Description C6518 3101071060010 10UF C6519 3101071060010 10UF C6520 3199056890000 6.8PF C6521 3101054740020 0.47UF C6522 3101054740020 0.47UF C6523 3101071060010 10UF C6524 3101071060010 10UF C6525 3101071060010 10UF C6526 3101071060010 10UF C6527 3101051030020 0.01UF C6528 3101051030020 0.01UF C6529...
- Page 87 Service Manual Ref. No. Print No. Part No. Description L1007 3210306339000 3.3nH L1008 3217106121000 120nH L1009 3217106391000 390nH L1010 3217106120010 12nH L1011 3217106120010 12nH L1013 3217106391000 390nH L1014 3217105569010 5.6nH L1015 3217106391000 390nH L1016 3217106470000 47nH L1017 3217106270000 27nH L1018 3217112120000 12nH L1019...
- Page 88 Service Manual Ref. No. Print No. Part No. Description L4107 3217136769000 7.6nH L4108 3217106120010 12nH L4109 3221507600000 Bead L4112 3217107629000 6.2nH L4113 3217107629000 6.2nH L4116 3221505100010 Bead L4117 3211506101000 Bead L5001 3217106689010 6.8nH L5002 3217106829000 8.2nH L5003 3217106829000 8.2nH L5004 3217106681000 680nH L5005...
- Page 89 Service Manual Ref. No. Print No. Part No. Description Q2502 3505010000210 P-MOSFET Q2503 3505010000210 P-MOSFET Q4101 3403008000140 Q5001 3408004000000 NPN transistor Q6001 3403008000140 Q6501 3499000000150 Compound transistor Q6502 3499000000150 Compound transistor Q6503 3499000000150 Compound transistor Q6504 3499000000150 Compound transistor Q6505 3404001000020 NPN transistor Q6506...
- Page 90 Service Manual Ref. No. Print No. Part No. Description R1037 3001051000020 10Ω R1038 3001051000020 10Ω R1039 3001055620010 5.6KΩ R1040 3001054790010 4.7KΩ R1041 3001051000020 10Ω R1042 3001051000020 10Ω R1043 3001055610010 560Ω R1044 3001058220010 8.2KΩ R1045 3212105101000 100nH R1046 3001051010040 100Ω R1047 3001053310000 330Ω...
- Page 91 Service Manual Ref. No. Print No. Part No. Description R2043 3001051030050 10KΩ R2044 3001051030050 10KΩ R2045 3001051030050 10KΩ R2055 3001052700010 27Ω R2056 3001052700010 27Ω R2057 3001051030050 10KΩ R2058 3001051030050 10KΩ R2060 3001052700010 27Ω R2061 3001051030050 10KΩ R2062 3001051030050 10KΩ R2063 3001050000000 0Ω...
- Page 92 Service Manual Ref. No. Print No. Part No. Description R2305 3001052700010 27Ω R2306 3001054790010 4.7KΩ R2307 3001051020000 1KΩ R2308 3001051040000 100KΩ R2309 3001052240010 220KΩ R2310 3001052240010 220KΩ R2311 3001051020000 1KΩ R2312 3001052220010 2.2KΩ R2313 3001052220010 2.2KΩ R2315 3001052700010 27Ω R2316 3001052700010 27Ω...
- Page 93 Service Manual Ref. No. Print No. Part No. Description R2510 3001051040000 100KΩ R2511 3001051040000 100KΩ R2519 3001051030050 10KΩ R2520 3001051030050 10KΩ R4001 3001055130000 51KΩ R4002 3001051040000 100KΩ R4003 3001051040000 100KΩ R4004 3001053390000 3.3Ω R4005 3001055130000 51KΩ R4007 3001051000020 10Ω R4008 3001051000020 10Ω...
- Page 94 Service Manual Ref. No. Print No. Part No. Description R4042 3001053390000 3.3Ω R4043 3001051040000 100KΩ R4044 3001051040000 100KΩ R4045 3001055130000 51KΩ R4047 3001053390000 3.3Ω R4048 3001053390000 3.3Ω R4049 3001053900010 39Ω R4050 3001059100000 91Ω R4051 3001058200000 82Ω R4052 3001059100000 91Ω R4101 3001051010040 100Ω...
- Page 95 Service Manual Ref. No. Print No. Part No. Description R6005 3001051030050 10KΩ R6006 3001051030050 10KΩ R6008 3001050000000 0Ω R6010 3001051240010 120KΩ R6014 3001051030050 10KΩ R6015 3001051030050 10KΩ R6023 3001050000000 0Ω R6025 3001051030050 10KΩ R6027 3001050000000 0Ω R6028 3001051030050 10KΩ R6501 3001054740010 470KΩ...
- Page 96 Service Manual Ref. No. Print No. Part No. Description U6001 3608090000050 Power management IC U6002 3608026000050 Power management IC U6501 3608026006190 Power management IC U6502 3608026006190 Power management IC U6503 3608026006190 Power management IC U6504 3608026006190 Power management IC U6505 3608089000010 Power management IC U6506...
- Page 97 Service Manual PT580 F5 Parts List 2 (MMI Board) Ref. No. Print No. Part No. Description B7203 5202002100200 Board-to-wire connector C7001 3101051040060 0.1UF C7002 3101051040060 0.1UF C7004 3101064750010 4.7UF C7005 3101051010030 100PF C7006 3101051010030 100PF C7007 3101051010030 100PF C7008 3101051010030...
- Page 98 Service Manual Ref. No. Print No. Part No. Description C7201 3101051010030 100PF C7202 3101051010030 100PF C7203 3101082260020 22UF C7204 3101061050020 C7205 3101051010030 100PF C7206 3101051010030 100PF C7207 3101051040060 0.1UF C7208 3101064750010 4.7UF C7210 3101082260020 22UF C7211 3101051010030 100PF C7214 3101054700010 47PF C7215 3101051010030...
- Page 99 Service Manual Ref. No. Print No. Part No. Description D7220 3399040600000 ESD protection diode F7001 4010000000010 Resumable fuse J7001 5201070100010 Board-to-board connector J7002 5201016000010 Board-to-board connector J7004 5201030000050 Board-to-board connector J7005 5201010100010 Board-to-board connector J7006 5201010100010 Board-to-board connector J7007 5206021200000 FPC connector L7001 3221505100010...
- Page 100 Service Manual Ref. No. Print No. Part No. Description L7504 3221505100010 Bead Q7101 3409003000030 Transistor Q7102 3505010000200 P-MOSFET Q7105 3403008000140 Q7106 3403008000140 R7001 3001051520000 1.5KΩ R7002 3001052700000 27Ω R7003 3001052700000 27Ω R7004 3001051530000 15KΩ R7005 3001051530000 15KΩ R7008 3001051030000 10KΩ R7009 3001052220000 2.2KΩ...
- Page 101 Service Manual Ref. No. Print No. Part No. Description R7237 3001050000000 0Ω R7238 3001050000000 0Ω R7240 3001051010010 100Ω R7241 3001051010010 100Ω R7251 3001052220000 2.2KΩ R7252 3001050000000 0Ω R7259 3001051000000 10Ω S7122 4301080000020 Momentary contact switch U7002 3608010000070 Power management IC U7201 3602010000010 Audio amplifier...
-
Page 102: Specifications
Service Manual Specifications General Dimensions (H×W×D) 125×53.5×32 mm/ 4.921×2.106×1.260 inch (with standard battery, without antenna) Weight (with standard antenna & battery) 265g/ 0.59lb Battery 1800mAh Battery Life (5-5-90 Duty Cycle) Above 10 hours in TMO Operating Voltage 3.7V Talk Groups-TMO 2048 Talk Groups-DMO 1024... - Page 103 Service Manual Environmental Specifications Operating Temperature -25℃~+65℃ Storage Temperature -40℃~+80℃ Humidity ETS 300 019 (95%) Water & Dust Protection IEC60529 / IP56 Drop, Shock & Vibration MIL-STD-810 F All Specifications are tested according to applicable standards, and subject to change without notice due to continuous development.
- Page 104 1616300000100...
Need help?
Do you have a question about the PT580 and is the answer not in the manual?
Questions and answers