Table of Contents
Advertisement
Advertisement
Table of Contents

Subscribe to Our Youtube Channel
Related Manuals for Hytera PD40X


Summary of Contents for Hytera PD40X
- Page 1 DIGITAL PORTABLE RADIO OWNER’S MANUAL...
- Page 3 To avoid body injury or property loss caused by misoperation, please read the Safety Information Booklet carefully before use. This manual is applicable to the following product: PD40X Digital Portable Radio (X may represent 2, 5, 6 or 8)
-
Page 4: Fcc Regulations
● American National Standards Institute (ANSI)/Institute of Electrical and Electronic Engineers (IEEE) C95. 1-1992; Hytera Communications Corporation Limited (the Company) endeavors to ● Institute of Electrical and Electronic Engineers (IEEE) C95.1-1999; achieve the accuracy and completeness of this manual, but no warranty of accuracy or reliability is given. -
Page 5: Table Of Contents
Contents Items in the Package ----------------------------------------1 Features and Operations ----------------------------------8 Product Overview --------------------------------------------2 Power Level ---------------------------------------------------------8 Covert Mode --------------------------------------------------------8 Product Controls ---------------------------------------------------2 Time-out Timer (TOT) ---------------------------------------------8 Programmable Keys ----------------------------------------------3 Busy Channel Lockout -------------------------------------------8 Before Use ------------------------------------------------------3 Scan -------------------------------------------------------------------8 Attaching the Battery ----------------------------------------------3 Talk Around ----------------------------------------------------------9 Attaching the Antenna --------------------------------------------3 One Touch Call... -
Page 6: Items In The Package
Items in the Package Please unpack carefully and check if all items listed below are received. If any item is missing or damaged, please contact your dealer. The frequency band is marked on the label of antenna; if not, please refer to the label on the radio for frequency band Note information. -
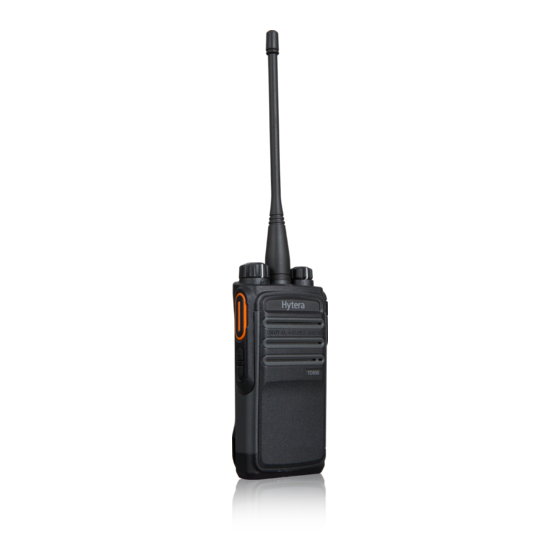
Page 7: Product Overview
Product Overview Product Controls... -
Page 8: Programmable Keys
Product Overview Before Use Attaching the Battery Programmable Keys To attach the battery, do as follows. For enhanced convenience, you may request your dealer to program the SK1 and SK2 keys as shortcuts to certain feature. “ click ” “ click ” Assemble Disassemble To remove the battery, please turn off the radio first. -
Page 9: Attaching The Belt Clip
Before Use Attaching the Belt Clip Charging the Battery Charging the Radio Charging the Battery Remove the screws Assemble the Belt Clip Attaching the Accessories LED Indication Current Status The LED Indicator flashes red slowly Standby (no load) The LED Indicator glows red Charging The LED Indicator glows orange 90% charged... -
Page 10: Checking The Battery Power
Before Use Status Indication Checking the Battery Power LED Indicator You may check the current battery power by holding down the programmed Battery Power Indicator key preset by your dealer. And release the key to exit. Battery power indications are listed below: LE D LE D LED Indication... -
Page 11: Basic Operation
Basic Operation Turning the Radio On/Off appropriate zone by pressing the programmed Zone Up or Zone Down key preset by your dealer. If the Zone Notify feature is enabled by your dealer, the radio will announce the zone number when selecting zone. Adjusting the Volume Selecting a Zone Selecting a Channel... -
Page 12: Call Services
Call Services call to the calling party in private call; but in group call, the radio will make After the radio is powered on, you can make and receive calls. To ensure a call to all parties involved when calling back. And you cannot call back optimal volume of the receiving radio, keep the microphone about 2.5 to in an all call. -
Page 13: Features And Operations
Features and Operations Power Level Time-out Timer (TOT) Description Description Power Level allows you to set the TX power level. High power can extend This feature is to prevent any user from occupying a channel for an the signal coverage, enabling you to communicate with farther radios. extended period and to avoid radio damages due to overheat. -
Page 14: Talk Around
Features and Operations to communication activities on other channels so that you can keep a the programmed Talk Around key when the repeater malfunctions, or close track of your team members. when the radio is out of the repeater’s coverage but still within the coverage of the other radio. -
Page 15: Squelch Level Adjustment
Features and Operations Squelch Level Adjustment CTCSS/ CDCSS Description Description Squelch Level Adjustment allows you to adjust the squelch threshold CTCSS/CDCSS allows the radio to add signaling with a frequency lower than that of the audio to the carrier. The speaker can be unmuted only required for the radio to be unmuted. -
Page 16: Tdma Direct Mode
Features and Operations ● The VOX feature will be enabled for all the channels. TDMA Direct Mode ● The VOX feature settings will not remain unchanged when Description the radio is powered on and off. ● After the VOX feature is enabled, switching the PTT/ TDMA Direct Mode allows the radio to divide the 12.5 kHz channel into VOX switch to “PTT”... -
Page 17: Troubleshooting
Troubleshooting Phenomena Analysis Solution The battery may be improperly installed. Remove the battery and reattach it. The battery power may run out. Recharge or replace the battery. The radio cannot be powered on. The battery may suffer from poor contact caused by dirtied Clean the battery contacts. -
Page 18: Care And Cleaning
Care and Cleaning Product Cleaning To guarantee optimal performance as well as a long service life of the product, please follow the tips below. Turn off the product and remove the battery before cleaning. Product Care Caution ● Clean up the dust and fine particles on the product surface and charging piece with a clean and dry lint-free cloth or a brush regularly. -
Page 19: Optional Accessories
Optional Accessories The following items are the main optional accessories for the product, and please consult your local dealer for more other accessories. Cable: PC76 Programming & Download Cable Use the accessories specified by the Company only. If not, the Company shall not be liable for any losses or Caution damages arising out of use of unauthorized accessories. - Page 20 Hytera Communications Corporation Limited. 2015 Hytera Communications Corporation Limited. C10524 L07157 8 1 1 PD4 0 0 0 0 0 0 0...
Need help?
Do you have a question about the PD40X and is the answer not in the manual?
Questions and answers