Intermec CS40 User Manual
Hide thumbs
Also See for CS40:
- User manual (152 pages) ,
- Options manual (14 pages) ,
- Instructions manual (28 pages)
Table of Contents
Advertisement
Quick Links
Advertisement
Table of Contents
Troubleshooting

Subscribe to Our Youtube Channel
Related Manuals for Intermec CS40


Summary of Contents for Intermec CS40
- Page 1 CS 40 Mobile Computer User’s Manual...
- Page 2 Intermec Technologies Corporation. Information and specifications contained in this document are subject to change without prior notice and do not represent a commitment on the part of Intermec Technologies Corporation. © 2010 by Intermec Technologies Corporation. All rights reserved.
-
Page 3: Table Of Contents
About the CS40 Mobile Computer ........ - Page 4 Improving GPS Performance on the CS40........20...
- Page 5 CS40 Docking Connector Specifications ........58...
- Page 6 Imager Configuration Bar Codes ..........72 CS40 Mobile Computer User’s Manual...
-
Page 7: Before You Begin
Global Services and Support Warranty Information To understand the warranty for your Intermec product, visit the Intermec web site at www.intermec.com and click Support > Returns and Repairs > Warranty. -
Page 8: Web Support
Web Support Visit the Intermec web site at www.intermec.com to download our current manuals (in PDF). To order printed versions of the Intermec manuals, contact your local Intermec representative or distributor. Visit the Intermec technical knowledge base (Knowledge Central) at www.intermec.com and click Support >... -
Page 9: Who Should Read This Manual
This manual provides you with information about the features of the CS40, and how to install, configure, operate, maintain, and troubleshoot it. Before you work with the CS40, you should be familiar with your network and general networking terms, such as IP address. Related Documents... -
Page 10: Patent Information
6,042,414; 6,049,813; 6,052,279; 6,053,759; 6,058,000; 6,061,155; 6,064,763; 6,076,731; 6,091,227; 6,094,029; 6,095,422; 6,097,839; 6,102,266; 6,102,289; 6,102,295; 6,109,528; 6,112,206; 6,113,047; 6,119,941; 6,124,800; 6,128,414; 6,131,815; 6,135,810; 6,137,260; 6,149,059; 6,149,061; 6,149,063; 6,152,370; 6,155,490; 6,158,661; 6,161,123; 6,163,359; 6,164,542; 6,164,545; 6,173,893; 6,174,180; CS40 Mobile Computer User’s Manual... - Page 11 7,180,640; 7,184,068; 7,185,819; 7,190,835; 7,206,338; 7,208,916; 7,210,633; 7,232,072; 7,249,302; 7,271,679; 7,296,749; 7,298,791; 7,325,741; 7,327,988; 7,347,375; 7,360,705; 7,392,951; 7,407,105; 7,411,501; 7,412,097; 7,413,125; 7,417,809; 7,418,157; 7,427,912; 7,444,516; 7,451,441; 7,451,931; 7,451,933 There may be other U.S. and foreign patents pending. CS40 Mobile Computer User’s Manual...
- Page 12 Before You Begin CS40 Mobile Computer User’s Manual...
-
Page 13: Using The Cs40
Adjusting the Volume • Configuring Backlight Settings About the Status LEDs • • About the Imager • About Bar Codes • About the Color Camera • Inserting a microSD Card • How to Enable the Integrated GPS on the CS40... -
Page 14: About The Cs40 Mobile Computer
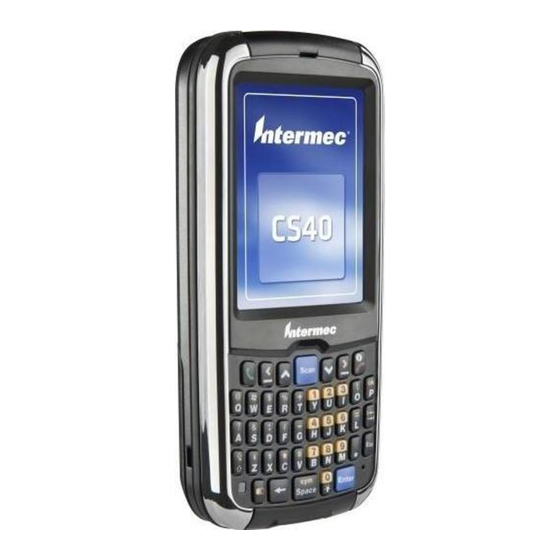
Chapter 1 — Using the CS40 About the CS40 Mobile Computer The Intermec CS40 Mobile Computer is a small, lightweight mobile ® ® computer built on the Microsoft Windows Mobile 6.5 operating system. This Personal Digital Assistant PDA-style mobile computer supports the latest High Speed Uplink Packet Access (HSUPA). -
Page 15: Overview Of Cs40 Features
• up to 32 GB Customer-accessible SIM card slot • • Numeric or QWERTY keypad The CS40 Mobile Computer with an IEEE 802.11b/g radio installed ® is Wi-Fi certified for interoperability with other 802.11b/g wireless LAN devices. CS40 Accessories The CS40 accessories are sold and ordered separately. For help, contact your local Intermec sales representative. -
Page 16: About The Cs40 Battery
Keep away from children. Note: If the CS40 is not using external power and you remove the battery pack, the CS40 goes into a power off state and then cold boots. Charging the Battery You need to fully charge the battery before using your CS40 for the first time. -
Page 17: Replacing The Battery
Vehicle power adapter Data and power y-cable variable* * When you charge your CS40 from your PC, the charge time depends on the amount of power provided by the USB port on your PC. Replacing the Battery The CS40 resets when you remove the battery. -
Page 18: About Battery Status
Chapter 1 — Using the CS40 4 Insert the bottom of a fully charged battery into the CS40, and press down firmly on the top of the battery. Make sure that the battery release tab is fully engaged. About Battery Status Use the battery icon to see the power status of your battery. -
Page 19: About Battery Life And Conservation
Chapter 1 — Using the CS40 About Battery Life and Conservation Batteries that are stored outside the CS40 for long periods of time slowly discharge. Intermec recommends storing the battery in a charger to maintain battery performance. Battery Conservation Tips... -
Page 20: About The Keypad
About the Power Button When you press and hold the Power button for about 2 seconds, you put the CS40 into suspend mode. In this lower power mode, the CS40 continues to supply power to all memory, but turns off power to most hardware, such as the display. -
Page 21: Entering Characters On The Qwerty Keypad
Chapter 1 — Using the CS40 Entering Characters on the QWERTY Keypad You need to use the orange modifier key b and the Shift key [ to access all characters and functions. To type a character Press the key for the character. -
Page 22: Adjusting The Volume
Chapter 1 — Using the CS40 To type a character or access a function in orange on the overlay 1 Press b. The key status LED turns orange. 2 Press the key for the character or function. The orange modifier key stays on until you press b again. -
Page 23: Configuring Backlight Settings
If you have a numeric keypad, press b .. • By default, the CS40 goes into Screen Off mode when there is no activity. Screen Off mode turns off the backlight and display. Press a key or tap the screen to resume activity. -
Page 24: About The Status Leds
Chapter 1 — Using the CS40 To configure the backlight 1 Tap the Battery ( ) icon at the top of the screen, and then tap the battery icon from the menu. 2 With Turn off backlight if device is not used for checked, select the timeout value (30 seconds, or 1 to 5 minutes). -
Page 25: About The Imager
“Symbology Bar Codes” on page 73. You can use EasySet to create configuration bar codes specific to your system. You can download a free copy of EasySet from the CS40 web page on the Intermec web site at www.intermec.com. To develop an application you can use to configure the imager, use the Data Collection Resource Kit. - Page 26 Intermec Settings Command Reference Manual. 3 Point the imager window at the bar code label, and hold the CS40 steady a few inches from the label. 4 Press the Scan button. The laser pointer and illumination beam and frame appear.
-
Page 27: About Signature Capture
5 Use the laser pointer as a guide and aim toward the middle of the bar code. Make sure that the illumination frame covers the bar code you are trying to decode. When the CS40 successfully reads a bar code label, the Good Read LED turns on briefly. 6 Release the Scan button. -
Page 28: Taking A Picture
6 When you are done, tap Stop or press Enter to stop recording and save the video. If you choose to save your videos to Main memory, they are saved to permanent storage on the CS40. CS40 Mobile Computer User’s Manual... -
Page 29: Saving Pictures And Videos To An Sd Card
Saving Pictures and Videos to an SD Card Pictures and videos are automatically saved to the main memory on your CS40. You can save your pictures and video to an SD card to easily transport them to another device. To save picture and video files to an SD card 1 Install a miniSD card. -
Page 30: How To Enable The Integrated Gps On The Cs40
7 Close the card access door. 8 Install the battery. 9 Press the Power button. The CS40 cold boots. How to Enable the Integrated GPS on the CS40 The CS40 comes equipped with an integrated Global Positioning System (GPS) receiver. It can deliver standards-based National Marine Electronics Association (NMEA) data strings to GPS applications. -
Page 31: Using The Gpsid Installed On The Cs40
• Provides access to GPS data without requiring applications to recognize and parse NMEA syntax. Using the GPSID Installed on the CS40 To use the GPSID installed on your computer, you need to configure the GPSID settings. To configure your GPSID settings 1 Tap Start >... -
Page 32: Improving Gps Performance On The Cs40
• Assisted GPS • Qualcomm XTRA In Standalone mode, the CS40 GPS module relies solely on GPS satellites to determine position. In Assisted GPS mode, the mobile computer can determine position without receiving GPS signals directly from satellites; instead, the mobile computer receives GPS signals and information provided by the cellular network. -
Page 33: About Additional Gps Options For The Computer
Chapter 1 — Using the CS40 Qualcomm XTRA Assistance technology provides enhanced operation for Standalone-GPS. This option lets the CS40 automatically download a small assistance data file from the XTRA servers through a brief internet access session. To improve GPS performance 1 Tap Start >... - Page 34 Chapter 1 — Using the CS40 CS40 Mobile Computer User’s Manual...
-
Page 35: Connecting And Configuring The Cs40
• How to Configure the CS40 • About SmartSystems Foundation • How to Connect the CS40 to a PC • How to Connect the CS40 to Your Network • About the Phone • Connecting to an ISP •... -
Page 36: How To Configure The Cs40
Chapter 2 — Connecting and Configuring the CS40 How to Configure the CS40 You can configure many parameters of the CS40, such as the bar code symbologies it decodes or the network settings. The values you set for these configuration parameters determine how the CS40 operates. -
Page 37: How To Connect The Cs40 To A Pc
CS40 to your PC using the power and data y-cable accessory. How to Connect the CS40 to Your Network The CS40 is a versatile mobile computer that you can easily add to your wireless or wired data collection network. You can connect your computer using: •... -
Page 38: Connecting The Cs40 Using 802.11 Radio Communications
Make sure all components with antennas are at least 30 cm (1 ft) apart when power is applied. Failure to comply could result in equipment damage. Your CS40 has an 802.11 radio to transfer data using wireless communications. This section assumes that your wireless network is set up, including your access points. -
Page 39: Connecting The Cs40 Using Bluetooth Communications
Password 9 Tap OK. Your CS40 connects to the network. 10 Make sure that your CS40 is talking to the network and that the network can see your CS40. If you are connected to the wireless network, a connected icon (... -
Page 40: Connecting The Cs40 To A Wireless Printer
1 Tap Start > Settings > Bluetooth > Mode. 2 Tap the Turn on Bluetooth check box. 3 (Optional) If you want your CS40 to be visible to other Bluetooth devices, tap Make this device visible to other devices. 4 Tap ok. -
Page 41: Connecting The Cs40 Using Ethernet Communications
Microsoft APIs with Bluetooth extensions for Winsock and Bluetooth virtual COM ports. For help, see the Bluetooth Resource Kit documentation. Connecting the CS40 Using Ethernet Communications You connect your CS40 to your Ethernet network using these accessories: • USB Ethernet adapter cable •... -
Page 42: Connecting The Cs40 Using Usb Communications
“CS40 Accessories” on page 3. About the Phone Your CS40 supports UMTS mobile wireless phone technology. With the radio module installed in your CS40, you can send and receive telephone calls as well as transmit data through wide-area (WAN) cellular networks. -
Page 43: Turning On The Phone Using The Wireless Manager
3 Tap Done to close the Wireless Manager. Activating the UMTS Radio You use a SIM card to activate the UMTS/HSPA phone on your CS40. You can purchase the SIM card from your network provider. To install the SIM card and activate the UMTS radio 1 Tap Start >... -
Page 44: Making A Phone Call
4 Slide the SIM card into the slot in the card access door. 5 Close the card access door. 6 Install the battery. 7 Press the Power button. The CS40 cold boots. Making a Phone Call After you activate your phone, you are ready to start making phone calls. - Page 45 Chapter 2 — Connecting and Configuring the CS40 To connect to an Internet service provider 1 Tap Start > Settings > Connections. 2 Under My ISP, tap Add a new modem connection. 3 Enter a name for the connection, such as “ISP Connection.”...
-
Page 46: Connecting To A Network With A Vpn Server
Chapter 2 — Connecting and Configuring the CS40 After your mobile computer is connected, you can: • send and receive message using Messaging (Outlook E-mail). • visit web pages using Internet Explorer Mobile. Connecting to a Network With a VPN Server A VPN connection helps you to securely connect to servers, such as a corporate network, through the Internet. -
Page 47: Developing And Installing Applications
Developing and Installing Applications Use this chapter to understand the guidelines for developing applications for use on your CS40. This chapter contains these sections: • How to Develop Applications for the CS40 • How to Install Applications on the CS40 •... -
Page 48: How To Develop Applications For The Cs40
How to Develop Applications for the CS40 Use the Intermec Resource Kits to develop new applications to run on your CS40. The Resource Kits are a library of components grouped by functionality that you can use to create applications for your CS40. -
Page 49: How To Install Applications On The Cs40
Software Vault. 3 From the SmartSystems console in the Software Vault, drag-and- drop the application onto each CS40 in your network, or drop the application on a group of CS40s contained in a folder. CS40 Mobile Computer User’s Manual... -
Page 50: Installing Applications Using Microsoft Activesync Or
To install an application using Microsoft ActiveSync or Windows Mobile Device Center 1 On your PC, copy the .cab file you want to download to your CS40. 2 Create an ActiveSync or Windows Mobile Device Center connection between your PC and your CS40. -
Page 51: How To Update The System Software
4 Copy your application file to the microSD card. 5 Remove the microSD card from the adapter card and insert it into your CS40. 6 On your CS40, navigate to the storage card folder and run your application. How to Update the System Software Your CS40 uses Image Update to update the operating system (OS) and system software. -
Page 52: Updating Multiple Cs40S Using Smartsystems Console
Updating Multiple CS40s Using SmartSystems Console You can use the SmartSystems console to update the operating system or system software on your CS40. The console is part of SmartSystems Foundation and is available from the Intermec web site through the Intermec Developer Library (IDL). Before you can upgrade your CS40, you need: •... -
Page 53: How To Send Silent Update Packages To The Computer
Downloads. 2 Transfer the Image Update packages from your PC to your CS40. 3 On your CS40, tap Start > File Explorer and navigate to the location of the Image Update package. 4 Double-tap the package to install it. Your CS40 validates the update package and prompts you to continue with installation. - Page 54 Chapter 3 — Developing and Installing Applications CS40 Mobile Computer User’s Manual...
-
Page 55: Troubleshooting And Maintaining The Computer
Troubleshooting and Maintaining the Computer If you encounter any problems while using the mobile computer, look in this chapter to find a possible solution. You will also find information on routine maintenance. This chapter contains these sections: • Calling Product Support •... -
Page 56: Calling Product Support
If you still need help after visiting Knowledge Central, you may need to call Product Support. To talk to an Intermec Product Support representative, call 1-800-755-5505. Before you call Intermec Product Support, make sure you have the following information ready: • Configuration number •... -
Page 57: Troubleshooting The Computer
Use this section to troubleshoot some common problems you may experience with your CS40. Note: If you send your CS40 in for service, it is your responsibility to save the computer data and configuration. Intermec is responsible only for ensuring that the hardware matches the original configuration when repairing or replacing the computer. - Page 58 Try reloading the firmware. For help, see “How to Update the System Software” on page 39. • If the mobile computer does not boot or reset, contact your Intermec representative for help. • You tap the screen Make sure the mobile computer is not locked. and nothing •...
- Page 59 You are setting up When you change the SSID, the WEP key values are multiple access not saved. Configure the WEP key values and save points in a network, your changes. with different SSIDs, and the connection fails. CS40 Mobile Computer User’s Manual...
- Page 60 You may be scanning the bar code label “straight on.” Change the scanning angle and try again. • Move within two feet of a wall to test the effective scan of the imager. For help scanning bar codes, “Reading Bar Codes” on page 13. CS40 Mobile Computer User’s Manual...
- Page 61 If the mobile computer is configured to use level triggering, there may be a problem. Press the Scan button again without scanning a bar code label. If the LED is still on, contact your local Intermec representative. • The imager does not...
-
Page 62: Resetting The Computer
Chapter 4 — Troubleshooting and Maintaining the Computer Resetting the Computer You rarely need to reset the mobile computer. If the CS40 does not resume after pressing the Power button, or if the CS40 or an application locks up, you may need to reset the CS40. The CS40 uses the configuration currently saved in flash memory during the boot process. -
Page 63: Clean Booting The Computer
Flash File Store. For more information, see “How to Install Applications on the CS40” on page 37. To clean boot the computer 1 Remove the battery pack. 2 Install the battery pack and press 3 When the computer starts the boot process, simultaneously press >... -
Page 64: Cleaning The Computer
2 Dip a clean towel or rag in the ammonia solution and wring out the excess. Wipe off the imager window and screen. Do not allow any abrasive material to touch these surfaces. 3 Wipe dry. CS40 Mobile Computer User’s Manual... -
Page 65: Specifications
Specifications... -
Page 66: Physical And Environmental Specifications
7.1 cm (2.8 in) diagonal square active area • LED backlight with 5 levels of brightness, including Off • LCD capable of both portrait and landscape operation Keypad Options • Numeric keypad • Alphanumeric keypad (QWERTY) CS40 Mobile Computer User’s Manual... -
Page 67: Cs40 Micro-Ab Usb Connector Specifications
• GS1 DataBar Limited • TLC 39 CS40 Micro-AB USB Connector Specifications The CS40 has a standard Micro-AB USB connector: • 1A maximum charge when using the universal cell phone charger accessory • maximum VBUS output power of 5 V @ 100 mA... -
Page 68: Ea11 Imager Reading Distances
Appendix A — Specifications CS40 Docking Connector Specifications The CS40 has an array of seven pin surface contacts that provide USB “On the Go” (OTG) connectivity and charge power while docked. CS40 Docking Connector Specifications Pin Number Signal Name Description... - Page 69 Data Matrix 7.5 mils 6" 4" PDF417 6.6 mils 2" 0" 2" 4" 0.125mm/5mils 6" 0.25 mm / 10 mils 8" 100% contrast UPC EAN 10" 0.5 mm / 20 mils EA11 Standard Typical Reading Distances CS40 Mobile Computer User’s Manual...
-
Page 70: Cs40 Docking Connector Specifications
Data Matrix 7.5 mils 6" PDF417 6.6 mils 4" 2" 0" 2" 4" 0.125mm / 5mils 6" 0.25 mm / 10 mils 8" 100% contrast UPC EAN 10" 0.5 mm / 20 mils EA11 Standard Minimum Reading Distances CS40 Mobile Computer User’s Manual... -
Page 71: Default Settings
Default Settings... -
Page 72: Default Configuration
The commands are grouped by function and reflect the organization of Intermec Settings. You can configure your computer with Intermec Settings from the SmartSystems Foundation console. For detailed information on most of the commands, see the... - Page 73 Disable QR Code Disable Standard 2 of 5 Disable SwedenPost Disable Telepen Disable TLC 39 Disable Symbology Option Settings Symbology Option Default Value Preamble None (disabled) Postamble None (disabled) Global Symbology ID Disable Multicode Disable CS40 Mobile Computer User’s Manual...
- Page 74 Default Value Device Name CS40xxxxxxxxxxx Bluetooth Settings Bluetooth Setting Default Value Bluetooth Power Bluetooth Discoverable Disable Bluetooth Connectable Disable 802.11 Radio Settings 802.11 Radio Setting Default Value Allow Security Changes Enable Radio Measurement Radio Enabled Enable CS40 Mobile Computer User’s Manual...
- Page 75 Null Primary DNS Null Secondary DNS Null Primary WINS Null Secondary WINS Null Device Settings Device Settings Device Setting Default Value Date Null Time Null Adjust for Daylight Time Disable Good Read Beep One Beep CS40 Mobile Computer User’s Manual...
- Page 76 Appendix B — Default Settings Device Settings (continued) Device Setting Default Value Beeper Volume Medium CS40 Mobile Computer User’s Manual...
-
Page 77: Keypads And Keystrokes
Keypads and Keystrokes... -
Page 78: Standard Characters
Standard Characters Use the following tables to learn how to enter standard and hidden characters and functions with the keypad. Alphanumeric Characters Character QWERTY Keypad Numeric Keypad c222 c333 c444 c555 c666 c777 c7777 c888 CS40 Mobile Computer User’s Manual... - Page 79 Appendix C — Keypads and Keystrokes Alphanumeric Characters (continued) Character QWERTY Keypad Numeric Keypad c999 c9999 c122 c1222 c133 c1333 c144 c1444 c155 c1555 c166 c1666 c177 c1777 c17777 c188 c1888 c199 c1999 c19999 CS40 Mobile Computer User’s Manual...
- Page 80 Characters and Functions Function QWERTY Keypad Numeric Keypad Forward Tab Back Tab Space Backspace Shift Caps Lock Up Arrow Down Arrow b< b< Left Arrow b> b> Right Arrow Not available Not available Not available Not available CS40 Mobile Computer User’s Manual...
- Page 81 Characters and Functions (continued) Function QWERTY Keypad Numeric Keypad & Not available Start (Windows) Not available Not available Not available Not available ‘ (apostrophe) Not available , (comma) Not available . (period) Backlight Talk End call CS40 Mobile Computer User’s Manual...
- Page 82 Appendix C — Keypads and Keystrokes CS40 Mobile Computer User’s Manual...
- Page 83 Imager Configuration Bar Codes...
- Page 84 If you need to create a bar code for a specific setup, please download a free copy of EasySet from the CS40 web page on the Intermec web site www.intermec.com. Basic Configuration Bar Codes...
- Page 85 Appendix D — Imager Configuration Bar Codes Imager Predefined Modes (continued) Command Bar Code 1D and 2D codes bright environment 1D and 2D codes with reflective surface Symbology Bar Codes Symbology Enable Bar Code Disable Bar Code AustraliaPost Aztec CanadaPost Codabar CS40 Mobile Computer User’s Manual...
- Page 86 Appendix D — Imager Configuration Bar Codes Symbology Bar Codes (continued) Symbology Enable Bar Code Disable Bar Code Code 11 Code 39 Code 93 Code 128 DataMatrix DutchPost EAN 8 EAN 13 CS40 Mobile Computer User’s Manual...
- Page 87 Appendix D — Imager Configuration Bar Codes Symbology Bar Codes (continued) Symbology Enable Bar Code Disable Bar Code GS1 128 Interleaved 2 of 5 JapanPost Matrix 2 of 5 MaxiCode Micro PDF417 MSI Code PDF417 CS40 Mobile Computer User’s Manual...
- Page 88 Appendix D — Imager Configuration Bar Codes Symbology Bar Codes (continued) Symbology Enable Bar Code Disable Bar Code Planet Plessey Code Postnet QR Code Standard 2 of 5 Telepen TLC 39 UPC-A CS40 Mobile Computer User’s Manual...
- Page 89 Appendix D — Imager Configuration Bar Codes Symbology Bar Codes (continued) Symbology Enable Bar Code Disable Bar Code UPC-E UPC-E1 CS40 Mobile Computer User’s Manual...
- Page 90 Appendix D — Imager Configuration Bar Codes CS40 Mobile Computer User’s Manual...
- Page 92 Worldwide Headquarters 6001 36th Avenue West Everett, Washington 98203 U.S.A. tel 425.348.2600 fax 425.355.9551 www.intermec.com © 2010 Intermec Technologies Corporation. All rights reserved. CS40 Mobile Computer User’s Manual *935-037-001* P/N 935-037-001...
Need help?
Do you have a question about the CS40 and is the answer not in the manual?
Questions and answers