Intermec CN50 User Manual
Hide thumbs
Also See for CN50:
- User manual (154 pages) ,
- Instructions manual (36 pages) ,
- Instructions (4 pages)
Table of Contents
Advertisement
Quick Links
Download this manual
See also:
User Manual
Advertisement
Table of Contents
Troubleshooting

Related Manuals for Intermec CN50


Summary of Contents for Intermec CN50
- Page 1 CN 50 Mobile Computer User’s Manual...
- Page 2 Intermec Technologies Corporation. Information and specifications contained in this document are subject to change without prior notice and do not represent a commitment on the part of Intermec Technologies Corporation. © 2009 by Intermec Technologies Corporation. All rights reserved.
-
Page 3: Table Of Contents
Introducing the CN50 Mobile Computer ........ - Page 4 Connecting the CN50 to a Wireless Printer ....... . .
- Page 5 Upgrading the CN50 Using a microSD Card ....... 47 Upgrading the CN50 Using SmartSystems Foundation ..... 48 Troubleshooting and Maintaining the CN50 .
-
Page 6: Before You Begin
Global Services and Support Warranty Information To understand the warranty for your Intermec product, visit the Intermec web site at www.intermec.com and click Support > Returns and Repairs > Warranty. -
Page 7: Web Support
Web Support Visit the Intermec web site at www.intermec.com to download our current manuals (in PDF). To order printed versions of the Intermec manuals, contact your local Intermec representative or distributor. Visit the Intermec technical knowledge base (Knowledge Central) at www.intermec.com and click Support >... -
Page 8: Who Should Read This Manual
This manual provides you with information about the features of the CN50, including how to install, configure, operate, maintain, and troubleshoot it. Before you work with the CN50, you should be familiar with your network and general networking terms, such as IP address. Related Documents The Intermec web site at www.intermec.com... -
Page 9: Patent Information
6328214; 6330975; 6345765; 6356949; 6367699; 6375075; 6375076; 6375344; 6431451; 6435411; 6484944; 6488209; 6497368; 6532152; 6538413; 6539422; 6621942; 6641046; 6681994; 6687403; 6688523; 6732930; 6859190; 6889903; 6967280; 7027037; 7035466; 7090137; 7121467. There may be other U.S. and foreign patents pending. CN50 Mobile Computer User’s Manual... - Page 10 Before You Begin CN50 Mobile Computer User’s Manual...
-
Page 11: Using The Computer
Using the Computer This chapter introduces the CN50 Mobile Computer with ® ® Windows Mobile 6.1 and contains these topics: • Introducing the CN50 Mobile Computer • Using the Battery Using the Keypad • • Adjusting the Volume of the Speaker •... -
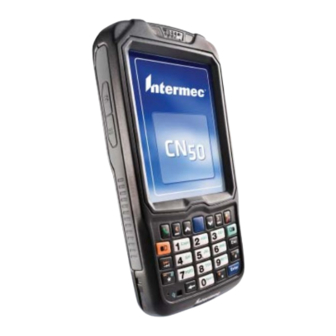
Page 12: Introducing The Cn50 Mobile Computer
The CN50 uses dual ARM processors to provide high throughput and is the only mobile computer with the latest High Speed Uplink Packet Access (HSUPA). The CN50 is also the only mobile computer that can be reprovisioned from a CDMA to a GSM/ UMTS network. -
Page 13: Using The Battery
Charging the Battery Make sure you fully charge the AB24 or AB25 battery before you use your CN50. You can charge the battery before or after you install it in the CN50. A fully discharged battery charges in approximately 4 (AB24) to 6 (AB25) hours. -
Page 14: Removing And Installing The Battery
Chapter 1 — Using the Computer • Install the battery in the CN50 and insert the CN50 into the AD23 charge-only multidock or AD24 Ethernet multidock. • Attach an AE37 AC adapter or AE36 vehicle battery adapter. Use the next table to understand how long it takes to charge your batteries in each of the CN50 charger or dock accessories. -
Page 15: Maximizing Battery Life
3 Push forward on the battery release tab until the battery releases, and then lift it away from the CN50. 4 Insert a fully charged battery into the CN50, and press down on the battery until it clicks into place. -
Page 16: Checking The Battery Status
When You Want To: Do This to Save Battery Power: Store the CN50 for more If you are storing the CN50 for a few days, like than a day. over the weekend, install the charged battery or attach the CN50 to a power source. -
Page 17: Using The Keypad
IDL Resource Kit from the Intermec web site at www.intermec.com/ idl. The CN50 comes with a numeric keypad or a QWERTY keypad. The QWERTY keypad is designed for applications that require primary input of alphabetic data. This keypad also provides special characters, numbers, symbols, and functions by pressing color-coded key sequences. -
Page 18: Using The Color-Coded Keys
Each keypad provides color-coded keys to let you access additional characters, symbols, and functions printed on the keypad overlay. Once you understand how to use the color-coded keys and key sequences, you can access all of the additional features printed on the keypad overlay. CN50 Mobile Computer User’s Manual... -
Page 19: Capitalizing Characters
To enable Caps Lock • On the QWERTY keypad, press , then the key. Press up arrow again to disable the Caps Lock. • On the numeric keypad, press CN50 Mobile Computer User’s Manual... -
Page 20: Using The Power Button
Press Configuring the Backlight Settings By default, the CN50 goes into Screen Off mode when there is no activity on the computer. Screen Off mode turns off the backlight and display. Press a key or tap the screen to resume activity. -
Page 21: Adjusting The Volume Of The Speaker
2 Use your stylus to adjust the volume slider. Using the Touch Screen The CN50 has a 240 x 320 pixel color touch screen display. The Windows Mobile 6.1 start screen has three distinct areas: the navigation bar, today screen, and command bar. -
Page 22: Using The Stylus
The volume is turned off. To turn the volume back on, tap this icon and choose your setting. The computer is connected to the network. The computer is not connected to the network. The 802.11b/g radio is connected to the wireless network. CN50 Mobile Computer User’s Manual... -
Page 23: Aligning The Touch Screen
3 Click ok. If you are unable to align the touch screen, you may need to cold boot the CN50. For help, see “Cold Booting the CN50” on page Understanding the Status LEDs The CN50 has three status LEDs. Notification LED... -
Page 24: Using The Imager
Configuring the Imager The CN50 ships with an internal imager to read and enter bar code data. By default, these bar code symbologies are enabled on the CN50: •... -
Page 25: Reading Bar Codes With The Imager
“Symbology Bar Codes” on page You can use EasySet to create configuration bar codes specific to your system. You can download a free copy of EasySet from the CN50 page on the Intemec web site at www.intermec.com. To develop an application you can use to configure the imager, use the Data Collection Resource Kit. -
Page 26: Capturing A Signature
Make sure that the illumination frame covers the bar code you are trying to decode. When the CN50 successfully reads a bar code label, you hear a high beep, and the Good Read LED turns on briefly. 5 Release the Scan button. -
Page 27: Capturing A Document
Intermec Enhanced Mobile Document Imaging (eMDI) is an image capture application that enables users to capture document images while in the field. Using the imager on your CN50, eMDI allows you to convert paper documents into document images that are saved on your mobile computer. - Page 28 You can use the Pictures & Videos application on the CN50 to take, view, and edit pictures or record and launch video clips stored on the CN50 or a storage card. You can also send pictures and video clips to others or save an image as the background on the Today screen.
-
Page 29: Using A Microsd Card
Using a microSD Card You can use a micro Secure Digital (SD) card to increase file storage and install software. The CN50 supports an optional 32 GB maximum capacity microSD™. The microSD card slot is located in the battery compartment. -
Page 30: Enabling The Integrated Gps On The Cn50
Chapter 1 — Using the Computer • If the microSD card is bootable, your CN50 boots from the card. • If the microSD card contains operating system upgrade files, the upgrade process automatically starts. For more information, see “Upgrading the System Software” on... -
Page 31: Using The Gpsid Installed On The Cn50
Chapter 1 — Using the Computer Using the GPSID Installed on the CN50 To use the GPSID installed on your CN50, you need to configure the GPSID settings. To configure your GPSID settings 1 Tap Start > Settings > the System tab. - Page 32 Chapter 1 — Using the Computer 5 Tap the Access tab and select the Manage GPS automatically check box. 6 Tap ok. CN50 Mobile Computer User’s Manual...
-
Page 33: Learning About Additional Gps Options For The Cn50
Intermec provides enhanced feature support for the Extended Ephemeris data capability. For the latest Extended Ephemeris data files and other CN50 downloads, visit the CN50 downloads page on the Intermec web site at www.intermec.com. For more information about programming for Extended Ephemeris GPS, visit the Intermec Developer Library at www.intermec.com/idl. - Page 34 Chapter 1 — Using the Computer CN50 Mobile Computer User’s Manual...
-
Page 35: Connecting And Configuring The Cn50
Connecting and Configuring the CN50 Use this chapter to understand how to configure the CN50 to communicate in your network. This chapter contains these topics: • Connecting the CN50 to a PC • Configuring the CN50 for Your Network •... -
Page 36: Connecting The Cn50 To A Pc
ActiveSync is a free application available from the Microsoft web site. To establish an ActiveSync partnership between your CN50 and PC, you need to physically connect your CN50 to your PC using these accessories: • CN50 AC adapter •... -
Page 37: Configuring The Cn50 For Your Network
Microsoft ActiveSync screen appears on your PC. Configuring the CN50 for Your Network You have several options for configuring the CN50 to connect to your network: • You can use the Scan-to-Connect utility, which is part of SmartSystems Foundation, to quickly provide the CN50 with the minimal information necessary to connect to a secure network. -
Page 38: Connecting The Cn50 To Your Network
Network web site at http://msdn.microsoft.com/en-us/ default.aspx. Connecting the CN50 to Your Network The CN50 is a versatile mobile computer that you can easily add to your wireless or wired data collection network. You can connect your CN50 using: • 802.11b/g radio communications. -
Page 39: Connecting The Cn50 Using Bluetooth Communications
• Password 8 Tap OK. You device will connect to the network. 9 Make sure that your CN50 is talking to the network and that the network can see your CN50. Connecting the CN50 Using Bluetooth Communications You CN50 is Bluetooth™-enabled, which lets you connect to other Bluetooth devices, such as printers. -
Page 40: Connecting The Cn50 To A Wireless Printer
Chapter 2 — Connecting and Configuring the CN50 3 (Optional) If you want your CN50 to be visible to other Bluetooth devices, tap Make this device visible to other devices. 4 Click ok. The Bluetooth radio maintains its current state through a warm or cold boot and maintains virtual COM ports. -
Page 41: Connecting The Cn50 Using Ethernet Communications
Note: You can also print wirelessly using Microsoft APIs with Bluetooth extensions for Winsock and Bluetooth virtual COM ports. For help, see the IDL, available from the Intermec web site at www.intermec.com/idl. Connecting the CN50 Using Ethernet Communications You connect your CN50 to your Ethernet network with an ethernet cable and an AD24 ethernet multidock. -
Page 42: Connecting The Cn50 Using Usb Communications
Chapter 2 — Connecting and Configuring the CN50 Connecting the CN50 Using USB Communications You can use the CN50 AC adapter to transmit data to and receive data from another device through USB communications. For more information about this accessory and how to order it, see “Accessories”... -
Page 43: Activating The Cdma Phone
Activating the CDMA Phone The CDMA WAN radio module is installed at the factory. To activate your CDMA CN50 device, you need to contact the carrier you have chosen and set up accounts for each device. Use the following table to view the carriers that Intermec currently supports. - Page 44 Chapter 2 — Connecting and Configuring the CN50 • on a label located in the upper right corner of the battery compartment. • on the outside of the CN50 shipping box. The activation process is slightly different for each CDMA carrier.
-
Page 45: Activating The Umts Phone
You use a SIM card to activate the UMTS/HSPA phone on the CN50. You can purchase the SIM card from your network provider. You insert the SIM card in the battery cavity on the back of the CN50. For more information, please contact your local Intermec representative. -
Page 46: Making A Phone Call
Chapter 2 — Connecting and Configuring the CN50 Making a Phone Call After you activate your phone, you are ready to start making phone calls. To make a phone call 1 Tap Start > Phone. 2 Tap the keys to enter the telephone number you want to call. -
Page 47: Connecting To A Network With A Ras Account
Chapter 2 — Connecting and Configuring the CN50 4 If using an external modem connected to your CN50 with a cable, select Hayes Compatible on COM1 from the Select a modem drop-down list. 5 Tap Next. 6 Enter the access phone number and then tap Next. -
Page 48: Connecting To A Network With A Vpn Server
Chapter 2 — Connecting and Configuring the CN50 4 Select your modem type. • If using an external modem connected to your CN50 with a cable, select Hayes Compatible on COM1 from the Select a modem drop-down list. • If using any type of external modem, select the modem by name. - Page 49 4 In the Host name / IP field, enter the VPN server name or IP address. 5 Select the VPN type of authentication to use with your CN50. If you are not sure which option to choose, check with your network administrator.
- Page 50 Chapter 2 — Connecting and Configuring the CN50 11 Insert the necessary equipment, such as a network card, into the CN50 and begin connecting. CN50 Mobile Computer User’s Manual...
-
Page 51: Developing And Installing Applications
Developing and Installing Applications Use this chapter to understand the guidelines for developing applications for use on the CN50. This chapter contains these sections: • Developing Applications for the Computer • Installing Applications on the Computer • Upgrading the System Software... -
Page 52: Developing Applications For The Computer
Developing Applications for the Computer Use the Intermec Resource Kits to develop new applications to run on the CN50. The Resource Kits are a library of components grouped by functionality that you can use to create applications for the computer. -
Page 53: Installing Applications Using Smartsystems Foundation
1 Download the application to your PC. 2 Double-click the application. The application appears in the SmartSystems console in the Software Vault. 3 Drag the application to each CN50 in your network or to a group of CN50 in a folder. CN50 Mobile Computer User’s Manual... -
Page 54: Installing Applications Using Microsoft Activesync
6 Clean boot the CN50. For help, see “Clean Booting the CN50” on page 7 On your CN50, tap Start > Programs > File Explorer and navigate to the location of the .cab file. 8 Tap the .cab file to install it. -
Page 55: Installing Applications Using A Microsd Card
3 Copy your application file to the microSD card. 4 Remove the microSD card from the adapter card and insert it into the CN50. 5 On your CN50, navigate to the storage card folder and run your application. Installing Applications Using Wavelink Avalanche You can use the Wavelink Avalanche device management system to install applications on all of your wireless CN50s. -
Page 56: Upgrading The System Software
You need to download the latest upgrade files from the Intermec web site to your PC. To download the upgrade files 1 Start your web browser and go to the Intermec web site at www.intermec.com. 2 Go to Support > Downloads. -
Page 57: Upgrading The Cn50 Using A Microsd Card
, read the message, and press either button on the right side to continue. 7 Perform the screen alignment and wait for the CN50 to load files from the microSD card. When the progress is complete, the CN50 warm boots to reset the configuration. -
Page 58: Upgrading The Cn50 Using Smartsystems Foundation
6 From the SmartSystems console, locate the device upgrade to install. 7 Drag the application to each CN50 you want to upgrade or to a group of CN50s in a folder.The SmartSystems console installs the upgrade on your computers. - Page 59 After the download is complete, your CN50 replaces the operating system and automatically performs a cold boot. Note: The SmartSystems console indicates that your CN50 is offline, by displaying a red stop sign symbol, until the CN50 reboots and reconnects to the system. CN50 Mobile Computer User’s Manual...
- Page 60 Chapter 3 — Developing and Installing Applications CN50 Mobile Computer User’s Manual...
-
Page 61: Troubleshooting And Maintaining The Cn50
Troubleshooting and Maintaining the CN50 If you encounter any problems while using the mobile computer, look in this chapter to find a possible solution. You will also find information on routine maintenance. This chapter contains these sections: • Calling Product Support Troubleshooting the CN50 •... -
Page 62: Calling Product Support
Use this section to troubleshoot some common problems you may experience with your CN50. Note: If you send the CN50 in for service, it is your responsibility to save the computer data and configuration. Intermec is responsible only for ensuring that the hardware matches the original configuration when repairing or replacing the computer. - Page 63 If the battery status LED is a steady red, the main battery is on charge. • The computer Press the power key to turn off the CN50, and then appears to be locked press the power key again to turn it on. up and you cannot •...
- Page 64 CN50. Problems While Configuring 802.1x Security Problem Possible Solution The CN50 Make sure the CN50 IP address, host IP address, indicates that subnet mask, default router are configured for the it is authenticated, network. but it does not communicate with the host.
- Page 65 PC. You clean boot When you clean boot the CN50, the date and time are the CN50 and this not saved. Configure the date and time and save your message appears, changes.
- Page 66 Scan button, the triggering, the Good Read LED stays on. Good Read LED If the CN50 is configured to use level triggering, there does not turn off. may be a problem. Press the Scan button or pull the trigger again without scanning a bar code label. If the LED is still on, contact your local Intermec representative.
-
Page 67: Resetting The Cn50
You rarely need to reset the computer. If the computer does not resume after pressing the £ button, or if the computer or an application lock up, you may need to reset the CN50. The CN50 uses the configuration currently saved in flash memory during the boot process. -
Page 68: Cold Booting The Cn50
2 Reinsert the battery pack and press £. Clean Booting the CN50 If the CN50 does not warm boot or cold boot, you may need to perform a clean boot. When you clean boot the CN50, the CN50 only loads files and applications that are absolutely required by the operating system. -
Page 69: Cleaning The Cn50
4 When prompted, tap the screen to set up the CN50. 5 Follow the instructions to calibrate the screen. Cleaning the CN50 To keep the CN50 in good working order, you may need to perform these minor maintenance tasks: •... - Page 70 Chapter 4 — Troubleshooting and Maintaining the CN50 CN50 Mobile Computer User’s Manual...
-
Page 71: Specifications
Specifications... -
Page 72: Physical And Environmental Specifications
8.9 cm (3.52 in) diagonal square active area, ¼ VGA • LED backlight with 5 levels of brightness • LCD capable of both portrait and landscape operation Keypad Options • Numeric keypad • Alphanumeric keypad (QWERTY) CN50 Mobile Computer User’s Manual... - Page 73 • Dutch Post • Standard 2 of 5 • EAN/UPC • Telepen • EAN.UCC Composite • TLC 39 • GS1 DataBar Expanded EA21 Imager Reading Distances Insert information here when I receive it from Krista..CN50 Mobile Computer User’s Manual...
-
Page 74: Accessories
The AD23 charge-only multidock charges up to four CN50 computers at one time. Vehicle Holder Use the vehicle holder to hold your CN50 while you are using it in a vehicle. Vehicle Battery Adapter (AE36) Use the AE36 vehicle battery adapter to provide power to your CN50 from your vehicle. -
Page 75: Default Settings
Default Settings... -
Page 76: Default Configuration
Default Configuration The following tables list the default values of the configuration commands supported on the CN50. If you restore the CN50 to factory default settings, the CN50 uses these values. The commands are grouped by function and reflect the organization of Intermec Settings. - Page 77 Disable Plessey Disable Postnet Disable QR Code Disable Standard 2 of 5 Disable Telepen Disable TLC 39 Disable Symbology Option Settings Symbology Option Default Value Preamble None (disabled) Postamble None (disabled) Global Symbology ID Disable CN50 Mobile Computer User’s Manual...
- Page 78 Device Name IntermecCN50 Bluetooth Settings Bluetooth Setting Default Value Bluetooth Power Bluetooth Discoverable Disable Bluetooth Connectable Disable 802.11 Radio Settings 802.11 Radio Setting Default Value Security Choice Funk Security Allow Security Changes Enable Radio Measurement CN50 Mobile Computer User’s Manual...
- Page 79 Import User Certificates False Import Pac Files False Ethernet Adapter IP Settings Ethernet Adapter IP Setting Default Value DHCP Enable DHCP Client Identifier Null Primary DNS Null Secondary DNS Null Primary WINS Null Secondary WINS Null CN50 Mobile Computer User’s Manual...
- Page 80 High Power Management Settings Power Management Setting Default Value Battery Power Device Turns Off After 2 min Screen Turns Off After 1 min External Power Device Turns Off After Disable Screen Turns Off After Disable CN50 Mobile Computer User’s Manual...
- Page 81 Backup Battery Charge Remaining Main Battery Charge Remaining Storage Load Memory Load Core Messaging Service Core Messaging Service Settings Core Messaging Service Setting Default Value Associated Server IP Null Server Name INTERMEC Keep Alive Ping Interval 30 s CN50 Mobile Computer User’s Manual...
- Page 82 Appendix B — Default Settings CN50 Mobile Computer User’s Manual...
-
Page 83: Keypads And Keystrokes
Keypads and Keystrokes... -
Page 84: Standard Characters
Standard Characters Use the following tables to learn how to enter standard and hidden characters and functions with the keypad. Alphanumeric Characters Character QWERTY Keypad Numeric Keypad ]222 ]333 ]444 ]555 ]666 ]777 ]7777 ]888 CN50 Mobile Computer User’s Manual... - Page 85 Appendix C - Keypads and Keystrokes Alphanumeric Characters (continued) Character QWERTY Keypad Numeric Keypad ]999 ]9999 ]122 ]1222 ]133 ]1333 ]144 ]1444 ]155 ]1555 ]166 ]1666 ]177 ]1777 ]17777 ]188 ]1888 ]199 ]1999 ]19999 CN50 Mobile Computer User’s Manual...
- Page 86 QWERTY Keypad Numeric Keypad Forward Tab Back Tab Space Backspace [ or ] Shift Caps Lock Up Arrow Down Arrow Left Arrow Right Arrow Not available Not available Not available Not available & Not available CN50 Mobile Computer User’s Manual...
- Page 87 Appendix C - Keypads and Keystrokes Characters and Functions (continued) Function QWERTY Keypad Numeric Keypad Start (Windows) Not available Not available Not available Not available ‘ (apostrophe) Not available , (comma) Not available . (period) Backlight Talk End call CN50 Mobile Computer User’s Manual...
- Page 88 Appendix C - Keypads and Keystrokes CN50 Mobile Computer User’s Manual...
-
Page 89: Imager Configuration Bar Codes
Imager Configuration Bar Codes... -
Page 90: Imager Configuration Bar Codes
If you need to create a bar code for a specific setup, please download a free copy of EasySet from the CN50 page on the Intemec web site at www.intermec.com. Basic Configuration Bar Codes... - Page 91 Appendix D - Imager Configuration Bar Codes Imager Predefined Modes (continued) Command Bar Code 1D and 2D codes bright environment 1D and 2D codes with reflective surface Symbology Bar Codes Symbology Enable Bar Code Disable Bar Code AustraliaPost Aztec CanadaPost Codabar CN50 Mobile Computer User’s Manual...
- Page 92 Appendix D - Imager Configuration Bar Codes Symbology Bar Codes (continued) Symbology Enable Bar Code Disable Bar Code Code 11 Code 39 Code 93 Code 128 DataMatrix DutchPost EAN 8 EAN 13 CN50 Mobile Computer User’s Manual...
- Page 93 Appendix D - Imager Configuration Bar Codes Symbology Bar Codes (continued) Symbology Enable Bar Code Disable Bar Code EAN 128 Interleaved 2 of 5 JapanPost Matrix 2 of 5 MaxiCode Micro PDF417 MSI Code PDF417 CN50 Mobile Computer User’s Manual...
- Page 94 Appendix D - Imager Configuration Bar Codes Symbology Bar Codes (continued) Symbology Enable Bar Code Disable Bar Code Planet Plessey Code Postnet QR Code Standard 2 of 5 Telepen TLC 39 UPC-A CN50 Mobile Computer User’s Manual...
- Page 95 Appendix D - Imager Configuration Bar Codes Symbology Bar Codes (continued) Symbology Enable Bar Code Disable Bar Code UPC-E UPC-E1 CN50 Mobile Computer User’s Manual...
- Page 96 Appendix D - Imager Configuration Bar Codes CN50 Mobile Computer User’s Manual...
- Page 98 Worldwide Headquarters 6001 36th Avenue West Everett, Washington 98203 U.S.A. tel 425.348.2600 fax 425.355.9551 www.intermec.com © 2009 Intermec Technologies Corporation. All rights reserved. CN50 Mobile Computer User’s Manual *935-022-001* P/N 935-022-001...
Need help?
Do you have a question about the CN50 and is the answer not in the manual?
Questions and answers