Intermec CK3a User Manual
Hide thumbs
Also See for CK3a:
- User manual (130 pages) ,
- Quick start manual (2 pages) ,
- User manual (126 pages)
Table of Contents
Advertisement
Advertisement
Table of Contents
Troubleshooting

Subscribe to Our Youtube Channel
Related Manuals for Intermec CK3a


Summary of Contents for Intermec CK3a
-
Page 1: Mobile Computer
CK 3 Mobile Computer CK3a, CK3a1, CK3n, CK3n1, CK3NI User’s Manual... - Page 2 Intermec Technologies Corporation. Information and specifications contained in this document are subject to change without prior notice and do not represent a commitment on the part of Intermec Technologies Corporation. © 2008-2009 by Intermec Technologies Corporation. All rights reserved.
- Page 3 Document Change Record This page records changes to this document. The document was originally released as Revision 001. Version Number Date Description of Change 10/2009 Revised manual to add the large 28-key numeric keypad and the CK3NI model. 3/2009 Revised manual to support the new CK3a1 and CK3n1 models, and the DDIB 802.11 a/b/g radio module.
- Page 4 CK3 Mobile Computer User’s Manual...
-
Page 5: Table Of Contents
Contents Contents Before You Begin..............ix Safety Information . - Page 6 Using Intermec Settings Remotely With SmartSystems Foundation ..30 Using Intermec Settings Directly On the CK3 ......31 Hiding Menu Items in Intermec Settings .
- Page 7 Contents Installing Applications on the CK3 ..........55 Installing Applications Using SmartSystems Foundation.
- Page 8 Contents Index ..............113 viii CK3 Mobile Computer User’s Manual...
-
Page 9: Before You Begin
Global Services and Support Warranty Information To understand the warranty for your Intermec product, visit the Intermec web site at www.intermec.com and click Support > Returns and Repairs > Warranty. -
Page 10: Web Support
Web Support Visit the Intermec web site at www.intermec.com to download our current manuals (in PDF). To order printed versions of the Intermec manuals, contact your local Intermec representative or distributor. Visit the Intermec technical knowledge base (Knowledge Central) at www.intermec.com and click Support >... -
Page 11: Who Should Read This Manual
This manual is for the person who is responsible for installing, configuring, and maintaining the CK3 Mobile Computer. In this manual, CK3 refers to models CK3a, CK3a1, CK3n, CK3n1, and CK3NI, unless specifically stated otherwise. This manual provides you with information about the features of the CK3, including how to install, configure, operate, maintain, and troubleshoot it. -
Page 12: Patent Information
Before You Begin Patent Information Product is covered by one or more of the following patents: 4953113; 4961043; 4970379; 4988852; 5019699; 5021642; 5038024; 5081343; 5095197; 5144119; 5144121; 5182441; 5187355; 5187356; 5195183; 5216233; 5216550; 5218191; 5227614; 5233172; 5241488; 5243602; 5258606; 5278487; 5288985; 5308966; 5322991; 5331136; 5331580;... -
Page 13: Using The Computer
Using the Computer This chapter introduces the CK3 Mobile Computer with ® ® Windows Mobile 6.1 and contains these topics: • Introducing the CK3 Mobile Computer • What’s New? • Using the Battery • Using the Keypad • Understanding the Audio Features •... -
Page 14: Introducing The Ck3 Mobile Computer
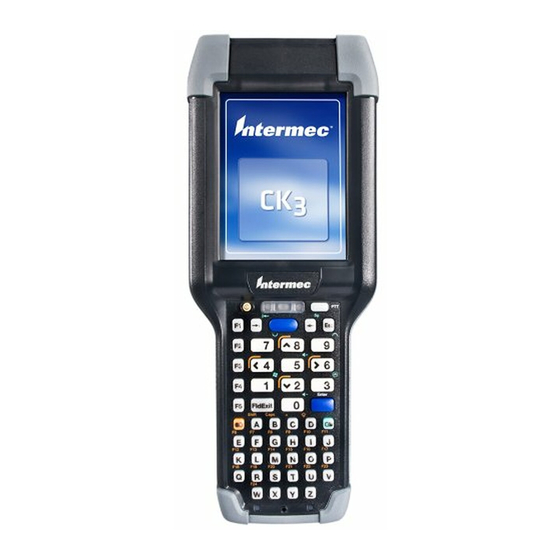
Power button Status LEDs Scan button Docking connector CK3 Mobile Computer The CK3a and CK3n Mobile Computer with a DHIB 802.11b/g radio ® installed is Wi-Fi certified for interoperability with other 802.11b/g wireless LAN devices. The CK3a1 and CK3n1 Mobile Computer with a DDIB 802.11 ®... -
Page 15: What's New
VT/ANSI, and support for third-party TE applications • Intermec Browser Note: The Intermec Client Pack is not compatible with the new large 28-key numeric keypad option. Use this manual to understand how to use the features and options available on the CK3. For information about Windows Mobile 6.1 applications installed on the CK3, refer to the online help. -
Page 16: Using The Battery
Note: If the CK3 is not using external power and you remove the battery pack, the CK3 goes into Suspend mode. For replacement batteries, contact your Intermec representative. Charging the Battery Make sure you fully charge the AB17 or AB18 battery before you use your CK3. -
Page 17: Removing And Installing The Battery
Chapter 1 — Using the Computer Use the next table to understand how long it takes to charge your batteries in each of the CK3 charger or dock accessories. Charging Times for CK3 Batteries CK3 Charging Accessory AB17 Charging Time AB18 Charging Time AC20 quad battery charger up to 4 hours up to 6 hours... -
Page 18: Checking The Battery Status
Chapter 1 — Using the Computer Battery Conservation Tips When You Want To: Do This to Save Battery Power: Operate the CK3 and the Press to turn off the CK3. Remove the Low Battery status icon battery and insert another fully charged appears or the Battery LED battery within 10 minutes or you may lose comes on. -
Page 19: Using The Keypad
Using the Keypad Use the following sections to understand how to use the keypad. For information on remapping the keypad, you can download the Device IDL Resource Kit from the Intermec web site at www.intermec.com/ idl. The CK3 comes with an alphanumeric keypad, a numeric keypad, or a large 28-key numeric keypad. - Page 20 Chapter 1 — Using the Computer CK3 Alphanumeric Keypad CK3 Numeric Keypad Action Enter CK3 Large 28-Key Numeric Keypad CK3 Mobile Computer User’s Manual...
-
Page 21: Using The Color-Coded Keys
However, you can remap keys and access them with the orange or green color-coded keys. To remap keys, you need the Device Resource Kit which is part of IDL. For help, go to www.intermec.com/idl. Using the Color-Coded Keys You Want to:... -
Page 22: Capitalizing Characters
Chapter 1 — Using the Computer Capitalizing Characters You can capitalize characters individually, or you can type all capital letters by enabling Caps Lock. To capitalize a single character On the alphanumeric keypad, press the key, and then the • key to select the Shift function. -
Page 23: Configuring The Backlight Settings
2 With Turn off backlight if device is not used for checked, select the timeout value (10 seconds, 30 seconds, or 1 to 5 minutes). You can also use Intermec Settings to configure the backlight settings. Understanding the Audio Features The CK3 has a speaker, a microphone, and multiple software tools for configuring the volume of sounds. -
Page 24: Recording Audio On Your Ck3
You can record using the internal microphone or a headset microphone attached to the CK3 through the AA20 audio adapter. To stop recording, release the PTT key. To order the AA20 audio adapter, contact your local Intermec representative. Using Your CK3 as a Two-Way Radio You can also use the PTT feature with audio applications, such as iTalkie™... -
Page 25: Using The Touch Screen
Chapter 1 — Using the Computer Using the Touch Screen The CK3 has a 240 x 320 pixel color touch screen display. The Windows Mobile 6.1 start screen has three distinct areas: the navigation bar, today screen, and command bar. Navigation bar Today screen Command bar... -
Page 26: Understanding The Screen Icons
Chapter 1 — Using the Computer Functions You Can Perform With the Stylus (continued) Action Description Tap and hold Tap and hold the stylus on an item to see a menu of actions available for that item. On the pop-up menu that appears, tap the action you want to perform. -
Page 27: Aligning The Touch Screen
Chapter 1 — Using the Computer Aligning the Touch Screen If the touch screen does not respond when you tap it with the stylus, you may need to calibrate the screen. To calibrate the touch screen 1 Tap Start > Settings > the Systems tab > Screen. Note: If the touch screen is so out of alignment that you cannot open the Start menu, you can try to align the screen menu using the keypad. -
Page 28: Understanding The Status Leds
Good Read LED and Intermec Ready-to-Work indicator Location of the Status LEDs The next table describes the Notification LED, Good Read LED, and Intermec Ready-to-Work™ indicator. For information about the battery status LED, see “Understanding the Battery Status LED” on page... -
Page 29: Scanning Bar Codes
CK3. The Intermec Ready-to-Work indicator (blue LED) is used by Intermec’s SmartSystems Foundation, an application that lets you manage all of your SmartSystems-enabled devices simultaneously from a central location. For more information, see “Configuring the... -
Page 30: Scanning With The Linear Imager
If you are using bar code labels that are encoded in a different symbology, you need to enable the symbology on the CK3. Use Intermec Settings to enable and disable symbologies. For help, see “Using Intermec Settings Directly On the CK3” on page The next two sections describe how to scan a bar code label with the linear imager, area imager, and near-far range area imager. -
Page 31: Scanning With An Area Imager
Chapter 1 — Using the Computer Good Read LED Scan button When the CK3 successfully reads a bar code label, you hear a high beep and the green Good Read LED turns on briefly. 4 Release the Scan button or trigger. Scanning With an Area Imager Your CK3 may come with one of two types of area imagers: •... -
Page 32: Scanning With The Near-Far Range Area Imager
Chapter 1 — Using the Computer 3 Press the Scan button or pull the trigger on your scan handle. The laser pointer and illumination beam and frame appear. 4 Use the laser pointer as a guide and aim toward the middle of the bar code. -
Page 33: Improving The Performance Of The Area Imager
• Choose a Predefined mode in Intermec Settings: a Tap Start > Settings > the System tab > Intermec Settings. b Tap Data Collection > Internal Scanner > Imager Settings > Predefined Modes and then select one of these options:... - Page 34 Aim triggering mode • Center decoding To enable these parameters, use Intermec Settings. For help, see “Using Intermec Settings Directly On the CK3” on page For help scanning using center decoding, see the next procedure. To scan a bar code using center-decoding 1 Press to turn on the CK3.
-
Page 35: Using A Microsd Card
Chapter 1 — Using the Computer Laser pointer Good Read LED Scan button When the CK3 successfully reads a bar code label, you hear a high beep and the green Good Read LED turns on briefly. Using a microSD Card You can use a micro Secure Digital (SD) card to increase file storage and install software. - Page 36 Chapter 1 — Using the Computer 2 Use a paper clip or slotted screwdriver to remove the cover. 3 Slide the microSD card cover toward the OPEN position and lift the cover. CK3 Mobile Computer User’s Manual...
- Page 37 Chapter 1 — Using the Computer 4 Insert the microSD card. 5 Close the microSD card cover, and slide the cover toward the LOCK position. 6 Replace the cover. 7 Use the stylus to press the reset button in the battery compartment of the CK3.
- Page 38 Chapter 1 — Using the Computer 9 Press to turn on the CK3: • You should be able to navigate to the SDMMC Disk folder and see the contents of the microSD card. • If the microSD card is bootable, your CK3 boots from the card. •...
-
Page 39: Connecting And Configuring The Ck3
Connecting and Configuring the CK3 Use this chapter to understand how to configure the CK3 to communicate in your network. This chapter contains these topics: • Managing the CK3 Using SmartSystems Foundation • Connecting to a PC • Configuring the CK3 Parameters •... -
Page 40: Managing The Ck3 Using Smartsystems Foundation
Chapter 2 — Connecting and Configuring the CK3 Managing the CK3 Using SmartSystems Foundation Intermec's SmartSystems™ Foundation is a software platform that lets you manage all of your SmartSystems-enabled devices, including the CK3, simultaneously from a central server. The SmartSystems console displays all SmartSystems-enabled computers and peripherals in your network. - Page 41 Chapter 2 — Connecting and Configuring the CK3 To establish an ActiveSync partnership between your CK3 and PC, you need to physically connect your CK3 to your PC using these accessories: • AD20 single dock • USB to mini-USB cable To establish an ActiveSync partnership 1 Download ActiveSync from the Microsoft web site and install ActiveSync on your PC.
-
Page 42: Configuring The Ck3 Parameters
For more information, see the next section. • Directly on the CK3. Using Intermec Settings on the CK3 changes only the settings on that computer. For more information, see “Using Intermec Settings Directly On the CK3” on page •... -
Page 43: Using Intermec Settings Directly On The Ck3
Intermec Settings browser. 4 When you are done making changes, choose File > Save Settings. For help with using Intermec Settings, in the browser click Help > Contents. For information on all parameters in Intermec Settings, see the Intermec Settings Command Reference Manual. -
Page 44: Hiding Menu Items In Intermec Settings
Tap File > Save Settings or tap Hiding Menu Items in Intermec Settings In Intermec Settings, you can hide items in the CK3 menus, or in the directory tree in the SmartSystems console. Hidden items are not saved when you back up your settings in the SmartSystems console. -
Page 45: Configuring The Ck3 Remotely With Smartsystems Foundation
Chapter 2 — Connecting and Configuring the CK3 Configuring the CK3 Remotely With SmartSystems Foundation Intermec’s SmartSystems Foundation lets you manage all of your SmartSystems-enabled devices simultaneously from a central location. The SmartSystems console displays all of the SmartSystems- enabled devices in your network. -
Page 46: Configuring Bluetooth Communications
Chapter 2 — Connecting and Configuring the CK3 To configure 802.11 radio parameters 1 Tap Start > Settings > the Systems tab >Intermec Settings. 2 Tap Communications > 802.11 Radio > Funk Security > [Profile #] > SSID. 3 Enter your SSID (network name). -
Page 47: Connecting To A Bluetooth Scanner
Settings Command Reference Manual. Connecting to a Bluetooth Scanner You can connect to an Intermec Bluetooth scanner, such as the SF51 or SR61, using one of these methods: • Scan the association bar code label that ships with the CK3. -
Page 48: Configuring Bluetooth Communications For Wireless Printing
• create an application that opens the wireless printing COM port on your CK3. For help, see the Bluetooth Resource Kit, part of the Intermec Developer Library (IDL), available from the Intermec web site at www.intermec.com/idl. • select the current wireless printer on the CK3. For help, see the next procedure. -
Page 49: Connecting To A Bluetooth Audio Device
Note: You can also print wirelessly using Microsoft APIs with Bluetooth extensions for Winsock and Bluetooth virtual COM ports. For help, see the IDL, available from the Intermec web site at www.intermec.com/idl. Connecting to a Bluetooth Audio Device Use the Bluetooth Audio applet to discover, activate, and connect to Bluetooth audio devices such as a Bluetooth headset. -
Page 50: Configuring Ethernet Communications
Chapter 2 — Connecting and Configuring the CK3 2 Follow the onscreen instructions to connect to a Bluetooth audio device. Configuring Ethernet Communications You connect your CK3 to your Ethernet network with an Ethernet cable and one of these accessories: •... -
Page 51: Using Serial And Usb Communications
Chapter 2 — Connecting and Configuring the CK3 4 Make sure that your CK3 is communicating with the network and that the network can see your CK3. Using Serial and USB Communications You can use these CK3 accessories to transmit data to and receive data from another device through serial or USB communications: •... -
Page 52: Configuring Wireless Security
“Disabling Security” on If you choose not to use security, see page 51. Intermec always recommends that you implement security. You must use either Funk or Microsoft security to implement your security solution. For details, see the next section, “Choosing Between Funk and Microsoft Security.”... -
Page 53: Selecting A Funk Security Profile
) in the lower right corner of the Today screen and select Tools > Wireless Settings. To select a Funk security profile 1 Start Intermec Settings. 2 Choose Communications > 802.11 Radio > Funk Security. 3 Tap a profile to expand it. - Page 54 1 Make sure the communications and radio parameters on your CK3 are configured. 2 Make sure Funk is selected as your security choice. 3 Start Intermec Settings. 4 Choose Communications > 802.11 Radio > Funk Security. 5 Select the profile you want to configure.
- Page 55 (Optional) To increase your level of security, enter a Server 1 Common name and a Server 2 Common name. 9 Save your settings and exit Intermec Settings. To configure WPA or WPA2 with Funk security 1 Make sure the communications and radio parameters on your CK3 are configured.
- Page 56 (Optional) To increase your level of security, enter a Server 1 Common name and a Server 2 Common name. 10 Save your settings and exit Intermec Settings. Configuring LEAP Security on Your CK3 1 Make sure the communications and radio parameters on your CK3 are configured.
-
Page 57: Selecting Microsoft As Your Security Choice
Chapter 2 — Connecting and Configuring the CK3 10 Tap User Password, enter your password, and press Enter. 11 Save your settings and exit Intermec Settings. Configuring Static WEP Security With Funk Security 1 Make sure the communications and radio parameters on your CK3 are configured. - Page 58 Chapter 2 — Connecting and Configuring the CK3 To select Microsoft security as your security choice 1 Select Start > Settings > the System tab > Intermec Settings. The Intermec Settings application appears. 2 Select Communications > 802.11 Radio > Security Choice.
- Page 59 (Optional) In the Domain field, enter the Active Directory domain associated with the user account. e Press Enter. 8 Save your settings and exit Intermec Settings. To enable WPA-PSK With Microsoft Security 1 Make sure the communications and radio parameters on your CK3 are configured.
- Page 60 (Optional) In the Domain field, enter the domain. e Press Enter. 9 For Network Key Setting, choose Automatic. 10 Save your settings and exit Intermec Settings. Configuring Static WEP Security With Microsoft Security 1 Make sure the communications and radio parameters on your CK3 are configured.
-
Page 61: Loading A Certificate
8 For Network Key Index, select the key you want to use for data transmission. 9 Save your settings and exit Intermec Settings. Loading a Certificate If you choose to use transport layer security (TLS) with WPA or 802.1x security, you need a unique client certificate on the CK3 and a trusted root certificate authority (CA) certificate. - Page 62 Chapter 2 — Connecting and Configuring the CK3 5 Tap Get Certificates. 6 To import a root certificate: a Tap the <<< button next to the Import Root Certificate field to select the root certificate (DER-encoded .cer file) to import. b Click Import Root Cert to install the selected certificate.
-
Page 63: Disabling Security
Chapter 2 — Connecting and Configuring the CK3 Disabling Security If you choose not to use security with your wireless network, you can disable it on the CK3. Intermec recommends that you always set security in your network. To disable security 1 Open Intermec Settings. - Page 64 Chapter 2 — Connecting and Configuring the CK3 CK3 Mobile Computer User’s Manual...
-
Page 65: Developing And Installing Applications
Developing and Installing Applications This chapter contains guidelines for developing applications for the CK3 and contains these sections: • Developing Applications for the CK3 • Installing Applications on the CK3 • Freeing Up Virtual Memory for Applications • Launching an Application Automatically •... -
Page 66: Developing Applications For The Ck3
Chapter 3 — Developing and Installing Applications Developing Applications for the CK3 Use the Intermec Resource Kits to develop applications to run on the CK3. The Resource Kits are a library of C++, .NET, Java, and web components grouped by functionality that you can use to create applications for the computer. -
Page 67: Installing Applications On The Ck3
SmartSystems Foundation” on page To use SmartSystems console to install an application 1 Download your application file from the Intermec web site and unzip it on your desktop PC. 2 Double-click the application file to install it. The application file should appear in the Software Vault. -
Page 68: Installing Applications Using Microsoft Activesync
Chapter 3 — Developing and Installing Applications Installing Applications Using Microsoft ActiveSync When you only have a few computers to update with applications, you can copy files using Microsoft ActiveSync. This procedure assumes that Microsoft ActiveSync is installed on your PC and is up and running. For more information on installing and using ActiveSync, see “Connecting to a PC”... -
Page 69: Freeing Up Virtual Memory For Applications
Note: InstallSelect is designed for use only by administrators, developers, integrators, or Intermec service representatives. Do not run InstallSelect while using any other applications. When you free up virtual memory, you reduce the amount of virtual memory used by portions of the SmartSystems Platform Bundle (SSPB) by removing value-added software features. - Page 70 Data collection and Intermec Settings. Also includes Intermec Settings on-unit SDK libraries. If you disable this .cab file, you cannot scan or collect data on the device and you cannot use Intermec Settings. Funk Wireless Intermec security supplicant that provides a wireless...
-
Page 71: Launching An Application Automatically
AutoRun.exe automates operations on your CK3. You can configure AutoRun.exe through the AutoRun data file (AutoRun.dat). For compatibility with other Intermec computers, you can place a copy of AutoRun.exe in the same folder as your AutoRun.dat file. To create and install the AutoRun.dat file on your computer 1 Create a folder called System on your CK3. -
Page 72: Upgrading The System Software
You can upgrade your computer using the SmartSystems Console. For help, see “Upgrading the CK3 Using SmartSystems Foundation” on page You need to download the latest upgrade files from the Intermec web site to your PC. CK3 Mobile Computer User’s Manual... -
Page 73: Upgrading The Ck3 Using A Microsd Card
Chapter 3 — Developing and Installing Applications To download the upgrade files 1 Start your web browser and go to the Intermec web site at www.intermec.com. 2 Go to Support > Downloads. 3 Click the link to search the product downloads. -
Page 74: Upgrading The Ck3 Using Smartsystems Foundation
Device Management page. • the device upgrade .exe file. This file is available from the Intermec web site at www.intermec.com. Go to Support > Downloads. Make sure the file you select is for your language. To upgrade the computer using SmartSystems Foundation 1 Install SmartSystems Foundation on your PC and open the SmartSystems console. - Page 75 Chapter 3 — Developing and Installing Applications 5 Double-click the .exe file on your PC. An InstallShield application starts and walks you through the process of extracting the upgrade files to the default location. Note: Do not change the default location where InstallShield extracts the files.
- Page 76 Chapter 3 — Developing and Installing Applications CK3 Mobile Computer User’s Manual...
-
Page 77: Troubleshooting And Maintaining The Ck3
Troubleshooting and Maintaining the CK3 This chapter contains possible solutions to problems you may encounter while using the CK3. This chapter also contains information on booting the computer and these topics: • Calling Product Support • Troubleshooting Your CK3 • Resetting the CK3 •... -
Page 78: Calling Product Support
If you still need help after visiting Knowledge Central, you may need to call Product Support. To talk to an Intermec Product Support representative, call 1-800-755-5505. Before you call Intermec Product Support, make sure you have the following information ready: • Serial number •... -
Page 79: Troubleshooting Your Ck3
Chapter 4 — Troubleshooting and Maintaining the CK3 To find your operating system version 1 Tap Start > Internet Explorer. 2 Tap the Intermec logo. The Intermec page appears and displays the version of the operating system and the SmartSystems Platform Bundle (SSPB) loaded on your CK3. - Page 80 Chapter 4 — Troubleshooting and Maintaining the CK3 Problems While Configuring the CK3 (continued) Problem Possible Solution You scan or enter You may have scanned or entered a Scanner Model an option for the command that does not apply to the type of scanner Scanner Model that you have installed.
- Page 81 The CK3 appears to There may be a problem with the host computer, with be connected to the the connection between the Intermec Application network, but you Server and the host computer, or with the connection cannot establish a between the access point and the host computer.
- Page 82 Make sure the CK3 network appears in the name matches the access point network name. toolbar, but then Default network name is “INTERMEC.” disappears. • The access point may not be communicating with the server. Ensure the access point is turned on, properly configured, and has 802.1x security...
- Page 83 Chapter 4 — Troubleshooting and Maintaining the CK3 Problems While Configuring 802.1x Security (continued) Problem Possible Solution The CK3 Make sure that: indicates it is not • the User Name and Password parameters on the authenticated. CK3 match the user name and password on the authentication server.
- Page 84 If the CK3 is configured to use level triggering, there does not turn off. may be a problem. Press the Scan button or pull the trigger again without scanning a bar code label. If the LED is still on, contact your local Intermec representative. • The scanner does not...
-
Page 85: Checking 802.11 Network Status
Follow the next procedure to use iConnect to verify available access points and networks, check signal strength, and view other diagnostics. If you need to contact Intermec Product Support, this information can be helpful in troubleshooting wireless network connection issues. - Page 86 Chapter 4 — Troubleshooting and Maintaining the CK3 4 Tap the Scan tab to view a list of available 802.11 networks. The list includes the signal strength, channel, and MAC address for each network. • Tap Scan to refresh the screen. 5 Tap the Supp tab to view radio supplicant information, including a list of supplicant events and authentication status.
- Page 87 Chapter 4 — Troubleshooting and Maintaining the CK3 6 Tap the Ping tab to run a ping test to the host. To run a ping test: a In the Host field, enter the IP address of the host. b From the Repetitions list, choose the number of times the CK3 will ping the host.
- Page 88 Chapter 4 — Troubleshooting and Maintaining the CK3 • Tap Mark to place an arrow marker above the graph. 8 Tap the Conf tab to set up a log file that lists RSSI history. This screen includes the 802.11 radio driver version and available radio modes.
-
Page 89: Resetting The Ck3
Press and hold for 5 seconds. • From the SmartSystems console, right-click the CK3 and select Intermec Power Tools > Warm Boot Device. The CK3 shuts down, restarts, and goes through the initialization process. Cold Booting the CK3 If the CK3 or application is locked up and does not respond to a warm boot, follow this procedure to perform a cold boot. -
Page 90: Clean Booting The Ck3
Chapter 4 — Troubleshooting and Maintaining the CK3 To cold boot your CK3 1 Press and hold for about 2 seconds to suspend the CK3. 2 Remove the battery. 3 Use the stylus to press the reset button in the battery compartment of the CK3. - Page 91 Note: You can also clean boot your CK3 from the SmartSystems console: right-click the CK3 and select Intermec Power Tools > Clean Boot Device. CK3 Mobile Computer User’s Manual...
-
Page 92: Cleaning The Scanner Window And Screen
Chapter 4 — Troubleshooting and Maintaining the CK3 Cleaning the Scanner Window and Screen To keep the CK3 in good working order, you may need to perform these minor maintenance tasks: • Clean the scanner window. Clean the CK3 screen. •... -
Page 93: Specifications
Specifications... -
Page 94: Physical And Environmental Specifications
Appendix A — Specifications Physical and Environmental Specifications Physical Dimensions Length: 21.69 cm (8.54 in) Width (at widest part): 8.36 cm (3.29 in) Height (at tallest part): 4.67 cm (1.84 in) CK3 Weight Scan Engine Option With AB17 With AB18 With EV12 14.41 oz 16.32 oz... - Page 95 Appendix A — Specifications Keypad Options • Alphanumeric and function keypad • Numeric and function keypad Large numeric and limited function keypad • Bar Code Symbologies • Australian Post* • GS1 DataBar Omnidirectional • Aztec* • Info Mail • BPO (British Post 4-state)* •...
- Page 96 Appendix A — Specifications EV12 Linear Imager Reading Distances Minimum Reading Distances With 0.12 cm (0.05 in) Setback* Symbology Density Minimum Distance Maximum Distance Code 39 0.15 mm (6 mils) 9.6 cm (3.8 in) 17.9 cm (7.1 in) 0.25 mm (10 mils) 7.1 cm (2.9 in) 20.9 cm (8.3 in) 0.5 mm (20 mils)
- Page 97 Appendix A — Specifications Typical Reading Distances With 0.12 cm (0.05 in) Setback* Symbology Density Minimum Distance Maximum Distance Code 39 0.15 mm (6 mils) 9.1 cm (3.6 in) 19.9 cm (7.9 in) 0.25 mm (10 mils) 6.1 cm (2.5 in) 24.9 cm (9.8 in) 0.5 mm (20 mils) 5.1 cm (2.1 in)
- Page 98 Appendix A — Specifications EA20X Extended Range Area Imager Minimum Reading Distances Minimum Reading Distances With 0.2 cm (0.08 in) Setback* Symbology Density Minimum Distance Maximum Distance Code 39 0.15 mm (6 mils) 16.2 cm (6.4 in) 21.8 cm (8.6 in) 0.20 mm (8mils) 12.2 cm (4.8 in) 30.8 cm (12.1 in)
- Page 99 Appendix A — Specifications 0" 4" 8" 12" 16" 20" 24" 28" 32" 36" 10" 8" PDF417 10 mils 6" Data Matrix 10 mils 4" 2" 0" 2" 4" 0.15mm/6 mils 6" 0.25 mm / 10 mils 8" 100% contrast EAN/UPC 10"...
- Page 100 Appendix A — Specifications EX25 Near-Far Range Area Imager Reading Distances. 1D Symbologies Minimum Reading Distances With 0.24 cm (0.09 in) Setback* Symbology Density Minimum Distance Maximum Distance Code 39 0.1 mm (3.8 mils) 18.24 cm (7.18 in) 31.76 cm (12.51 in) 0.25 mm (10 mils) 18.24 cm (7.18 in) 68.76 cm (27.07 in)
- Page 101 Appendix A — Specifications 144 " 160 " 32 " 128 " 112 " 174 " 0" 16 " 48 " 64 " 80 " 96 " " " " 100% EAN 100 cm contrast UPC " 39.4" " " "...
- Page 102 Appendix A — Specifications 1D Symbologies Typical Reading Distances With 0.24 cm (0.09 in) Setback* Symbology Density Minimum Distance Maximum Distance Code 39 0.25 mm (10 mils) 16.24 cm (6.21 in) 89.76 cm (35.34 in) 0.5 mm (20 mils) 18.24 cm (7.00 in) 179.76 cm (70.77 in) 1 mm (40 mils) 18.24 cm (7.00 in)**...
- Page 103 Appendix A — Specifications " " " " 0 " " " " " " " " " " 100% EAN 110 cm " contrast UPC 43.3" " " " " 0.25 mm 90 cm 10 mils 35.4" " 180 cm 0.5 mm / 20 mils 70.9"...
- Page 104 Appendix A — Specifications 2D Symbologies Typical Reading Distances With 0.24 cm (0.09 in) Setback* Symbology Density Minimum Distance Maximum Distance DataMatrix 0.25 mm (10 mils) 20.24 cm (7.96 in)** 73.76 cm (29.04 in) 1.4 mm (55 mils) 20.24 cm (7.96 in)** 339.76 cm (133.77 in) 2.5 mm (100 mils) 20.24 cm (7.96 in)**...
- Page 105 Appendix A — Specifications " " " " 0 " " " " " " " " " " 0.25 mm / 10 mils 74 cm 29.1" " 340 cm 1.4 mm / 55 mils " 133.9" " " " "...
-
Page 106: Accessories
Appendix A — Specifications Accessories You can use these accessories (sold and ordered separately) with the CK3. To order accessories, contact your local Intermec sales representative. Battery (AB17, AB18) The AB17 standard battery and AB18 extended battery provide main power to the CK3. - Page 107 Appendix A — Specifications Power Adapter (AA23) Use the power adapter to provide power to your CK3 from an external power supply. Scan Handle The scan handle provides you with an alternate way to hold the CK3 and scan bar code labels using a convenient scanning trigger. Vehicle Holder Use the vehicle holder to store your CK3 when you are not using it.
- Page 108 Appendix A — Specifications CK3 Mobile Computer User’s Manual...
-
Page 109: Default Settings
Default Settings... -
Page 110: Default Configuration
CK3. If you restore the CK3to factory default settings, the CK3 uses these values. The commands are grouped by function and reflect the organization of Intermec Settings. For detailed information on most of the commands, see the Intermec Settings Command Reference Manual, available from the Intermec web site at www.intermec.com. - Page 111 Appendix B — Default Settings Symbology Settings (continued) Symbology Default Value EAN/UPC Enable UPC A, UPC E, EAN 8, EAN 13 GS1 Composite Disable GS1 DataBar Expanded Disable GS1 DataBar Limited Disable GS1 DataBar Omnidirectional Disable Info Mail Disable Interleaved 2 of 5 Disable Japan Post Disable...
- Page 112 Appendix B — Default Settings Scanner Settings Scanner Setting Default Value Hardware trigger Enable Turn Off After Good Read Enable/One-shot Trigger mode (area imagers only) Level Imager Settings Imager Setting Default Value Predefined Modes 1D and 2D Standard Sticky Aimer LED duration 0 (disabled) Signature Image Capture Disable...
- Page 113 Appendix B — Default Settings Application Connection Settings Application Connection Setting Default Value Allow External BRI Connections Enable BRI TCP Port 2189 Enable Logging Disable Reader 1 Settings Reader 1 Setting Default Value Enable Reader Disable Reader Model IP30 RFID Module Settings RFID Module Setting Default Value Tag Type...
- Page 114 Appendix B — Default Settings RFID Module Settings (continued) RFID Module Setting Default Value Initial Q Field Strength dB Session Enable Antenna Port 1 Enable Enable Antenna Port 2 Disable Enable Antenna Port 3 Disable Enable Antenna Port 4 Disable Bluetooth Power Off 300 s Communications...
- Page 115 Appendix B — Default Settings Funk Security Settings Funk Security Setting Default Value Active Profile Profile Label Profile_1 Network Type Infrastructure Channel SSID INTERMEC Power Mode Enabled (Fast PSP) 8021x None Association Open Encryption None Pre-Shared Key Null Transmit Key...
- Page 116 Appendix B — Default Settings Ethernet Adapter Settings IP Settings Default Value DHCP Enable DHCP Client Identifier Null Primary DNS 0.0.0.0 Secondary DNS 0.0.0.0 Primary WINS 0.0.0.0 Secondary WINS 0.0.0.0 Certificates Settings Certificates Setting Default Value Import Root Certificates False Import User Certificates False Import Pac Files...
- Page 117 Appendix B — Default Settings PSK Settings (continued) PSK Setting Default Value Serial Port Baud 115200 Parity Even Data Bits 7 Data Bits Stop Bits 1 Stop Bit Flow Control No Flow Control Protocol Configurable EOM1 \x03 EOM2 \xFFFFFFFF \x02 Reader Command Enable w/o TMF Disable...
- Page 118 Backup Battery Charge Remaining Main Battery Charge Remaining Storage Load Memory Load Core Messaging Service Core Messaging Service Settings Core Messaging Service Setting Default Value Associated Server IP Null Server Name INTERMEC Keep Alive Ping Interval 30 s CK3 Mobile Computer User’s Manual...
-
Page 119: Keypads And Keystrokes
Keypads and Keystrokes... -
Page 120: Standard Characters
Appendix C — Keypads and Keystrokes Standard Characters Use the following tables to learn how to enter standard and other available characters and functions with the keypad. If there is no sequence of keystrokes for a particular character or function, it is only available through the soft input panel (SIP), which can be accessed by tapping the keyboard icon on the touch screen. - Page 121 Appendix C — Keypads and Keystrokes Alphanumeric Characters (continued) Alphanumeric Large Numeric Character Keypad Numeric Keypad 28-Key Keypad CK3 Mobile Computer User’s Manual...
- Page 122 Appendix C — Keypads and Keystrokes Alphanumeric Characters (continued) Alphanumeric Large Numeric Character Keypad Numeric Keypad 28-Key Keypad Function Keys Alphanumeric Large Numeric Function Keypad Numeric Keypad 28-Key Keypad CK3 Mobile Computer User’s Manual...
- Page 123 Appendix C — Keypads and Keystrokes Function Keys (continued) Alphanumeric Large Numeric Function Keypad Numeric Keypad 28-Key Keypad Special Functions Alphanumeric Large Numeric Function Keypad Numeric Keypad 28-Key Keypad Forward Tab Back Tab Space Backspace Shift Caps Lock Field Exit Up Arrow Down Arrow Left Arrow...
- Page 124 Appendix C — Keypads and Keystrokes Other Available Characters and Functions (continued) Character or Alphanumeric Large Numeric Function Keypad Numeric Keypad 28-Key Keypad & OEM Down CR Select Select Zoom [Enter] [Enter] [Enter] [Enter] ‘ [Action] ‘ “ Volume Down CK3 Mobile Computer User’s Manual...
- Page 125 Soft Key 2 Note: The following ITE functions are only operational when you are using the ITE application. The large numeric 28-key keypad does not support ITE. Intermec Terminal Emulation (ITE) Functions Character or Function Alphanumeric Keypad Numeric Keypad Field Exit...
- Page 126 Appendix C — Keypads and Keystrokes CK3 Mobile Computer User’s Manual...
- Page 127 Index...
- Page 128 Index Numerics area imager reading distances 802.11 radio – scanning bar codes communications, configuring association label, connecting to a Bluetooth scanner 802.11d standard, described audio adapter, AA20, described 802.1x security audio device, Bluetooth, configuring with Funk connecting to configuring with Microsoft audio recordings, creating using the PTT key AA20 audio adapter, described...
- Page 129 – booting Intermec Settings clean SmartSystems console cold connecting to a PC troubleshooting console warm contacting Intermec by phone calibrating screen default calling product support bar code symbologies – capitalizing characters configuration caps lock, enabling and disabling EA20X card, miniSD, using to install...
- Page 130 IDL (Intermec Developer Library) using the color-coded keys Knowledge Central web site imager, area center-decoding extended range reading large numeric keypad. See keypad. distances launching applications near-far range reading distances...
- Page 131 Index 802.1x persistent storage manager, upgrading physical specifications WPA-802.1x power adapter, AA23, described WPA-PSK power button described described miniSD card troubleshooting using to install applications printer, Bluetooth, connecting to modifier keys, using – multidock problems, troubleshooting charge-only, AD22, described product support Ethernet, AD21, described calling Knowledge Central web site...
- Page 132 802.1x Funk SmartSystems Foundation security applications, installing choosing with WPA Funk AutoDeploy security configuring CK3 remotely Intermec Settings, using from console uninstalling the battery Platform Bundle upgrade files, downloading finding version upgrading upgrading with microSD card operating system...
- Page 133 Microsoft configuring WPA-PSK security, configuring supported with Microsoft will not boot from microSD card www.intermec.com window, scanner, cleaning Intermec Developer Library wireless Knowledge Central audio device, connecting to Product Support connection, check status with SmartSystems Foundation iConnect CK3 Mobile Computer User’s Manual...
- Page 134 Index CK3 Mobile Computer User’s Manual...
- Page 136 Worldwide Headquarters 6001 36th Avenue West Everett, Washington 98203 U.S.A. tel 425.348.2600 fax 425.355.9551 www.intermec.com © 2009 Intermec Technologies Corporation. All rights reserved. CK3 Mobile Computer User’s Manual *935-016-003* P/N 935-016-003...
Need help?
Do you have a question about the CK3a and is the answer not in the manual?
Questions and answers