enphase M215 Installation And Operation Manual
Microinverter
Hide thumbs
Also See for M215:
- Installation and operation manual (36 pages) ,
- Instructions manual (8 pages) ,
- Manual (52 pages)

Related Manuals for enphase M215


Summary of Contents for enphase M215
- Page 1 I NS TA L L A TI O N A N D O P E R A TI O N MA NU A L Enphase Microinverter Model M215™ 141-00012, Rev 04...
-
Page 2: Contact Information
Other Information Product information is subject to change without notice. All trademarks are recognized as the property of their respective owners. User documentation is updated frequently; Check the Enphase website (http://www.enphase.com/support/downloads) for the latest information. See the M215 25-year limited warranty. -
Page 3: Table Of Contents
Step 1 – Measure AC at the Electrical Utility Connection ..............9 Step 2 – Install the AC Branch Circuit Junction Box ................10 Step 3 – Position the Enphase Engage Cable ..................11 Step 4 – Attach the Microinverters to the PV Racking ................12 Step 5 –... -
Page 4: Important Safety Information
This manual contains important instructions for use during installation and maintenance of the Enphase M215™ Microinverter. To reduce the risk of electrical shock, and to ensure the safe installation and operation of the Enphase Microinverter, the following safety symbols appear throughout this document to indicate dangerous conditions and important safety instructions. -
Page 5: The Enphase Microinverter System
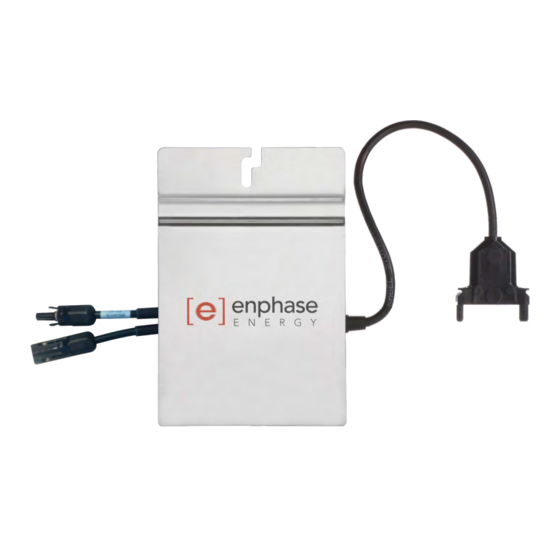
M215 Installation and Operation The Enphase Microinverter System The Enphase Microinverter System is the world’s most technologically advanced inverter system for use in utility-interactive applications. This manual details the safe installation and operation of the Enphase Microinverter. The three key elements of an Enphase Microinverter System include the: •... -
Page 6: How The Microinverter Works
Microinverter systems are inherently more reliable than traditional inverters. The distributed nature of a microinverter system ensures that there is no single point of system failure in the PV system. Enphase Microinverters are designed to operate at full power at ambient temperatures as high as 65° C (150° F). The... -
Page 7: Enphase Microinverter Installation
Normally grounded conductors may be ungrounded and energized when a ground fault is indicated. Compatibility and Capacity The Enphase M215 Microinverters are electrically compatible with most 60-cell PV modules. For more information, see Technical Data page 25 of this manual. WARNING: The M215 should be paired only with a 60-cell PV module. -
Page 8: Parts And Tools Required
As the Enphase Limited Warranty does not cover “acts of God” such as lightning strikes, and since lightning strikes can occur anywhere, it is best practice to install surge protection as part of any solar installation. We recommend the following protection devices. -
Page 9: Installation Procedure
M215 Installation and Operation Installation Procedure Installing the Enphase Microinverter System involves several key steps. Each step listed below is detailed in the following pages. Step 1 – Measure AC at the Electrical Utility Connection Step 2 – Install the AC Branch Circuit Junction Box Step 3 –... -
Page 10: Step 2 - Install The Ac Branch Circuit Junction Box
M215 Installation and Operation Step 2 – Install the AC Branch Circuit Junction Box DANGER: Risk of Electrical Shock. Be aware that installation of this equipment includes risk of electric shock. Do not install the AC junction box without first removing AC power from the Enphase System. -
Page 11: Step 3 - Position The Enphase Engage Cable
PV module widths vary by manufacturer. On the Engage Cable, connectors are spaced at intervals to allow for the widest PV modules compatible with Enphase Microinverters. If narrower PV modules are used, it may be necessary to account for excess cable by looping the cable at suitable intervals. -
Page 12: Step 4 - Attach The Microinverters To The Pv Racking
If installing the M215 at an angle, check that this angle does not allow for collection of water in the recesses of the microinverter. -
Page 13: Step 5 - Dress The Engage Cable
M215 Installation and Operation Step 5 – Dress the Engage Cable a. Attach the Engage Cable to the PV racking using the cable clips, or you may use tie wraps. The cable clips are designed so that the connector from the microinverter can also be dressed into the clip underneath the Engage Cable. - Page 14 Unused AC connectors are live when the system is energized by the utility system. NOTE: If you need to remove a sealing cap, you must use the Enphase disconnect tool or a #3 Phillips screwdriver. Sealing caps may not be reused.
-
Page 15: Step 7 - Terminate The Unused End Of The Engage Cable
Hold the cap with an Enphase disconnect tool, or insert a #2 Phillips screwdriver. h. Use a 24mm (7/8 inch) wrench to tighten the hex nut until the latching mechanism is screwed all the way to the base. -
Page 16: Step 8 - Connect The Engage Cable To Ac Junction Box(Es)
M215 Installation and Operation Step 8 – Connect the Engage Cable to AC Junction Box(es) a. Connect Engage Cable into the AC branch circuit junction box using an appropriate gland or strain relief fitting. The Engage Cable requires a strain relief connector with an opening of 1.3 cm (0.5 inches) in diameter. -
Page 17: Step 9 - Ground The System
WEEB Installation Application Note. Each Enphase Microinverter comes with a grounding clip that can accommodate a 6-8 AWG conductor. NOTE: The AC output neutral is not bonded to ground inside the microinverter. a . Route a continuous GEC through each of the microinverters to the NEC-approved AC grounding electrode. -
Page 18: Step 10 - Complete The Installation Map
. Each Enphase Microinverter has a removable serial number label located on the mounting plate. Peel the removable serial number label from each Enphase Microinverter and affix it to the respective location on the Enphase installation map (see map on page 28). Remember to keep a copy of the installation map for your records. -
Page 19: Step 12 - Build The Virtual Array
PV system. It also shows detailed current and historical performance information. Please go to http://www.enphase.com for more information on the Enphase Enlighten web- based monitoring and analysis. a . Scan the installation map and upload it to the Activation form online. -
Page 20: Commissioning And Operation
The first units should be detected within 15 minutes but the entire system could take hours to detect. 4. The M215 has field adjustable voltage and frequency trip points. If adjustments are required by your local utility, the installer can use the Envoy to Manage the Grid Profile after all microinverters have been detected. -
Page 21: Troubleshooting
PV system does not operate correctly. WARNING: Do not attempt to repair the Enphase Microinverter; it contains no user- serviceable parts. If it fails, please contact Enphase customer service to obtain an RMA (return merchandise authorization) number and start the replacement process. -
Page 22: Troubleshooting An Inoperable Microinverter
PV module. WARNING: Always disconnect AC power before disconnecting the PV module wires from the Enphase Microinverter. The AC connector of the microinverter is suitable as a disconnecting means. WARNING: The Enphase Microinverters are powered by DC power from the PV modules. -
Page 23: Disconnecting A Microinverter From The Pv Module
4. Take care when measuring DC current as most clamp-on meters must be zeroed first and tend to drift with time. 5. Disconnect the PV module DC wire connectors from the microinverter using the Enphase disconnect tool. 6. Remove the microinverter from the PV racking. -
Page 24: Installing A Replacement Microinverter
M215 Installation and Operation Installing a Replacement Microinverter 1. With the silver side of the microinverter facing up and the black side facing down, attach the replacement microinverter to the PV racking using hardware recommended by your PV racking vendor. -
Page 25: Technical Data
Technical Data Technical Considerations The Enphase M215 Microinverters are electrically compatible with most 60-cell PV modules. Be sure to verify the voltage and current specifications of your PV module match those of the microinverter. For more information, refer to our list of compatible PV modules. -
Page 26: Technical Specifications
M215 Installation and Operation Technical Specifications Enphase M215 Microinverter Parameters Topic Unit Typical DC Parameters MPPT voltage range Operating range Maximum DC input voltage Minimum / Maximum start voltage Maximum DC input short circuit current Maximum DC input current 10.5... - Page 27 M215 Installation and Operation Enphase M215 Microinverter Parameters Topic Unit Typical Miscellaneous Parameters Maximum inverters per 20 amp AC branch circuit 240 VAC (split phase) 208 VAC (three phase) Peak inverter efficiency 96.3 CEC weighted efficiency 96.0 Static MPPT efficiency (weighted, ref EN 50530) 99.6...
-
Page 28: Enphase Installation Map
M215 Installation and Operation Enphase Installation Map Copyright 2012 Enphase Energy 141-00012 Rev 04... -
Page 29: Sample Wiring Diagram - M215, 240 Vac
M215 Installation and Operation Sample Wiring Diagram – M215, 240 VAC Copyright 2012 Enphase Energy 141-00012 Rev 04... -
Page 30: Sample Wiring Diagram - M215, 208 Vac
M215 Installation and Operation Sample Wiring Diagram – M215, 208 VAC Copyright 2012 Enphase Energy 141-00012 Rev 04... - Page 32 Enphase Energy Inc. For product and purchase inquiries contact: Petaluma, CA 94952 www.enphase.com info@enphaseenergy.com support@enphaseenergy.com www.ecodirect.com | 888.899.3509...
Need help?
Do you have a question about the M215 and is the answer not in the manual?
Questions and answers