Table of Contents
Advertisement
Quick Links
BOARD OF
BUILDING AND SAFETY
COMMISSIONERS
____
VAN AMBATIELOS
PRESIDENT
E. FELICIA BRANNON
VICE PRESIDENT
JOSELYN GEAGA-ROSENTHAL
GEORGE HOVAGUIMIAN
JAVIER NUNEZ
____
Enphase Energy, Inc.
1420 N. McDowell Blvd.
Petaluma, CA 94954
Attn:
Peter Tarver
GENERAL APPROVAL - Renewal - Micro-inverter, models M215-IG series and M250 series -
Manufactured by Enphase Energy, Inc. - For commercial or residential installations, installed as a part of a
Photovoltaic (PV) system.
CONDITIONS OF APPROVAL
The installation of the PV Micro-inverters are approved when the following conditions are met:
1.
Only the following model designations are approved under this research report:
Model Number
M250-60-2LL-S2X
M250-72-2LL-S2X
M215-60-2LL-S2X-IG
*
M250:
M215:
-60,
-72:
-2LL:
-S2X:
-IG:
-ZC
-NA
2.
Upon installation, the following durable marking on a contrasting color background shall be placed
on a tag at the load center or at the end of each PV circuit run(s):
"The installation of this PV Micro-inverter shall comply with City of Los Angeles Research Report (RR) number
930509. Not valid if the RR is expired. For a copy of RR visit
LADBS G-5 (Rev.06/30/2013)
C
ITY OF
Power
*
240 W
*
240 W
*
215 W
Base model number
Base model number
Compatible with 60 cell modules
Compatible with -60- and -72- cell modules
Injects current into the grid (Line-to-Line)
X= 2, 3, 4, 5. Connector style: 2= MC4; 3 = Tyco; 4 = SMK; 5=Amphenol H4
Integrated Ground (for use on ungrounded arrays)
Built in ZEP racking system bracket
North America
AN EQUAL EMPLOYMENT OPPORTUNITY - AFFIRMATIVE ACTION EMPLOYER
L
A
OS
NGELES
CALIFORNIA
ERIC GARCETTI
MAYOR
RESEARCH REPORT NO.: 930509
Input (DC)
MPPT Range
Max DC Short
Circuit Current
27 - 39 VDC
15 Amp
27 - 48 VDC
15 Amp
27 - 39 VDC
15 Amp
www.LADBS.org
DEPARTMENT OF
BUILDING AND SAFETY
201 NORTH FIGUEROA STREET
LOS ANGELES, CA 90012
____
FRANK M. BUSH
GENERAL MANAGER
SUPERINTENDENT OF BUILDING
OSAMA YOUNAN, P.E.
EXECUTIVE OFFICER
-------
Approval Date: April 12, 2017
Expires: April 12, 2018
Output (AC)
60 HZ, 0.95pf
208 VAC, 1.15 Amp
240 VAC, 1.0 Amp
208 VAC, 1.15 Amp
240 VAC, 1.0 Amp
208 VAC, 1.1 Amp
240 VAC, 0.9 Amp
or call 213-482-6721."
Page 1 of 5
Advertisement
Table of Contents

Related Manuals for enphase M215-60-2LL-S25-IG


Summary of Contents for enphase M215-60-2LL-S25-IG
- Page 1 Expires: April 12, 2018 GENERAL APPROVAL - Renewal - Micro-inverter, models M215-IG series and M250 series - Manufactured by Enphase Energy, Inc. - For commercial or residential installations, installed as a part of a Photovoltaic (PV) system. CONDITIONS OF APPROVAL...
- Page 2 Enphase Energy, Inc. RR 930509 PV Micro-inverter The Micro-inverters shall be plainly and permanently marked on a contrasting color background where readily visible with the following: Manufacturer’s Name, Model designation, Serial Number, Complete input and output direct current (DC) and alternating current (AC) electrical ratings in Volts, Amperes/Watts, “Maximum branch circuit protection: 20A”,...
- Page 3 Enphase Energy, Inc. RR 930509 PV Micro-inverter The available symmetrical line to ground fault current at the Micro-inverter shall not exceed 2,840 amperes. For installations in a single family dwelling in the City of Los Angeles, The minimum distance between the service equipment to the first micro inverter in a circuit shall comply to the following:...
- Page 4 The product covered under this Research Report is an AC grounded single phase, 208 or 240 volts, utility- interactive, Enphase Micro-inverter. For Models M215-IG and M250-60 the maximum DC input Voltage shall not exceed 48VDC and for model M250-72, the maximum DC input voltage shall not exceed 62VDC.
- Page 5 Enphase Energy, Inc. RR 930509 PV Micro-inverter When this system is installed in accordance with the provisions of this General Approval, it should meet the minimum safety standards of the Los Angeles City Electrical Code. For this General Approval to be valid on any installation in the City of Los Angeles, an engineer or inspector of the Department of Building and Safety must make a determination that all conditions of the General Approval required to provide equivalency have been met.
- Page 6 Ground Electrode Conductor (GEC) is required for the microinverter. This further simplifies installation, enhances safety, and saves on labor and materials costs. The Enphase M215 integrates seamlessly with the Engage Cable , the Envoy Communications ™...
- Page 7 2. Frequency ranges can be extended beyond nominal if required by the utility enphase.com To learn more about Enphase Microinverter technology, visit © 2017 Enphase Energy. All rights reserved. All trademarks or brands in this document are registered by their respective owner. 2017-01-25...
- Page 8 With its all-AC approach and integrated grounding, the M250 delivers increased energy harvest and reduces design and installation complexity. The Enphase M250 Microinverter integrates seamlessly with the Enphase Engage™ Cable, the Enphase Envoy™ communications gateway, and Enphase Enlighten™ monitoring and analysis software. Productive •...
- Page 9 2. Frequency ranges can be extended beyond nominal if required by the utility. To learn more about Enphase offerings, visit enphase.com © 2017 Enphase Energy. All rights reserved. All trademarks or brands used are the property of Enphase Energy, Inc. 2017-01-19...
- Page 10 This document contains important instructions to use during installation of the Enphase M250 Microinverter™. To reduce the risk of electrical shock, and to ensure the safe installation and operation of the Enphase Microinverter, follow these in- structions. The following safety symbols and information indicate dangerous conditions and important safety instructions.
- Page 11 NOTE: If you need to remove a sealing cap, you must the module, out of rain and sun. Do not mount the micro- use the Enphase disconnect tool or a #3 Phillips screw- inverter in a position that allows long-term exposure to driver.
- Page 13 PV module must be equipped with DC cables labeled “PV Wire” or “PV Cable.” Read the included safety information and follow all warnings and instructions in the M250 Installation and Operation Manual at http://www.enphase.com/support before installing the Enphase M250™ Microinverter. ® Connect the Envoy Communications Gateway™...
- Page 14 PV racking. See notes in Step isolated and insulated from ground, the M250 Details on back. does not require a GEC. For further informa- tion, refer to: http://enphase.com/global/files/ M250-and-Ungrounded-Array.pdf. Connect the Microinverters b. Mount the microinverter under the PV mod- a.
- Page 15 Complete the Installation Map Build the map manually, or use the Array Gun tool to map the system. For more information, go to http://enphase.com/products/arraygun. To manually build the map, peel the removable se- c. Slide the hex nut onto the cable.
- Page 16 Blue – L3 Green – Ground White – Neutral Green – Ground Enphase Energy, Inc. 1420 N. McDowell Blvd. NOTE: The green wire acts as equipment ground (EGC). Petaluma, CA 94954 info@enphaseenergy.com http://www.enphase.com © 2013 Enphase Energy Inc. All rights reserved.
- Page 17 I NS TA L L A TI O N A N D O P E R A TI O N MA NU A L Enphase M250 Microinverter with integrated ground—no GEC required 141-00022, Rev 01...
- Page 18 Other Information Product information is subject to change without notice. All trademarks are recognized as the property of their respective owners. User documentation is updated frequently; Check the Enphase website (http://www.enphase.com/support) for the latest information. For warranty text refer to http://www.enphase.com/warranty.
-
Page 19: Table Of Contents
Important Safety Information ......................... 4 Read this First ..............................4 Safety Instructions ............................4 Audience ................................4 The Enphase Microinverter System ......................5 How the Microinverter Works ........................... 6 System Monitoring ............................6 Optimal Reliability ............................6 Ease of Design ............................6 Planning for Microinverter Installation ...................... -
Page 20: Important Safety Information
This manual contains important instructions for use during installation and maintenance of the Enphase M250™ Microinverter. ® To reduce the risk of electrical shock, and to ensure the safe installation and operation of the Enphase Microinverter, the following safety symbols appear throughout this document to indicate dangerous conditions and important safety instructions. -
Page 21: The Enphase Microinverter System
M250 is isolated and insulated from ground. Because of this, the M250 does not require a GEC. As a result, the M250 takes less time to install than other microinverters, saves money, and increases safety. This manual details the safe installation and operation of the Enphase Microinverter. The three key elements of an Enphase Microinverter System include the: ... -
Page 22: How The Microinverter Works
Microinverter systems are inherently more reliable than traditional inverters. The distributed nature of a microinverter system ensures that there is no single point of system failure in the PV system. Enphase Microinverters are designed to operate at full power at ambient temperatures as high as 65 C (150 F). -
Page 23: Planning For Microinverter Installation
For Engage Cable ordering information, see page 26. Compatibility and Capacity The Enphase M250 is compatible with 60-cell modules. The modules must use PV (photovoltaic) Wire. For more information, see “Technical Data” on page 29. Refer to the http://www.enphase.com/support... -
Page 24: Parts And Tools Required
For this reason, Enphase recommends that you protect your system with lightning and/or surge suppression devices. In addition to having some level of surge suppression, it is also important to have insurance that protects against lightning and electrical surges. -
Page 25: Enphase Microinverter Installation
M250 Installation and Operation Enphase Microinverter Installation Installing the Enphase Microinverter System involves several key steps. Each step listed here is detailed in the following pages. Follow the instructions in this section to install Enphase M250 Microinverters. Step 1: Connect the Envoy... -
Page 26: Step 1: Connect The Envoy
BEST PRACTICE: When powered up and connected for the first time, the Envoy may retrieve an automatic upgrade from Enphase. Because this upgrade may take up to 20 minutes, connect the Envoy first at the site (connect to both AC power and the broadband router) so that it performs the upgrade well before the solar module installation is complete. -
Page 27: Step 2: Install The Ac Branch Circuit Junction Box
(OCPD). c. Provide an AC connection from the AC junction box back to the electrical utility connection using equipment and practices as required by the NEC and local jurisdictions. 2013 Enphase Energy Inc. 141-00022 Rev 01... -
Page 28: Step 3: Plan, Cut, And Position The Engage Cable
PV module widths vary by manufacturer. On the Engage Cable, connectors are spaced at intervals to allow for the widest PV modules compatible with Enphase Microinverters. If narrower PV modules are used, it may be necessary to account for excess cable by looping the cable at suitable intervals. -
Page 29: Step 4: Attach The Microinverters To The Pv Racking
8 mm (5/16”) mounting hardware: 9 N m (80 to 85 in-lbs) NOTE: Using a power screwdriver to tighten the mounting hardware is not recommended due to the risk of thread galling. 2013 Enphase Energy Inc. 141-00022 Rev 01... -
Page 30: Step 5: Dress The Engage Cable
NOTE: When looping the Engage Cable, do not exceed the minimum bend radius of 4.75 inches (12 cm). WARNING: Tripping Hazard. Loose cables can become a tripping hazard. Dress the Engage Cable to minimize this potential. 2013 Enphase Energy Inc. 141-00022 Rev 01... -
Page 31: Step 6: Connect The Microinverters
Unused AC connectors are live when the system is energized by the utility system. Sealing caps may not be reused. NOTE: If you need to remove a sealing cap, you must use the Enphase disconnect tool or a #3 Phillips screwdriver. See “Disconnect a Microinverter ” on page 24. Sealing caps may not be reused. -
Page 32: Step 7: Terminate The Unused End Of The Engage Cable
Screw the hex nut onto the cap. Never unscrew the hex nut as this can twist and damage the cable. g. Hold the cap with an Enphase disconnect tool, or insert a #2 Phillips screwdriver. h. Use a 22 mm (7/8 inch) wrench to tighten the hex nut until the latching mechanism is screwed all the way to the base. -
Page 33: Step 8: Connect The Engage Cable To Ac Junction Box(Es)
NOTE: The green wire acts as equipment ground (EGC). Because the DC circuit is isolated and insulated from ground, the M250 does not require a GEC. Balanced 208 VAC (three-phase) is accomplished by alternating phases between microinverters as shown: 2013 Enphase Energy Inc. 141-00022 Rev 01... -
Page 34: Step 9: Complete The Installation Map
You can build the system map manually, by peeling the serial number labels from the microinverters and placing the labels on the installation map, or you can use the ArrayGun feature from the Enphase Installer Toolkit to easily build and configure a system. Refer to http://enphase.com/products/arraygun/... -
Page 35: Commissioning And Operation
2. Turn ON the main utility-grid AC circuit breaker. Your system will start producing power after a five-minute wait time. 3. The Enphase Microinverters will begin communicating over the power lines to the Envoy. time required for the Envoy to discover all of the microinverters varies with the number of microinverters in the system and quality of the power line communications. -
Page 36: Build The Virtual Array
Enlighten from the installation map you created. You can scan and upload the paper copy of the Installation Map, or you can use the ArrayGun feature from the Enphase Installer Toolkit to easily build and configure a system. Refer to http://enphase.com/products/arraygun/ for more information. -
Page 37: Troubleshooting
PV system does not operate correctly. WARNING: Do not attempt to repair the Enphase Microinverter; it contains no user- serviceable parts. If it fails, contact Enphase customer service to obtain an RMA (return merchandise authorization) number and start the replacement process. -
Page 38: Troubleshoot An Inoperable Microinverter
L1, L2, L3 to neutral 106 to 132 VAC 5. Using an Enphase disconnect tool, disconnect the AC cable for the microinverter in question from the Engage Cable. 6. Verify that utility power is present at the microinverter by measuring line to line and line to neutral at the Engage Cable connector. - Page 39 PV module isn’t functioning correctly. If it stays in place, the problem is with the microinverter. Call Enphase Customer Support for help in reading the microinverter data and for help in obtaining a replacement microinverter, if needed.
-
Page 40: Disconnect A Microinverter
NOTE: Take care when measuring DC current, as most clamp-on meters must be zeroed first and tend to drift with time. 5. Disconnect the PV module DC wire connectors from the microinverter using the Enphase disconnect tool. 6. Remove the microinverter from the PV racking. -
Page 41: Install A Replacement Microinverter
Envoy to discover the new microinverter. 9. Use Enlighten’s Array Builder to add the newly detected microinverter to the virtual array. 10. Ship the old microinverter to Enphase using the supplied return-shipping label. 2013 Enphase Energy Inc. 141-00022 Rev 01... -
Page 42: Engage Cable Planning And Ordering Information
PV Racking Compatibility document on the Enphase website (http://www.enphase.com/support). Selecting Cable Type Enphase Engage Cable is available in two different voltage types and two connector spacing options. Depending upon installer needs, the cable is also available in different lengths. Connector Spacing Options The gap between connectors on the cable can be either 1.025 meters (40”) or 1.7 meters (67”). -
Page 43: Voltage Type And Conductor Count Options
The number of Enphase Microinverters to be installed on the AC branch circuit. Be certain to allocate the correct number of connectors, including extra connectors for gaps and turns. - Page 44 The transition from cable to conduit is accomplished using an outdoor-rated AC junction box, as required by the NEC and local code. Unused connectors must be covered with Enphase sealing caps. ...
-
Page 45: Technical Data
PV module match those of the microinverter. WARNING: You must match the DC operating voltage range of the PV module with the allowable input voltage range of the Enphase Microinverter. WARNING: The maximum open circuit voltage of the PV module must not exceed the specified maximum input voltage of the Enphase Microinverter. - Page 46 Frequency ranges can be extended beyond nominal if required by the utility To avoid potential phase imbalance, minimize the number of unused connectors with three-phase systems. See “Planning for Cable Lengths and Type” on page 27 for more information. 2013 Enphase Energy Inc. 141-00022 Rev 01...
-
Page 47: Engage Cable Specifications
4.75 inches (12 cm) 11.8 cm x 6.0 cm x 3.2 cm (4.64” x 2.36” x 1.25”) Drop connector dimensions 3.6 cm diameter x 5.1 cm tall (1.4” x 2”) Terminator cap dimensions 2013 Enphase Energy Inc. 141-00022 Rev 01... -
Page 48: Enphase Installation Map
M250 Installation and Operation Enphase Installation Map 2013 Enphase Energy Inc. 141-00022 Rev 01... -
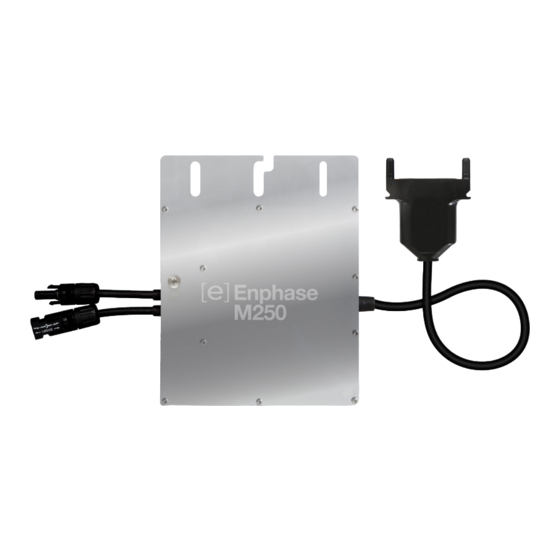
Page 49: M250 Dimensions
M250 Installation and Operation M250 Dimensions 2013 Enphase Energy Inc. 141-00022 Rev 01... -
Page 50: Sample Wiring Diagram: M250, 240 Vac
M250 Installation and Operation Sample Wiring Diagram: M250, 240 VAC 2013 Enphase Energy Inc. 141-00022 Rev 01... -
Page 51: Sample Wiring Diagram: M250, 208 Vac
M250 Installation and Operation Sample Wiring Diagram: M250, 208 VAC 2013 Enphase Energy Inc. 141-00022 Rev 01... - Page 52 Enphase Energy Inc. 1420 N. McDowell Boulevard Petaluma, CA 94954 www.enphase.com info@enphaseenergy.com support@enphaseenergy.com...
Need help?
Do you have a question about the M215-60-2LL-S25-IG and is the answer not in the manual?
Questions and answers