Table of Contents
Advertisement
Quick Links
Advertisement
Table of Contents

Subscribe to Our Youtube Channel
Related Manuals for Elumen8 ELUM085


Summary of Contents for Elumen8 ELUM085
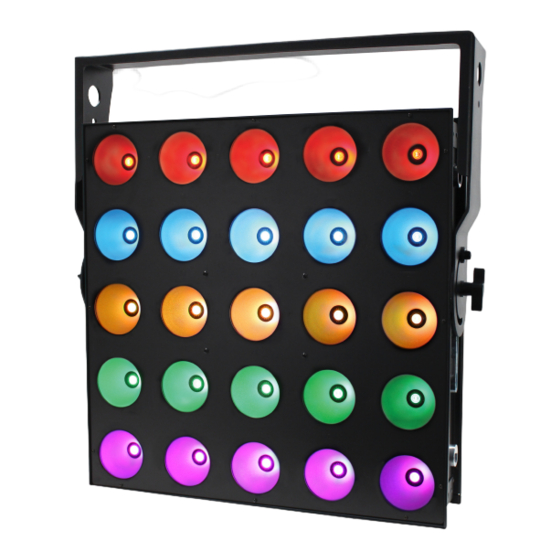
- Page 1 Matrix Tri Pixel Panel 25 MKII User Manual Order code: ELUM085...
-
Page 2: Safety Advice
Safety advice WARNING FOR YOUR OWN SAFETY, PLEASE READ THIS USER MANUAL CAREFULLY BEFORE YOUR INITIAL START-UP! • Before your initial start-up, please make sure that there is no damage caused during transportation. • Should there be any damage, consult your dealer and do not use the equipment. • To maintain the equipment in good working condition and to ensure safe operation, it is necessary for the user to follow the safety instructions and warning notes written in this manual. • Please note that damages caused by user modifications to this equipment are not subject to warranty. CAUTION! CAUTION! TAKE CARE USING KEEP THIS EQUIPMENT THIS EQUIPMENT! AWAY FROM RAIN, HIGH VOLTAGE-RISK MOISTURE AND LIQUIDS OF ELECTRIC SHOCK!! IMPORTANT:... - Page 3 • Quarter turn quick lock rigging system Specifications Tri Pixel Panel 25 MKII 80° - RGB 18370 7510 4240 2590 1710 Power consumption 780W Power supply 100~240V, 50/60Hz Dimensions with bracket 655 x 640 x 120mm 80° Dimensions without bracket 550 x 550 x 120mm Weight 18.5kg Order code ELUM085 640mm 550mm 130mm www.prolight.co.uk Matrix Tri Pixel Panel 25 MKII User Manual...
-
Page 4: Technical Specifications
Technical specifications SAFETY EYE SAFETY EYE FUSE F4A~250V DMX IN DMX IN NET IN NET OUT POWER OUT DMX OUT DMX OUT POWER IN AC 100-240V DMX OCCUPATION DMX OCCUPATION 50/60Hz 1: GROUND 1: GROUND 2: SIGNAL (-) 2: SIGNAL (-) 3: SIGNAL (+) 3: SIGNAL (+) 4: NC... -
Page 5: Operating Instructions
Operating instructions DMX mode: Operating in a DMX control mode environment gives the user the greatest flexibility when it comes to customising or creating a show. In this mode you will be able to control each individual trait of the fixture and each fixture independently. To access the DMX mode, press the “MODE” button on the rear of the unit to show “DMX MODE” on the LCD display. Now press the “ENTER” button and use the “UP” and “DOWN” buttons to set the required DMX address. Press the “ENTER” button again and use the “UP” and “DOWN” buttons to choose the DMX channel mode required 3/5/6/25C/25W/26/75/76/78 or 100. Press the “ENTER” button to confirm the setting. To exit out of any of the above options, press the “MODE” button. 3 channel mode: 25C (cool white) channel mode: Channel Value Function Channel Value Function 000-255 Red (0-100%) 000-255 LED 1 (0-100%) 000-255 Green (0-100%) 000-255 LED 2 (0-100%) 000-255 Blue (0-100%) 000-255 LED 3 (0-100%) 000-255 LED 4 (0-100%) 5 channel mode: 000-255 LED 5 (0-100%) - Page 6 Operating instructions 25W (warm white) channel mode: 26 channel mode: Channel Value Function Channel Value Function 000-255 LED 1 (0-100%) 000-255 LED 1 (0-100%) 000-255 LED 2 (0-100%) 000-255 LED 2 (0-100%) 000-255 LED 3 (0-100%) 000-255 LED 3 (0-100%) 000-255 LED 4 (0-100%) 000-255 LED 4 (0-100%) 000-255 LED 5 (0-100%) 000-255 LED 5 (0-100%) 000-255 LED 6 (0-100%) 000-255 LED 6 (0-100%) 000-255 LED 7 (0-100%) 000-255 LED 7 (0-100%) 000-255 LED 8 (0-100%)
- Page 7 Operating instructions 75 channel mode: CH10 CH11 CH12 (0-100%) (0-100%) (0-100%) (0-100%) (0-100%) (0-100%) (0-100%) (0-100%) (0-100%) (0-100%) (0-100%) (0-100%) CH13 CH14 CH15 CH16 CH17 CH18 CH19 CH20 CH21 CH22 CH23 CH24 (0-100%) (0-100%) (0-100%) (0-100%) (0-100%) (0-100%) (0-100%) (0-100%) (0-100%) (0-100%) (0-100%)
- Page 8 Operating instructions 76 channel mode: CH10 CH11 CH12 (0-100%) (0-100%) (0-100%) (0-100%) (0-100%) (0-100%) (0-100%) (0-100%) (0-100%) (0-100%) (0-100%) (0-100%) CH13 CH14 CH15 CH16 CH17 CH18 CH19 CH20 CH21 CH22 CH23 CH24 (0-100%) (0-100%) (0-100%) (0-100%) (0-100%) (0-100%) (0-100%) (0-100%) (0-100%) (0-100%) (0-100%)
- Page 9 Operating instructions 78 channel mode: Value ...CH78 Master 000-015 function dimmer 016-023 024-031 032-039 040-047 048-055 056-063 064-071 Dimmer 072-079 Colour 1 (0-100%) 080-087 Colour 2 088-095 Colour 3 096-103 Colour 4 104-111 Colour 5 112-119 Colour 6 120-127 Colour 7 Flash ...B25 (slow-fast) (0-100%) (0-100%) (0-100%) (0-100%) (0-100%) (0-100%)
- Page 10 Operating instructions 100 channel mode: CH10 CH11 CH12 Dimmer Dimmer Dimmer (0-100%) (0-100%) (0-100%) (0-100%) (0-100%) (0-100%) (0-100%) (0-100%) (0-100%) (0-100%) (0-100%) (0-100%) CH13 CH14 CH15 CH16 CH17 CH18 CH19 CH20 CH21 CH22 CH23 CH24 Dimmer Dimmer Dimmer (0-100%) (0-100%) (0-100%) (0-100%) (0-100%)
-
Page 11: Sound-Active Mode
Operating instructions Sound active mode: To select the sound active mode, press the “MODE” button to show “SOUND MODE” on the LCD display. Now press the “ENTER” button and use the “UP” and “DOWN” buttons to adjust the sound sensitivity level (SENS00-31) and press the “ENTER” button again to adjust the frequency level (FQN01-99). Press the “ENTER” button to confirm your setting. To exit out of any of the above options, press the “MODE” button. Auto mode: To select the Auto run mode, press the “MODE” button to show “AUTO RUN” on the LCD display. Now press the “ENTER” button to adjust the frequency level (FQN01-99). Press the “ENTER” button to confirm your setting. The unit will now run all 14 built-in programmes one after another. To exit out of any of the above options, press the “MODE” button. Slave mode: To select slave mode, first link the units together via 3-Pin or 5-Pin XLR cable(s), press the “MODE” button to show “SLAVE MODE” on all of the slave units. Now the slave units will follow in conjunction with the master unit. Press the “ENTER” button to confirm your setting. To exit out of any of the above options, press the “MODE” button. Built-in programs: To access the built-in program, press the “MODE” button to show “01.STATIC” on the LCD display. Now press the “ENTER” button and use the “UP” and “DOWN” buttons to choose one of the 14 built-in programs (01-14) (see table overleaf). To choose one of the seven colours in the “STATIC” mode, press the press the “ENTER” button and use the “UP” and “DOWN” buttons to choose one of the following 15 colours. To adjust the speed level in the remaining 13 built-in programs, press the “ENTER” button and use the “UP” and “DOWN” buttons to set the desired speed level (00-99). To adjust the flash speed press the “ENTER” button and use the “UP”... -
Page 12: Artnet Mode
Operating instructions Built-in programs: Value Function Static colour Blackout, Red, Yellow, Green, Flow 3 7 colour fade CL: BLAC-RGB Cyan, Blue, Purple, White Speed: 00-99 Speed & flash ajustable Flash: 00-99 Flash speed adjustable Flash 00-99 Dream Flow 4 7 colour dream 7 colour fade Speed: 00-99 Speed: 00-99 Speed & flash ajustable Speed & flash ajustable Flash 00-99 Flash 00-99 Meteor Flow 5 7 colour flow 7 colour fade Speed: 00-99 Speed: 00-99 Speed & flash ajustable Speed & flash ajustable Flash 00-99 Flash 00-99 Fade Flow 6 7 colour fade 7 colour fade Speed: 00-99 Speed: 00-99... -
Page 13: Ethernet Installation
Ethernet installation Electrical installation via Ethernet in/out: Art-Net is nothing more than a protocol for transmitting DMX-512 over an ethernet network, developed by Artistic Licence Engineering (UK) Ltd. Thanks to the much larger bandwidth it is now possible to send to more than 256 DMX-universes at one time. This unit can be connected in such ethernet network using routers and switches etc. The network topology is exactly the same for a normal PC network. However the IP addresses cannot be optained via DHCP. See the previous page on how to manually set up the IP address, Net mask and DMX universe. MATRIX MATRIX MATRIX PANEL PANEL PANEL RJ45 RJ45 RJ45 RJ45 RJ45 RJ45 CAT 5 CAT 5 CAT 5 MAX ±10 units IMPORTANT NOTE: This fixture has both Ethernet input and output so you can daisy chain several units. However the number of units in one chain should be limited to ±10 units to avoid unwanted signal delays. In bigger installations you should use the “STAR-topology” using ethernet switches (or a combination of both): MATRIX MATRIX PANEL PANEL... - Page 14 Rigging Rigging: NOTE: The installation of this unit must be carried out by qualified service personal only. Improper installation can result in serious injuries and/or damage to the property. Overhead rigging requires extensive experience! Working load limits should be respected, certified installation materials should be used and the installed unit should be inspected regular intervals for safety.
- Page 15 Rigging Rigging with optional flying bracket (ELUM085A): - This flying bracket is used for hanging vertical arrays of the Tri Pixel Panel 25. - To attach the flying bracket, first you must remove the supplied hanging bracket from the unit. To do this simply unscrew the tightening knobs on the side of the unit and slide off. - On the top of the flying bracket there is 2 clamp points (M12). Please use these to attach suitable clamps before fitting to the unit. - Place the flying bracket on top of the unit making sure that both carry handles are folded flat. Line up the bracket with the steel locating pins. - Now using a size 8 allen key turn the coffin lock and turn anti clockwise until you hear it lock into position. Make sure that you hear a click and cannot turn the lock any more. - Fix 2 suitable safety cable(s) to the safety eyes to make sure the unit cannot drop more than 20cm should the hanging bracket or clamps fail. LOCK If you cannot lock the bracket as described please check that it is in the correct position before attempting to join the units. Turn the lock clockwise until the pin is in the correct position see below. www.prolight.co.uk Matrix Tri Pixel Panel 25 MKII User Manual...
- Page 16 Multi array setup Multi array setup: Once the flying bracket has been fixed to the unit securely, you can add a maximum of 4 units horizontally for the array and vertically you can fix as many columns as you like, each column must feature an array bracket at the top. NOTE: Please be sure that each unit is fixed together properly using the coffin locks on the left side and bottom side of the unit following the same method for the flying bracket. Safety Wire Safety Wire Safety Wire Safety Wire Safety Wire When the units are lined up against each other use a size 8 allen key to turn the coffin lock, turn the coffin lock anti clockwise until you hear it lock into position. Make sure that you hear a click and cannot turn the lock any more. www.prolight.co.uk Matrix Tri Pixel Panel 25 MKII User Manual...
-
Page 17: Rdm Functions
RDM functions RDM functions and remote setup: RDM means “Remote Device Management”. The Tri Pixel Panel 25 works with a brief set of RDM functions that means it can setup a bidirectional communication with an RDM compatible DMX controller. See below for these functions: - The DMX controller will send out a “discovery command”, the RDM unit(s) respond and send their unique unit ID. - The DMX controller asks each RDM unit for basic data so it knows which unit(s) are connected. The Elumen8 Tri Pixel Panel 25 will show: - Unit name: Tri Pixel Panel 25 - Manufacturer: Elumen8 - Category: LED Dimmer - Firmware: XXXX (version of the software of the unit) - DMX address: XXX (current DMX start address of the unit) - DMX footprint: XX (current number of DMX channels used by the unit) - Personality: XX (current working DMX mode/personality of the unit) The DMX controller can send certain commands to each to each RDM unit which allows remote setup of the units. The following functions can be managed remotely: - DMX start address: The DMX start addres can be set remotely from 001 to 512 - DMX personality: Set the DMX personality/mode remotely. -
Page 18: Dmx Setup
DMX setup Setting the DMX address: The DMX mode enables the use of a universal DMX controller. Each fixture requires a “start address” from 1- 511. A fixture requiring one or more channels for control begins to read the data on the channel indicated by the start address. For example, a fixture that occupies or uses 7 channels of DMX and was addressed to start on DMX channel 100, would read data from channels: 100,101,102,103,104,105 and 106. Choose a start address so that the channels used do not overlap. E.g. the next unit in the chain starts at 107. DMX 512: DMX (Digital Multiplex) is a universal protocol used as a form of communication between intelligent fixtures and controllers. A DMX controller sends DMX data instructions form the controller to the fixture. DMX data is sent as serial data that travels from fixture to fixture via the DATA “IN” and DATA “OUT” XLR terminals located on all DMX fixtures (most controllers only have a data “out” terminal). DMX linking: DMX is a language allowing all makes and models of different manufactures to be linked together and operate from a single controller, as long as all fixtures and the controller are DMX compliant. To ensure proper DMX data transmission, when using several DMX fixtures try to use the shortest cable path possible. The order in which fixtures are connected in a DMX line does not influence the DMX addressing. For example; a fixture assigned to a DMX address of 1 may be placed anywhere in a DMX line, at the beginning, at the end, or anywhere in the middle. When a fixture is assigned a DMX address of 1, the DMX controller knows to send DATA assigned to address 1 to that unit, no matter where it is located in the DMX chain. DATA cable (DMX cable) requirements (for DMX operation): This fixture can be controlled via DMX-512 protocol. The DMX address is set on the back of the unit. Your unit and your DMX controller require a standard 3-pin XLR connector for data input/output, see image below. Further DMX cables can be purchased from all good sound and lighting suppliers or Pro Light Concepts dealers. -
Page 19: Line Termination
DMX setup Notice: Be sure to follow the diagrams below when making your own cables. Do not connect the cables shield conductor to the ground lug or allow the shield conductor to come in contact with the XLRs outer casing. Grounding the shield could cause a short circuit and erratic behaviour. Special note: Line termination: When longer runs of cable are used, Termination reduces signal transmission you may need to use a terminator on problems and interference. It is always advisable to connect a DMX terminal, the last unit to avoid erratic behaviour. (resistance 120 Ohm 1/4 W) between pin 2 Using a cable terminator will decrease (DMX-) and pin 3 (DMX+) of the last fixture. the possibilities of erratic behaviour. (3-pin - Order ref: CABL90, 5-pin - Order ref: CABL89) 5-pin XLR DMX connectors: Some manufactures use 5-pin XLR connectors for data transmission in place of 3-pin. 5-pin XLR fixtures may be implemented in a 3-pin XLR DMX line. When inserting standard 5-pin XLR connectors in to a 3-pin line a cable adaptor must be used. The diagram below details the correct cable conversion. -
Page 20: Weee Notice
WEEE notice Correct Disposal of this Product (Waste Electrical & Electronic Equipment) (Applicable in the European Union and other European countries with separate collection systems) This marking shown on the product or its literature, indicates that it should not be disposed with other household wastes at the end of its working life. To prevent possible harm to the environment or human health from uncontrolled waste disposal, please separate this from other types of wastes and recycle it responsibly to promote the sustainable reuse of material resources. Household users should contact either the retailer where they purchased this product, or their local government office, for details of where and how they can take this item for environmentally safe recycling. Business users should contact their supplier and check the terms and conditions of the purchase contract. This product should not be mixed with other commercial wastes for disposal. www.prolight.co.uk Matrix Tri Pixel Panel 25 MKII User Manual...
Need help?
Do you have a question about the ELUM085 and is the answer not in the manual?
Questions and answers