Table of Contents
Advertisement
Quick Links
Advertisement
Table of Contents

Subscribe to Our Youtube Channel
Related Manuals for Elumen8 DB1300


Summary of Contents for Elumen8 DB1300
- Page 1 DB1300 DMX Stage Blinder User Manual Order codes: ELUM065...
- Page 2 When using smoke machines, make sure the fixture is • If the equipment is dropped or damaged, disconnect the never exposed to the direct smoke jet and is installed in mains power supply immediately and have a qualified a distance of 0.5m between the smoke machine and the engineer inspect the equipment before operating again. fixture. The room must only be saturated with an amount of smoke where the visibility is still greater than 10m. • If the equipment has been exposed to drastic temperature fluctuation (e.g. after transportation), • Never use this fixture during thunderstorms. Over voltage do not connect power or switch it on immediately. could destroy the fixture. Always disconnect the device The arising condensation might damage the equipment. during thunderstorms. Leave the equipment switched off until it has reached • The symbol determines the minimum room temperature. distance from lit objects. The minimum distance • If your product fails to function correctly, stop use between light fixture and the illuminated surface immediately. Pack the unit securely (preferably in the must be more than 2m. original packing material), and return it to your Pro Light dealer for service. www.prolight.co.uk DB1300 DMX Stage Blinder User Manual...
- Page 3 • WARRANTY: Two years from date of purchase. • Repairs, servicing and power connection must only be This does not apply to lamps or triac devices. carried out by a qualified technician. THIS UNIT CONTAINS NO USER SERVICEABLE PARTS. CABLE/LAMP INSTALLATION DANGER TO LIFE! DB1300 Stage Blinder, 2 x Par 36 650W THE INSTALLATION MUST ONLY BE CARRIED OUT BY 120V DWE Lamps, 240V connection A QUALIFIED TECHNICIAN. 120V/650W 120V/650W DANGER TO LIFE!
-
Page 4: Connection With The Mains
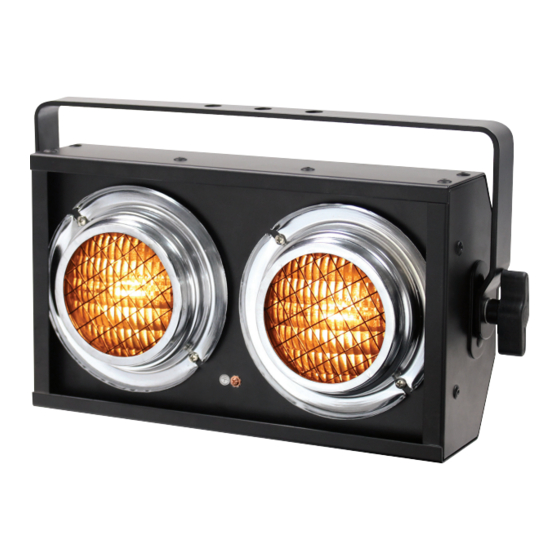
CONNECTION WITH THE MAINS If the lamp burns out, the fine-wire fuse of the fixture might fuse too. Only replace the fuse by a fuse of the same type and rating. Before replacing the fuse, unplug the mains lead. To replace the fuse follow the procedure below: Step 1: Unscrew the fuse holder on the rear panel with an appropriate screwdriver from the housing anti-clockwise. Step 2: Remove the old fuse from the fuse holder. Step 3: Install the new fuse in the fuse holder. Step 4: Replace the fuse holder in the housing and screw it back in. OPERATING DETERMINATIONS If this equipment is operated in any other way, than those described in this manual, the product may suffer damage and the warranty becomes void. Incorrect operation may lead to danger e.g: short-circuit, burns and electric shocks etc. Do not endanger your own safety and the safety of others! Incorrect installation or use can cause serious damage to people and/or property. www.prolight.co.uk DB1300 DMX Stage Blinder User Manual... - Page 5 Product overview & technical specifications DB1300 DMX 2 Cell Stage Blinder The eLumen8 DB1300 Blinder features an integral, 1CH DMX dimmer allowing traditional blinders to be added into lighting rigs without any bulky dimmer racks. Utilising industry standard 650W DWE MFL lamps wired in series the 2-cell blinder delivers the warm tones of halogen from a compact, rugged chassis. Ideal for use on stage. • 2 x 120V 650W DWE lamps wired in series (Order code: LAMP91 - not supplied) • Beam angle: 40° x 30° • 7699 Lux @ 2m (full on) • DMX channels: 1 • Dimming, auto and master/slave modes • Dipswitch mode/address selection • 0-100% dimming • Captive power connection fitted with a 13A UK plug • 3-Pin XLR input/output • Convection cooled Specifications DB1300 Stage Blinder Power consumption 1320W Max. ambient temperature T 45°C Max. distance from flammable surfaces 0.5m Minimum distance to lit object Duty cycle 1 minute (full on) 40 x 30 °...
-
Page 6: Technical Specifications
Keep away from rain and moisture. Duty cycle: 1 minute full on, 3 minutes rest DMX OUTPUT DMX INPUT 01 - Earth point 02 - Dipswitches 06 - Captive power connection 03 - DMX signal indicator 07 - Fuse F8A 250V In the box: 1 x fixture 04 - 3-Pin DMX input 08 - Hanging bracket & 1 x user manual 05 - 3-Pin DMX output 09 - Hanging bracket adjustable knob www.prolight.co.uk DB1300 DMX Stage Blinder User Manual... -
Page 7: Operating Instructions
Each device occupies 1 channel. To ensure that the control signals are properly directed to ach device the fixture requires addressing. This needs to be changed for every fixture by changing the dipswitches as set out in the table below. The starting address is defined as the first channel from which the device will respond to the controller. Please make sure that you do not have any overlapping channels in order to control each fixture correctly and independently from any other fixture on the DMX data link. If two, three, or more devices are addressed similarly, they will work similarly. Occupation of the dipswitches: Controlling After having addressed all Dipswitch number devices, you may now start DMX starting address 128 256 operating these via your controller. Fixture 1 - Channel 1 1 channel mode Fixture 2 - Channel 2 Channel Value Function 000-255 Master dimmer Fixture 3 - Channel 3 (0-100%) Fixture 4 - Channel 4 Fixture 5 - Channel 5 www.prolight.co.uk DB1300 DMX Stage Blinder User Manual... - Page 8 125 157 189 221 253 285 317 349 381 413 445 477 509 126 158 190 222 254 286 318 350 382 414 446 478 510 127 159 191 223 255 287 319 351 383 415 447 479 511 www.prolight.co.uk DB1300 DMX Stage Blinder User Manual...
-
Page 9: Dmx Setup
DATA cable (DMX cable) requirements (for DMX operation): This fixture can be controlled via DMX-512 protocol. The DMX address is set on the back of the unit. Your unit and your DMX controller require a standard 3-pin XLR connector for data input/output, see image below. Further DMX cables can be purchased from all good sound and lighting suppliers or Pro Light Concepts dealers. Please quote: CABL10 – 2m CABL11 – 5m CABL12 – 10m Note: DMX cable must be daisy chained and cannot be split. www.prolight.co.uk DB1300 DMX Stage Blinder User Manual... - Page 10 3-pin XLR (socket) Pin 1: GND (screen) Pin 1: GND (screen) Pin 2: Signal (-) Pin 2: Signal (-) Pin 3: Signal (+) Pin 3: Signal (+) Pin 4: N/C Pin 5: N/C www.prolight.co.uk DB1300 DMX Stage Blinder User Manual...
-
Page 11: Weee Notice
WEEE notice Correct Disposal of this Product (Waste Electrical & Electronic Equipment) (Applicable in the European Union and other European countries with separate collection systems) This marking shown on the product or its literature, indicates that it should not be disposed with other household wastes at the end of its working life. To prevent possible harm to the environment or human health from uncontrolled waste disposal, please separate this from other types of wastes and recycle it responsibly to promote the sustainable reuse of material resources. Household users should contact either the retailer where they purchased this product, or their local government office, for details of where and how they can take this item for environmentally safe recycling. Business users should contact their supplier and check the terms and conditions of the purchase contract. This product should not be mixed with other commercial wastes for disposal. www.prolight.co.uk DB1300 DMX Stage Blinder User Manual... -
Page 12: Optional Accessories
Please contact your local retailer to purchase these accessories. Par 36 650W 120V DWE Lamp 50mm Professional G Clamp Self Locking Truss Clamp Black 75cm Safety Wire Order code: LAMP91 Order code: CLAM01A Order code: GL3017 Order code: CLAM03 To keep up-to-date on the latest accessories and product range additions please visit www.prolight.co.uk www.prolight.co.uk DB1300 DMX Stage Blinder User Manual...
Need help?
Do you have a question about the DB1300 and is the answer not in the manual?
Questions and answers