Table of Contents
Advertisement
Quick Links
Advertisement
Table of Contents

Subscribe to Our Youtube Channel
Related Manuals for Elumen8 Virtuoso 1000 Profile WW


Summary of Contents for Elumen8 Virtuoso 1000 Profile WW
- Page 1 Virtuoso 1000 Profile WW User Manual Order codes: ELUM133...
-
Page 2: Safety Advice
Incorrect operation may lead to danger e.g: short-circuit, burns and electric shocks etc. Do not endanger your own safety and the safety of others! Incorrect installation or use can cause serious damage to people and/or property. www.prolight.co.uk Virtuoso 1000 Profile WW User Manual... - Page 3 • Temperature controlled fan for whisper quiet operation • Handle on rear panel Specifications Virtuoso 1000 Profile WW Power consumption 285W Fuse T6.3A 250V Power supply 100~240V, 50/60Hz Dimensions 520 x 310 x 540mm Weight 8.3kg Order code ELUM133 www.prolight.co.uk Virtuoso 1000 Profile WW User Manual...
-
Page 4: Technical Specifications
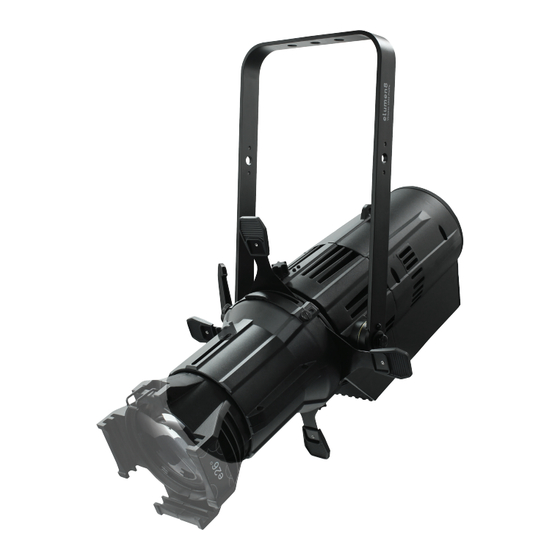
09 - Fuse T6.3A 250V 10 - Shutters 11 - Hanging bracket 12 - Hanging bracket adjustment knob 13 - Carry handle In the box: 1 x fixture, & 1 x power cable www.prolight.co.uk Virtuoso 1000 Profile WW User Manual... -
Page 5: Installation
The installation should be checked annually by a qualified person. The eLumen8 Virtuoso 1000 Profile WW can be operated in a number of mounting positions as shown in the diagram above, hanging upside-down from the ceiling or truss, mounting sideways on truss or stood upright on a flat level surface. - Page 6 1. Fasten the clamp to the fixtures bracket with a bolt and lock nut through one of the mounting holes. 2. Mount the fixture onto your truss system via the clamp and tighten to ensure secure. 3. Pull the safety cable through the fixture bracket and around the truss. www.prolight.co.uk Virtuoso 1000 Profile WW User Manual...
- Page 7 (do not remove the knobs or the barrel assembly). 2. Rotate the barrel into the desired position. 3. Once the barrel is rotated, tighten the barrel rotation knobs. Barrel rotation knob www.prolight.co.uk Virtuoso 1000 Profile WW User Manual...
-
Page 8: Accessory Slot
Accessory Slot: The Virtuoso 1000 Profile WW has an accessory slot, which holds a drop-in iris or a motorised pattern device (sold separately). When the slot is not in use a small metal cover secures the slot with 2 screws to prevent light leakage. -
Page 9: Shutter Adjustment
Shutter adjustment Shutters: The shutters are located inside the barrel. They can be adjusted via the shutter handles to adjust the shape of the beam. Shutters Shutters www.prolight.co.uk Virtuoso 1000 Profile WW User Manual... - Page 10 Control Panel Menu: The LCD control panel situated on the rear of the fixture allows the user to access the menu system to adjust the fixtures settings. When the unit has been powered on the display will show “eLumen8”. MENU ENTER DOWN The fixture will then return to its home screen.
- Page 11 LCD display. Press the “ENTER” button and use the “UP” and “DOWN” buttons to select between “1 CHANNEL”, “4 CHANNEL” or “5 CHANNEL”. Press the “ENTER” button to confirm the setting. www.prolight.co.uk Virtuoso 1000 Profile WW User Manual...
- Page 12 “DIM3”, and “DIM4”. Press the “ENTER” button to confirm the setting. DIM1-DIM4 - Dimmer speed fast-slow. OFF - Dimmer speed off. SETTING DIMMER RESET DIMMER DIM1 CURVE DIM2 DMX FAIL DIM3 PERFORMANCE DIM4 PWM RATE www.prolight.co.uk Virtuoso 1000 Profile WW User Manual...
- Page 13 SAVE - The fixture will remember the last DMX signal. BLACK - The fixture will blackout when the DMX signal is lost. SETTING DMX FAIL RESET DIMMER SAVE CURVE BLACK DMX FAIL PERFORMANCE PWM RATE www.prolight.co.uk Virtuoso 1000 Profile WW User Manual...
- Page 14 “ENTER” button and use the “UP” and “DOWN” buttons to select between “600Hz”, “1200Hz”, “2000Hz”, “2400Hz”, “6000Hz”, and “25000Hz”. Press the “ENTER” button to confirm the setting. SETTING PWM RATE RESET 600Hz DIMMER 1200HZ CURVE 2000HZ DMX FAIL 2400HZ PERFORMANCE 6000HZ PWM RATE 25000HZ www.prolight.co.uk Virtuoso 1000 Profile WW User Manual...
- Page 15 When this is set to ON, the passcode will need to be entered each time the display goes off. The passcode sequence is; “UP”, “DOWN”, “UP”, “DOWN”, “ENTER”. MAIN MENU DIMMER ADDRESS Pass code: RUN MODE PERSONALITY SETTING INFO www.prolight.co.uk Virtuoso 1000 Profile WW User Manual...
- Page 16 “ENTER” button and the fixtures RDM UID will be displayed. If LABEL is highlighted press the “ENTER” button and the model number will be displayed. INFO VERSION VERSION xx/xx/xxxx INFO VERSION LABEL 0x09A5xxxxxxxx LABEL Virtuoso LABEL 1000P-WW www.prolight.co.uk Virtuoso 1000 Profile WW User Manual...
- Page 17 010-080 Live performance mode 000-009 No function 081-160 Studio performance mode 010-080 Live performance mode 161-240 Power performance mode 081-160 Studio performance mode 241-255 No function 161-240 Power performance mode 241-255 No function www.prolight.co.uk Virtuoso 1000 Profile WW User Manual...
-
Page 18: Photometric Charts
19° - Lux 177408 44352 19712 11088 7096 19° 26° Fixed Lens 26° - Lux 100340 25085 11148 6271 4013 26° 36° Fixed Lens 36° - Lux 70096 17524 7788 4381 2803 36° www.prolight.co.uk Virtuoso 1000 Profile WW User Manual... - Page 19 17892 11451 30° - Lux 77356 19339 8595 4834 3094 15° 30° 25-50° Fixed Lens 25° - Lux 97360 24340 10817 6085 3864 50° - Lux 32736 8184 3637 2046 1309 25° 50° www.prolight.co.uk Virtuoso 1000 Profile WW User Manual...
-
Page 20: Dmx Setup
3-Pin: CABL10 – 2m CABL11 – 5m CABL12 – 10m 5-Pin: CABL185 – 2m CABL187 – 5m CABL188 – 10m Also remember that DMX cable must be daisy chained and cannot be split. www.prolight.co.uk Virtuoso 1000 Profile WW User Manual... - Page 21 3-pin XLR (female) Pin 1: GND (screen) Pin 1: GND (screen) Pin 2: Signal (-) Pin 2: Signal (-) Pin 3: Signal (+) Pin 3: Signal (+) Pin 4: N/C Pin 5: N/C www.prolight.co.uk Virtuoso 1000 Profile WW User Manual...
- Page 22 Please note: Caution should be used when power linking other fixtures to the Virtuoso 1000 Profile as the power consumption of other fixtures will vary. Fixtures fitted with lamps often require 2/3 times more current on startup, these may require their own power source. www.prolight.co.uk Virtuoso 1000 Profile WW User Manual...
-
Page 23: Weee Notice
Business users should contact their supplier and check the terms and conditions of the purchase contract. This product should not be mixed with other commercial wastes for disposal. www.prolight.co.uk Virtuoso 1000 Profile WW User Manual... - Page 24 Virtuoso 1000 Profile WW User Manual...
Need help?
Do you have a question about the Virtuoso 1000 Profile WW and is the answer not in the manual?
Questions and answers