Table of Contents
Advertisement
Quick Links
Advertisement
Table of Contents

Subscribe to Our Youtube Channel
Related Manuals for Elumen8 Kudos 60 Beam


Summary of Contents for Elumen8 Kudos 60 Beam
- Page 1 Kudos 60 Beam User Manual Order codes: ELUM017...
-
Page 2: Safety Advice
NO USER SERVICEABLE PARTS. pulling the power-cable. • This lighting fixture is for professional use only - it is • Make sure that the available mains supply voltage is not designed for or suitable for household use. The between 100~240V AC, 50/60Hz. product must be installed by a qualified technician in accordance with local territory regulations. The safety of • Make sure that the power cable is never crimped or the installation is the responsibility of the installer. The damaged. Check the equipment and the power cable fixture presents risks of severe injury or death due to fire periodically. hazards, electric shock and falls. • If the equipment is dropped or damaged, disconnect the • Warning! Risk Group 2 LED product according to mains power supply immediately and have a qualified EN 62471. Do not view the light output with optical engineer inspect the equipment before operating again. instruments or any device that may concentrate the beam. • WARRANTY: Two years from date of purchase. OPERATING DETERMINATIONS If this equipment is operated in any other way, than those described in this manual, the product may suffer damage and the warranty becomes void. Incorrect operation may lead to danger e.g: short-circuit, burns and electric shocks etc. Do not endanger your own safety and the safety of others! Incorrect installation or use can cause serious damage to people and/or property. www.prolight.co.uk Kudos 60 Beam User Manual... - Page 3 1068 12100 3782 1617 2254 21290 6658 3089 1806 1168 45° - Lux FULL ON 5431 1649 1287 1937 3542 1032 4° 10° 45° Kudos 60 Beam MENU LEFT ENTER RIGHT DISPLAY BACKUP DOWN www.prolight.co.uk Kudos 60 Beam User Manual...
-
Page 4: Technical Specifications
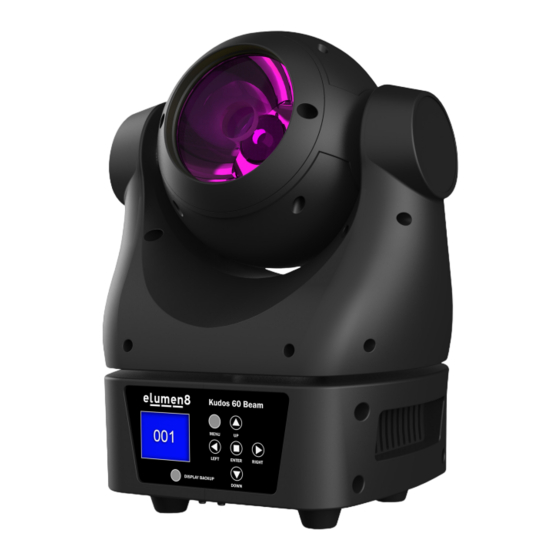
In the box: 1 x fixture, 1 x 10° lens, 01 - Earth point 06 - 5-Pin DMX input 1 x 45° frost lens, 02 - LCD display 07 - 5-Pin DMX output 1 x omega clamp, 03 - Function buttons 08 - PowerCON input 1 x power cable 04 - 3-Pin DMX input 09 - PowerCON output & 1 x user manual 05 - 3-Pin DMX output 10 - Fuse T2A 250V www.prolight.co.uk Kudos 60 Beam User Manual... - Page 5 Frost Lens Installation Frost Lens Installation: The fixture is supplied with two lenses (10° and 45°). See below for installation instructions. 1) Place the fixture on a flat surface and 2) Remove plastic cover from the head. unscrew the plastic cover. 3) Carefully place the required frost lens over the centre of the LED reflector. 4) Place the plastic cover back on the head. 5) Tighten the screws until the plastic cover is secure. www.prolight.co.uk Kudos 60 Beam User Manual...
-
Page 6: Operating Instructions
Operating instructions Control Panel Menu: The LCD control panel situated on the front of the fixture allows the user to access the menu system to adjust the fixtures settings. When the unit has been powered on it will show “Software Update Please Wait...” followed by “Motor Reset Please Wait...” and “Elumen8 Kudos 60”. The fixture will then return to its home screen. Pressing the “MENU” button once will take the user to the fixtures main menu. Using the “UP” and “DOWN” buttons you can then navigate between the different modes in the main menu. Pressing the “ENTER” button on one of these modes allows you to access the sub menu where you can use the “LEFT” and “RIGHT” buttons to select the sub mode you require. When you have selected the option/ value you wish to adjust press the “ENTER” button and use the “UP” and “DOWN” buttons to select the option/value required. Once the option/value has been selected press the “ENTER” button once more to confirm the setting. To exit out of any of the above options, press the “MENU” button. The LCD control panel can be used via the internal battery. To access this press and hold the “DISPLAY BACKUP” button for 5 seconds until the fixtures home screen is displayed. The LCD display will automatically shut off after 20 seconds of inactivity. Kudos 60 Beam MENU LEFT ENTER RIGHT DISPLAY BACKUP DOWN Error Codes: When the unit is powered on the unit will automatically perform a motor reset. If there is a problem with... - Page 7 (Hours) Total Time XXXh Fixture Total Run Time (Hours) Time. Info Last Clear XXXh Fixture Last Run Time (Hours) Enter PIN To Access Timer PIN PIN = 066 Last Clear Menu Clear Last ON/OFF Reset Fixture Last Run Time Information Temp.Info Head. Temp XXXC/F Temperature Of Fixture Head Error. Info NONE, Error Record 1-Error Record 10 Display Error Messages Model. Info Elumen8 Kudos 60 Display Brand/Model Number 1U01: ≥V1.02 Software. V 2U01: ≥V1.02 Software Versions 3U01: ≥V1.02 www.prolight.co.uk Kudos 60 Beam User Manual...
-
Page 8: Remote Address
To remotely adjust the fixtures address, connect the fixture to a controller and power the fixture on. Set the DMX value of “Channel 1” to “007” on the controller. Then set the DMX value of “Channel 2” to “007” or “008” on the controller (“007” - allows the address to be set from 001-255, “008” - allows the address to be set from 256-511). Now use “Channel 3” on the controller to set the required DMX address. After setting “Channel 3” to the required DMX address wait for approximately 20 seconds for the fixture to register the setting. Example 1: If the required DMX address is 076, “Channel 1” to “007” and “Channel 2” to “007”, then set “Channel 3” to a DMX value of “076”. Example 2: If the required DMX address is 435, “Channel 1” to “007” and “Channel 2” to “008”, then set “Channel 3” to a DMX value of “179” (435–256=179). Calibrate: The calibrate funtion allows fine adjustments to be made to the motors for when a sensor has been knocked slightly out of place. This function has been password protected to refrain from improper use. The password to access this menu is “050” and must be entered each time the calibration menu needs to be accessed. www.prolight.co.uk Kudos 60 Beam User Manual... -
Page 9: Dmx Channel Modes
021-024 Colour Macro 6 025-028 Colour Macro 7 029-032 Colour Macro 8 033-036 Colour Macro 9 037-040 Colour Macro 10 041-044 Colour Macro 11 045-048 Colour Macro 12 049-052 Colour Macro 13 053-056 Colour Macro 14 057-060 Colour Macro 15 061-064 Colour Macro 16 065-068 Colour Macro 17 069-072 Colour Macro 18 073-076 Colour Macro 19 077-080 Colour Macro 20 081-084 Colour Macro 21 085-088 Colour Macro 22 www.prolight.co.uk Kudos 60 Beam User Manual... - Page 10 177-180 Colour Macro 45 181-184 Colour Macro 46 185-188 Colour Macro 47 189-192 Colour Macro 48 193-196 Colour Macro 49 197-200 Colour Macro 50 201-204 Colour Macro 51 205-208 Colour Macro 52 209-212 Colour Macro 53 213-216 Colour Macro 54 217-220 Colour Macro 55 221-224 Colour Macro 56 225-228 Colour Macro 57 229-232 Colour Macro 58 233-236 Colour Macro 59 237-240 Colour Macro 60 241-244 Colour Macro 61 www.prolight.co.uk Kudos 60 Beam User Manual...
- Page 11 Auto Program 6 111-126 Auto Program 7 127-142 Auto Program 8 143-158 Auto Program 9 159-174 Auto Program 10 175-190 Auto Program 11 191-206 Auto Program 12 207-222 Auto Program 13 223-238 Auto Program 14 239-255 Auto Program 15 000-255 Auto Program Speed (slow-fast) Program Fade Speed (Normal) 001-255 Program Fade Speed (slow-fast) 000-020 Linear Dimming Curve 021-040 Square Dimming Curve 041-060 InvSquare Dimming Curve 061-080 S-curve Dimming Curve 081-255 Defualt unit setting www.prolight.co.uk Kudos 60 Beam User Manual...
- Page 12 Channel Value Function Basic Standard Extend 000-225 Pan/Tilt Speed (fast-slow) 226-235 Move while dark 236-255 No function 000-079 No function 080-084 Motor reset 085-099 No function 100-119 Internal Program 1 120-139 Internal Program 2 140-159 Internal Program 3 160-179 Internal Program 4 180-199 Internal Program 5 200-219 Internal Program 6 220-239 Internal Program 7 240-255 No function www.prolight.co.uk Kudos 60 Beam User Manual...
-
Page 13: Dmx Setup
DATA cable (DMX cable) requirements (for DMX operation): This fixture can be controlled via DMX-512 protocol. The DMX address is set on the back of the unit. Your unit and your DMX controller require a standard 3-pin XLR connector for data input/output, see image below. Further DMX cables can be purchased from all good sound and lighting suppliers or Pro Light Concepts dealers. Please quote: CABL10 – 2m CABL11 – 5m CABL12 – 10m Note: DMX cable must be daisy chained and cannot be split. www.prolight.co.uk Kudos 60 Beam User Manual... -
Page 14: Line Termination
5-pin XLR (socket) 3-pin XLR (socket) Pin 1: GND (screen) Pin 1: GND (screen) Pin 2: Signal (-) Pin 2: Signal (-) Pin 3: Signal (+) Pin 3: Signal (+) Pin 4: N/C Pin 5: N/C www.prolight.co.uk Kudos 60 Beam User Manual... -
Page 15: Weee Notice
WEEE notice Correct Disposal of this Product (Waste Electrical & Electronic Equipment) (Applicable in the European Union and other European countries with separate collection systems) This marking shown on the product or its literature, indicates that it should not be disposed with other household wastes at the end of its working life. To prevent possible harm to the environment or human health from uncontrolled waste disposal, please separate this from other types of wastes and recycle it responsibly to promote the sustainable reuse of material resources. Household users should contact either the retailer where they purchased this product, or their local government office, for details of where and how they can take this item for environmentally safe recycling. Business users should contact their supplier and check the terms and conditions of the purchase contract. This product should not be mixed with other commercial wastes for disposal. www.prolight.co.uk Kudos 60 Beam User Manual... - Page 16 Kudos 60 Beam User Manual...
Need help?
Do you have a question about the Kudos 60 Beam and is the answer not in the manual?
Questions and answers