Table of Contents
Advertisement
Quick Links
Advertisement
Table of Contents

Related Manuals for Malaguti SPIDER MAX GT 500


Summary of Contents for Malaguti SPIDER MAX GT 500
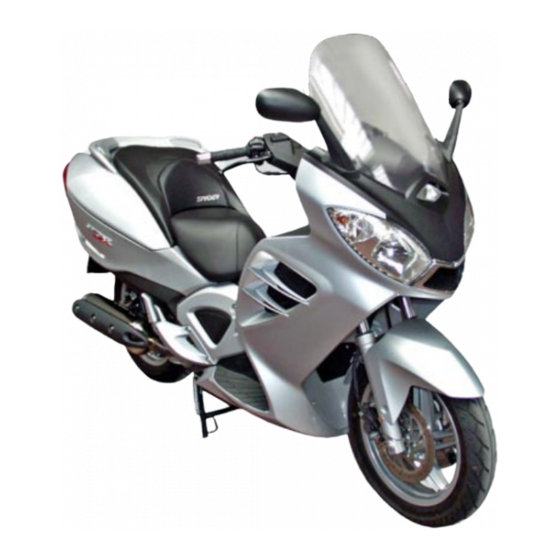
- Page 1 SPIDER MAX 500 - EURO 3 EURO 3 07/06...
- Page 2 SPIDER MAX 500 - EURO 3 FOREWORD • The present service manual concerns the main electrical, mechanical and necessary checks and the assembly of single components before delivering the new motorcycle (the operation sequence is not compulsory) • It is important to adhere strictly to the following instructions. Any operation carried out carelessly or not carried out at all may lead to personal injury, damage to the motorcycle or simply to complaints.
-
Page 3: Spider Max 500 - Euro
SPIDER MAX 500 - EURO 3 OPERATION SYMBOLS IMPORTANT! WARNING! - Used to indicate dangerous operation that can lead to the injury of service, workshop personnel or people in general or damage to the facility, the motorcycle or equipment. ENGINE OFF - Used for all the operations that must be carried out with engine off. VOLTAGE OFF - Disconnect the battery negative pole before the operation. -
Page 4: Pre-Delivery
SPIDER MAX 500 - EURO 3 PRE-DELIVERY NO. SERVICE NO. SERVICE Various checks On delivery Tyre pressure Visual check Starting Identification data check Steering lock Important tightening Accelerator Front wheel Handlebar controls Rear wheel Brake levers Brake callipers Side stand Shock absorbers Fuses Exhaust... -
Page 5: Table Of Contents
SPIDER MAX 500 - EURO 3 INDEX TOPICS Technical data Dimensions General specifications Main component identification Handlebar controls Right control Left control Key switch Steering lock Side stand Dashboard Tubeless tyres Fuel tank Helmet compartment Luggage compartment Coolant tank Engine oil Transmission oil Front and rear brake liquid Lubricant table... - Page 6 SPIDER MAX 500 - EURO 3 TOPICS Driver seat Passenger seat (including movable support) Driver seat cushion Grab handle Helmet compartment Rear fairing Battery compartment Airbox Front mudguard Lower fairing mudguard Front wheel (Front brakes) discs Front wheel Brake master cylinders Brake callipers (Rear brake) disc Braking distributor...
- Page 7 SPIDER MAX 500 - EURO 3 TOPICS Cooling circuit bleeding Subframe Aluminium central frame Frame dimension check Exhaust Lambda sensor Rear shock absorbers Rear arm Rear wheel Engine removal Engine reassembly Engine mount Lighting system Dashboard Bulb change Front headlights Tail light S Horn Immobilizer ECU...
- Page 8 SPIDER MAX 500 - EURO 3 KNOW YOUR MOTORCYCLE ON DELIVERY • When receiving the motorcycle follow the indications provided on the packaging and then dispose of the same in compliance with the Law in force. VISUAL CHECK • Visually inspect the assembly of all plastic components and inspect the motorcycle for marking and damage. FRAME NO.
-
Page 9: Technical Data
SPIDER MAX 500 - EURO 3 TECHNICAL DATA DIMENSIONS Pitch (A) 1.490 mm Length (B) 2.255 mm Width (C) 930 mm Max. height (D) 1.470 mm Weight 230 Kg GENERAL SPECIFICATIONS ENGINE 4-stroke single-cylinder with 4 valves - Type: PIAGGIO M341M Refer to Piaggio Engine Service Manual. -
Page 10: Main Component Identification
SPIDER MAX 500 - EURO 3 MAIN COMPONENT IDENTIFICATION 1) Left mirror 2) Coolant tank 3) Glove compartment 4) Battery 5) Battery compartment 6) Side stand 7) Throttle body 8) Air cleaner 9) Number plate bracket 10) Rear indicators 11) Parking and stop lights 12) Passenger grab handle 13) Fuel filler cap 14) Key switch... -
Page 11: Handlebar Controls
SPIDER MAX 500 - EURO 3 HANDLEBAR CONTROLS RIGHT CONTROL 1) Counterweight 2) Throttle 3) Front brake lever (left-hand) 4) MODE button: to select the digital dashboard functions 5) Front brake oil tank A) Emergency Stop, engine cut-out. ON - Engine ignition OFF - Engine cut-out B) Light switch: right = off... -
Page 12: Steering Lock
SPIDER MAX 500 - EURO 3 KEY SWITCH • This switch controls the ignition circuit and the steering lock device. Locked ignition(key can be removed) Ignition ready position (key cannot be removed) Steering lock engagement (locked ignition; key can be removed) Helmet compartment opening luggage compartment opening F. -
Page 13: Dashboard
SPIDER MAX 500 - EURO 3 DASHBOARD Multifunction digital dashboard (Refer to the User Manual for function set up). Analogic speedometer indicates the current driving speed in km/h and miles (mph). Coolant temperature indicator The indicator goes on when the coolant temperature is too high. Side stand/engine stop indicator (red) The indicator goes on when the side stand is down or the Engine Stop button is on the OFF position. -
Page 14: Tubeless Tyres
SPIDER MAX 500 - EURO 3 TUBELESS TYRES 120/80 - 16” 60S 150/70 - 16” 68S PRESSURE CHECK Check and adjust tyre pressure with “cold tyres”. F. 11 FUEL TANK To reach the fuel tank, proceed as follows: • place the motorcycle on the central stand. •... -
Page 15: Helmet Compartment
SPIDER MAX 500 - EURO 3 HELMET COMPARTMENT • Placed under the passenger seat. Place the motorcycle on the stand, press and rotate the ignition key clockwise: this operation releases the seat lock. • In the helmet compartment a light goes on and off when opening and closing the compartment. -
Page 16: Coolant Tank
SPIDER MAX 500 - EURO 3 LUBRIFICANTS COOLANT TANK (EXPANSION RESERVOIR) To access the coolant tank, containing the engine cooling liquid, open the luggage compartment (A) and remove the plastic cover (B). LEVEL CHECK • At this point, thanks to the tank position, it is possible to check the level of the coolant with respect to the MIN and MAX marks peeping through the grid placed under the fairing in the front part of the vehicle. -
Page 17: Engine Oil
SPIDER MAX 500 - EURO 3 ENGINE OIL • In 4T engines, the engine oil is used to lubricate the timing components, crankcase stand and the thermal unit. A low oil quantity may cause damage to the engine. • In all 4T engines, oil characteristics and oil consumption may change over time. CHECK LEVEL every 3000 km or 6 months Perform this operation with “cold engine”, proceeding as follows:... - Page 18 SPIDER MAX 500 - EURO 3 OIL TOPPING UP Always check oil level before topping it up and never exceed the MAX mark. Topping up oil between MIN and MAX marks indicates a quantity of oil around. 400 cc. Never exceed the MAX mark! An excessive inner pressure may damage the engine. Check and top up engine oil level every 3000 km.
-
Page 19: Transmission Oil
SPIDER MAX 500 - EURO 3 TRANSMISSION OIL CHECK LEVEL every 6.000 Km or 12 months 1) Place the vehicle on a level surface, on the central stand. 2) Release the dipstick (A), clean it, then fit it back tightening it completely. 3) Extract it again and check that the oil level is between the MAX and MIN marks. -
Page 20: Front And Rear Brake Liquid
SPIDER MAX 500 - EURO 3 FRONT AND REAR BRAKE LIQUID CHECK every 30 days • Use the tank indicator (S) for the (visual) check: front brake (A) and rear brake (B), with the motorcycle on a level ground and vertical position. •... -
Page 21: Steering
MECHANICAL SPIDER MAX 500 - EURO 3 ADJUSTMENTS STEERING PLAY CHECK • Place the motorcycle on the central stand. • Rotate the handlebar repeatedly in both directions, to check that the ball bearings can slide smoothly. • In case of (a light) friction during rotation or exceeding smooth sliding, adjust it by means of the appropriate wrench. CHECK HANDLEBAR TIGHTENING •... -
Page 22: Shock Absorbers C
SPIDER MAX 500 - EURO 3 REAR SHOCK ABSORBER ADJUSTMENT • The rear shock absorbers can be adjusted on the spring pre-load allowing to adapt the motorcycle behaviour according to the load, the type of ride and the road. • Use the supplied wrench on the ring nut placed in the shock absorber lower part;... -
Page 23: Fairing Components
SPIDER MAX 500 - EURO 3 BODYWORK FAIRING COMPONENTS DESCRIPTION Windscreen Central fairing Front fairing Front mudguard Lower fairing mudguard Front handlebar cover Rear handlebar cover Central handlebar cover Dashboard frame Leg protector Rear fairing Number plate bracket Tail light Front headlight Footpeg Alukit chassis... -
Page 24: Number Plate Assembly
SPIDER MAX 500 - EURO 3 NUMBER PLATE ASSEMBLY NOTE - The motorcycle is equipped with number plate bracket. The number plate is assembled at the dealer’s premises. • Fit the number plate on the number plate holder (1), securing it to the slots (A) by means of screws or rivets. Do not use adhesives, both-side adhesive tapes, etc... - Page 25 SPIDER MAX 500 - EURO 3 • Free the fairing from the front and the two side retainers (A). To facilitate the separation of the locking tabs, remove the access covers to the front direction indicators, insert one hand and force Release the fairing from the front locking tab.
-
Page 26: Windscreen D
SPIDER MAX 500 - EURO 3 WINDSCREEN • Release the screws (V6) and remove the windscreen. F. 12 DASHBOARD • Disconnect the dashboard connector (A). F. 13 • Release the screws (V4) and extract the dashboard carefully. 1,5 ± 15% F. -
Page 27: Front Fairing
SPIDER MAX 500 - EURO 3 FAIRING FRONT NOTE - The front fairing is made of two parts: one on the right and the other on the left. The following description refers to the complete fairing. • Release the screws (V6). 1,5 ±... - Page 28 SPIDER MAX 500 - EURO 3 • Release and remove the lower screw (V1) and its washer. 1,5 ± 15% F. 19 • Remove the rubber mat. F. 20 Release the screws (V2) and remove the passenger footpeg. 40 ± 15% F.
- Page 29 SPIDER MAX 500 - EURO 3 • Release the half-fairing upper part from the mirror mount, opening it up carefully. F. 23 • Disconnect the two connectors (A) (direction indicators). • Disconnect the connector (B) (front headlight). • Remove the fairing. ACCESSES •...
-
Page 30: Dashboard Panel
SPIDER MAX 500 - EURO 3 DASHBOARD PANEL • Release the screws (V2). • Remove the dashboard panel (A), releasing it from the locking tabs. F. 27 LEG PROTECTOR • Remove the key switch ring nut (A) rotating it counterclockwise. F. - Page 31 SPIDER MAX 500 - EURO 3 • Release the three screws (V) inside the luggage compartment. F. 30 • Release the screw underneath (V1). 5 ± 20% F. 31 • Release the screws (V3). 5 ± 20% F. 32 • Unlock the luggage compartment closing transmission cable from its seat (A).
-
Page 32: Upper Handlebar Cover
SPIDER MAX 500 - EURO 3 • Extract the leg protector assembly, together with the footpegs. F. 35 • Remove the footpeg if necessary, release the screws (V2). 1,5 ± 15% F. 36 UPPER HANDLEBAR COVER • Release the screws (V2) and remove the upper handlebar cover (A). -
Page 33: Front And Rear Handlebar Cover
SPIDER MAX 500 - EURO 3 FRONT AND REAR HANDLEBAR COVER • Release the upper screws (V2). 1,5 ± 15% F. 39 • Release the outside screws (B2) and remove the front handlebar cover (A). • Release the remaining four inside screws and remove the rear handlebar cover (P). -
Page 34: Driver Seat
SPIDER MAX 500 - EURO 3 DRIVER SEAT • Release the screws (V2) on the rear part. 5 ± 20% F. 43 • Remove the driver seat (A), releasing it form the locking tab (B). F. 44 • Remove the driver seat (A). F. -
Page 35: Grab Handle
SPIDER MAX 500 - EURO 3 PASSANGER SEAT (including movable support) • Remove the Benzing ring (C) and release the passenger seat shock absorbers. F. 47 • Release the screws (V2) from the front supports. 10 ± 20% • Remove the seat together with the grab handle and movable support. -
Page 36: Helmet Compartment
SPIDER MAX 500 - EURO 3 HELMET COMPARTMENT • Extract (without any tool) the compartment inside coating. F. 50 • Release the screws (V2a). • Release the screws (V2b). • Release the screws (V4a). • Release the screws (V4b). 5 ± 15% 5 ±... - Page 37 SPIDER MAX 500 - EURO 3 • Disconnect the 12V plug cable from the back of the helmet compartment. F. 54 • Lift the helmet compartment, disconnect the connector (A) and release the cable from the clamp (B). • Remove the helmet compartment completely.
- Page 38 SPIDER MAX 500 - EURO 3 • Release the screws (V4). 1,5 ± 15% F. 57 • Extract the entire fairing together with the tail lights. F. 58 ACCESSES • Removing the rear fairing allows reaching the following components: Right-hand side: A) Voltage rectifier B) Coolant pump C) Flywheel connector...
-
Page 39: Battery Compartment
SPIDER MAX 500 - EURO 3 Left side A) Coil B) Ground ends F. 60 BATTERY COMPARTMENT • Remove the seat (S/D - P. 34). • Remove the fuel filler cap. F. 61 • Release the screws (V2). F. 62 •... -
Page 40: Battery F
SPIDER MAX 500 - EURO 3 NOTE - Inside the battery compartment, is located the general protection fuse (A) (30 A). • Release the battery cables. • Extract the battery (S/F - P. 89). F. 64 • Release the screw (V) at the bottom of the battery compartment and remove the compartment, extracting the battery cables and fusebox. -
Page 41: Airbox
SPIDER MAX 500 - EURO 3 AIRBOX • Release the screws (V8) and remove the cover (A). F. 67 • Release the gas recovery hose (C). F. 68 • Release the hose (B) from the throttle body. • Extract the airbox. F. -
Page 42: Front Mudguard
SPIDER MAX 500 - EURO 3 FRONT MUDGUARD • Release the screws (V2) • Release the screws (V) and corresponding nuts (A). 3,5 ± 10% 3,5 ± 10% F. 70 LOWER FAIRING MUDGUARD NOTE - To remove the lower fairing mudguard, first remo- ve the front wheel (S/E - P. -
Page 43: Front Wheel
MECHANICAL SPIDER MAX 500 - EURO 3 COMPONENTS FRONT WHEEL REMOVAL Before removing the front wheel, check for the perfect stability of the motorcycle. If necessary, place an suitable support under the engine. NOTE - In order to remove the front wheel, it is necessary to release the odometer sprocket transmission and the brake callipers. -
Page 44: Front Wheel
SPIDER MAX 500 - EURO 3 Do not actuate the brake levers without the wheel, as the pads would close. FRONT WHEEL REASSEMBLY When reassembling the wheel, observe rotation direction, which can be determined by the position of the spokes of the rim (Please refer: F. 32 - P. 52). To reassemble the wheel, proceed as follows: •... -
Page 45: Brake Callipers
SPIDER MAX 500 - EURO 3 • Release the screws (V2) and remove the clamp (D). • Remove the pump unit (E). • In order to reassemble the unit lock (by means of a long T-wrench) the lower screw, without tightening it, and then the upper screw;... - Page 46 SPIDER MAX 500 - EURO 3 FRONT CALLIPER DISASSEMBLY In order to extract the pads: • Release and remove the screw (V). F. 9 • Shift downward the stop plate (A), in order to release the pins (B) and extract them from the other side of the calliper unit.
- Page 47 SPIDER MAX 500 - EURO 3 • Release the nut (D - F. 11). • Remove the floating support (S) from the calliper body, including the two slide pins. During reassembly, lubricate the slide pins must rubber gasket grease. F. 14 •...
- Page 48 SPIDER MAX 500 - EURO 3 • Remove the dust seal (A) and the seal ring (B) from both the pistons. During this operation, take care not to damage the dust seal and seal ring housing. • Make sure there are no signs of scoring on the pistons and their housing.
-
Page 49: Rear Brake) Disc
SPIDER MAX 500 - EURO 3 (REAR BRAKE) DISC During the check and the service on the rear brake calliper, check the disc conditions (C). If the disc is too worn out, (service limit 3.5 mm), replace it, releasing and removing the screws (V6), including their washers (D). - Page 50 SPIDER MAX 500 - EURO 3 • Release and remove the screws (V2). • Separate the two housing halves, taking care not to let the two pistons fall. 20 ± 20% F. 26 • Remove the two pistons (D). • Remove the two O-Rings (E). F.
-
Page 51: Braking Distributor
SPIDER MAX 500 - EURO 3 BRAKING DISTRIBUTOR NOTE - To access the braking distributor (A), remove the central fairing (S/D - P. 24). Drain completely the circuit. • Release the screws (V2). F. 29 10 ± 20% • Release the couplings (B). •... - Page 52 SPIDER MAX 500 - EURO 3 F. 32 07/06...
- Page 53 SPIDER MAX 500 - EURO 3 F. 33 07/06...
-
Page 54: Braking System Bleeding
SPIDER MAX 500 - EURO 3 BRAKING SYSTEM BLEEDING A) INTEGRAL SYSTEM Put the vehicle on firm and level ground. • Remove the cover of the oil pump tank (left-hand side), releasing the two screws, so as to top up the liquid. NOTE - The left brake lever allows the front right brake calliper and the rear brake calliper to be controlled interlockedly at the same time. -
Page 55: Handlebar
SPIDER MAX 500 - EURO 3 HANDLEBAR To remove the handlebar: • Remove the handlebar cover: upper, front and rear (S/D - P. 32 - 33). • Cut the clips securing wiring, tubes, and cables. • Remove the (right and left) brake master cylinders (S/E - P. -
Page 56: Accelerator Transmission Cables
SPIDER MAX 500 - EURO 3 ACCELERATOR TRANSMISSION CABLES NOTE - The pictures shown hereafter highlight the routing of the accelerator control cables, which will have to be observed if the cables need replacing. F. 37 F. 38 F. 39 07/06... - Page 57 SPIDER MAX 500 - EURO 3 F. 40 F. 41 F. 42 07/06...
-
Page 58: Fork
SPIDER MAX 500 - EURO 3 FORK STANCHION GROUP Make sure that the motorcycle is really stable; in case, put a suitable support under the engine. The front wheel will have to protrude over the runaway edge of the lift. NOTE - To remove one or both of the legs of the front fork, completed with stanchion, first remove: •... -
Page 59: E Complete Fork
SPIDER MAX 500 - EURO 3 • Using a meter or the stick of a gauge, check the proper oil level, which should be at mm 140 from the upper edge of the leg. • If necessary, top up with oil: Q8 FORK OIL FRONT FORK OIL REPLACEMENT F. -
Page 60: Seat Opening Transmission Cable
SPIDER MAX 500 - EURO 3 SEAT OPENING TRANSMISSION CABLE NOTE - The pictures shown hereafter highlight the routing of the transmission cables and their anchorage seats on the frame of the motorcycle. F. 52 F. 51 F. 53 07/06... - Page 61 SPIDER MAX 500 - EURO 3 F. 54 F. 55 07/06...
-
Page 62: Luggage Compartment Opening Transmission Cable
SPIDER MAX 500 - EURO 3 LUGGAGE COMPARTMENT OPENING TRANSMISSION CABLE NOTE - The pictures shown hereafter highlight the proper position of the transmission cable for the opening of the luggage compartment, after the possible reassembly. F. 58 F. 59 F. -
Page 63: Fuel Tank
SPIDER MAX 500 - EURO 3 FUEL TANK Fuel fumes are highly toxic, and therefore harmful to your health. Ventilate the room before proceeding and, if necessary, wear a protection mask. Do not remove the tank, unless the latter has been previously emptied. Do not smoke, nor use bare flames. -
Page 64: Fuel Pump
SPIDER MAX 500 - EURO 3 • Extract the couplings (1 - 2) of the fuel pump, pressing down with two fingers on the ring nut, at the base of the couplings. F. 65 • The coupling (1) (with the grey tube) has to be fitted in the coupling (3) (with grey ring nut). - Page 65 SPIDER MAX 500 - EURO 3 • Extract the tank, sliding it from the front side of the frame, downwards. F. 69 • Disconnect the tube (C). • After extracting the tank, release the screw (V - F. 64 - 69), releasing it from the support (T - F.
-
Page 66: Radiators (Including Lines And Expansion Reservoir)
SPIDER MAX 500 - EURO 3 RADIATORS (including lines and expansion reservoir) • Remove the fairing (S/D - P. 24). • Remove the leg protector (S/D - P. 30). • Wait for the engine to cool down completely. • Put a suitable container under the coolant pump (A). •... - Page 67 SPIDER MAX 500 - EURO 3 RIGHT RADIATOR • Release the lower securing screw (V) of the right radiator (A). 10 ± 20% F. 76 • Release and remove the screws (V2) and their washers. 10 ± 20% • Remove the right radiator. F.
-
Page 68: Electrical Fan Radiator
SPIDER MAX 500 - EURO 3 ELECTRICAL FAN RADIATOR NOTE - Please refer: (S/F - P. 88). EXPANSION RESERVOIR (coolant tank) Drain the coolant from the circuit, as previously described. • Disconnect the tube (C) from the expansion reservoir. • Release the screws (V2). F. -
Page 69: Coolant Circuit
SPIDER MAX 500 - EURO 3 COOLANT CIRCUIT FLOWCHART F. 85 1) Main Radiator (left) 2) Circuit filler 3) Right radiator 4) Expansion reservoir 5) Thermal expansion valve for the second radiator adjustment (65° ± 2) 6) “T” coupling 7) Thermal expansion valve on the engine (82° ± 2) 8) Cylinder head 9) Centrifugal pump driven by the engine countershaft 10) Fan 107°... - Page 70 SPIDER MAX 500 - EURO 3 HOSE ROUTING (right-hand side cooling circuit) NOTE - The pictures shown hereafter highlight the routing of the tubes and hoses of the cooling circuit and their anchorage seats on the frame, which will have to be restored during the reassembly of the different components. F.
- Page 71 SPIDER MAX 500 - EURO 3 HOSE ROUTING (left-hand side cooling circuit) F. 87 07/06...
- Page 72 SPIDER MAX 500 - EURO 3 BLEEDING, COOLING CIRCUIT To bleed the air, with the circuit completely drained from the coolant, proceed as follows: BLEEDING OF THE LEFT SIDE • Remove the cap on the bleeding coupling (A). • Fit a tube in the coupling (A) of the bleed nipple on the cylinder head.
-
Page 73: Subframe
SPIDER MAX 500 - EURO 3 SUBFRAME NOTE - The subframe is made up of three parts (F. 93): 1 - Upper subframe 2 - Right-hand side subframe 3 - Left-hand side subframe • To remove the subframe from the central aluminium frame, first remove all the components described up to this paragraph. - Page 74 SPIDER MAX 500 - EURO 3 F. 93 10 ± 15% 10 ± 15% 60 ± 15% 60 ± 15% 25 ± 15% 60 ± 15% 25 ± 15% 25 ± 15% 55 ± 15% 07/06...
-
Page 75: Frame Dimension Check
SPIDER MAX 500 - EURO 3 FRAME DIMENSION CHECK • If the motorcycle has had an accident, which “appear” to have caused a distortion, even light of the frame, carry out a dimension check, before any other “restoration and set up”. •... -
Page 76: Exhaust
SPIDER MAX 500 - EURO 3 EXHAUST Before operating on the exhaust and on the exhaust manifold, wait for the components to cool down and wear, always and in any case, suitable safety gloves. EXHAUST • Slacken the screw (V) of the clip securing the exhaust/ exhaust manifold. - Page 77 SPIDER MAX 500 - EURO 3 EXHAUST MANIFOLD • Disconnect the Lambda sensor connector (A). F. 100 • Release the cable from the two hose clamps (B). F. 101 • Release the two nuts (C). • Remove the exhaust manifold (D). •...
-
Page 78: Lambda Sensor
SPIDER MAX 500 - EURO 3 LAMBDA SENSOR Removal • Slacken the Lambda sensor (A) from the exhaust manifold using a suitable locking system in order not to damage the manifold. F. 102/a Reassembling • Screw the Lambda sensor down with along cable and connector. -
Page 79: Rear Shock Absorbers
SPIDER MAX 500 - EURO 3 REAR SHOCK ABSORBERS Before carrying out any operation in the rear shock absorbers, prepare a system ensuring the vehicle perfect stability even without shock absorbers. NOTE - If during the operation the shock absorbers are not to be completely removed, simply release the shock absorbers, by releasing the lower screws (V2). -
Page 80: Rear Arm
SPIDER MAX 500 - EURO 3 REAR ARM Before removing the rear arm (A), check that the vehicle is in perfectly stable conditions. After removing the exhaust (the exhaust manifold does not have to be removed) and releasing the shock absorbers, as described in the previous pages, proceed as follows: •... -
Page 81: Rear Wheel
SPIDER MAX 500 - EURO 3 Left: after releasing the shock absorber, release the screws (V2) and remove their washers and nuts. 30 ± 10% F. 108 REAR WHEEL NOTE - To extract the rear wheel, first remove the brake calliper, and the exhaust. -
Page 82: Engine Reassembly
SPIDER MAX 500 - EURO 3 • Slacken the clips and release the coolant manifolds from the pump. Place the coolant manifolds so that they will not impede the engine removal, taking care not to bend nor damage them. F. 112 Support suitably the engine with systems ensuring both the top safety for the operators during the removal, as well as the perfect... - Page 83 SPIDER MAX 500 - EURO 3 • Detach the (upper) mount shaft (E). • Remove the engine mount and the spacers. While reassembling, take care not to interfere and exchange the spacers, which will have to be lubricated with bearing grease. F.
-
Page 84: Lighting System
ELECTRICAL AND ELECTRONIC SPIDER MAX 500 - EURO 3 COMPONENTS LIGHTING SYSTEM F. 1 LAMPS A) (Front) parking light: 12V - 5W (W5W) B) Low beams/high beams: 12V - 35/35W (HS1) C) Front direction indicators: 12V - 21W (PY21) D) Number plate light: 12V - 5W (W5W) E) Rear direction indicators: 12V - 16W (W16W) -
Page 85: Dashboard
SPIDER MAX 500 - EURO 3 DASHBOARD • To remove the dashboard, please refer: S/D - P. 26. BULB CHANGE The burnt out bulbs always have to be replaced with new ones, with the same specifications. PARKING LIGHT • To access the bulb of the parking light, remove the central fairing: S/D - P. -
Page 86: Tail Light S
SPIDER MAX 500 - EURO 3 TAIL LIGHTS • Tail lights can be accessed by removing the helmet com- partment (S/D - P. 36) and the rear fairing (S/D - P. 37). • Disconnect the wiring. • Release the screws (V3). •... -
Page 87: Key Switch
SPIDER MAX 500 - EURO 3 KEY SWITCH NOTE - First remove: front fairing (S/D - P. 27) and leg protector (S/D - P. 30). • Disconnect the seat opening transmission cable (A). • Disconnect the helmet compartment opening transmis- sion cable (B). -
Page 88: Electrical Fan
SPIDER MAX 500 - EURO 3 ELECTRICAL FAN • Remove the fairing (S/D - P. 24). • Remove the leg protector (S/D - P. 30). • Cut the clip securing the electrical fan wiring. NOTE - While reassembling, use a new clip, like the origi- nal one and fixed as before. - Page 89 Before refitting the removed parts, we suggest to test the “control panel” in order to check the connections are properly fitted. The original battery, supplied by “Malaguti”, is a hermetic type (12V - 14A). If replaced, install a battery having the same specifications. In fact, the battery compartment cannot host a F.
-
Page 90: Spark Plug
SPIDER MAX 500 - EURO 3 SPARK PLUG Replace every 12.000 Km • To access the spark plug cap, remove the inserted left side cover (A). • Remove moderately the cap (B), slightly rotating it in the two directions. • Remove the spark plug (C) when the engine is still hot (taking care to avoid burns). -
Page 91: Voltage Rectifier
SPIDER MAX 500 - EURO 3 VOLTAGE RECTIFIER NOTE - To remove the voltage rectifier, first remove the rear fairing (S/D - P. 37). • Release the screws (V2). • Remove the wiring cable ends from the right screw • Remove the voltage rectifier (A). •... -
Page 92: Ecu Mount Removal
SPIDER MAX 500 - EURO 3 ECU MOUNT REMOVAL • After removing the Electronic injection ECU, disconnect the connector (A) of the flasher (B). • Extract the relays (1 - 2 - 3 - 4) (F. 26) and remove their supports, releasing their screws. - Page 93 SPIDER MAX 500 - EURO 3 • Disconnect the connector of the anti-tilting device. F. 32 • Remove the ECU mount and the relay. If the anti-tilting device (5) is to be removed, take care to refit it in its original position and not upside down.
-
Page 94: Complete Wiring
The wirings have to be refitted in the way established by “Malaguti”, who is not liable in any way for any damage caused by the non-observance of this concept, which is a normal and rational way of operating. All the cut or removed clips have to be replaced and applied in their original position. - Page 95 SPIDER MAX 500 - EURO 3 F. 38 F. 39 07/06...
- Page 96 SPIDER MAX 500 - EURO 3 F. 40 F. 41 07/06...
- Page 97 SPIDER MAX 500 - EURO 3 F. 42 F. 43 07/06...
- Page 98 SPIDER MAX 500 - EURO 3 F. 44 07/06...
- Page 99 SPIDER MAX 500 - EURO 3 F. 45 07/06...
- Page 100 SPIDER MAX 500 - EURO 3 F. 46 100 07/06...
- Page 101 SPIDER MAX 500 - EURO 3 F. 47 101 07/06...
- Page 102 SPIDER MAX 500 - EURO 3 F. 48 102 07/06...
- Page 103 SPIDER MAX 500 - EURO 3 F. 49 103 07/06...
- Page 104 SPIDER MAX 500 - EURO 3 F. 50 104 07/06...
Need help?
Do you have a question about the SPIDER MAX GT 500 and is the answer not in the manual?
Questions and answers
Je voulais savoir en cas de besoin de Carrinage ou d’autre pièces spider max au Sénégal vous êtes basé ou ça ?