Table of Contents
Advertisement
Advertisement
Table of Contents

Related Manuals for Sartorius eLINE


Summary of Contents for Sartorius eLINE
- Page 1 ® eLINE Electronic Pipette User Manual...
-
Page 3: Table Of Contents
Tip Sealing and Electronic Tip Ejection ............8 4.5. Safe-Cone Filters ....................8 5. Charging of the Pipette ......................9 5.1. Charging with the Sartorius Charging Stand and Carousel ....9 5.2. Charging Directly ....................10 5.3. Electrical Specifications .................. 11 6. -
Page 4: Intended Use
98/97/EC of the European Parliament. The electronic pipette product range covers a volume range of 0,1 µl to 5 ml. It is recommended that Sartorius Optifit Tips or SafetySpace Filter Tips are used with Sartorius pipettes to ensure optimum compatibility and performance. -
Page 5: Eline® Single, 8 And 12 Channel Pipettes
1200 µl. 2.2. Sartorius Pipette Tips Sartorius pipette tips are recommended for use with eLINE® pipettes. The use of fully compatible tips will ensure the maximal pipetting accuracy and precision, and thereby guarantee the performance specifications given for the pipette. Sartorius tips are made of pure virgin polypropylene and manufactured in protected clean room conditions. -
Page 6: Unpacking
Sartorius offers a full range of standard Optifit, and SafetySpace Filter and Low Retention tips. Sartorius non-filter tips are available in trays, bulk packages and space-saving refill systems. Sartorius non-filter tips and trays are autoclavable at 121°C (252F), 20 min, 1 bar overpressure (15 p.s.i). All Single Tray Racks and clean Refill Packs are certified RNase, DNase and endotoxin-free. -
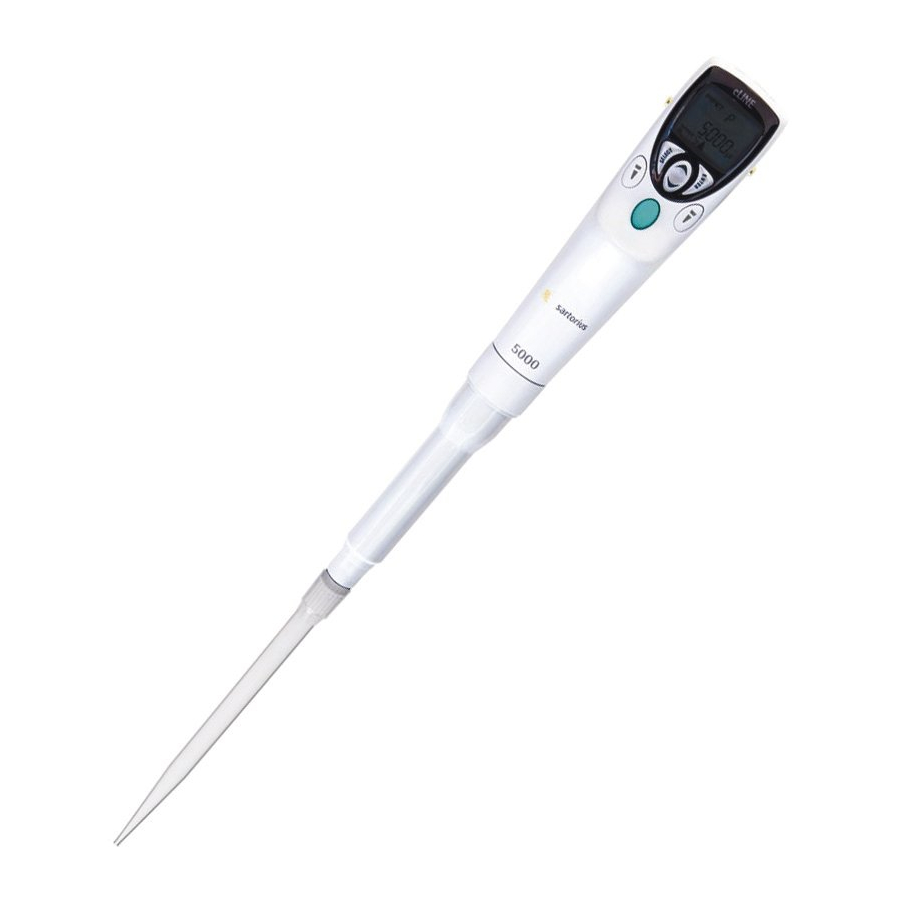
Page 7: Pipette Description
Tip Ejector Tip Cone(s) (excl. 5000 µl) Assembly (5000 µl) Safe-Cone Filter 4.1. Display and Controls The control and programming of the eLINE® pipette is performed using the display, keyboard and operating buttons. Display: Operating Mode Symbol Mode Range Aliquots/Counter Volume... -
Page 8: Reset Button
NOTE: When the pipette is not connected to the charging unit the pipette/display will automatically switch off after 10 minutes of non-use. Pipette can be switched on by pressing any key. 4.2. Reset Button To reset the pipette, press the reset button on the battery cover. - Page 9 P COUNT = pipetting with SA = multi-aspirating cycle counter Ad = automatic P MANUAL** = manual pipetting multi-dispensing *Only available in eLINE® 5 µl *Not available in eLINE® 5 µl **Not available in multichannels Keyboard: Select Arrow up/down Enter...
-
Page 10: Tip Sealing And Electronic Tip Ejection
4.5. Safe-Cone Filters The tip cone design of the eLINE® pipettes (>10 µl) allows the use of Safe-Cone Filters in the tip cones. These removable filters prevent liquids and liquid vapours from entering the pipette and thus protects the pipette from cross contamination and damage. -
Page 11: Charging Of The Pipette
The eLINE® pipettes should be charged using the original Sartorius Charging Stand or Charging Carousel. However, the eLINE® also features direct charging by using the eLINE®... -
Page 12: Charging Directly
The AC-adaptor supplied with the eLINE® pipette or single charging stand can be used for the charging of the eLINE® electronic pipette. The socket for the AC- adaptor is situated on the back of the pipette. 1. Before connecting the AC-adaptor to the electrical... -
Page 13: Electrical Specifications
NOTE: It is possible to continue pipetting while the eLINE® pipette is charging, connected to the AC- adaptor. With a fully discharged battery a 30 minute initial charging is required before continuing the pipetting. 5.3. Electrical Specifications Battery - Rechargeable NiMH battery pack with protection circuit - 4.8 V, 500 mAH... - Page 14 Enter or Select. The eLINE® pipette includes also six storage locations (Prog 1–6). The operating mode with user-selected settings can be stored in to the storage location under PROG mode for future recalls.
-
Page 15: Programming Map
Change selected settings with settings to Prog 1–6 Start pipetting *SP is available only in eLINE® 5 µl **P MANUAL is not available in multichannel models Start pipetting Start pipetting ***Sd is not available in eLINE® 5 µl... -
Page 16: Speed Adjustment
Super Pipetting performs pipetting with super blow-out function enabling dispensing of very small volumes from the air. SP-mode is available only in eLINE® 5 µl pipette Pipetting with automatic blow-out Reverse pipetting without blow-out P + MIXING Pipetting with blow-out followed... -
Page 17: Super Pipetting (Sp), Pipetting Mode (P) And Pipetting With Mixing (P+Mixing)
7.1. Super Pipetting (SP), Pipetting mode (P) and Pipetting With Mixing (P+MIXING) 1. Press to display PIPET 2. Scroll with until the symbol SP, P or P+MIXING is displayed. 3. Confirm by pressing 4. Select the desired pipetting volume by using the NOTE: When holding down the the volume display... -
Page 18: Reverse Pipetting (Rp)
To mix: 1. Position the tip in to the solution, then press and hold the START button Mixing is performed automatically as long as the START button is held down. 2. Position the tip to dispense. Press START button twice NOTE: The mixing is performed with about 70% of the total volume. -
Page 19: Pipetting With Cycle Counter (P Count)
START button to aspirate the next sample. 7.3. Pipetting With Cycle Counter (P COUNT) The eLINE® performs pipetting with blow-out and the cycle counter function. The cycle counter counts up to 99 pipettings and then returns back to 0. It is possible to choose the cycle number to begin with. -
Page 20: Manual Pipetting (P Manual)
10. Select the speed out with (1= Min and 9 = Max) 11. Press to confirm selections 12. Position the tip to aspirate and press the START button 13. Position the tip to dispense and press the START button . The tip is emptied with blow- out and the piston returns automatically back to the home position. -
Page 21: Multi-Modes
speed in or press or continue from Step 10. 6. Select the speed in with (1= Min and 5 = Max) 7. Press to confirm selection and to display the speed out 8. Select the speed out with (1= Min and 5 = Max) 9. -
Page 22: Multi-Dispensing (D)
8.1. Multi-dispensing (d) The pipette performs repetitive dispensing of a selected volume. The sum of the dispensing aliquots and an automatically selected excess volume is aspirated into the tip. The excess volume is needed to ensure equal operating conditions for each dispensing step. 1. -
Page 23: Diluting (Dd) And Diluting With Mixing (Dd+Mixing)
15. Finally position the tip to discard any remaining excess and press the START button twice NOTE: It is also possible to continue to aspirate and dispense the same volume without the empty function. To continue, keep the START button pressed during the last dispensing and within one second the direction arrow will change. -
Page 24: Sequenced Dispensing (Sd)
10. Select the speed out with (1= Min and 9 = Max) 11. Press to confirm selections 12. Position the tip to aspirate the volume 1 and press the START button 13. With the tip in the air press the START button again to aspirate an air gap 14. - Page 25 4. Select the number of dispensing steps by using 5. Press to confirm the selection 6. Select the first dispensing volume with NOTE: When holding down the volume display starts to scroll faster. 7. Press to confirm selection and to select the next dispensing volume.
-
Page 26: Multi-Aspirating (Sa)
8.4. Multi-aspirating (SA) The pipette performs consecutive aspiration operations of the programmed volume. This mode allows e.g. emptying a microwell plate, sample pooling and other special applications. 1. Press to display MULTI 2. Scroll with until the symbol SA is displayed. 3. - Page 27 1. Press to display MULTI 2. Scroll with until the symbol Ad is displayed. 3. Confirm by pressing 4. Select the desired dispensing volume by using the NOTE: When holding down the volume display starts to scroll faster. 5. Press to confirm the selection and to display the aliquots 6.
-
Page 28: Prog Mode
NOTE: It is possible to stop the second counter and interrupt dispensing at any time by pressing the START button. Releasing the START button activates the counter again and dispensing continues. NOTE: It is also possible to interrupt the dispensing by pressing the START button and then ENTER key simultaneously. -
Page 29: Store Operating Mode To Storage Locations
Recommendations The wide selection of different operating modes makes it possible to perform several different liquid handling tasks with eLINE® pipettes. The operating modes P, P+MIXING, P COUNT, dd, dd+MIXING and SA feature an automatic blow-out and others leave an excess liquid in the tip. The user should follow the recommendations below to ensure optimal performance. -
Page 30: Dispensing With Blow-Out
By holding the START button down during dispensing the piston will stop in the lowest position. This allows the tip to be placed under the liquid surface or against the bottom or the wall of the container during dispensing. Once the liquid is dispensed, the tip can be removed from the container and the START button released. -
Page 31: Maintenance
To avoid pipette and sample contamination and to extend the pipette’s lifetime, Sartorius Safe-Cone Filters (available for pipettes >10 µl) or Sartorius SafetySpace Filter Tips should be used. Sartorius provides service, maintenance, and calibration services through its global network of service centres. -
Page 32: Cleaning The Lower Part Of A Single Channel Pipette (Every Three Months)
If the pipette is in daily use, it is recommended to clean, decontaminate, and grease it every three months. NOTE: We recommend sending multichannel pipettes to your local Sartorius service center for cleaning and greasing. 11.2. Cleaning and Autoclaving The Lower Part of Pipettes Single-channel pipettes The lower parts of the eLINE®... -
Page 33: Sterilizing
Wipe dry. Cleaning and maintaining the lower parts of all multichannel models Opening the lower part of a multichannel pipette should only be done by an authorized Sartorius service provider. Please contact your nearest Sartorius service provider or distributor. 11.2.1 Sterilizing... -
Page 34: Autoclaving
Always follow the autoclaving instructions below. 11.2.2. Autoclaving The lower parts of Sartorius electronic pipettes are autoclavable, excluding the 1200 µl multichannel model. Please see the autoclaving symbol printed on the lower part of your pipette to ensure the section is autoclavable. -
Page 35: Battery Replacement
11.3. Battery Replacement The design of the eLINE® pipettes enables fast and easy battery replacement. The battery replacement pack includes 4 NiMH batteries fixed to the battery cover. If the batteries do not hold a sufficient charge for proper operation follow these steps for replacement of the battery pack. - Page 36 pipettes having regard to the accuracy requirements of the application, frequency of use, number of operators using the pipette, nature of the liquid dispensed and the acceptable maximum permissible errors established by the user. (ISO 8655-1.) Performance test should take place in a draught-free room at 15–30°C, constant to ±0.5°C and relative humidity above 50%.
-
Page 37: Recalibration
NOTE: This method is based on ISO 8655. 12.1. Recalibration The eLINE® electronic pipette’s calibration has been factory checked and certified at 22°C using grade 3 distilled water according to ISO 8655. The pipette’s specifications are guaranteed only with genuine... - Page 38 The length of the piston stroke is electronically monitored and the pipette does not normally need recalibration. However, for special applications the eLINE® pipettes can be recalibrated in PIPET modes (excluding P MANUAL) for one selected volume at a time as follows: 1.
-
Page 39: Troubleshooting
NOTE: Repeated occurrence of error messages indicates an internal error causing failure of the eLINE® to complete the execution of the pipetting. The eLINE® therefore needs to be returned to the nearest Sartorius Service Centre or your local Sartorius service... - Page 40 Insufficient amount of grease Grease accordingly on a piston and o-ring Pipette out of Instrument damaged Return to your Sartorius established specifications service representative for servicing Pipette blocked, aspirated Liquid has penetrated tip cone Clean and grease the...
-
Page 41: Warranty Information
14. Warranty Information eLINE® electronic pipettes are covered by a warranty for two years against defects in materials and workmanship (exept the batteries). Should your eLINE® pipette fail to function according to specifications at any time, please contact your local Sartorius representative immediately. -
Page 42: Recycling Instruction (Weee)
15. Recycling Instruction (WEEE) In compliance with European Directive, WEEE (2002/96EC) on waste and reducting of hazardous substances in electical and electronic equipments, this device must not be recycled as unsorted municipal waste. Instead this device must be collected separately in accordance the local recycling regulations. - Page 43 * The listed systematic and random error values are valid for Pipetting (P) mode only and are achieved under strictly controlled conditions during type tests per ISO 8655. Due to the continuous product development by Sartorius, the systematic and random error values may change without prior notice.
- Page 44 Sartorius Biohit Liquid Handling Oy Laippatie 1 FI-00880 Helsinki Finland Phone +358.755.951 lhinfo.finland@sartorius.com www.sartorius.com Sartorius Lab Instruments GmbH & Co. KG Weender Landstrasse 94 108 37075 Goettingen Germany Phone +49.551.308.0 Fax +49.551.308.3289 www.sartorius.com Copyright by Sartorius, Helsinki, Finland. All rights reserved. No part of this publication...
Need help?
Do you have a question about the eLINE and is the answer not in the manual?
Questions and answers