Table of Contents
Advertisement
Quick Links
Advertisement
Chapters
Table of Contents

Related Manuals for Sartorius ePET


Summary of Contents for Sartorius ePET
- Page 1 Electronic Pipette User Manual...
- Page 3 Electronic Pipette ePET® English 1 Chinese 23...
-
Page 5: Table Of Contents
Contents 1. Intended Use ..................... 2 2. Product Description ..................2 ePET® Single-Channel Pipettes........... 2 ePET® Multichannel Pipettes ............3 3. Pipette Tips ......................3 4. Unpacking ......................3 Electrical Specifications ..............3 Charging the Pipette ..............4 5. Pipette Parts and Materials ................. 5 6. -
Page 6: Intended Use
The ePET® pipette is intended to be used in liquid handling applications for dispensing liquids in the volume range of 0,2 μl to 5 ml. With ePET® pipettes it is recommended to use Sartorius Optifit Tips or SafetySpace™ Filter Tips to ensure the best compatibility and performance. -
Page 7: Epet® Multichannel Pipettes
Optifit Tips and SafetySpace™ Filter Tips are also available as Low Retention Tips. 4. Unpacking The ePET® pipette package contains the following items: 1. Pipette 2. Grease 3. AC/DC Adapter (acts as a recharging unit) 4. -
Page 8: Charging The Pipette
4.2. Charging the Pipette An ON/OFF switch is located at the top of the Connect the pipette. This switch protects the battery from charger to the discharging while the pipette is not in use and pipette's charger not connected to the charger. port 1. -
Page 9: Pipette Parts And Materials
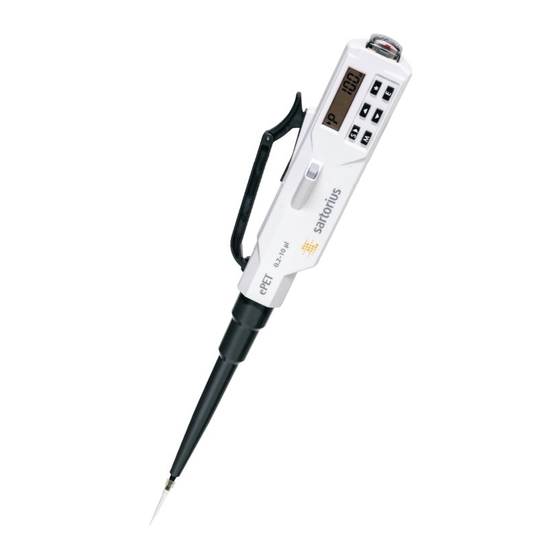
5. Pipette Parts and Materials Charger port ePET® Single-Channel cover (PC) Finger support (at the back) (ASA/PC) Display (glass) Keyboard (silicon keys) Start button (POM) Tip ejector lever (POM) Handle (ASA/PC) Power ON/OFF switch Tip ejector collar (PP) ePET® Multichannel... -
Page 10: Pipette Description
6. Pipette Description The control and the programming of the ePET® electronic pipette are performed using the Power Switch control keys and display. Charger Port 6.1. Controls - Power Switch - Charger Connection - Battery Compartment Control Keys: S Changes speed Moves to next mode ... -
Page 11: Display
6.5. Loading and Ejecting Tips is loaded tightly Original Sartorius tips are recommended for use with Sartorius ePET® pipettes. Before fitting a tip make sure that the pipette tip cone is clean. Press the tip onto the cone of the pipette firmly, to ensure an airtight seal. -
Page 12: Programming The Pipette
7. Programming the Pipette Programming is performed using the six-key keyboard and the LC-display. There are three operating modes offering special functions and varying speeds to choose from. 7.1. Mode Selection and Mode Recall 1. Press repeatedly to view the available modes of the pipette. -
Page 13: Pipetting Mode (P)
7.3. Pipetting Mode (P) The pipette performs ordinary pipetting with blow-out. 1. Press to display ↑ 2. Press to confirm the mode change. 3. Select the desired pipetting volume by using Step 5 Aspiration to increase, and to decrease. (Pipetting Mode) ... -
Page 14: Multi-Dispensing Mode (D)
7.4. Multi-Dispensing Mode (d) In the Multi-Dispensing Mode (d), the pipette performs repetitive dispensings of a selected ↑ volume. During this operation, the desired volume, plus the automatically selected excess volume, is aspirated into the tip. Step 7 Aspiration 1. Press to display (Multi-Dispensing Mode) -
Page 15: Diluting Mode (Dd)
7.5. Diluting Mode (dd) In the Diluting Mode (dd), two different solutions ↑ separated by an air gap are aspirated and then dispensed together with an automatic blow- out. The purpose of the air gap is to prevent contamination while aspirating the second volume, but it will not prevent the two liquids Step 7 Aspiration from mixing in the tip. -
Page 16: Mixing Mode With Pipetting Or Diluting
7.6. Mixing Mode with Pipetting or Diluting (*) In the Mixing Mode, the piston is automatically moved up and down to mix the liquid in the delivery vessel. The mixing time is controlled by the START button. 1. Use to select either on the display. -
Page 17: Pipetting Recommendations
To Mix: 1. Position the tip in the solution, then press ↕ and hold the START button. The mixing is done automatically as long as the START button is held down. 2. Position the tip to dispense. Press the START button twice. -
Page 18: Other Recommendations
- Change the filter on the tip cone regularly (after 50 - 250 pipettings). 9. Storage When not in use, it is recommended that the pipette is stored on a Sartorius Linear stand, ® T i t i connected to the charger. The green charging light should be lit. -
Page 19: Performance Testing
10. Performance Testing It is recommended, the performance of your ePET® pipettes be checked regularly (e.g. every 3 months), and always after in-house maintenance. However, the user should establish a regular testing routine for their pipettes with regard to accuracy requirements of the application,... - Page 20 (ISO 8655-1.) NOTE: Sartorius specifications are achieved in strictly controlled conditions (ISO 8655-6). The user should establish own specifications based on the field of use and the accuracy requirements placed on the pipette (ISO8655-1).
-
Page 21: Maintenance
11. Maintenance To maintain the best results with your ePET® pipette, the cleanliness of every unit should be checked daily. Particular attention should be paid to the tip cone(s). ePET® pipettes have been designed for easy in-house service. However, Sartorius also provides... -
Page 22: Battery Replacement
Test the operation of the tip ejector. NOTE: Check the performance of your Sartorius ePET® pipette regularly, e.g. every 3 months, and always after in-house service or maintenance. 11.3. Battery Replacement If the battery is not sufficiently charged for proper operation of the pipette, follow these steps for replacement of the battery. -
Page 23: Troubleshooting
12. Troubleshooting The ePET® electronic pipette has a built-in monitoring program to control the performance of each pipetting action. If the error message ER1 appears on the display, this means the pipette has been unable to perform the attempted action properly. - Page 24 Troubles, causes and solutions Trouble Possible cause Solution Droplets left Unsuitable tip Use original Sartorius tips inside the tip Non-uniform wetting of the Attach new tip tip plastic Laeakage or pipetted Tip incorrectly attached Attach firmly volume Unsuitable tip Use original Sartorius tips...
-
Page 25: Warranty Information
The Sartorius Quality Assurance Procedure guarantees that the ePET® electronic pipette you have purchased is ready for use. Each ePET® electronic pipette is CE marked, fulfilling the requirements of the EN 55014, 1993/EN 55104, 1995/ ISO 13485:2003 and Directive (98/79 EC). -
Page 26: Performance Specifications
The manufacturer's specifications should be used as guidelines when establishing your own performance specifications in accordance with ISO 8655. Specifications ePET® Single and 8-Channel Pipettes Order No. Channels Volume Test Systematic Random range µl... - Page 27 目录 1. 用途 ··········································································································· 24 2. 电子移液器 ································································································· 24 2.1. ePET® 单道电子移液器 ···························································· 24 2.2. ePET® 多道电子移液器 ···························································· 25 3. 移液器吸头 ································································································· 25 4. 打开移液器包装 ······················································································· 25 4.1. 电气规格 ······················································································· 26 4.2. 移液器充电··················································································· 26 5. 移液器材料 ································································································· 27 6. 移液器说明 ································································································· 28 6.1.
-
Page 28: 电子移液器
1. 用途 ePET® 电 子 移 液 器 的 量 程 范 围 覆 盖 从 0.2- 5000 µ l。推荐使用 Optifit 吸头或 SafetySpace ™ 吸头,最好的兼容性和性能。 这种液体处理装置的设计和作为通用制造的 实验室设备。 操作之前, 推荐阅读本用户手册, 更好的操作 ePET® 移液器。 2. ePET® 电子移液器 新型赛多利斯 ePET® 电子移液器采用不需要 充电支架的直接充电系统,提供了一种颇具 成本效益的电子移液替代方案。该自校正、... -
Page 29: Epet® 多道电子移液器
5-100 200, 350 710221ET 25-250 710801ET 50-1200 1200 3. 移液器吸头 建 议 将 Sartorius Optifit 吸 头 或 SafetySpace ™ 滤芯吸头配合 Sartorius 移液器一同使用。这 些吸头是针对上述移液器设计的,因此能够 确保最佳的兼容性,从而获得最佳的准确性 和精确性。 Optifit 吸头和 SafetySpace ™ 滤芯 吸 头 同 样 具 有低吸附特性的型号。 4. 打开移液器包装 移液器包装包含下列物品:... -
Page 30: 电气规格
4.1. 电气规格 电池 充电 NiMH 电池 充电时间:空电池最多充 12 小时 交流 / 直流适配器 根据当地要求输入电压与电源插头 输出电压 9 VDC 4.2. 移液器充电 移液器顶部有一处“开 / 关 (ON/OFF)”开关。 充电连接 此开关可保护移液器在未使用时不放电,移 液器不能与充电装置连接。 1. 打开移液器 (ON)( 远左端位置 )。 2. 只需将交流 / 直流适配器与兼容的交流电 插座连接,并与移液器连接。 当与交流 / 直流适配器 / 充电装置正确连 注!... -
Page 31: 移液器材料
5. 移液器材料 充电接口 ePET® 单道移液器 (PC) 手指支撑 (背部) (ASA/PC) 显示屏 (玻璃) 键盘 (硅胶) 开始按钮 (聚甲醛) 吸头退除杆 (聚甲醛) 手柄 (丙烯腈/ 充电开/关按钮 苯乙烯/ 丙烯酸酯共聚 止推环 (聚丙烯) 物/聚碳酯) ePET® 多道移液器 显示屏 (玻璃) 安全圆锥过滤器 键盘 10 µl (聚氯乙烯) (硅胶) 100 µl (SS) 1200 µl (聚苯硫醚) 5000 µl (聚乙烯) -
Page 32: 移液器说明
6. 移液器说明 ePET® 电子移液器的控制与编程通过键盘与显 示屏完成,详情如下所示。 电源开关 充电连接 6.1. 控制 电源开关 充电连接 电池盒 控制键: 改变速度 移动到下一模式 电池盒 增加体积或提高速度 减少体积或降低速度 确认设置更改 切换混合开 - 关 “开始”按钮 启动所有机械操作 控制键 量程彩色标识 吸头退除器杆 挤压可以退除移液器吸头 6.2. 开始按钮 “开始”按钮启动吸液操作及根据选择的操 作模式进行分液的操作。操作此按钮仅需快 速按一次。若“开始”按钮保持按下位置, 则活塞将停在最低位置,直到松开“开始” 按钮。该特点适用于所有操作模式,多次分 开始按钮... -
Page 33: 密封与退除吸头
6.4. 显示 左边的显示是状态指示器。它为用户提供有 关编程参数、待执行功能及可分液数量的信 息。 右边显示用于编程及显示不同操作模式需要 的不同体积。 可见密封环时, 6.5. 密封与退除吸头 表明密封严密 建议采用原装赛多利斯吸头与 ePET® 电子移 液器一起使用。在安装吸头之前,确保移液 器吸头锥体洁净。将吸头紧套到移液器锥体 上,确保密封良好。当吸头与吸头锥体之间 形成可见密封环时,表明密封严密。 赛多利斯 ePET® 移液器的设计使吸头的连接 与退除简单轻松。退除吸头时,只需将移液 挤压吸头退除杆, 退除吸头 器放到废品容器上方, 挤压吸头退除杆即可。 6.6. 安全圆锥过滤器 选定赛多利斯 ePET® 电子移液器的吸头锥体 允许采用可选可拆卸的安全圆锥过滤器。过 滤器避免液体与液体蒸汽进入移液器。过滤 器不影响移液器的校正。采用赛多利斯过滤 器镊子,避免用手接触污染的过滤器。 使用镊子插入或 去除一个安全圆 锥过滤器 订购信息 安全圆锥过滤器... -
Page 34: 移液器编程
7. 移液器编程 采用六键键盘与液晶显示屏进行编程。 有三种操作模式,提供特殊功能、改变速度, 以供您的选择。 7.1. 模式选择与模式调出 1. 重复按 查看移液器提供的模式。 2. 当需要的模式显示时,按 。此时,移 液器处于选择模式的准备状态。 只有当活塞处于原始位置 ( 右键标志亮 ) 注! 而不是处于吸液中或分液循环时,才能激活 模式。 7.2. 设置速度 1. 按 显示当前吸液速度。 2. 按 , 直到吸液速度显示 ( “ 5” 快速, 或 “1”慢速 )。 3. -
Page 35: 移液模式
7.3. 移液模式 (P) 移液器执行通常的吹出移液。 ↑ 1. 按 ,以显示 。 2. 按 确认模式更改。 3. 使用 增加, 减少,所需的移液体积。 步骤5 吸液 (移液模式) 按住 或 ,体积显示开始快速滚动。 注! 4. 按 确认选择。 ↑ 5. 将吸头定位到吸液位置, 按下 “开始” 按钮。 6. 将吸头定位到分液位置。按“开始”按钮。 吸头通过吹出清空,并为下一次移液做好 准备。 步骤6 分液 (移液模式) -
Page 36: 多次分液模式 (D)
7.4. 多次分液模式 (d) 移液器执行所选体积的重复分配。在此操作 ↑ 中,所需体积加上自动选择的过量体积被吸 到吸头中。 步骤7 吸液 1. 按 ,以显示 。 (多次分液模式) 2. 按 确认模式更改。 3. 按 或 ,直到显示多次分液体积。 4. 按 确认选择。 5. 按 或 ,直到显示要求的等分数量。 ↑ 6. 按 确认选择。 7. 将吸头定位到吸液位置,按“开始”按钮。 * 标志与左箭头亮,表明复位功能。 步骤8 排出 8. 将吸头定位,排出多余液体,按下“开始” 多余液体... -
Page 37: 稀释模式 (Dd)
7.5. 稀释模式 (dd) 在稀释模式 (dd) 中,移取被空气隔层分开的 ↑ 两种不同溶液,然后采用自动吹出分液。空 气隔层的作用是当移取第二体积时避免污染, 但其不能避免两种液体在吸头内混合。 步骤7 吸液 (稀释模式) 1. 按 ,以显示 。 2. 按 确认模式更改。 3. 采用 ,选择所需的稀释体积 ( 体 或 ↑ 积 1)。 4. 按 确认选择。 5. 按 , 选择显示屏上的样品体积 ( 体 或 步骤8 吸取 积... -
Page 38: 移液后混合(*或+混合)模式
7.6. 移液后混合 (* 或 + 混合 ) 模式 活塞自动上下移动混合输送容器中的液体。 混合时间由“开始”按钮控制。 1. 使用 在显示屏上显示选择 或 。 2. 按 打开混合。显示应为 或 。 注! 按 将交替打开混合“开”与“关”。 3. 按 ,确认模式更改。 对移液来说: 1. 按 增加,按 减少。 2. 按 确认选择。 3. 将吸头定位到吸液位置,按“开始”按钮。 4. 将吸头定位到分液位置,按“开始”按钮。 对稀释来说: 1. 采用 ,选择所需的稀释体积... -
Page 39: 移液建议
对混合来说: ↕ 1. 将吸头放到溶液中,然后按下并保持“开 始”按钮。只要开始按钮一直按下,则混 合自动进行。 2. 将吸头定位到分液位置,按“开始”按钮 两次。 步骤1 混合 (混合模式) 混合采用总体积的大约 70% 进行。 注! ↑ 8. 移液建议 采用不同的操作模式与特殊功能,可以进行 几种不同的液体处理方法。模式 P 与 dd 的特 步骤2 分液 (混合模式) 点是自动吹出,而其它模式的特点是在吸头 内保留过量液体。 遵守以下建议,以确保获得最佳性能。 8.1. 采用吹出模式进行分液 P 及 dd 模式具有自动吹出功能,随后紧接着 活塞立即返回到“初始”位置。为了避免将 液体意外吸回到吸头,建议分液总是在液体 表面上方进行。 通过在分液期间一直保持“开始”按钮按下,... -
Page 40: 其它建议
8.3. 其它建议 吸取液体时,垂直拿着移液器,将吸头放 在液体中几毫米深处。 通过装满与清空吸头五次, 预先清洗吸头。 当分配粘度及密度与水不同的液体时或分 配不是室温的液体时,这一点非常重要。 检查移液器、吸头与液体都处于室温。 避免污染吸头锥体。 当移液器未使用时, 连接移液器充电装置。 若其未与充电装置连接,当其未使用时, 将移液器“关 (OFF)”上。 当安装吸头时,不要将吸头锥体对着吸头 盘撞击,因为这可能损坏几种内部部件。 不要摔落移液器或交流 / 直流适配器,因 为这可能导致过度震动。 避免将移液器曝露在温度变化大、高湿度 与高尘埃环境中。 避免粗心操作。当使用键盘或“开始”按 钮时,只需适当按压即可。 避免在吸头内有液体时将移液器侧放,这 可能会使液体回渗到移液器内部。 总是紧靠接收容器壁移取。将吸头紧靠内 壁,上拉拿出吸头。 定期更换吸头上的过滤器 ( 移液 50-250 次之后 )。 9. 贮存 当移液器不使用时,建议将移液器放在移液 器支架上, 处于 “开” 位置, 与充电装置连接。 绿色充电灯应为亮。... -
Page 41: 性能测试
10. 性能测试 建议定期(如每 3 个月)测试赛多利斯移液 器的性能,在自行维护后必须测试性能。用 户应该根据移液器使用的精准度要求、使用 频率、移液器的操作人员数量、分配液体的 性质以及可接受的最大允许误差 (ISO 8655-1) 等来确定定期测试。 10.1. 性能测试 性能测试应该在无风的房间中进行,房间温 度为 15-30 ° C,波动为 ± 0.5 ° C,相对湿度高于 50%。移液器、吸头以及测试水应该在房间 里放足够长的时间(至少 2 小时),达到和 房间条件的平衡。使用蒸馏水或者去离子水 (ISO 3696,等级 3)。使用根据 ISO 8655-6 标准的分析天平。 称重 1. 调整所需测试体积 V 。 2. 将吸头小心地安装到吸头圆锥上。 3. - Page 42 Z- 值 (µl/mg): 温度 ( ° C) 气压 (kPa) 101.3 20.0 1.0028 1.0028 1.0029 1.0029 20.5 1.0029 1.0029 1.0030 1.0030 21.0 1.0030 1.0031 1.0031 1.0031 21.5 1.0031 1.0032 1.0032 1.0032 22.0 1.0032 1.0033 1.0033 1.0033 22.5 1.0033 1.0034 1.0034 1.0034 23.0 1.0034 1.0035...
-
Page 43: 清洗消毒
11. 维护 赛多利斯 ePET® 电子移液器要求定期进行清 洗,确保无故障操作。定期更换吸头圆锥过 滤器。 ePET® 移液器已经被设计为便于清洗和保养。 然而,赛多利斯还提供了一个完整的维修和 校准服务,包括服务报告和性能证书。请内 部维护或将您的移液器寄回测试 / 校准。在 寄出之前,请确保没有任何污染。请告知我 们的客服移液器被用于什么危险材料。 定期检查 ePET® 移液器 (例如每 3 个月) , 注! 总是内部服务或维修后。 11.1. 清洗消毒 ePET® 电子移液器应该每天检查清洁情况。用 70% 乙醇,60% 的异丙醇或者温和型清洁剂 对表面去污。 用湿布轻擦移液器表面并拭干。请额外注意 吸头连件,如果需要的话请更换安全圆锥过 滤器。(6.6 章) 11.2. 内部维护 1. 取下吸头推出器套。轻轻地逆时针转动... -
Page 44: 电池更换
剂的烧杯中至少 30 分钟,采用蒸馏水冲洗部 件,然后最好是在暖风中干燥。 5. 采用提供的润滑油脂在活塞上薄薄地涂上 一层。不要使用任何其它润滑油脂。检查 活塞表面上无任何绒屑或颗粒。避免油脂 涂得太多,尤其是在活塞底部不要涂得太 多。 6. 将活塞与吸头锥体重新旋回其原位,安装 移液器,更换推出器环管,使推出器手柄 连接卡进推出器套的连接槽内。若安装了 过滤器的话,更换过滤器。 7. 按“开始”按钮几次,试验移液器。试验 吸头推出器操作。 定期检查赛多利斯 ePET® 的性能,如每 注! 三个月进行一次,并在内部维护或维修之后 总是检查其性能。 11.3. 电池更换 若电池无法保持足够的电力来维持移液器的 正常操作,按照下述步骤更换电池。 1. 将移液器关上 (OFF)。 2. 取下移液器背部的两颗顶部螺钉,取下电 池盖。 3. 上抬使电池脱出电池座,小心取出电池。 4. 安装新 NiMH- 电池,正极端对准电池座 底部的接触弹簧... -
Page 45: 故障排除
12. 故障排除 赛多利斯 ePET® 电子移液器具有内部监控程 序,控制每次移液操作的性能。若错误信息 ER1 出现在显示屏上,意味着移液器无法正 确进行预定操作。若看到这种错误信息,请 按照下述方法处理: 1. 将移液器连接充电器充电 15 分钟。 2. 按 ,清除屏幕上的错误信息。 3. 按 “开始” 按钮, 设置移液器到其初始位置。 注! 由于此步将清空吸头,建议重新安装移 液器前,取下吸头。 有时 ER1 情况可能会因切断的电源插座而起, 或为移液器在充电期间处于“关”位置。 重复出现 ER1 信息,是因为出现内部错误, 无法完成移液操作。移液器需要返回当地赛 多利斯代表处修理。... - Page 46 故障,可能原因和解决方案 故障 可能原因 解决方案 吸头内部残留液滴 吸头不合适 采用原装吸头 塑料湿润不均匀 连接新的吸头 泄漏或移取体积 吸头连接不正确 连紧 太小 吸头不合适 采用原装吸头 吸头与吸头锥体之间存在 清洁吸头锥体,连接新 外部杂质颗粒 的吸头 仪器污染 清洁和润滑O形环和活 塞,清理过滤圆锥(*) 活塞与O形环的润滑油涂 对活塞与吸头锥体进行清 得不够 洁与涂润滑油脂。进行相 应的润滑。 O形环不正确定位或损坏 更换O形圈 错误操作 仔细按照指示 校准或改变不适合的液体 根据指令调整 仪器损坏 送去维修 按钮卡住或移动 活塞污染 清洁和润滑O形环和活 不正常 塞,清理过滤圆锥 液体渗过吸头锥体...
-
Page 47: 保修信息
每支赛多利斯 ePET® 在生产商发货之前都进 行了试验。赛多利斯质量保证程序保证您购 买的赛多利斯 ePET® 能够随时可用。 每 支 赛 多 利 斯 ePET® 是 CE - 标 记 的, 符 合 EN 55014, 1993 / EN 55104, 1995 / ISO 13485: 2003 及 IVD 指令 (98/79 EC) 的要求。 14. 回收说明 (WEEE) 根据欧洲指令... -
Page 48: 性能规格
15. 性能规格 所提供的性能参数使用原装吸头测得。当您 根据 ISO8655 确定自己的性能参数时,厂家 参数仅供参考。 规格 ePET® 单道和 8 道移液器 量程 ( µ l) 产品编号 通道数 测量体积 系统误差 随机误差 ( µ l) 710521ET 0,2 - 10 0,90 0,50 1,00 0,70 2,50 1,50 710011ET 5 - 100 0,40 0,15... - Page 49 赛多利斯移液器服务中心是国内最专业的移 液器维修和校准服务中心。 赛多利斯移液器服务中心是总公司在全球推 广的最高级别的移液器售后服务。 赛多利斯移液器服务中心的技术人员是经过 赛多利斯和英国移液器维修中心的认真培训, 同时我们的技术人员具有丰富的维修和校准 经验。 赛多利斯校准实验室于 2011 年 7 月 11 日正 式获得中国合格评定国家认可委员会 (CNAS) 的“检测与校准实验室”认可。 在这里,我们不仅可以提供赛多利斯移液器 的维修和校准服务,还可以提供赛多利斯以 外的其他品牌移液器的维修和校准服务 : 所有类型的移液器 所有规格的移液器 所有量程的移液器 维修热线:0512-66168157、66168159 邮箱:service@pipettedoctor.cn 网址:www.pipettedoctor.cn 在我们的服务中心,您的移液器将会得到最 高标准的维修和校准服务。 以下是我们的优势: 专业的一站式服务 无需将不同品牌移液器寄回不同售后服务 中心 方便快捷,无需您费神 我们的服务合约为您节约维修成本...
-
Page 50: 移液器家族其他成员
学性、出色的 少 液 体 在 吸 性 能, 是 您 头 中 的 残 留 的不二选择。 量, 节 省 珍 贵 的 试 剂 和 样品。 Optifit Proline® 吸头 手动移液器 Midi Plus 瓶口分液器 大容量液体助吸器 欲了解更多产品信息,请咨询: 电话:400.920.9889 | 800.820.9889 shawn.li@sartorius.com www.sartorius.com.cn... -
Page 51: 实验室赛多利斯其他产品
实验室 赛多利斯其他产品 实验室天平 实验室纯水 微生物检测 实验室过滤/超滤... - Page 52 Contact details Sartorius Liquid Handling Oy Laippatie 1 00880 Helsinki Finland Phone +358.9.755.951 lhinfo.finland@sartorius.com Sartorius Lab Instruments GmbH & Co. KG Weender Landstrasse 94-108 37075 Goettingen Germany Phone +49.551.3080 Fax +49.551.308.3289 www.sartorius.com 赛多利斯科学仪器(北京)有限公司 Email: info.cn@sartorius.com 热线电话:400 920 9889 | 800 820 9889 上海...
Need help?
Do you have a question about the ePET and is the answer not in the manual?
Questions and answers