
Subscribe to Our Youtube Channel
Related Manuals for Invertek Optidrive P2 series


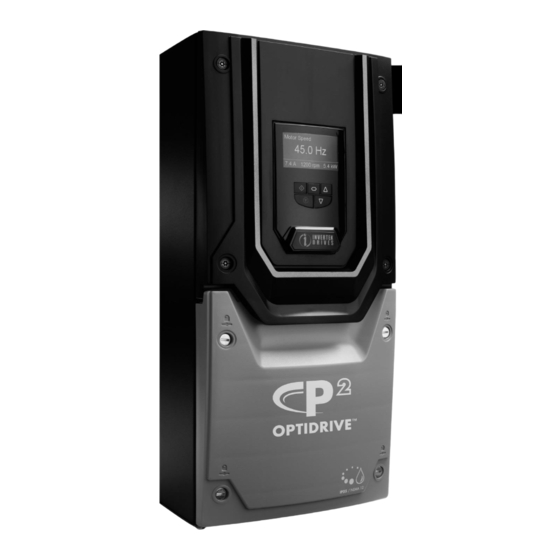
Summary of Contents for Invertek Optidrive P2 series
- Page 1 AC Variable Speed Drive 0.75kW – 160kW / 1HP – 250HP 200 – 480 Volt 1 & 3 Phase Installation & Operating Instructions...
- Page 2 Optidrive ODP-2 User Guide Revisions 1.30 Optidrive P2 IP20 Easy Start Up Guide AC Supply Connection Supply Voltage 3 Phase Units : Connect L1 L2 L3, PE 200 – 240 Volts + / - 10% 1 Phase Units : Connect L1, L2, PE 380 –...
- Page 3 Optidrive ODP-2 User Guide Revision 1.30 Optidrive P2 IP55 Easy Start Up Guide Display Keypad Operation can be found on page 27 IMPORTANT HARDWARE ENABLE 12 13 Link the terminals as shown above, optionally through switch contacts to enable the drive AC Supply Connection Control Terminals 200 –...
- Page 4 Optidrive ODP-2 User Guide Revisions 1.30 Optidrive P2 IP66 Easy Start Up Guide Display Keypad Operation can be found on page 27 IMPORTANT HARDWARE ENABLE 12 13 Link the terminals as shown Above, optionally through switch contacts to enable the drive Control Terminals Run / Stop 10K Pot...
- Page 5 Note frequency, motor, cable lengths and installation methods adopted. For motor cable lengths greater than 100m, an output dv / dt filter must be used, please refer to the Invertek Stock Drives Catalogue for further details Vector Speed and Torque control modes may not operate correctly with long motor cables and output filters. It is recommended to operate in V/F mode only for cable lengths exceeding 50m All rights reserved.
-
Page 6: Table Of Contents
Optidrive ODP-2 User Guide Revisions 2.10 Introduction ..............................7 1.1. Important safety information .................................. 7 General Information and Ratings ........................8 2.1. Part Number Construction and Definition ............................... 8 2.2. Drive model numbers – IP20 ..................................9 2.3. Drive model numbers – IP55 .................................. 10 2.4. -
Page 7: Introduction
Ensure that all terminals are tightened to the appropriate torque setting Do not attempt to carry out any repair of the Optidrive. In the case of suspected fault or malfunction, contact your local Invertek Drives Sales Partner for further assistance. www.invertekdrives.com... -
Page 8: General Information And Ratings
Optidrive ODP-2 User Guide Revisions 2.10 2. General Information and Ratings 2.1. Part Number Construction and Definition The model number of each Optidrive P2 is constructed according to the following system. Product Family PCB Coating ODE : E Series N : Standard Localised Coating ODP : Optidrive Plus Series C : Full Conformal Coating ODV : HVAC Product Series... -
Page 9: Drive Model Numbers – Ip20
Optidrive ODP-2 User Guide Revision 2.10 2.2. Drive model numbers – IP20 Mechanical Dimensions and Mounting information are shown from section 3.4.1 on page 12. Electrical Specifications are shown in section 10.2 on page 48. 200-240V ±10% - 1 Phase Input kW Model HP Model Output Current (A) -
Page 10: Drive Model Numbers – Ip55
Optidrive ODP-2 User Guide Revisions 2.10 2.3. Drive model numbers – IP55 Mechanical dimensions and mounting information are shown from section 3.4.2 on page 13. Electrical specifications are shown in section 10.2 on page 48. 200-240V ±10% - 3 Phase Input kW Model Number HP Model Number Output Current (A) -
Page 11: Drive Model Numbers – Ip66
Optidrive ODP-2 User Guide Revision 2.10 2.4. Drive model numbers – IP66 Mechanical dimensions and mounting information are shown from section 3.4.3 on page 14. Electrical specifications are shown in section 10.2 on page 48. 200-240V ±10% - 1 Phase Input kW Model HP Model Output... -
Page 12: Mechanical Installation
Optidrive ODP-2 User Guide Revisions 2.10 3. Mechanical Installation 3.1. General The Optidrive should be mounted in a vertical position only, on a flat, flame resistant, vibration free mounting using the integral mounting holes or DIN Rail clip (Frame Size 2 only). ... - Page 13 Optidrive ODP-2 User Guide Revision 2.10 3.4.2. IP55 Units Drive Weight Size 17.72 16.85 17.05 0.31 9.92 6.73 4.33 4.25 0.17 0.30 11.5 25.4 21.26 20.28 20.47 0.31 10.63 9.25 6.89 4.25 0.17 0.30 50.7 34.06 32.68 33.07 0.39 12.99 12.99 7.87 0.22...
- Page 14 Optidrive ODP-2 User Guide Revisions 2.10 3.4.3. IP66 Units Note : Unit shown is a non-switched unit Drive Weight Size 10.12 8.66 7.87 1.12 9.41 7.40 7.01 0.17 0.33 10.6 12.20 10.89 9.90 1.31 10.47 8.29 7.87 0.17 0.33 16.8 Mounting Bolts Tightening Torques Frame Size...
-
Page 15: Guidelines For Enclosure Mounting (Ip20 Units)
The enclosure design and layout should ensure that the adequate ventilation paths and clearances are left to allow air to circulate through the drive heatsink. Invertek Drives recommend the following minimum sizes for drives mounted in non-ventilated metallic enclosures:- Drive... -
Page 16: Guidelines For Mounting (Ip55 Units)
Optidrive ODP-2 User Guide Revisions 2.10 3.7. Guidelines for mounting (IP55 Units) Before mounting the drive, ensure that the chosen location meets the environmental condition requirements for the drive shown in section 10.1 on page 48. The drive must be mounted vertically, on a suitable flat surface ... -
Page 17: Removing The Terminal Cover
Optidrive ODP-2 User Guide Revision 2.10 3.9. Removing the Terminal Cover 3.9.1. Frame Sizes 2 & 3 Using a suitable flat blade screwdriver, rotate the two retaining screws indicated until the screw slot is vertical. 3.9.2. Frame Size 4 3.9.3. Frame Size 5 Using a suitable flat blade Using a suitable flat blade screwdriver, rotate the two... -
Page 18: Routine Maintenance
Optidrive ODP-2 User Guide Revisions 2.10 3.9.4. Frame Sizes 6 & 7 Using a suitable flat blade screwdriver, rotate the six retaining screws indicated until the screw slot is vertical. 3.10. Routine Maintenance The drive should be included within the scheduled maintenance program so that the installation maintains a suitable operating environment, this should include: ... -
Page 19: Electrical Installation
4.1. Grounding the Drive This manual is intended as a guide for proper installation. Invertek Drives Ltd cannot assume responsibility for the compliance or the non-compliance to any code, national, local or otherwise, for the proper installation of this drive or associated equipment. -
Page 20: Wiring Precautions
Optidrive ODP-2 User Guide Revisions 2.10 4.1.2. Grounding Guidelines The ground terminal of each Optidrive should be individually connected DIRECTLY to the site ground bus bar (through the filter if installed). Optidrive ground connections should not loop from one drive to another, or to, or from any other equipment. Ground loop impedance must confirm to local industrial safety regulations. -
Page 21: Operation Of 3 Phase Drives From A Single Phase Supply
Optidrive ODP-2 User Guide Revision 2.10 4.4. Operation of 3 Phase drives from a Single Phase Supply A special function of Optidrive P2 allows all drives designed for operation on 3 phase supplies to be operated on a single phase supply of the correct rated voltage at up to 50% of the nominal capacity. -
Page 22: Control Terminal Wiring
Optidrive ODP-2 User Guide Revisions 2.10 4.8. Control Terminal Wiring All analog signal cables should be suitably shielded. Twisted pair cables are recommended. Power and Control Signal cables should be routed separately where possible, and must not be routed parallel to each other. ... -
Page 23: Safe Torque Off
Optidrive ODP-2 User Guide Revision 2.10 4.10. Safe Torque Off Safe Torque OFF will be referred to as “STO” through the remainder of this section. 4.10.1. Responsibilities The overall system designer is responsible for defining the requirements of the overall “Safety Control System” within which the drive will be incorporated;... - Page 24 Number A fault has been detected within either of the “Sto-F” Refer to your Invertek Sales Partner internal channels of the “STO” circuit. 4.10.6. “STO” Function response time The total response time is the time from a safety related event occurring to the components (sum of) within the system responding and becoming safe.
- Page 25 Optidrive ODP-2 User Guide Revision 2.10 4.10.7.1. Recommended “STO” wiring Using an External 24Vdc Power Supply. Using the drives on-board 24Vdc supply Protective Capped Trunking or equivalent to prevent Protective Capped Trunking STO Cable short circuit to an or equivalent to prevent external Voltage source.
- Page 26 Optidrive ODP-2 User Guide Revisions 2.10 4.10.2. “STO” Function Maintenance. The “STO” function should be included within the control systems scheduled maintenance program so that the function is regularly tested for integrity (Minimum once per Year), furthermore the function should be integrity tested following any safety system modifications or maintenance work.
-
Page 27: Managing The Keypad
Optidrive ODP-2 User Guide Revision 2.10 5. Managing the Keypad The drive is configured and its operation monitored via the keypad and display. 5.1. Keypad Layout and Function –LED Keypad Used to display real-time information, to access and exit NAVIGATE parameter edit mode and to store parameter changes Used to increase speed in real-time mode or to increase parameter values in parameter edit mode... -
Page 28: Advanced Keypad Operation Short Cuts
Optidrive ODP-2 User Guide Revisions 2.10 5.3. Advanced Keypad Operation Short Cuts Function When Display shows... Press... Result Example Display shows The next highest Parameter xxx Press group is selected Fast Selection of Parameter Groups Display shows Note : Parameter Group ... -
Page 29: Drive Operating Displays
Optidrive ODP-2 User Guide Revision 2.10 5.5. Keypad Layout and Function –OLED Keypad OLED Display Main Displayed Parameter Control Keypad Shows which of the selectable Provides access to the drive parameters, and parameters is currently being shown on also allows control of the drive when Hand the main display, e.g. -
Page 30: Changing The Language On The Oled Display
Optidrive ODP-2 User Guide Revisions 2.10 5.8. Changing the Language on the OLED Display Hold down the Start and Up keys Use the Up and Down arrows to for >1s select a language. Press the Navigate button to select. 5.9. Resetting Parameters to Factory Default Settings LED Display Press and hold the Keys for at least 2... -
Page 31: Terminal Control
Optidrive ODP-2 User Guide Revision 2.10 5.10. Terminal Control When delivered, the Optidrive is in the factory default state, meaning that it is set to operate in terminal control mode and all parameters have the default values as indicated in section 6. ... -
Page 32: Keypad Control
Optidrive ODP-2 User Guide Revisions 2.10 5.11. Keypad Control To allow the Optidrive to be controlled from the keypad in a forward direction only, set P1-12 =1: Connect the drive to the supply, ensuring the correct voltage and fusing / circuit breaker protection – see section 10.2. ... -
Page 33: Parameters
Optidrive ODP-2 User Guide Revision 2.10 6. Parameters 6.1. Parameter Set Overview The Optidrive P2 Parameter set consists of 6 groups as follows: Group 0 – Read Only Monitoring Parameters Group 1 – Basic Configuration Parameters Group 2 – Extended Parameters ... - Page 34 Optidrive ODP-2 User Guide Revisions 2.10 Parameter Name Minimum Maximum Default Units P1-11 V/F Mode Voltage Boost Drive Rating Dependent Voltage boost is used to increase the applied motor voltage at low output frequencies, in order to improve low speed and starting torque.
-
Page 35: Digital Input Functions
Optidrive ODP-2 User Guide Revision 2.10 7. Digital Input Functions 7.1. Digital Input Configuration Parameter P1-13 Digital Input 1 Digital Input 2 Digital Input 3 Analog Input 1 Analog Input 2 P1-13 (Terminal 2) (Terminal 3) (Terminal 4) (Terminal 6) (Terminal 10) User defined User defined... - Page 36 Optidrive ODP-2 User Guide Revisions 2.10 The “Selected Speed Reference” referred to in the above table is determined by the value set in P1-12 (Control Mode) : P1-12 (control Mode) Selected Speed Reference 0 : Terminal Mode Analog input 1 1 : Keypad Mode (uni-directional) Digital Potentiometer 2 : Keypad Mode (bi-directional)
-
Page 37: Extended Parameters
Optidrive ODP-2 User Guide Revision 2.10 8. Extended Parameters 8.1. Parameter Group 2 - Extended parameters Parameter Name Minimum Maximum Default Units P2-01 Preset / Jog Frequency / Speed 1 P1-02 P1-01 Hz / Rpm P2-02 Preset / Jog Frequency / Speed 2 P1-02 P1-01 10.0... - Page 38 7 : Analog Input 2 Signal Level >= Limit. 1 Logic when the signal applied to the Analog Input 2 exceeds the adjustable limit 8 : Hoist Brake Control. The relay can be used to control the motor holding brake on a hoist. Contact your local Invertek Sales Partner for further information on using this feature.
- Page 39 Optidrive ODP-2 User Guide Revision 2.10 Parameter Name Minimum Maximum Default Units P2-23 Zero Speed Holding Time 60.0 Seconds Determines the time for which the drive output frequency is held at zero when stopping, before the drive output is disabled P2-24 Effective Switching Frequency Drive Rating Dependent...
- Page 40 P2-25 3: DC Bus Power Supply Mode. This mode is intended to be used when the drive is powered directly via the +DC and –DC Bus connections. Refer to your Invertek Sales Partner for further details. P2-39 Parameter Access Lock 0 : Unlocked.
-
Page 41: Parameter Group 3 – Pid Control
Optidrive ODP-2 User Guide Revision 2.10 8.2. Parameter Group 3 – PID Control Parameter Name Minimum Maximum Default Units P3-01 PID Proportional Gain 30.0 PID Controller Proportional Gain. Higher values provide a greater change in the drive output frequency in response to small changes in the feedback signal. -
Page 42: Parameter Group 4 – High Performance Motor Control
P4-07. 4: Master / Slave. The output torque is controlled based on the signal from the Invertek Master / Slave, whereby 100% input signal level will result in the drive output torque being limited by the value set in P4-07. -
Page 43: Parameter Group 5 – Communication Parameters
Optidrive ODP-2 User Guide Revision 2.10 8.4. Parameter Group 5 – Communication Parameters Par. Name Minimum Maximum Default Units P5-01 Drive Fieldbus Address Sets the fieldbus address for the Optidrive P5-02 CAN Open Baud Rate 1000 kbps Sets the baud rate when CAN Open communications are used P5-03 Modbus RTU Baud Rate 115.2... -
Page 44: Parameter Group 0 – Monitoring Parameters (Read Only)
Optidrive ODP-2 User Guide Revisions 2.10 8.5. Parameter Group 0 – Monitoring Parameters (Read Only) Description Units P0-01 Analog Input 1 Applied Signal Level Displays the signal level applied to analog input 1 (Terminal 6) after scaling and offsets have been applied. P0-02 Analog Input 2 Applied Signal Level Displays the signal level applied to analog input 2 (Terminal 10) after scaling and offsets have been applied. - Page 45 Optidrive ODP-2 User Guide Revision 2.10 Description Units P0-31 Drive Lifetime Operating Time HH:MM:SS Displays the total operating time of the drive. The first value shown is the number of hours. Pressing the Up key will display the minutes and seconds. P0-32 Drive Run Time Since Last Trip (1) HH:MM:SS...
-
Page 46: Serial Communications
Optidrive P2 has an RJ45 connector on the front of the control panel. This connector allows the user to set up a drive network via a wired connection. The connector contains multiple interfaces for different communication protocols:- Invertek’s Optibus Protocol - Used for PC and peripheral connection only Modbus RTU ... - Page 47 Optidrive ODP-2 User Guide Revision 2.10 9.2.2. Modbus Control & Monitoring Registers The following is a list of accessible Modbus Registers available in the Optidrive P2. When Modbus RTU is configured as the Fieldbus option, all of the listed registers can be accessed. ...
-
Page 48: Technical Data
The maximum motor cable length stated applies to using a shielded motor cable. When using an unshielded cable, the maximum cable length limit may be increased by 50%. When using the Invertek Drives recommended output choke, the maximum cable length may be increased by 100% ... - Page 49 The maximum motor cable length stated applies to using a shielded motor cable. When using an unshielded cable, the maximum cable length limit may be increased by 50%. When using the Invertek Drives recommended output choke, the maximum cable length may be increased by 100% ...
-
Page 50: Additional Information For Ul Approved Installations
For input supplies which have supply imbalance greater than 3% (typically the Indian sub- continent & parts of Asia Pacific including China) Invertek Drives recommends the installation of input line reactors. Alternatively, the drives can be operated as a single phase supply drive with 50% derating. -
Page 51: Troubleshooting
Check all three supply phases are present and within the 3% supply voltage level imbalance tolerance. Reduce the motor load If the fault persists, contact your local Invertek Drives Sales Partner Input phase loss trip Drive intended for use with a 3 phase supply, one input phase has been disconnected or lost. - Page 52 Active only when hoist brake control is enabled P2-18 = 8. The torque developed prior to releasing the motor holding brake is below the preset threshold. Contact your local Invertek Sales Partner for further information on using the Optidrive P2 in hoist applications.
Need help?
Do you have a question about the Optidrive P2 series and is the answer not in the manual?
Questions and answers