
Related Manuals for Terex TL80


Summary of Contents for Terex TL80
-
Page 1: Operating Instructions
Wheel Loader OPERATING INSTRUCTIONS Language version 2010-07 Edition 5780211303 Order number TL08020101>0437 From vehicle ID No Translation of the original operating instructions... - Page 2 Terex GmbH Geschäftsbereich Terex Schaeff Schaeffstr. 8 74595 Langenburg Germany Phone +49(0)7905/58-0 Fax +49(0)7905/58-114 www.terex.com E-mail: info@terex.com Please complete before commissioning the wheel loader: Vehicle model: ................Vehicle ID No.: ................Year of construction: ............... Commissioned on: ..............Dealer: This operating manual is protected by limited copyright. It may be reproduced for and used by the drive /...
-
Page 3: Table Of Contents
4.3.1 Starting the engine ...........................42 4.3.2 Monitoring during operation......................43 4.3.3 Switching off the engine ........................43 4.4 Driver's seat / Steering wheel tilt adjustment ..................44 4.5 Heating / ventilation..........................45 4.6 Lighting in compliance with German Road Traffic Regulations (StVZO)..........46 4.7 Hydroinflation of tires ..........................46 TL80... - Page 4 7.9.19 Windshield washer system......................95 7.10 Taking out of service ..........................96 7.10.1 Preservation for temporary taking out of service................96 7.10.2 During immobilization ........................96 7.10.3 After the machine had been taken out of service................96 7.10.4 Disposing of the wheeled loader ....................96 TL80...
- Page 5 9.2 Equipment options ..........................102 9.3 Immobilizer............................103 9.3.1 Activating the immobilizer.......................103 9.3.2 Deactivating the immobilizer ......................103 9.3.3 Learning a new key ........................103 9.3.4 Learning multiple new keys ......................104 9.3.5 Clearing learned keys........................104 9.3.6 Security functions ...........................104 9.3.7 Fault causes ...........................105 TL80...
- Page 6 Table of Contents TL80...
-
Page 7: Introduction 1
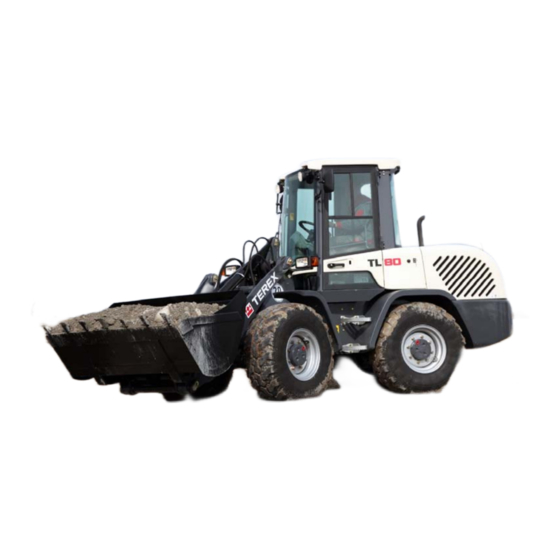
Introduction 1 1 Introduction You decided to buy a Terex TL80 Wheel Loader. The confidence placed in this model will be rewarded efficient economical performance of the machine. This operating manual contains all the information and instructions that are required to handle the machine correctly. -
Page 8: Warranty And Maintenance
Symbol "Danger " machine is constantly in good working order and enjoys a reasonable service life. This symbol indicates a high risk of Insist that only original Terex spare parts are injuries. Strictly observe safety used in the event of any repair work. -
Page 9: Environmental Standards
The environmental standards currently valid must be observed. Engine oil pressure Engine oil temperature Engine oil level Coolant temperature Coolant level Air filter Hydraulic oil Hydraulic oil level Hydraulic oil temperature Hydraulic oil filter clogging indicator TL80... - Page 10 High-beam indicator Danger of crushing Rotating beacon Danger of injury Travel direction The relevant notes in the operating instructions should FWD/REV be observed Travel speed Grease gun FAST Lubricating point Travel speed SLOW Working hydraulics shut-off Unlocked Locked Float position TL80...
-
Page 11: Location Of Safety Signs
Safety signs must always be kept in good condition and legible. Replace any safety sign which has been damaged or disappeared. Use mild detergents and water to clean the safety signs. Do not use any detergents containing solvents. Always specify machine serial number and language when ordering safety signs. TL80... - Page 12 TL80...
-
Page 13: Safety And Accident Prevention 2
The EC declaration of conformity only applies if the earth-moving machine is used in accordance with the operating instructions. It includes the use of original Terex work attachments and other work attachments, which are mentioned in the operating instructions or in other Terex documentation for application at this earth- moving machine. -
Page 14: Intended Use
This risk is borne solely by the user. Strict compliance with operating maintenance instructions and the performance of maintenance work, as well as adherence to the maintenance intervals is also part of intended use. TL80... -
Page 15: General Safety Notes
• Loose parts such as tools or other accessories must be secured to the earth-moving machine. • Open doors, windows, covers, flaps, etc. must be closed or secured so that they cannot slam shut. TL80... -
Page 16: Danger Zone
• If conditions are such that the machine operator’s view of the driving and working zone is restricted, he must be guided or the driving and working zone must be marked by a solid barricade. TL80... -
Page 17: Travel Operation
Outside areas covered general traffic regulations, e.g. on factory premises, traffic regulations should be applied in the proper manner. This should also apply with regard to drivers’ licenses. TL80... -
Page 18: Guides
See regulations book "Demolition work" (ZH 1/614) published German Tiefbau- Berufsgenossenschaft (Civil Engineering Employer’s Liability Insurance Association). TL80... -
Page 19: Working In The Vicinity Of Overhead Power Lines
Such measures could be, e.g. • Switching off the current • Re-routing the overhead line • Cabling, or • Limiting work zone earth-moving machines. TL80... -
Page 20: Change Of Work Attachments, Maintenance, Repair
Stabilize the earth-moving machine that has been lifted with the work attachment, immediately after lifting with a supporting structure. Work under raised machines which are only supported by their hydraulics is forbidden. TL80... -
Page 21: Recovery, Loading, Transportation
In the event of shortcomings which jeopardize the are large enough and that roads and bridges have operating safety of the earth-moving machine, it is sufficient carrying capacity. not to be used until these have been eliminated. TL80... -
Page 22: Fire Prevention
• manual steering (without servo assistance) and • lower work equipment (only if ignition is switched on). TL80... -
Page 23: Technical Data 3
Technical data 3 3 Technical data 3.1 Views • General-purpose bucket and paralell kinematics Fig. 3 Dimensioned drawing - standard bucket and parallel kinematics Tires 405/70 R18 TL80... - Page 24 3 Technical data • Multi-purpose bucket and paralell kinematics Fig. 4 Dimensioned drawing - multi-purpose bucket and parallel kinematics Tires 405/70 R 18 TL80...
- Page 25 Technical data 3 • Fork lift attachment and paralell kinematics Fig. 5 Dimensioned drawing - fork lift attachment and parallel kinematics Tires 405/70 R 18 TL80...
- Page 26 3 Technical data • General-purpose bucket and Z kinematics Fig. 6 Dimensioned drawing - standard bucket and Z kinematics Tires 405/70 R18 TL80...
- Page 27 Technical data 3 • Multi-purpose bucket and Z kinematics Fig. 7 Dimensioned drawing - multi-purpose bucket and Z kinematics Tires 405/70 R18 TL80...
- Page 28 3 Technical data • Fork lift attachment and Z kinematics Fig. 8 Dimensioned drawing - fork lift attachment and Z kinematics Tires 405/70 R18 TL80...
- Page 29 Technical data 3 • Low profile canopy with general-purpose bucket 0.8 m³ Fig. 9 Dimensioned drawing - low profile canopy with standard bucket 0.8 m³ Tires 15.5/55 R18 TL80...
- Page 30 3 Technical data • Fold-down bar with general-purpose bucket 0.8 m³ Fig. 10 Dimensioned drawing - fold-down bar with standard bucket 0.8 m³ Tires 15.5/55 R18 TL80...
-
Page 31: Diesel Engine
Suction return filter in the form of a tank insert filter. Travel speed Forward - Reverse TL80 TL80 S Travel range Travel range Travel range 0 - 7 km/h 0 - 7.0 km/h 0 - 14 km/h "Work"... -
Page 32: Brakes
Electro-hydraulically operated float position for "Lower" work function. Single, four-way control lever (joystick) with integrated direction-of- travel switch, float position switch and switch for additional control circuit. Additional control circuit Max. oil flow 64 l/min Max. operating pressure 230 bar Hydraulic oil cooler Thermostatically controlled. TL80... -
Page 33: Axles
If solid-rubber or foamed tires are used, special measures must be taken and restrictions apply. The tire pressure refers to standard equipment. During fork lift operations, the tire pressure of the front wheels must be increased by at least 0.5 bar. TL80... -
Page 34: Consumables
Wheel hubs, front / rear axle each Transmission oil approx. Coolant each Mixture of water, additives and approx. glycol * The hydraulic oil quantity depends on the equipment level of the machine The filling level indication is always the decisive factor TL80... -
Page 35: Consumable Specifications
Diesel fuel EN 590 Before using RME fuels ASTM D975 1-D / 2-D (rape oil methyl ester), it is essential to consult your responsible Terex dealer for further details. Engine EO 1540 A Engine oil SAE 15W-40 See also engine manufacturer’s... - Page 36 Engine oil Hydraulic oil In compliance with API CH-4 or CI-4 and In compliance with DIN 51524.T3 HVLP In compliance with ACEA E3 / E4 0W-30 0W-40 5W-30 5W-40 10W-30 10W-40 15W-40 20W-50 Viskode °C °F Umgebungstemperatur/Ambient temperature/Température ambiante TL80...
-
Page 37: Permissible Loads In Compliance With German Road Traffic Regulations (Stvzo)
<4500kg Load & carry 0.84 0.81 0.52 0.23 0.20 0.14 Wheeled Use in quarrying 1.27 0.97 0.81 0.47 0.31 0.47 loader Transition travel 0.76 0.91 0.49 0.33 0.35 0.17 >4500kg V-shaped motion 0.99 0.84 0.54 0.29 0.32 0.14 TL80... -
Page 38: Dimensions And Weights
Rear overhang angle ° Ground clearance below propeller shaft Turning radius at outside edge of bucket in transport position 4,160 4,160 Turning radius at outside edge of tires 3,780 3,780 Turning radius at inside edge of tires 1,980 1,980 TL80... -
Page 39: Front Loader Installation
"Out" sec. Stability conforms to DIN 24094 3.14 Bucket Width Capacity, heaped Max. density (γ) m³ General-purpose bucket 1850 Multi-purpose bucket 1850 0.75 Earth bucket 1850 Light-material bucket 1850 Super light-material bucket 1950 Side-dump bucket 1850 High-tip bucket 1850 TL80... -
Page 40: Fork Lift Attachment
3,790 5,060 1,870 2,500 +0,5bar +7,3psi 4,120 5,500 If screw-on rear axle weights or rear tires with hydroinflation are used. During fork lift operations, the tire pressure of the front wheels must be increased by at least 0.5 bar. TL80... -
Page 41: Optional Accessories (Options)
Filling with biodegradable hydraulic oil (ester-based "BIO-E-HYD-HEES") Further optional equipment available on request! Any modifications of Terex products and their equipment using extras and work attachments which are not included in our product range require our written approval. If our approval is not sought, our warranty expires, as does our product liability for any resulting consequential damage. - Page 42 3 Technical data TL80...
-
Page 43: Operation 4
In the event of shortcomings which jeopardize the operating safety, the machine must not be put into operation until these have been eliminated. Before putting the machine into operation, the inspections according to chapter 7.8 must be carried out. TL80... -
Page 44: Display Elements And Operating Controls
4 Operation 4.2 Display elements and operating controls The following list includes non-standard equipment! • Operating controls Fig. 10.1 Operator controls TL80... - Page 45 Control lever - loader installation Travel direction preselection (without function if working hydraulics are disabled) Impulse mode - float position Parking brake Power socket Fuse carrier Fresh air - recirculating air Radio Control rod for mechanical quick-attach device Washer fluid tank TL80...
- Page 46 4 Operation • Instrument panel Fig. 10.2 Instrument panel TL80...
- Page 47 Function only active if working hydraulics are disabled Speed indicator Not assigned* Not assigned* * for non-standard equipment Not assigned* Windshield washer function front/rear Windshield wiper, front Windshield wiper, rear Fan switch - heating Switch - air-conditioning Not assigned* TL80...
-
Page 48: Engine
20 seconds, turn the ignition key to "1" or "0", and pause for at least 1 minute before trying again. Repeat the start-up procedure. Do not drive the engine at full throttle straight away. Drive with restraint until the operating temperature of the engine has been reached. TL80... -
Page 49: Monitoring During Operation
4.3.3 Switching off the engine Do not switch off the engine when running at full throttle, but allow it to run for a short time without load at low idle- running speed. • Turn the ignition key to "0". The engine stops automatically. TL80... -
Page 50: Driver's Seat / Steering Wheel Tilt Adjustment
Tilt adjustment of steering wheel • Push down lever (14/4) • Adjust steering-wheel tilt. • Release lever. Steering wheel height adjustment • Push up lever (14/4). • Adjust steering-wheel height. • Release lever. L824-014 Fig. 14 Operation TL80... -
Page 51: Heating / Ventilation
Fig. 15 Operation circulation, close the foot and front air vents and only open the rear air vents (15/60). • It is recommended to cool down the vehicle interior temperature by no more than 6 to 8°C below outside temperature. TL80... -
Page 52: Lighting In Compliance With German Road Traffic Regulations (Stvzo)
Recommendation when filled to 75% with ℃ antifreeze protection to -30 Values per wheel: Type of tire MgCl Total approx. 405/70 SPT 12.5-20 MPT 335/80 XM 335/80 SPT 12.5-18 MPT 14.5-20 MPT MgCl2 = Magnesium chloride O = Water TL80... -
Page 53: Driving, Steering And Braking
(16/35). By doing so, the switch (16/36) on the instrument panel is without function. The direction of travel is preselected using the travel direction preselection switch on the joystick (16/7). TL80... - Page 54 Fig. 17 Operation • Travel speed is reduced by releasing the accelerator pedal. The hydrostatic travel drive acts as a non-wearing auxiliary brake. • Operate the brake-inching pedal (17/2) as required. See also chapter "4.8.3 Brakes". Fig. 18 Height mark TL80...
-
Page 55: Steering
- irrespective of engine speed - until the machine comes to a stop. Fig. 19 Operation This mechanism permits sensitive driving at maximum engine speed, e.g. when loading a truck, where fast working cycles are required. TL80... -
Page 56: Driving On Roads
20/36) to "0" (neutral position). • Switch off the working hydraulics (20/35). Only shift when machine is at standstill! • Check the function of the direction indicators, hazard warning lights, horn, low/high beam. • Close the cab door. Fig. 20 Operation TL80... -
Page 57: Switching Off The Machine (Parking)
Apply the parking brake (21/9). • Switch the engine off and remove the ignition key. • Lock the cab after finishing work to keep unauthorized persons from getting in. If necessary, use chocks to stop the machine from rolling away. Fig. 21 Operation TL80... - Page 58 4 Operation TL80...
-
Page 59: Working Operation Of The Machine 5
4 Tilt 5 Dump* 6 Float position 7 Lift lift frame 8 Drive forwards and backwards * For grading work, only tilt the joystick half way, because if it is tilted all the way the "regeneration" function takes effect. TL80... -
Page 60: Operation - Loader
(22/47) once to the right or deactivating the starter preheat switch (22/50), "continuous operation" function deactivated. Observe the working direction of the Fig. 22 Operation attachment device. (e.g. rotating direction of broom). The additional control circuit must always switched unless additional equipment is operated. TL80... - Page 61 (23/48) twice to the left or on the symbol, "continuous float" is activated. • By pressing the "float position" preselection button (23/48) once to the right or deactivating the starter preheat switch (23/50), the float position is deactivated. Fig. 23 Operation TL80...
-
Page 62: Changing Work Attachments
It is essential to consult your dealer before mounting such a work attachment. When attachments have been removed, they must be secured against tilting and overturning to avoid possible injuries to persons. TL80... -
Page 63: Assembly Of Work Attachments
Fig. 24 Quick-attach system completely extended and the lock clicks in. • Ensure that the work attachment and the lock are properly seated. • The control rod is kept in the left-hand storage box in the cab. TL80... - Page 64 • Connect hydraulically operated work attachment to the connection of the additional control circuit. Fig. 25 Operation The additional control circuit (25/47) must be switched off unless a hydraulically operated additional attachment is connected. Fig. 26 Hydraulic quick-attach system TL80...
-
Page 65: Notes On How To Work With The Machine
• Plan the excavating work in such a way as to enable the wheel loader to drive forward with full bucket out of the excavation. • Keep the outward run of the excavation as flat as possible. TL80... - Page 66 5 Working Operation of the machine TL80...
-
Page 67: Recovery And Transport Of The Machine 6
Re-tighten the nut (28/1). Torque: 30 Nm Absolute cleanliness is essential when working on the hydraulic system. Always secure the machine with chocks and relieve the hydraulic system of pressure before carrying out maintenance and repair work. Fig. 28 High-pressure relief valve TL80... -
Page 68: Loading The Machine Using A Crane
Attach the excavator to the points illustrated (fig. 30) in the correct manner. Be aware of the total transport height. Risk of accident when driving in tunnels, under bridges, etc.! L824-030 Transport dimensions chap. Fig. 30 Lashing for transport Technical data. TL80... -
Page 69: Maintenance And Care 7
After every 1,000 operating hours or 12 months Chapter 7.8.4 Every 2,000 operating hours After every 2,000 operating hours or after 2 Chapter 7.8.4 years The first date to arrive always applies also applicable if new or overhauled diesel engines are put into operation. TL80... -
Page 70: Regular Oil Analysis
Transmission oil: 500 running hours • Engine oil: 100 running hours Based first results, laboratory recommends the interval for the next sampling. Ask your Terex dealer for an information booklet detailing the scope and procedures of the oil analysis. TL80... -
Page 71: Inspection Parts And Aids
• If lubricants which do not conform to our recommendations are used, consequential damage may occur for which we will not assume liability, even inside the warranty period. • For lubricant specifications see section 3.9. TL80... -
Page 72: Care And Cleaning
When installing the battery, ensure good plan and a test of all work cycles, steering and driving functions carried out. contact of terminal connections. • Only tighten terminal screws so that they are "hand-tight", to prevent deformation of the terminal cones! TL80... - Page 73 A = Summer diesel Flow improvement agents are to be selected according to the specifications B = Winter diesel of your fuel supplier. C = Added proportion of petroleum Petrol shall added. D = Outside temperature Danger of explosion! TL80...
-
Page 74: Checking, Maintenance And Inspection Plans
7 Maintenance and Care 7.8 Checking, maintenance and inspection plans 7.8.1 Initial inspection (hand-over inspection) Fig. 31 Initial inspection TL80... - Page 75 Test run, hydraulic function check and test work. Visual inspection of all hoses, pipes, cylinders, etc. for leak tightness Check function of electrical indicating and warning elements, as well as the light system Sign hand-over card and return to manufacturer TL80...
-
Page 76: Daily And Weekly Tasks
7 Maintenance and Care 7.8.2 Daily and weekly tasks Inspection and maintenance jobs to be performed by service personnel Fig. 32 Inspection and service schedule TL80... - Page 77 Check if the dust filter for cab ventilation is dirty and clean if required 7.9.18 Machine damage due to strong accumulation of dust. • Shorten the inspection and cleaning intervals! Check function, condition and completeness of safety equipment Lubricate the machine according to overview of lubricating points 7.8.3 TL80...
-
Page 78: Overview Of Lubricating Points
7 Maintenance and Care 7.8.3 Overview of lubricating points Replace defective grease nipples immediately and check if grease passes through! Fig. 33 Lubrication schedule - parallel kinematics L824-033_Z-Kine_2010 Fig. 33 Lubrication schedule - Z kinematics TL80... - Page 79 Rear axle bearing Door hinges Multi-purpose bucket Multi-purpose bucket cylinder * ( ) Z kinematics In the case of special operating conditions, e.g. working on sandy ground, the lubrication intervals should be shortened, in order to encourage self-cleaning of bearing points. TL80...
-
Page 80: Inspection Plan
Check condition of tires, tire pressure and fastening 7.9.14 of wheel nuts Check fastening of axles and propeller shaft Check bearing bushings bolts work equipment and replace if necessary Check bushings and bolts of the articulation and the articulated steering and replace if necessary TL80... - Page 81 Sign inspection card and return to manufacturer 1) at least every 2 years 2) Extension of oil change intervals according to oil sample analysis and laboratory report. For further information see section 7.3. 3) every 5 years or 3,000 running hours 4) Within warranty. TL80...
-
Page 82: Inspection And Maintenance Work
7.9.2. • Top up engine oil to the "MAX” mark on the oil dipstick (35/1) using the filling hole (35/2). • Start the engine and run at low idle speed for approx. 2 min. • Stop the engine. TL80... -
Page 83: Engine Oil Filter
Check filter head condition and clean. L824-036 • Fill the new filter with oil, wet the sealing ring Fig. 36 Engine oil filter with oil and tighten firmly by hand. • After a test run, check the tightness of the engine oil filter cartridge. TL80... -
Page 84: Cooling System - Combined Hydraulic Oil-Water Cooler
Refill with a 50%-50% mixture of water and antifreeze. 7.9.3.2 Checking antifreeze Before the beginning of the cold season, check the level of antifreeze. • The antifreeze is factory-set to -25 °C. If temperatures are lower, the level of antifreeze must be adjusted accordingly. TL80... - Page 85 • Fill the cooling system with coolant and close the cap. • Start the engine and bring to operating temperature; turn off the engine and allow to Fig. 37-2 Combined cooler cool. • Check the coolant level and top up coolant (several times, if necessary). TL80...
-
Page 86: Fuel System
Fig. 39 Fuel filter The fuel system does not have to be vented. Fuel tank • Drain water from the fuel tank via the drain plug (40/1). • Clean the filler screen (40/2) and check for damage. L824-040 Fig. 40 Fuel tank TL80... - Page 87 Connect the new rubber hoses with the connection pieces • Connect the rubber hoses (42/3) to the injection valves. • Connect the rubber hose (42/1) to the fuel tank. L824-042 • Check tightness. Fig. 42 Fuel leakage oil lines TL80...
-
Page 88: Air Filter, Air Intake
• after 2 years of operation at the latest. • if the service indicator switches on after the main cartridge has just been serviced. • if the main cartridge is damaged. • if the safety cartridge is defective. TL80... - Page 89 Grasp the safety cartridge (45/3) by the two clips (45/6), withdraw by moving slightly to and fro, and dispose of it. HR32-053 • Insert a new safety cartridge and check that it Fig. 45 Replacing air filter cartridge is correctly positioned. • Re-install the main cartridge. TL80...
- Page 90 (46/2). Tears and perforations in the paper bellows can be determined using a torch. S515-45 Never continue to use damaged main Fig. 46 Cleaning the main cartridge cartridges. If in doubt, use a new one. TL80...
-
Page 91: V-Belt
Slacken the fastening screws (47/1). • Swing the generator (47/2) until the tension is correct. • Re-tighten the fastening screws. • Check the tension again. 7.9.7 Checking Valve Lash The valve lash must be checked by your service specialist. TL80... -
Page 92: Brakes
Perform the bleeding process. • Remove the bleeder hose and re-tighten the bleeder screw. • Dismount the bleeding device and close the brake oil container using the original cover. • Re-mount the cover on the front-end. Fig. 50 Venting the brake TL80... -
Page 93: Hydraulic Oil Tank
Screw back on the drain plug carefully. Fig. 51 Hydraulic oil tank • Fill up with clean hydraulic oil using the breather. To do so, remove the filter head (51/3). • Screw back on the breather head. • Screw back in the oil dipstick. TL80... -
Page 94: Hydraulic Oil Cooler
If necessary, clean with cold cleaner or steam jet device with oil separator over a suitable surface. Do not spray generator directly with water or jet stream while L824-037 doing so. Fig. 52 Hydraulic oil cooler Run engine hot afterward to prevent formation of rust. TL80... -
Page 95: Hydraulic Oil Filter
• Screw back on the filter cover (53/1) and tighten using a torque of 20Nm. • Screw back in the oil dipstick. • Check the tightness of the filter by means of a test run. L834-053 Fig. 53 Hydraulic oil filter TL80... -
Page 96: Breather
• Clean the screen (54/4) and check for damage; replace if required. • Screw in new breather (54/2) with O-ring (54/3) and tighten by hand. • Screw back in the oil dipstick. L834-054 Fig. 54 Breather TL80... -
Page 97: Axles
• Flush out the axle if necessary. • Screw back on the drain plug carefully. • Pour in oil using the inspection-filling hole until oil escapes. Fig. 55 Front axle • Carefully close the inspection-filling plug. TL80... - Page 98 (56/3) and drain oil. • Flush out the axle if necessary. • Carefully close the drain plugs. • Pour in oil using the inspection-filling hole (56/1) until oil escapes. • Carefully close the inspection-filling plug. L834-056 Fig. 56 Rear axle TL80...
-
Page 99: Wheels
(M 20x1,5) daily and subsequently every week, and tighten to the correct torque if necessary. Fastening torque: 460 Nm • When fitting a wheel, tighten the nuts to the correct torque crosswise in several stages. TL80... -
Page 100: Injection Valves
In winter, in particular, take care to ensure that the battery is well charged. Lighting and warning equipment • Check the function of the lighting equipment. • Check the function of the indicator lamps. • Check the function of the warning equipment. TL80... -
Page 101: Cab Ventilation Dust Filter
Fasten the dust filter with the angle bracket. • Re-install the ventilation louver. L824-061 7.9.19 Windshield washer system Fig. 61 Windshield washer tank • Topping up the windshield washer tank (61/1) as required. • Add antifreeze when temperatures are around or below freezing. TL80... -
Page 102: Taking Out Of Service
Terex recommends returning operating temperature maneuvered machine to a Terex dealer. approx. 15 min. • Beforehand, the anti-corrosion coat must be removed from the piston rods, and the openings of the air filter system and the exhaust pipe freed. -
Page 103: Troubleshooting 8
8.6 Hydrostatic travel drive without neutral position Switch for travel direction damaged Replace / repair Solenoids of valve damaged Replace / repair Neutral position incorrectly adjusted Check, re-calibrate (call Service Agent) Internal damage to travel pump Replace travel pump Excessive engine idling Adjust TL80... -
Page 104: Hydraulic Oil Exceeds Max. Admissible Temperature
Travel pump does not open fully, pilot Nozzles clogged, check, repair pressure too low Internal damage to travel pump or travel Replace units motor Travel motor mis-adjusted Re-adjust travel motor TL80... -
Page 105: Transmission Works In One Direction Only
8.11 Loader installation is not working Oil supply to pump interrupted Check suction line and repair if required Main pressure relief valve damaged Check and replace if necessary Hydraulic pump damaged Check, repair or replace Hydraulic pump drive mechanically Check and repair interrupted TL80... -
Page 106: Decrease In Machine's Performance (Loader Installation)
Determine the fault or source of the problem, call Service Agent if necessary Starting system does work Check charge capacity of battery satisfactorily Test starter function Check connection and condition of power and battery ground cables Check function of ignition lock, replace if necessary TL80... -
Page 107: Appendix 9
Appendix 9 9 Appendix 9.1 Electrical system TL80... -
Page 108: Equipment Options
To do • Stop the machine in the proper Fig. 81 Slacken counternut manner. • Switch off the RCS (80/11). • Control block for RCS is installed in rear-end. • Slacken counternut and adjusting screw (81/1), accumulator pressure is reduced. TL80... -
Page 109: Immobilizer
15. This makes it necessary to first open the mechanical locking system before the electronic key is inspected. A manipulation of the immobilizer with the ignition deactivated is thereby impossible. TL80... -
Page 110: Learning Multiple New Keys
• All learned keys are cleared and all available keys can be relearned. • The master key code is not deleted during the clearing process. This function is only available if the control unit relay additionally connected to terminal 30. TL80... -
Page 111: Fault Causes
Key to be learned does not have transponder Defective antenna Learning time for key in ignition too short Clearing of learned keys not possible No or incorrect master key used (red grip) Time for master key in ignition lock too short Defective antenna TL80... - Page 112 9 Appendix TL80...
- Page 113 3. Warranty • Explanation of warranty stipulations • Explanation of inspection cards and note on maintenance and inspection plan. • Explanation of how to fill out the warranty/handing-over card correctly and how to return to Terex...
- Page 114 I n s p e c t i o n p l a n Work to be carried out by trained specialist dealer personnel O = Checking, maintenance O = Checking, maintenance X = Replace Operating hours X = Replace Operating hours Perform work with machine at operating temperature after...
Need help?
Do you have a question about the TL80 and is the answer not in the manual?
Questions and answers