Table of Contents
Advertisement
Advertisement
Table of Contents

Related Manuals for HP D300

Summary of Contents for HP D300
- Page 1 HP D300 Digital Dispenser Operating Manual...
- Page 2 The information contained herein is subject to change without notice. The only warranties for HP products and services are set forth in the express warranty statements accompanying such products and services. Nothing herein should be construed as constituting an additional warranty. HP shall not be liable for technical or editorial errors or omissions contained herein.
-
Page 3: Table Of Contents
4-5-3 Load a Dispensehead Cassette ......................22 4-5-4 Load fluid into the Dispensehead ......................23 4-6 View the report ............................. 27 4-7 Turn off the HP D300 Digital Dispenser ....................... 30 Create plate configurations 5-1 Create the fluids table ..........................31 5-2 Edit the Fluids List ............................ - Page 4 6-1-5 A1 alignment procedure ........................59 6-1-6 Check the fuses and replace if necessary ................... 61 6-2 Error messages ............................64 Appendix A HP D300 Digital Dispenser software basics ....................... 70 Appendix B Glossary ................................71 Appendix C Quick Start Guide ............................... 72 Appendix D Revision History ..............................
-
Page 5: Product Description
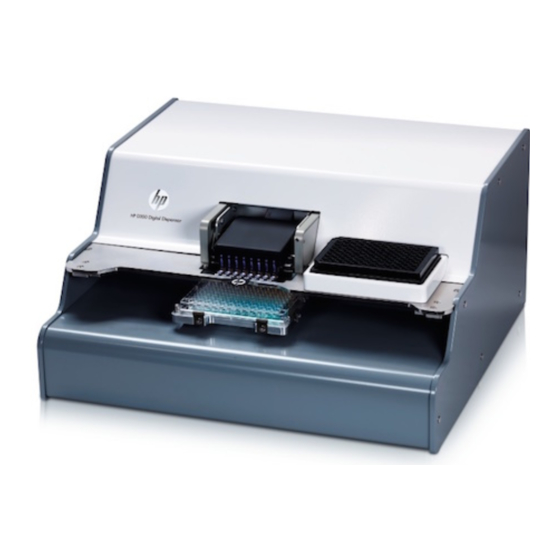
Product description The HP D300 Digital Dispenser dispenses precise amounts of dilute small molecule compounds in DMSO into standard 96- and 384-well plates. The dispenser is intended to be used in the lab environment for drug discovery purposes with small molecules in DMSO. -
Page 6: System Requirements
1-1-3 Environmental operating conditions Temperature: 20C - 30C laboratory conditions (68 - 86F) Humidity: 30% - 80% RH 1-1-4 Shipping and storage conditions Temperature: 10C - 32C (50F – 90F) Humidity: 20% - 80% RH HP D300 Digital Dispenser... -
Page 7: Safety
Safety The HP D300 Digital Dispenser is intended to be used in the lab environment for drug discovery purposes with small molecules in DMSO only. Other uses of the dispenser are not recommended at this time because they may introduce safety or performance issues. -
Page 8: Laser Safety
D300 Digital Dispenser rear placards indicating safety certifications for North America (top) and Europe (bottom) 2-6 Electrical safety The HP D300 Digital Dispenser has passed a TUV certification for a CUE marking signifying compliance with applicable electrical regulations in the EU and North America. As shown in Figure... -
Page 9: Decontamination Prior To Servicing
2-10 Ergonomic safety The HP D300 Digital Dispenser typically requires a single manual pipetting operation for each dispensed compound. In most situations, using the HP dispenser in the intended manner decreases the frequency of shoulder, arm, and wrist motions and so decreases the stress on these joints. -
Page 10: Clean The Dispenser
As with any lab instrument, it is a best practice to routinely clean areas of the Dispenser that come into contact with chemicals. Turn off the dispenser as instructed in the ―Turn off the HP D300 Digital Dispenser‖ section of this document. -
Page 11: Get Started
Get started The HP D300 Digital Dispenser runs on standard AC power, either 120V or 230V, depending on the Dispenser version. HP Product Number CV079A runs on 120V and CV080A runs on 230V. The Product Number and the voltage requirement is shown on the label on the rear of the Dispenser. -
Page 12: Get Familiar With The Software
*.exe file for it on the Tecan FTP site: ftp.tecan.com Username: HP-D300 Password: HP+Tecan Click on the HP D300 Digital Dispenser Software program icon on the computer desktop to start up the HP D300 Digital Dispenser software. See Figure 4-5. - Page 13 Note that this Operating Manual is accessible two different ways, either by opening the pdf file in the C:\Program Files\HP-D300 directory, or by clicking on Help/Operating Manual from the main operating window as shown in Figure 4-7.
-
Page 14: Load An Existing Plate Configuration
400pL bursts (20 drops simultaneously dispensed from 20 nozzles which are each 20pL) in order to dispense very close to the requested volume very rapidly. 4-3 Load an existing plate configuration ―Create plate NOTE: To build a new plate configuration, see configurations‖. HP D300 Digital Dispenser... - Page 15 On the HP D300 Digital Dispenser main operating window, click File and then Load Plate Configuration, then locate and select a plate configuration (.xls) that has been previously saved on your computer. Example configurations are in C:\Program Files\HP-D300\Configs. Many of the settings, including the Fluids List, assay volume, DMSO limit, plate layout and the plate jitter option, will change to reflect the configuration you select.
-
Page 16: Get To Know The Options Dialog Box
The Fluids List can also be managed by clicking Edit and then Fluids List. 4-4 Get to know the Options dialog box At the HP D300 Digital Dispenser main operating window, click Setup and then Options to open the Options dialog box. -
Page 17: Options: General
4-10. In the General pane, you can choose whether to show the Offline mode message when you use the software when not connected to an HP D300 Digital Dispenser. When in Offline mode, you can choose how rapidly to ―pseudo-dispense‖ upon using the Go button using the Offline mode simulation speed. -
Page 18: Options: Edit: Fluid Defaults
In the Options dialog box, click Edit and then Fluid Defaults to open the Edit: Fluid Defaults pane of the Options dialog box. Set the default concentration for new fluids and specify whether default fluids will be dispensed. See Figure 4-13. Figure 4-13 Edit: Fluid Defaults pane of the Options dialog box HP D300 Digital Dispenser... -
Page 19: Options: Edit: Assay Defaults
If this option is utilized, enter the number of seconds to shake after each Dispensehead has completed dispensing. IMPORTANT: Plate Jitter while dispensing is highly recommended when dispensing directly into plates containing live cells to reduce the deleterious effect of a DMSO bolus on the cells. HP D300 Digital Dispenser... -
Page 20: Options: Report
In the Options dialog box, click Report to open the Report pane of the Options dialog box as shown Figure 4-16. Use the Report pane to alter options related to the output report that the HP D300 Digital Dispenser software automatically generates after every dispense run (plate). In the Report pane, you can choose to Display the report after every run, alternatively you would choose File/View Report or use Excel to view the report after the run. -
Page 21: Plate Dispense Procedure
4-5 Plate dispense procedure 4-5-1 Initiate plate dispense After selecting the desired plate configuration and verifying the options, click the GO button in the lower-right corner of the main operating window. See Figure 4-17. Figure 4-17 Main operating window HP D300 Digital Dispenser... -
Page 22: Scan And Load The Well Plates
Load a new Dispensehead Cassette if necessary as shown in Figure 4-21: If a Cassette is already loaded in the dispenser, lift the tab with the HP logo and pull the Cassette out of the deck. HP D300 Digital Dispenser... -
Page 23: Load Fluid Into The Dispensehead
Make sure that you fill the Dispenseheads with the LARGEST load volume of the set of Dispenseheads you are loading. It is indicated in the upper right of the dialog box (―Max. Load Volume‖) as shown in Figure 4-22. HP D300 Digital Dispenser... - Page 24 Dispenseheads. The split will be identified in the Load Fluid dialog box and in the report file (as ―1 of 1‖ or ―1 of 2,‖ for instance). See Figure 4-23 for an example of using two Dispenseheads per fluid. HP D300 Digital Dispenser...
- Page 25 Do NOT depress the pipette plunger to the second ―blow out‖ stop as this could introduce air into the Dispensehead. Figure 4-24 A blue LED illuminates the Figure 4-25 Examples of a good load and a bad load Dispensehead on the Dispensehead Cassette Bad load Good load HP D300 Digital Dispenser...
- Page 26 WARNING: For multiplate configurations, the D300 software first minimizes the use of dispenseheads, so that fluids which are used on multiple plates are dispensed into all of those plates as long as the total dispense volume for that fluid does not exceed 10uL. This dispensehead conservation can result in a non-intuitive plate loading order.
-
Page 27: View The Report
4-20. After a fully used T8 cassette is removed from the D300 dispenser it may be disposed, as it will not be reused. You will then be shown which fluids to place in each dispensehead of the new cassette as... - Page 28 Fluids or Options in the menu on the left pane. To view more information about the dispense operation, click the menu options to section of the report you want to view as shown in Figure 4-29 Figure 4-30. Figure 4-29 Report Fluids sheet HP D300 Digital Dispenser...
- Page 29 Any previously saved report must be viewed in Excel. If you have trouble finding the reports, the folder that the last report was saved in is listed in the Report pane of the Options dialog box (click Setup, then Options…, and then Report). HP D300 Digital Dispenser...
-
Page 30: Turn Off The Hp D300 Digital Dispenser
If you are finished using the dispenser and will not use it again for an extended period of time, turn it off as follows: Close the HP D300 Digital Dispenser software, either by clicking the red X in the upper right corner of the main operating window, or by clicking on File/Exit. -
Page 31: Create Plate Configurations
96 or 384. The same fluids, or different fluids, can used in all the plates in a configuration. Figure 5-1 The HP D300 Digital Dispenser main operating window Total Volume column... -
Page 32: Edit The Fluids List
Select Copy, Paste, or Insert Fluid to copy, paste, or insert a fluid into the table. ○ Select Clear Fluids List to remove all fluids from the Fluids List. NOTE: These options are also available by right-clicking on selected fluids in the Fluids List. HP D300 Digital Dispenser... -
Page 33: Edit The Well Plate
Clear Well Plate ○ Plate Layout Wizard (see ―Plate Layout Wizard basics‖) TIP: This menu can also be accessed by clicking Edit and then Well Plate after selecting a well or wells in the well plate image. HP D300 Digital Dispenser... - Page 34 If a well does not contain any fluid, it has a dotted outline. The dotted outline is also used to denote a well that exceeds a dispense condition, such as containing more fluids than the DMSO limit, or having a requested volume of less than one 13pL drop. HP D300 Digital Dispenser...
-
Page 35: Set Concentrations Or Volumes In Wells
NOTE: The lowest possible concentration or volume is determined by the single drop volume, the fluid concentration, and the assay volume. The maximum concentration or volume is determined by the DMSO limit and the fluid concentration. HP D300 Digital Dispenser... - Page 36 Select the type of concentration or volume titration in the General Type area of the dialog box. Select either Linear or Logarithmic. ○ Linear: The titration steps are evenly spaced in concentration or volume units ○ Logarithmic: The titration steps are evenly spaced in log concentration or log volume units HP D300 Digital Dispenser...
- Page 37 Additional fluids can be added to the same wells using the same steps as above. If multiple fluids are in a single well, the well will have two or more colors in relative proportion to represent all the fluids that will be dispensed into the well as shown in Figure 5-7. HP D300 Digital Dispenser...
-
Page 38: Use The Paste Special Dialog Box
In the example shown below, wells A1 to B12 were copied, and fluid 1 will be mapped to fluid 3 and fluid 2 mapped to fluid 4. The result of this Paste Special operation is shown in Figure 5-9. Figure 5-8 Paste Special dialog box HP D300 Digital Dispenser... -
Page 39: Normalize
Edit Well Plate menu, and then click Normalize. The DMSO Normalize dialog box appears (see Figure 5-11). Figure 5-10 Select Normalize in the Edit Well Plate menu HP D300 Digital Dispenser... - Page 40 Remove Fluid, then pick the DMSO from the fluid drop down. After removing normalization, add the new fluid in the appropriate wells before repeating the DMSO normalization step. HP D300 Digital Dispenser...
-
Page 41: Randomize
CTRL key while clicking on the well. Right-click to open the Edit Well Plate menu and select Randomize. See Figure 5-13. TIP: To return to the non-randomized, ordered plate, click Edit and select Undo. Only the selected wells are randomized. HP D300 Digital Dispenser... -
Page 42: Save The Plate Configuration
Example of a randomized well plate 5-8 Save the plate configuration On the HP D300 Digital Dispenser software main operating window, click File and then Save Plate Configuration. All plates will be saved in a single file. Name the new plate configuration. The plate configurations are saved as Excel files. They can be edited or even created in Excel, but be extremely careful because the format must exactly match what is expected by the HP D300 Digital Dispenser software. -
Page 43: Plate Layout Wizard Basics
Ensure that the desired well plate type, either 96 or 384, is selected using the Well Plate drop down menu prior to starting the Plate Layout Wizard. In the HP D300 Digital Dispenser main operating window, click Edit and then Plate Layout Wizard. The Plate Layout Wizard: Initialization dialog box appears. See Figure 5-16. - Page 44 Select the NoDispense check box if the fluid should be a no dispense fluid (fluids are which are non-HP dispensed fluids). There needs to be at least one fluid with NoDispense checked in order to reserve rows or columns for controls which are not dispensed by the HP dispenser.
- Page 45 To use all fluids except for a few, select All, then click on the Use check boxes to uncheck just those few fluids to not use. When one or more Use checkboxes are selected, the appearance of the dialog box changes as shown below in Figure 5-19. HP D300 Digital Dispenser...
- Page 46 Click Next three times or click Positioning: Titrations to open the Positioning: Titrations pane. Only a single titration1 and no titration2’s will be used for this example. The twelve point singlet for each of the eight fluids selected fills up the entire 96 wells. HP D300 Digital Dispenser...
-
Page 47: Position Nodispense Controls
Click the arrow on the drop-down list box to select one of the four positioning preferences that the 96 points can be placed in. Figure 5-21 shows the layout by rows with the concentrations in high to low order across the rows. HP D300 Digital Dispenser... - Page 48 Select the Skip every other well check box to generate an interleaved well plate. Once the titrations are positioned properly, click Finish to exit the Plate Layout Wizard. More complex designs are described in the following section. HP D300 Digital Dispenser...
-
Page 49: Plate Layout Wizard Advanced Functions
―Create titration2 layouts: two fluids layout since there are two compounds in each well, and is described in well‖. All of these advanced functions take advantage of the digital nature of your HP D300 Digital Dispenser which allows ―any dose in any well‖. - Page 50 Titration Type drop-down list box. Enter a value in the Span box for this zone; if a span of 1 log is entered, the points will span plus and minus a half log around the center point. HP D300 Digital Dispenser...
- Page 51 16 point titration. The result of this operation is shown in Figure 5-25. Note that the Remove Zone Overlap button is unavailable again because the zone overlap was removed. HP D300 Digital Dispenser...
-
Page 52: Create Modified Range Titration1 Layouts
Type a value that is below the valid concentration range into the Low (µM) column, for example 0.00002 µM. Note that the number in the table turns red to indicate it is outside the valid range. HP D300 Digital Dispenser... - Page 53 (1 µM in this case) and the titration is complete. Make sure to remember to dilute the actual fluid concentration to 0.1 mM when this plate layout is run with the dispenser. The result of this titration is shown in Figure 5-28. HP D300 Digital Dispenser...
- Page 54 0.00002 µM to 100 µM, exactly what is needed. Click the Use Modification button. Note that the fluid table now has two entries in the Conc.(mM) column with two Dispenseheads when this plate layout is run. This is shown in Figure 5-30. HP D300 Digital Dispenser...
-
Page 55: Create Titration2 Layouts: Two Fluids Per Well
This opens the Titration2: <none> in the left pane of the Plate Layout Wizard: Titrations and Positioning dialog box. The Titration2 pane is opened as shown in Figure 5-31. Select two fluids you would like to use for this dual fluid titration by selecting the Use check boxes. HP D300 Digital Dispenser... - Page 56 Note that the design uses 78 of the 96 wells when the ―remove points in the high-side triangle‖ is selected, leaving room for controls on the plate. HP D300 Digital Dispenser...
- Page 57 Figure 5-32 Titration2 pane with remove points in the high-side triangle selected Remove points in the ―high-side triangle‖ (log-log) check box Note that the design uses 78 of the 96 wells HP D300 Digital Dispenser...
-
Page 58: Troubleshooting And Error Messages
Restart the software using the desktop icon (the black HP logo). The next step is to reinstall the software, either from the CD enclosed with the D300 Digital Dispenser, or preferably from the *.exe file of the latest version available on the Tecan FTP site: ftp.tecan.com... -
Page 59: Unable To Home Stage
6-1-3 Unable to home stage Occasionally, the error message ―Unable to home stage‖ may occur upon initiating the HP D300 Digital Dispenser software. This may be due to the stage sensors exceeding their limits. If this message occurs upon startup, close the software and power down the dispenser using the rocker ―Turn off the HP D300 Digital... - Page 60 Up arrow Move to This Position, Y+ button Set to Current Position and Set to Fail-Safe Values buttons on the A1 Position lines Step Size Right arrow Save All to Entry Box X+ button ROM button HP D300 Digital Dispenser...
-
Page 61: Check The Fuses And Replace If Necessary
M2 hex wrench Small slotted screwdriver Use a small flat head screwdriver to flip open and down the cover of the AC power inlet module on the back of the dispenser. See Figure 6-5. HP D300 Digital Dispenser... - Page 62 Carefully pry the fuse out of the holder with the small screwdriver or other tool and look for visible damage. The fuse is good if the filament is visibly continuous and unbroken from one end of the fuse to the other. See Figure 6-8 Figure 6-9. HP D300 Digital Dispenser...
- Page 63 Make sure the fuse presses against the metal connector on this end of the fuse box If the fuse is damaged, replace both fuses with a new one. If either fuse is damaged, both fuses should be replaced. HP D300 Digital Dispenser...
-
Page 64: Error Messages
Insert the fuse holder back into the dispenser, flip the black cover up and click it into place. 6-2 Error messages If you encounter an error message or warning while using the HP D300 Digital Dispenser software, note the title of the error message and the error message text as shown in Figure 6.1, and refer to the alphabetized list of error messages below to determine the appropriate response. - Page 65 Ensure that the file that is opened is an This file is not in a supported format. Excel Configuration Load .xls configuration file from the HP D300 Error Digital Dispenser and that it has not been altered. Ensure that the file that is opened is an This file is not in the correct format.
- Page 66 Ensure that there is nothing obstructing Unable to home the stage. (Could not move to Stage Home Error the motion of the destination plate destination.) holder and that the Dispensehead Cassette is seated properly. Restart the software if retry fails. HP D300 Digital Dispenser...
- Page 67 12mm. Ensure that a plate is on the destination Unable to initialize the well plate. (Plate is too Plate Initialization Error plate holder and use a plate with thick.) thickness less than 18mm. HP D300 Digital Dispenser...
- Page 68 Restart the software if retry fails. properly. Install Adobe Acrobat Reader if it is not Unable to open the operating manual 'HP D300 No Manual Found already installed on your computer. Digital Dispenser Operating Manual.pdf'...
- Page 69 Save the configuration, close the Unable to start dispensing this split. (Unknown Dispense Error software, and turn the dispenser off. plate type.) Restart the dispenser, restart the software, and retry the configuration. HP D300 Digital Dispenser...
-
Page 70: Hp D300 Digital Dispenser Software Basics
/Appendix A Appendix A HP D300 Digital Dispenser software basics Global view The global view of the plate contains all the fluids that will be dispensed into the plate whether or not the fluids are selected for editing. The well plate image on the main page of the software displays only the fluids selected for editing, except during the dispense GO operation, when only the current fluid being dispensed is shown. -
Page 71: Appendix B Glossary
Well plate A microtiter plate; a plastic plate that is composed of numerous small wells. The well plate receives the fluids that are dispensed by the dispenser. The HP D300 Digital Dispenser uses 96-well and 384-well plates. Well pop-up The information about the contents of a well that is displayed when you move the mouse over the well plate image in the main operating window. -
Page 72: Quick Start Guide
Appendix C Quick Start Guide HP D300 Digital Dispenser... - Page 73 HP D300 Digital Dispenser...
-
Page 74: Appendix D Revision History
December 1, 2011 eCMS 10797. New Document December 5, 2011 eCMS 11125. Edits for SW versions up to 1.03; Quick Start Guide for shipping bracket March 12, 2012 eCMS 14092. Edits for SW version 1.04, primarily multiplate capability HP D300 Digital Dispenser...
Need help?
Do you have a question about the D300 and is the answer not in the manual?
Questions and answers