Stromer ST2 Operating Manual
Hide thumbs
Also See for ST2:
- User manual ,
- Operating manual (176 pages) ,
- User's manual supplement (32 pages)
Table of Contents
Advertisement
Quick Links
Advertisement
Table of Contents

Related Manuals for Stromer ST2


Summary of Contents for Stromer ST2
- Page 1 OPERATING MANUAL | English...
-
Page 2: Components For The Stromer S-Pedelec
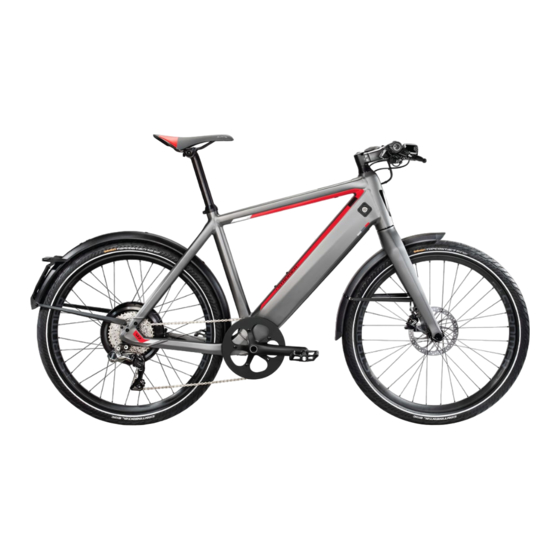
COMPONENTS FOR THE STROMER S-PEDELEC Headlights Operating element Touchscreen Brake with sensor Stem Saddle clamp Daytime running light / Power button USB connector Battery lock EnergyBus socket Mudguard Rear light Battery box Fork Number plate holder Brake disc Torque sensor... -
Page 3: Introduction
DEAR CUSTOMER, We would like to start by congratulating you on All information in these operating instructions your new Stromer and provide you with some im- relate to structure, technology, care and mainte- portant information regarding your new premium nance. Please adhere to this information, as it is vehicle. -
Page 4: Safety Information
If you don’t have a torque wrench, bring your bike to a Stromer shop for re- pair! Parts that have been installed incorrectly may fall off or break! This may result in severe... -
Page 5: Table Of Contents
CONTENTS Components for the Stromer S-Pedelec Appropriate use Service / Maintenance Screws and torque spanners Introduction Replacing parts on your speed pedelec 15 Chain / Drive Rims / Tires Safety information Riding a Stromer Dealing with punctures Power button Brakes... -
Page 6: Quick Start Guide For Stromer
S-pedelecs! Detailed supplementary information regard- Charge battery externally ing the functions and settings are provid- ed by the Stromer app or on the Internet at www.stromerbike.com/support Only charge the Stromer battery with a Stromer charger. Inserting the battery... - Page 7 The boost mode is activated when the plus on the top. button on the operating element is pressed and held for two seconds! The Stromer will then ac- b) Charge battery internally celerate without pedal support to a speed of 20 km/h! This boost mode only kicks in at a driv-...
-
Page 8: For Your Safety
S-pedelec. They are ways be fully fit to ride. Ask your Stromer dealer if you are not sure about also not intended to provide information regard- the purpose of use and the limits of the appropri-... -
Page 9: Instructions About Electrics And Electronics
TRICS AND ELECTRONICS If your Stromer S-pedelec does not start, al- the tail light. The lighting system of the Stromer though no error message is shown, check whether is powered by the battery or, when this has been both brake levers are in their initial position! No drained, by a motor with dynamo function. -
Page 10: Child Seats, Child Trailers And Load Trailers
The use of not be operated at the same time. (VRV [German Get advice from a Stromer dealer on the operation child trailers in combination with S-pedelecs is federal road traffic regulations] Art. 63 para. 3 lett. -
Page 11: Before The First Ride
Check the firm attachment of in the appropriate environment. • Allow your Stromer dealer to set up the brakes so the quick-release axles and all important fasten- that the brake levers are always within easy reach. - Page 12 Setting up the seating position If your pedelec was supplied without the pedals Before you use your Stromer S-pedelec for the first pre-installed, these have to be attached with the time, the seating position has to be set up to suit correct wrench.
-
Page 13: Before Each Ride
Do not ride off when you are not completely sure that your S-pedelec is in flawless condition. BEFORE EACH RIDE Have it inspected by a Stromer dealer. When adjusting the height of the seat, nev- It is particularly important if you use your... -
Page 14: Luggage And Load Transport
• The use of unlicensed parts may lead to accidents. more sluggish steering properties. Only transport Stromer must be equipped in order to drive in You should therefore only use original accesso- luggage on the luggage rack intended for this pur- traffic on public roads. -
Page 15: Appropriate Use
We urgently advise against trans- 4. Battery 11. Side stand porting additional persons, even in specific cases Stromer S-pedelecs may be used on public roads 5. Tires 12. Handlebars where this might be permitted. and fortified paths when they are equipped as pre- 6. -
Page 16: Switching On
Sleep mode Support mode 1: Low motor support, optimized electricity is produced to power the lighting. Thus When the Stromer is not switched off, it will for large driving range. you can always ride safely with your Stromer. switch to sleep mode after approx. 5 minutes of Support mode 2: Medium motor support –... -
Page 17: Boost Mode / Driving Speed Switch
This speed varies Touchscreen according to the version of the firmware loaded. It is usually below 10 km/h. The display of the Stromer is equipped with a re- sistive touch screen. Boost mode / Driving speed switch... -
Page 18: Usb Changing Socket
Stromer is moved. USB charging socket. Connect your smartphone to • Weather and vehicle weight: In addition to The Stromer can in this case only be returned from recharge the battery. the ambient temperature, wind conditions also theft mode by using the Stromer OMNI App. This The charging socket is located in front on the day- have influence on the range. - Page 19 You can adjust the strength of the motor braking Languages of the Stromer to your driving style with the brak- The Stromer supports the following languages: ing strength. A change of sensor sensitivity influences the German, English, French, Italian and Dutch.
-
Page 20: Handling The Battery
Store it in a warm environment, which increases leak fluid, start a fire or explode. and explosions. the range. Ensure that the Stromer is switched off • Do not apply force to the battery. The integrated • Do not clean the battery with a pressure wash- when you want to store your battery in your bike. -
Page 21: Removing The Battery
Storage at a battery charging level of 40-60% is best suited to preserving your battery. Please consider that this shortens the period after which deep discharging is possible when compared to a fully charged battery! The capacity of a battery de- creases with age, even when it is well-maintained. -
Page 22: Safety Information Regarding The Charger
The magnets will help you to position the plug You can change the battery of your Stromer while A defective battery should neither be correctly. it is installed in your S-pedelec. However, you charged nor used any further. -
Page 23: Service / Maintenance
The driving display provides the option of track- S-pedelec. The use of other non-approved parts ing the battery charge status of your Stromer. The A small part of the battery energy is saved in order generally invalidates the warranty and guaran-... -
Page 24: Screws And Torque Spanners
Chain / Drive break. If you don’t own a torque wrench then you Chain worn should always leave this work to a Stromer dealer! The drive chain must be regularly cleaned and A table with the most important fastening torques lubricated to ensure appropriate functioning (see for screw connections is provided in the “Screw... -
Page 25: Rims / Tires
Please take note of the correct size and the ECE quality test marker. It is essential to get Tire exchange works similarly to a normal bicycle advice from a Stromer dealer when selecting tires. in the event of a flat tire. Please contact a Stromer... - Page 26 • Pull the rear derailleur slightly backwards. inside of the tire. • Lift up the Stromer. The running wheel will de- • Insert the second tire lever approx. 10 cm from Place one edge of the rim into the tire.
- Page 27 Reattaching the wheel • Pull the cable with plug down from the cable Proceed in reverse order of the removal to rein- guide (1). stall the wheel. Reattach the motor connector to the hub before reinstalling the rear wheel. Safely attach the running wheel in the frame or fork, using the quick-release axle.
-
Page 28: Brakes
Brakes Your Stromer is equipped with a hydraulic disk brake. • Guide the wheel between the mounts from the bottom. The hub has to slide into the groove provided in the left mount. -
Page 29: Gears
• Clean your S-pedelec after every ride and check brakes manufacturer or on the manufacturer’s website: it for possible damage. www.stromerbike.com/support • Have inspections carried out by the Stromer dealer. Gears Avoid permanently braking for longer peri- • Check your S-pedelec every 300 – 500 km or ods, as can be the case during long, steep de- every three to six months. - Page 30 Cables and spokes stretch, while bolt- Make any adjustments to the following compo- if required ed connections can loosen. Therefore always allow nents: Clean: a Stromer dealer to carry out the first inspection. • Headset • Drive chain • Brakes Grease: • Pedals •...
-
Page 31: Lubrication
Lubrication Working on the S-pedelec requires special knowledge, experience and special tools! Only allow Stromer deal- ers to work or check key parts of the bicycle! Lubrication schedule What must be lubricated? At what intervals? With which lubricants? Chain after removing dirt, after riding in the rain, every 250 km... -
Page 32: Screw Connections
Screw connections It is vital that all bolted connections on the Component ST2 S ST1X Torque S-pedelec have the correct torque in order to en- Clamping handles (Ergon GS1-L) – handlebar 5 Nm sure that they are secure. Too much torque can damage the screw, nut or component. - Page 33 General torque for bolted connections Component ST2 S ST1X Torque Steel screws in aluminum thread Bottom bracket, FSA MegaExo 40 – 50 Nm 2 Nm Pedal crank arm, FSA MegaExo 38 – 41 Nm 4 Nm Pedals 40 Nm 7 Nm Front derailleur 5 –...
-
Page 34: Warranty, Defects, Wear
WARRANTY, DEFECTS, WEAR TECHNICAL DATA You were given the warranty and limitation of li- Permitted total weight of Stromer S-Pedelec: 140 kg ability separately at the time of purchase of your Vehicle including battery + driver + luggage + trailer S-pedelec. - Page 35 BQ983 Model BQ983 LI-ION BATTERIES BQ618 BQ814 ST1306AC Model ST983 VOLTAGE [V] 47,45 47,06 CAPACITY [AH 12,3 15,9 19,8 20,4 ENERGY [WH] CHARGING TIME WITH CHARGER CR190 [H:MIN] 4:50 5:30 6:30 6:30 CHARGING TIME WITH CHARGER CR254 [H:MIN] 4:00 4:45 5:30 5:30 PERMITTED STORAGE TEMPERATURE RANGE [°C]...
-
Page 36: Environmental Tips
© Copying, reprinting and translation as well as pulsory special labeling. They have to be disposed any commercial use (including extracts, in print- of by Stromer dealers or manufacturers. ed or digital form) is only permitted if specifically granted in writing in advance. - Page 37 QR Code zum Stromer Support QR Code Apple QR Code Android...
- Page 38 VERSION 3.0 myStromer AG Freiburgstrasse 798 | 3173 Oberwangen | Switzerland info@stromerbike.com | www.stromerbike.com...
Need help?
Do you have a question about the ST2 and is the answer not in the manual?
Questions and answers