Table of Contents
Advertisement
Quick Links
Download this manual
See also:
Service Manual
Advertisement
Table of Contents

Related Manuals for mundoclima MUCO-H6T


Summary of Contents for mundoclima MUCO-H6T
- Page 1 FLOOR STANDING Installation & Owner's manual MUCO-H6T CL20390 to CL20391 English www.mundoclima.com...
-
Page 2: Table Of Contents
Contents Use and Maintenance Cautions for Operation ..........1 Notices for Use .............4 Names of Each Part of the Unit ........6 Names and Functions of Each Part ......8 Operation of Remote Controller ........12 Adjustment of Swing ........... 18 Clean and Care ............20 Troubleshooting ............ -
Page 3: Cautions For Operation
Cautions for Operation Please read the following carefully before operating. WARNING Once abnormality like burning Don't operate the air conditioner Never cut off or damage power cord and signal wire. If they are smell occurs,please cut off the power with wet hand. damaged,replace them with special supply immediately and then contact cord by professionals. - Page 4 Cautions for Operation ★ ★ Earthing:the unit must be Never insert any foreign matter into The operation of cut-off valve of outdoor unit must be performed by the air conditioner to avoid damage of earthed reliably!The earthing professional personnel in order to the air conditioner.
- Page 5 Cautions for Operation ★ Select the most appropriate temperature. Don't insert your hands or stick into the air inlet or outlet. Keep proper temp difference between room and outdoors ★ Don't blow the wind to animals and plants directly. Splashing water on the air conditioner may cause electric It may cause a bad influence to them.
-
Page 6: Notices For Use
Notices for Use Working Principle and Special Functions for Cooling Principle: Air conditioner absorbs heat from room and then transmit it outdoors for discharge of it, so that indoor ambient temperature will be decreased.By this principle,its cooling capacity will decrease with the increase of outdoor temperature. Anti-freezing Function: If the unit is running under cooling mode at low temperature, the surface of indoor heat exchanger will frost.When the temperature of indoor heat exchanger decreases to -2... - Page 7 Notices for Use Condition that unit can't normally run The protection devices may be active or inactive in certain temp range of the following table. Indoor side DB/WB(℃ ) Outdoor side DB/WB(℃ ) Maximum cooling 32/23 43/- Maximum heating 27/- 24/18 NOTICE: ●...
-
Page 8: Names Of Each Part Of The Unit
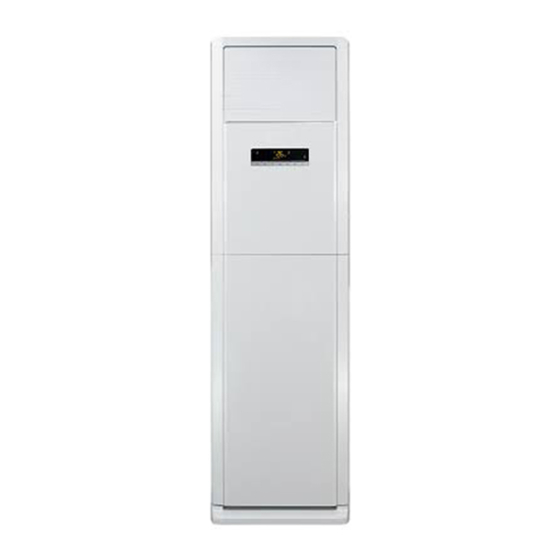
MUCO-48-H6T... - Page 9 MUCO-60-H6T AUTO HEALTH X-FAN HUMIDITY FILTER TURBO HOUR ON/OFF ON/OFF MODE X-FAN TEMP TIMER TURBO SLEEP LIGHT remote controller...
-
Page 10: Names And Functions Of Each Part
Names and Functions of Each Part Function Buttons of Air Conditioner E-HEATER Speed ON/OFF Function AMB. Mode and ON/OFF and Button ON/OFF Button Under the situation without setting ● Press this button, to turn on the unit. ● buttons, the function, press When unit is turned on, the original setting like Timer, Sleep function will the setting temperature goes up... - Page 11 Names and Functions of Each Part Function Buttons of Air Conditioner E-HEATER Function AMB. Speed Mode ON/OFF Speed Buttons (Continued) Speed Button After switch-on at first time, if without ● Press this button, the speed can ● any button input:1. consecutively press shift in the circulation among of twice of buttons in 20 seconds and...
- Page 12 Names and Functions of Each Part Function Buttons of Air Conditioner E-HEATER ON/OFF AMB. Speed Mode Function AMB. AMB. AMB.Buttons (Continued) AMB. Buttons (Continued) The modes of living room, restaurant, ● Under the modes of living room, ● conference/office can only be called restaurant, conference/office,The out by pressing buttons of air con- setting temperature, speed, blowing...
- Page 13 Names and Functions of Each Part Function Buttons of Air Conditioner E-HEATER AMB. Mode Speed Function ON/OFF Swing Status of swing Display status of swing. ● Setting Swing Display setting temperature. Status of swing ● Display status of swing. Room temperature ●...
-
Page 14: Operation Of Remote Controller
Operation of Remote Controller Names and functions of remote control buttons Note: Be sure that there are no obstructions between receiver and remote controller; Don't drop or throw the remote control; Don't let any liquid in the remote control and put the remote control directly under the sunlight or any place where is very hot. -
Page 15: Operation Of Remote Control
Operation of remote control Names and functions of remote control buttons NOTE: This Remote control is universal, it c o uld be used formany units, some buttons of this control which are not availabl e to this unit will not be described below. TIMER Timer button AUTO... - Page 16 Operation of remote control Names and functions of remote control buttons NOTE: This remote control is universal, it could be used formany units, some buttons of this control which are not available to this unit will not be described below. X-FAN X-FAN button Set X-FAN on (the characters of X-FAN will...
- Page 17 Operation of remote control Guide for operation-general operation Guide for operation-general operation 1.Press ON/OFF button to start the unit after powering the main unit on.(Note: Power the unit on every time, ON/OFF MODE the big -guide louver and small-guide louver will be closed firstly.
- Page 18 Operation of remote control ★ About AUTO RUN When AUTO RUN mode is selected, the setting temperature will not be displayed on the LCD, the unit will be in accordance with the room temp. automatically to select the suitable running method and to make ambient comfortable. ★...
-
Page 19: Changing Batteries And Notices
Operation of remote control Changing batteries and notices 1.Slightly to press the place with along the arrowhead direction to push the back cover of remote controller. (As show in Fig 1. ) 2.Take out the old batteries, insert two AAA alkaline cells. -
Page 20: Adjustment Of Swing
Adjustment of Swing Up & Down Swing Notes: Up &down swing can be selected to control start or stop ● of up & down swing motor by pressing up & down button on remote controller or FUNC button on displayer,so that guide louver will swing up and down or stop at a certain angle. - Page 21 Adjustment of Swing Left & Right Swing Left & right swing button Left & right swing can be selected to control start or stop ● of left & right swing motor by pressing left & right button on Up &down swing button remote controller or FUNC button on displayer,so that guide louver will swing left and right or stop at a certain angle.
-
Page 22: Clean And Care
Clean and Care Caution 1.Turn power off and pull out the power plug before cleaning air conditioner,or it may cause electric shock. 2.Never sprinkle water on the indoor unit and the outdoor unit for cleaning because it can cause electric shock. 3.Volatile liquid (e.g. - Page 23 Clean and Care Check before use ① Be sure that nothing obstructs the air outlet and intake vents ② Check that whether earthing wire is properly connected or not. ③ Check that whether the batteries of air conditioner are changed or not.
-
Page 24: Troubleshooting
Troubleshooting CAUTION Don't attempt to repair the air conditioner by yourself.It may cause the electric shock or ● ● fire. Please check the following items before asking for repair.It can save your time and money. Troubleshooting Phenomenon Not operate immediately when Once the air conditioner is stopped, it will not Waiting the air conditioner is restarted. - Page 25 Troubleshooting Phenomenon Troubleshooting Has the power been shut down? The unit can not run ● Is the circuit protection device tripped off or ● not? Is voltage higher or lower? Breakoff ● (Tested by professionals) Is the Timer correctly used? ● ...
- Page 26 Troubleshooting Phenomenon Troubleshooting In heating procedure, when the heat exchanger Indoor unit can not blow ● temperature of indoor unit is low, it stops blowing in order to avoid blowing cool air (within 90 s). When heating, if the outdoor temperature is low ● ...
-
Page 27: Installation Service Notes For Installation
Installation Service-Notes for Installation Important notices 1. The unit installation work must be done by qualified personnel according to the local rules and this manual. 2.When removing the unit to the other place, please firstly contact with the local maintenance center. - Page 28 Air-conditioner Air switch capacity MUCO-48/60-H6T...
-
Page 29: Notes For Installation
Notes for Installation Installation diagram, please refer to the following. Notes for electric wiring: Power supply Air switch 1. Special circuit must be used for power supply. 2. The circuit must be installed by special serviceman. 3. Please do the wiring according to the following wiring Power cable Signal control cable diagram. -
Page 30: Installation Dimension Diagram
MUCO-48-H6T... - Page 31 MUCO-60-H6T...
-
Page 32: Installation Of Indoor Unit
Installation of Indoor Unit Installation of connection pipe Before wiring and piping, please remove the filter after opening the glass panel. 1.As shown in Fig.9,take out the decorative strip at position 1 and then unscrew the Drainage screws.Remove the screws fixing the filter Connection pipe pipe... - Page 33 Installation of Indoor Unit Wire connection according to this diagram: 4. According to the diagram for wiring, according to the marks on wire board for connection correspondingly,as shown in Fig.13. L1 L2 L3 brown black vioet blue yellow- green 5. Place the section with sleeve of the power connection wire into the wire Outdoor unit connection groove, then cover the electric box...
- Page 34 Installation of Indoor Unit Notes for piping Pipes for refrigerant and drainage pipe should be insulated to avoid frosting Indoor unit and dripping. 1. Both of the indoor and outdoor units adopt flare-end connection. Refrigerant Fig.15 pipe as shown below is used to connect indoor and outdoor units.
- Page 35 Installation of Indoor Unit Installation of connection pipe Align the center of the piping flare with the pyramidal face of relevant valve. Screw in the flare nut by hand and then tighten the nut with spanner and torque wrench refer to the following. Tightening torque (N .
-
Page 36: Installation Of Outdoor Unit
Installation of Outdoor Unit When using vacuum pump 1. Connect charging hose of to charge nozzle. (both cores of gas and liquid valves should be shut down tightly.) Manometer 2. Connect joint of charging hose to vacuum pump. 3. Fully open low-pressure valve(Lo) of manometer. -76cmHg 4. -
Page 37: Leakage Detection
Installation of Outdoor Unit Leakage detection Coat soap water at the gap between connection pipes to see if there is any leakage.If there is air bubble at this position,it should leak.(As shown in Fig.20).Leakage detector, if possible,can be used. Leakage detection spot of indoor unit Leakage detection spot of outdoor unit Fig.20 Wiring method... - Page 38 Installation of Outdoor Unit Configuration of connection pipe 1. Standard length of connection pipe is 5 m . 2.Min. length of connection pipe is 3m. 3.Max. length of connection pipe and max. high difference. Max length Max height Model of connec- difference tion pipe MUCO-48-H6T...
-
Page 39: Test Operation And Check After Installation
Test Operation and Check after Installation Check after installation Items to be checked Possible malfunction The unit may drop, shake or emit noise. Has it been fixed firmly? It may cause insufficient cooling(heating) Have you done the refrigerant leakage test? capacity. - Page 40 ASK FOR MORE INFORMATION Phone: (+34) 93 446 27 81 eMail: info@mundoclima.com TECHNICAL ASSISTANCE Phone: (+34) 93 652 53 57 www.mundoclima.com...
Need help?
Do you have a question about the MUCO-H6T and is the answer not in the manual?
Questions and answers