
Subscribe to Our Youtube Channel
Related Manuals for TBK vision BUL7436EIR


Summary of Contents for TBK vision BUL7436EIR
- Page 1 IP Cameras 3Megapixel. Low Light. User Manual v5.0 IP Cameras TBK-VISION PLUS TBK-BUL7436EIR/TBK-MD7536EIR Please read this instruction carefully for correct use of the product and preserve it for reference purposes...
- Page 2 Notes on Safety Please use the specified power supply to connect. Do not attempt to disassemble the camera; in order to prevent electric shock, do not remove screws or covers. There are no user-serviceable parts inside. Please contact the nearest service center as soon as possible if there is any failure.
-
Page 4: Table Of Contents
Table of Contents Introduction ....................1 IE Remote Access .................... 2 LAN ..........................2 2.1.1 Access through IP-Tool ..................2 Directly Access through IE ................. 3 2.1.2 WAN ..........................5 Remote Preview ....................8 The Remote Preview Interface.................... 8 Playback ......................... 9 Snap Pictures ......................... - Page 5 TBK Vision Plus Network Camera User Manual 4.5.8 Mail configuration ................... 25 FTP Setting ....................25 4.5.9 Advanced Configuration ....................26 4.6.1 User Configuration ..................26 Security Configuration ..................27 4.6.2 Configure Backup & Restore ................28 4.6.3 Reboot ......................29 4.6.4...
-
Page 6: Introduction
TBK Vision Plus Network Camera User Manual 1 Introduction This IP-CAMERA (short for IP-CAM) is designed for high performance CCTV solutions. It adopts state of the art video processing chips. It utilizes most advanced technologies, such as video encoding and decoding technology, complies with the TCP/IP protocol, SoC, etc to ensure this system more stable and reliable. -
Page 7: Ie Remote Access
TBK Vision Plus Network Camera User Manual 2 IE Remote Access You may connect IP-Cam via LAN or WAN. Here only take IE browser (6.0) for example. The details are as follows: 2.1 LAN In LAN, there are two ways to access IP-Cam: 1. access through IP-Tool; 2. directly access through IE browser. -
Page 8: Directly Access Through Ie
TBK Vision Plus Network Camera User Manual of your device according to the practical situation. For example, the IP address of your computer is 192.168.1.4. So the IP address of the camera shall be changed to 192.168.1.X. After modification, please input the password of the administrator and click “Modify”... - Page 9 TBK Vision Plus Network Camera User Manual You may use the above default settings when you log in the camera for the first time. You may directly connect the camera to the computer through network cable. ①Manually set the IP address of the PC and the network segment should be as the same as the default settings of the IP camera.
-
Page 10: Wan
TBK Vision Plus Network Camera User Manual ② Open the IE browser and input the default address of IP-CAM and confirm. The IE browser will download Active X control automatically. ③After downloading Active X control, the login dialog box will pop up. - Page 11 TBK Vision Plus Network Camera User Manual IP Setup ③Go to the router’s management interface through IE browser to forward the IP address and port of the camera in the “Virtual Server”. Router Setup ④Open the IE browser and input its WAN IP and http port to access.
- Page 12 TBK Vision Plus Network Camera User Manual ③ Go to ConfigNetwork ConfigDDNS Config menu. Before you configure the DDNS, please apply for a domain name first. Please refer to 4.4.5 DDNS Configuration for detail information. ④Open the IE browser and input the domain name and http port to access.
-
Page 13: Remote Preview
TBK Vision Plus Network Camera User Manual 3 Remote Preview 3.1 The Remote Preview Interface Icon Description Icon Description Motion alarm Sensor alarm indicator icon indicator icon Fix size Start/Stop record Actual size Playback Zoom in Snap Zoom out Talk... -
Page 14: Playback
TBK Vision Plus Network Camera User Manual The descriptions of the control panel are as follows: Button Description to rotate the dome upwards; to rotate the dome downwards; to rotate the dome towards left; to rotate the dome towards right;... -
Page 15: Snap Pictures
TBK Vision Plus Network Camera User Manual 3.3 Snap Pictures Select the picture number, and then click “Snap” icon as shown below: Single Snap Snap multiple pictures: Select the picture number from Frame pull down list box, such as 2, and check “Title” and “Time”... -
Page 16: Remote Live Surveillance
TBK Vision Plus Network Camera User Manual 4 Remote Live Surveillance Functions of remote configurations include: System Configuration, Video Configuration, PTZ Configuration, Alarm Configuration, Network Configuration and Advanced Configuration. You should select the menu on the left, and then setup the relative parameters. -
Page 17: Date & Time
TBK Vision Plus Network Camera User Manual 4.1.2 Date & Time Setting steps: 1. Go to System ConfigDate & Time menu as shown below. 2. Set time zone. 3. Enable DST mode as required. 4. Set time. You may set time manually or enable NTP. -
Page 18: Camera
TBK Vision Plus Network Camera User Manual 4.2.1 Camera Setting steps: 1.Go to“Video Configuration”“Camera”interface as shown below. 2. You may adjust frequency, brightness, contrast, hue and saturation of the picture. 3. Select white balance mode. 4. Wide dynamic, sharpen, and denoise are adjustable. -
Page 19: Osd Configuration
TBK Vision Plus Network Camera User Manual Frame rate: The higher the frame rate is, the more fluency the video is. However, more storage room will be taken up. Bitrate type: Including CBR and VBR. CBR means that no matter how changeable the video resources are, the compression bitrate keeps constant. -
Page 20: Video Mask
TBK Vision Plus Network Camera User Manual You may set time stamp, device name and custom OSD here. Drag the time stamp and custom OSD to set their position. Then press the “Save” button to save the settings. 4.2.4 Video Mask Go to “Video Config”... -
Page 21: Ptz Configuration
TBK Vision Plus Network Camera User Manual 1. Go to Video ConfigROI Config menu. 2. Check “Enable” and then click “Draw” button. 3. Drag the mouse to set the ROI area. 4. Set the level. 5. Click “Save” button to save the settings. -
Page 22: Preset Configuration
TBK Vision Plus Network Camera User Manual 2. Input the protocol, address and baud rate according to the speed dome. 4.3.2 Preset Configuration 1. Go to“PTZ Configuration” “Preset” to see an interface as shown below: Button Meanings to rotate the dome upwards;... -
Page 23: Alarm Configuration
TBK Vision Plus Network Camera User Manual 4.4 Alarm Configuration Alarm configuration includes seven submenus: Motion Detection Area, Motion Detection Trigger, Motion Detection Schedule, Alarm Input Trigger, Alarm Input Schedule, Alarm Out and Alarm Server. 4.4.1 Motion Detection Area 1.Go to “Alarm configuration”“Motion Detection Area” to see an interfaceas below. -
Page 24: Motion Detection Schedule
TBK Vision Plus Network Camera User Manual 4. Set alarm trigger options. Alarm Out: If selected, this would trigger the external relay output on detecting a motion based alarm. Trigger Snap: If selected, the system will snap images on an alarm and save them in SD card. -
Page 25: Alarm Input Trigger
TBK Vision Plus Network Camera User Manual 4.4.4 Alarm Input Trigger 1. Enter “Alarm Configuration” “Alarm Input Trigger” to see a screen as shown below: 2. Select the sensor at the “Sensor” pull down list and set the sensor name and alarm type: NO and NC. -
Page 26: Alarm Out
TBK Vision Plus Network Camera User Manual 1. Select the sensor. 2. The following setup steps are similar to Motion Detection Schedule’s. Please refer to Motion Detection Schedule chapter for more details. 4.4.6 Alarm Out 1. Go to “Alarm configuration” “Alarm output” as shown below: 2. -
Page 27: Ip Address
TBK Vision Plus Network Camera User Manual 2. Input port number for IE access in the “HTTPPort” textbox. 3.Input the port number for audio & video transmission in the “Data Port” textbox. 4.5.2 IP Address “IP Address”. 1. Go to“Network Configuration”... -
Page 28: Ip Notify
TBK Vision Plus Network Camera User Manual 1. Check “Do you want IP Camera to connect Server”. 2. Check the IP address and port of the transfer media server in the CMS/NVMS. Then enable the auto report in the CMS/NVMS when adding a new device. Next, self-define the device ID andinput the remaining information of the device in the CMS/NVMS. -
Page 29: Rtsp
TBK Vision Plus Network Camera User Manual 2. Select the server type and then input the username, password and domain name you apply for in the DDNS configuration interface. 3. Click “Save” button to save the settings 4.5.6 RTSP Go to “Network Configuration” “RTSP” interface as shown below. -
Page 30: Mail Configuration
TBK Vision Plus Network Camera User Manual 4.5.8 Mail configuration Go to “Network Configuration” “Mail configuration” interface. 1. From Email: sender’s e-mail address. 2. User name and password: sender’s user name and password. 3. Server address: SMTP name of sender. -
Page 31: Advanced Configuration
TBK Vision Plus Network Camera User Manual 3. Delete: Select certain FTP account. Click this button to delete this account. 4. Test: Select certain FTP account. Click this button to test its validity. Please refer to the following table for parameters and instructions of FTP configuration. -
Page 32: Security Configuration
TBK Vision Plus Network Camera User Manual 1. Select the user which needs to modify password and physical address in the user configuration list box. 2. Clicking “Modify” button will pop up “Modify user” dialog boxas shown below. Modify User 3. -
Page 33: Configure Backup & Restore
TBK Vision Plus Network Camera User Manual 2. Check “Enable IP address” check box, select “Deny the following IP address”, input IP address in the IP address list box and click “Add” button. Then this IP address will display in the list box;... -
Page 34: Reboot
TBK Vision Plus Network Camera User Manual Default Configuration Click “Load default” button to restore all system settings to the default status. 4.6.4 Reboot Go toAdvanced configuration—Reboot to see an interface as shown below Click “Reboot” button to reboot the device. -
Page 35: Video Search
TBK Vision Plus Network Camera User Manual 5 Video Search Click “Picture” icon and search the images saved in the SD card. Set time: Select date in the “Calendar” and choose the start and end time. Choose event “Motion” or “Sensor”. - Page 36 TBK Vision Plus Network Camera User Manual Item Buttons Explanations Close: Select certain picture and click this button to close this picture. Close all: Click this button to close all pictures viewing. Save: Click this button to select the save path of the picture file on the PC for savingthe current picture.
-
Page 37: Appendix
TBK Vision Plus Network Camera User Manual Appendix Appendix 1 Q& A Q: How to find my password if I forget it? A:Reset the device to the default factory settings. Default IP: 192.168.226.201; User name: admin; Password: 123456 Q:Fail to connect devices through IE browser, why? A: Network is not well connected. -
Page 38: Appendix 2 Installation Of Water-Proof Rubber Plug
TBK Vision Plus Network Camera User Manual Q:No sound can be heard, why? A:Audio input device is not connected. Please connect and try again. B: Audio function is not enabled at the corresponding channel. Please enable this function. Appendix 2 Installation of Water-proof Rubber Plug In order to improve the water-proof effect, the rubber plugs are attached to some network bullet cameras. -
Page 39: Appendix 3 Specifications
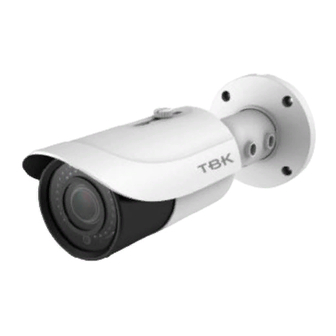
TBK Vision Plus Network Camera User Manual Appendix 3 Specifications TBK-BUL7436EIR Datasheet PARAMETERS DESCRIPTION CMOS 1/2.8” Image sensor Resolution 2048x1536 (3MP) at 25 IPS Minimum 0.01 lux color, 0.001 lux B&W (F1.2, illumination AGC ON) Varifocal 2.8-12 mm (lens angle Lens 30-78.5°) - Page 40 TBK Vision Plus Network Camera User Manual Dimensions TBK-BUL7436EIR Accesories JUNCTION BOX TBK-361C JUNCTION BOX TBK-362C...
- Page 41 TBK Vision Plus Network Camera User Manual TBK-MD7536EIR Datasheet PARAMETERS DESCRIPCIÓN CMOS 1/2.8” Image sensor Resolution 2048x1536 (3MP) at 25 IPS 0.01 lux color, 0.001 lux B&W (F1.2, AGC Minimumillumination Varifocal 2.8-12 mm (lens angle Lens 30-78.5°) Day/Night H.265 MP、H.264 BL/MP/HP、MJPEG...
- Page 42 TBK Vision Plus Network Camera User Manual Dimensions TBK-BUL7536EIR Accesories JUNCTION BOX TBK-363C WALL BRACKET TBK-371P...
Need help?
Do you have a question about the BUL7436EIR and is the answer not in the manual?
Questions and answers
Can you change the view to vertical instead of horizontal