Table of Contents
Advertisement
Advertisement
Table of Contents
Troubleshooting

Related Manuals for Vertical Edge 5000


Summary of Contents for Vertical Edge 5000
- Page 1 Installation/ Configuration Guide Release 1.0 September 2010...
- Page 2 Release 1.0 September 2010...
- Page 3 Vertical Communications, Inc. reserves the right to revise this publication and to make changes in content without notice. © 2010 by Vertical Communications, Inc. All rights reserved. This publication contains proprietary and confidential information of Vertical Communica- tions, Inc. The contents of this document may not be disclosed, copied or translated by third parties, in any form, or by any means known, or not now known or conceived, without prior explicit written permission from Vertical Communications, Inc.
- Page 4 R E V I S I O N H I S T O R Y Release Date Documentation Changes Page No. 09-10 Initial Release Release 1.0 September 2010...
-
Page 5: Table Of Contents
Overview - - - - - - - - - - - - - - - - - - - - - - - - - - - - - - - - - - - - - - - 1-1 About the Edge 5000 - - - - - - - - - - - - - - - - - - - - - - - - - - - - - - 1-2... - Page 6 Reboot - - - - - - - - - - - - - - - - - - - - - - - - - - - - - - - - - - - - - - - - 3-55 Edge 5000 Installation / Configuration Guide Release 1.0...
- Page 7 Software Download Messages - - - - - - - - - - - - - - - - - - - - - C-1 Configuration Download Messages - - - - - - - - - - - - - - - - - - C-2 Edge 5000 Installation / Configuration Guide Release 1.0...
- Page 8 SIP Server Check-in Request - - - - - - - - - - - - - - - - - - - - - F-4 Appendix G User Defined and Fixed Ring Tones Appendix H IP Phone Icons Edge 5000 Installation / Configuration Guide Release 1.0 September 2010...
-
Page 9: Introducing The Ip5000
Introducing the IP5000 Overview The Edge 5000 phones are Internet Protocol (IP) phones designed to support hosted telephony services over a managed IP network. Based on the open standard Session Initiation Protocol (SIP), the IP5000 series phones interoperate and exchange signaling messages with SIP call servers, proxies and gateways to establish, maintain and terminate calls. -
Page 10: About The Edge 5000
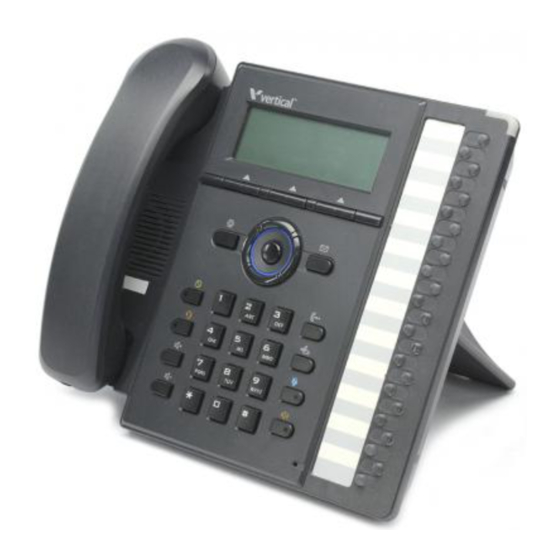
About the Edge 5000 For ease of use, the IP5000 phones are equipped with fixed buttons, flexible (programmable) buttons, an LCD display, softkeys, menu navigation buttons, and a dial pad. Release 1.0 September 2010 Edge 5000 Installation / Configuration Guide... - Page 11 Mute button - Toggle audio from the microphone to the connected party On and Off. Speakerphone button - Toggle the IP phone speakerphone On and Off. Dial pad buttons - Use to dial a number, select a menu item, or input a value. Release 1.0 September 2010 Edge 5000 Installation / Configuration Guide...
-
Page 12: Flexible Buttons
Flexible buttons not assigned for line access may access features such as Speed dial, DND, Redial and others. Refer to "Flexible Button Setting" on page for instructions on defining flexible buttons. Release 1.0 September 2010 Edge 5000 Installation / Configuration Guide... -
Page 13: Lcd (Liquid Crystal Display) And Menus
The bottom line of all of models shows choices associated with the three (3) context sensitive softkeys located just below the LCD. • The top line provides various icons to assist the user in understanding the state of the phone. Release 1.0 September 2010 Edge 5000 Installation / Configuration Guide... - Page 14 THIS PAGE INTENTIONALLY LEFT BLANK. Release 1.0 September 2010...
-
Page 15: Installing The Ip Phone
The figure below shows the cable connections for your IP Phone. The LAN and desktop PC connections employ standard 5 cables terminated with RJ-45 connectors. The Edge 5000 series phones support PoE (Power over Ethernet) in accordance with the IEEE-802.1af standard. - Page 16 Pin 6 = RX- Pin 6 = TX- Pin 7 = optional: GND (or 48V) Pin 7 = No connection 8 = optional: GND (or 48V) Pin 8 = No connection RJ-45 Termindations Release 1.0 September 2010 Edge 5000 Installation / Configuration Guide...
-
Page 17: Attaching The Foot Stand
Align the tabs on the Foot Stand with the notches in the base of the IP Phone. Push the Foot Stand upward until it clicks indicating it is fully engaged. Release 1.0 September 2010 Edge 5000 Installation / Configuration Guide... -
Page 18: Connecting A Dss Expansion Module
IP phone. • Install the Foot Stands on the Module and IP Phone, see "Attaching the Foot Stand" on page Expansion Module Installation Release 1.0 September 2010 Edge 5000 Installation / Configuration Guide... -
Page 19: Bluetooth Module Installation
Disconnect the IP Phone from power and the LAN. • Remove cover from the option module slot behind and below LCD. • Insert the Bluetooth module in the slot. • Reconnect to LAN and power. Release 1.0 September 2010 Edge 5000 Installation / Configuration Guide... -
Page 20: Wall Mounting
IP-5000 phone. • Mark and drill two 7 mm holes for plastic wall anchors with a vertical separation of 10 • Insert two (2) anchors into the holes, then insert and tighten the two (2) screws leaving about 2.5 mm exposed. -
Page 21: Provisioning The Edge 5000
Provisioning the Edge 5000 Chapter 2: Installing the IP Phone Provisioning the Edge 5000 The Edge 5000 phones support 'plug and play' installation employing the automated provisioning process described in . After connecting to the LAN, desktop PC and Appendix F power, refer to "Connecting the IP Phone"... - Page 22 THIS PAGE INTENTIONALLY LEFT BLANK. Release 1.0 September 2010...
-
Page 23: Using The Lcd Configuration Menu
Information is organized to follow the structure of the menu as shown in the "LCD Configuration Menu" below. Release 1.0 September 2010 Edge 5000 Installation / Configuration Guide... - Page 24 Chapter 3: Using the LCD Configuration Menu LCD Configuration Menu Release 1.0 September 2010 Edge 5000 Installation / Configuration Guide...
-
Page 25: Navigating The Lcd Configuration Menu
To enter characters with the dial pad, use the digit with the desired character. Press the same digit repeatedly until the desired character appears in the LCD. After entering a character, pause to allow the cursor to move to next character position. Release 1.0 September 2010 Edge 5000 Installation / Configuration Guide... -
Page 26: Lock/Unlock Configuration
[Change] softkey. • Enter your new password using the dial pad and press the [OK] softkey. A password is composed of four (4) to eight (8) digits. Release 1.0 September 2010 Edge 5000 Installation / Configuration Guide... -
Page 27: Network Configuration
DHCP server is not available, static addressing is used for the Network Mode. Selecting static addressing requires manual entry of other IP network parameters including: IP address of the phone Default gateway IP address Subnet mask DNS address Release 1.0 September 2010 Edge 5000 Installation / Configuration Guide... -
Page 28: Network Configuration
) button. If the LCD Menu is locked, use the unlock procedure. Refer to page 3-4 • Press the digit, or move the cursor to 1.Network Configuration using the [Next]-[Previous] softkeys and press the [OK] softkey. Release 1.0 September 2010 Edge 5000 Installation / Configuration Guide... -
Page 29: Ip Address
Changing the IP Address requires a reboot of the IP phone; when you leave the menu, you will receive a reboot notice. The IP phone must reboot to utilize the new values entered. Release 1.0 September 2010 Edge 5000 Installation / Configuration Guide... -
Page 30: Subnet Mask
Input the Default Gateway IP address using the dial pad and press the [OK] softkey to save your entry. • Move to another parameter with the navigation buttons and continue the session or press the Settings ( ) button to exit the configuration session. Release 1.0 September 2010 Edge 5000 Installation / Configuration Guide... -
Page 31: Secondary Dns Address
1.Network Configuration using the [Next]-[Previous] softkeys and press the [OK] softkey. • Press the digit, or move the cursor to 6.Secondary DNS Address using the [Next]-[Previous] softkeys and press the [OK] softkey. Release 1.0 September 2010 Edge 5000 Installation / Configuration Guide... -
Page 32: Mac Address
The VLAN Priority (LAN) establishes the priority for Ethernet frames from the IP5000 voice port including signaling and voice packets. Setting the VLAN ID to zero (0) disables VLAN framing and the IP Phone uses only standard Ethernet frames. Release 1.0 September 2010 Edge 5000 Installation / Configuration Guide... - Page 33 Input the VLAN ID for the LAN port using the dial pad and press the [OK] softkey to save your entry. • Move to another parameter with the navigation buttons and continue the session or press the Settings ( ) button to exit the configuration session. Release 1.0 September 2010 Edge 5000 Installation / Configuration Guide...
- Page 34 ) button. If the LCD Menu is locked, use the unlock procedure. Refer to page 3-4 • Press the digit, or move the cursor to 1.Network Configuration using the [Next]-[Previous] softkeys and press the [OK] softkey. Release 1.0 September 2010 Edge 5000 Installation / Configuration Guide...
-
Page 35: Cdp
Changing the CDP status requires a reboot of the IP Phone; when you leave the menu, you will NOTE receive a reboot notice. The IP Phone must reboot to utilize the new values entered. When CDP is enabled, VLAN settings are overwritten. Release 1.0 September 2010 Edge 5000 Installation / Configuration Guide... -
Page 36: Sip Configuration
[OK] softkey to select a line button. • Press the digit, or move the cursor to 1.Call Server Address using the [Next]-[Previous] softkeys and press the [OK] softkey. Release 1.0 September 2010 Edge 5000 Installation / Configuration Guide... - Page 37 Changing the Proxy Port requires a reboot of the IP Phone; when you leave the menu, you will NOTE receive a reboot notice. The IP Phone must reboot to utilize the new values entered. Release 1.0 September 2010 Edge 5000 Installation / Configuration Guide...
- Page 38 Enter the line button number or move the cursor using the [Next]-[Previous] softkeys and press the [OK] softkey to select a line button. • Press the digit, or move the cursor to 4.Name using the [Next]-[Previous] softkeys and press the [OK] softkey. Release 1.0 September 2010 Edge 5000 Installation / Configuration Guide...
- Page 39 ) button. If the LCD Menu is locked, use the unlock procedure. Refer to page 3-4 • Press the digit, or move the cursor to 2.SIP Configuration using the [Next]-[Previous] softkeys and press the [OK] softkey. Release 1.0 September 2010 Edge 5000 Installation / Configuration Guide...
- Page 40 Multiple Line Appearance (MLA). While incoming calls on a private line ring at all phones with an appearance, an active or held private line call is accessible only to the associated phone. Release 1.0 September 2010 Edge 5000 Installation / Configuration Guide...
-
Page 41: Sip Configuration, Line Parameters
[OK] softkey to select a line button. • Press the digit, or move the cursor to 8.Line Type using the [Next]-[Previous] softkeys and press the [OK] softkey. Release 1.0 September 2010 Edge 5000 Installation / Configuration Guide... - Page 42 Settings ( ) button to exit the configuration session. Assign an extension number only for a DSS line. Do not assign an extension number for a private NOTE or shared line. Release 1.0 September 2010 Edge 5000 Installation / Configuration Guide...
-
Page 43: Sip Configuration, General Parameters
2.SIP Configuration using the [Next]-[Previous] softkeys and press the [OK] softkey. • Press the digit, or move the cursor to 3.Outbound Proxy Port using the [Next]-[Previous] softkeys and press the [OK] softkey. Release 1.0 September 2010 Edge 5000 Installation / Configuration Guide... - Page 44 The IP Phone must reboot to utilize the new values entered. To enter alphanumeric characters select the [Mode] softkey. Refer to Appendix E for the character mapping of dial pad digits. Release 1.0 September 2010 Edge 5000 Installation / Configuration Guide...
- Page 45 Changing the Local UDP Port requires a reboot of the IP Phone; when you leave the menu, you NOTE will receive a reboot notice. The IP Phone must reboot to utilize the new values entered. Release 1.0 September 2010 Edge 5000 Installation / Configuration Guide...
- Page 46 To enable registration, press the [Yes] softkey or, to disable SIP registration, press the [No] softkey. • Move to another parameter with the navigation buttons and continue the session or press the Settings ( ) button to exit the configuration session. Release 1.0 September 2010 Edge 5000 Installation / Configuration Guide...
- Page 47 Settings ( ) button to exit the configuration session. To enter alphanumeric characters select the [Mode] softkey. Refer to Appendix E for the NOTE character mapping of dial pad digits. Release 1.0 September 2010 Edge 5000 Installation / Configuration Guide...
- Page 48 Settings ( ) button to exit the configuration session.To enter alphanumeric characters select the [Mode] softkey. Refer to Appendix E for the character mapping of dial pad digits. Release 1.0 September 2010 Edge 5000 Installation / Configuration Guide...
-
Page 49: Phone Settings
Press the [Down] softkey to decrease the contrast, or press the [Up] softkey to increase the contrast. • Move to another parameter with the navigation buttons and continue the session or press the Settings ( ) button to exit the configuration session. Release 1.0 September 2010 Edge 5000 Installation / Configuration Guide... -
Page 50: Ring Setting
Settings ( ) button to exit the configuration session. The Edge 5000 series phone uses one of 14 ring types, nine fixed in memory and the remaining NOTE 5 user-defined, as the phone or default ring, see Appendix G. Each line and Phone Book entry may use a different type. - Page 51 Line n Configuration using the [Next]-[Previous] softkeys and press the [OK] softkey. The value of n is the line button number. • Press the digit, or move the cursor to 2.Delayed Ring using the [Next]-[Previous] softkeys and press the [OK] softkey. Release 1.0 September 2010 Edge 5000 Installation / Configuration Guide...
-
Page 52: Ringer Off
) button to exit the configuration session. Headset Auto Mode The Edge 5000 phones support use of a headset that has a standard 2.5 mm plug. With Headset Auto Mode enabled, pressing a line button automatically connects audio to the headset. -
Page 53: Flexible Button Setting
[OK] softkey. • Select the desired flexible button. • Select a function using the [Next]-[Previous] softkey and press the [OK] softkey. Refer to the table above for "Flexible Button Functions". Release 1.0 September 2010 Edge 5000 Installation / Configuration Guide... -
Page 54: Time Configuration
For proper operation, Flexible button 1 should be assigned as the user's primary extension line appearance. The Edge 5000 has 24 flexible buttons. An Expansion Module may be connected to the IP Phone expanding the number of Flexible buttons available with the IP Phone by 12. - Page 55 6.Time Configuration using the [Next]-[Previous] softkeys and press the [OK] softkey. • Press the digit, or move the cursor to 3.DST Auto Adjustment using the [Next]-[Previous] softkeys and press the [OK] softkey. Release 1.0 September 2010 Edge 5000 Installation / Configuration Guide...
- Page 56 3.Phone Settings using the [Next]-[Previous] softkeys and press the [OK] softkey. • Press the digit, or move the cursor to 6.Time Configuration using the [Next]-[Previous] softkeys and press the [OK] softkey. Release 1.0 September 2010 Edge 5000 Installation / Configuration Guide...
-
Page 57: S/W Update
Changing the Provisioning Type requires a reboot of the IP Phone; when you leave the menu, NOTE you will receive a reboot notice. The IP Phone must reboot to utilize the new values entered. An asterisk, , displays in front of the current selection. Release 1.0 September 2010 Edge 5000 Installation / Configuration Guide... - Page 58 3.Phone Settings using the [Next]-[Previous] softkeys and press the [OK] softkey. • Press the digit, or move the cursor to 7.S/W Update using the [Next]-[Previous] softkeys and press the [OK] softkey. Release 1.0 September 2010 Edge 5000 Installation / Configuration Guide...
- Page 59 The IP Phone must reboot to utilize the new values entered. To enter alphanumeric characters select the [Mode] softkey. Refer to Appendix E for the character mapping of dial pad digits. Release 1.0 September 2010 Edge 5000 Installation / Configuration Guide...
- Page 60 3.HTTPS Provisioning using the [Next]-[Previous] softkeys and press the [OK] softkey. • Press the digit, or move the cursor to 4.DHCP Option Number using the [Next]-[Previous] softkeys and press the [OK] softkey. Release 1.0 September 2010 Edge 5000 Installation / Configuration Guide...
- Page 61 For each option, press the [Yes] softkey to enable the check, or press the [No] softkey to disable the check • Move to another parameter with the navigation buttons and continue the session or press the Settings ( ) button to exit the configuration session. Release 1.0 September 2010 Edge 5000 Installation / Configuration Guide...
- Page 62 ) button. If the LCD Menu is locked, use the unlock procedure. Refer to page 3-4 • Press the digit, or move the cursor to 3.Phone Settings using the [Next]-[Previous] softkeys and press the [OK] softkey. Release 1.0 September 2010 Edge 5000 Installation / Configuration Guide...
- Page 63 Changing the DCHP Options requires a reboot of the IP Phone; when you leave the menu, you NOTE will receive a reboot notice. The IP Phone must reboot to utilize the new values entered. An asterisk, , displays in front of the current selection. Release 1.0 September 2010 Edge 5000 Installation / Configuration Guide...
-
Page 64: Lock Outgoing Call
) button to exit the configuration session. When enabled, dialing an empty Speed Number terminates the call and the empty status of the Speed Number displays for approximately 2 seconds. Release 1.0 September 2010 Edge 5000 Installation / Configuration Guide... -
Page 65: Key Tone
3.Phone Settings using the [Next]-[Previous] softkeys, and press the [OK] softkey. • Press the digits, or move the cursor to 11.Bluetooth using the [Next]-[Previous] softkeys, and press the [OK] softkey. Release 1.0 September 2010 Edge 5000 Installation / Configuration Guide... - Page 66 [Discon] to deactivate the headset. • Move to another parameter with the navigation buttons and continue the session or press the Settings ( ) button to exit the configuration session. Release 1.0 September 2010 Edge 5000 Installation / Configuration Guide...
- Page 67 [OK] softkey. • Move to another parameter with the navigation buttons and continue the session or press the Settings ( ) button to exit the configuration session. Release 1.0 September 2010 Edge 5000 Installation / Configuration Guide...
-
Page 68: Language
1.Do Not Disturb using the [Next]-[Previous] softkeys and press the [OK] softkey. • Press the [Yes] softkey to enable DND, or press the [No] softkey to disable DND. Release 1.0 September 2010 Edge 5000 Installation / Configuration Guide... -
Page 69: Call Waiting
3.Call Waiting Tone using the [Next]-[Previous] softkeys and press the [OK] softkey. • Press the [Yes] softkey to enable Call Waiting Tone, or press the [No] softkey to disable Call Waiting Tone. Release 1.0 September 2010 Edge 5000 Installation / Configuration Guide... -
Page 70: Call Hold Ringback
Press the [Yes] softkey to enable stutter dial tone, or press the [No] softkey to disable stutter dial tone. • Move to another parameter with the navigation buttons and continue the session or press the Settings ( ) button to exit the configuration session. Release 1.0 September 2010 Edge 5000 Installation / Configuration Guide... -
Page 71: Auto Answer
• Move to another parameter with the navigation buttons and continue the session or press the Settings ( ) button to exit the configuration session. Release 1.0 September 2010 Edge 5000 Installation / Configuration Guide... -
Page 72: Anonymous Call Block
Speed Number dialing, see . Each “Key Tone” on page 3-43 contact can have a Ring type assigned. When a call is received from the contact, the specified ring signal is employed. Release 1.0 September 2010 Edge 5000 Installation / Configuration Guide... -
Page 73: Adding A Phone Book Record
Enter the new Number for the contact and press the [OK] softkey. • Select the Ring type to use when receiving a call from this contact. • Enter the new Speed Number for the contact and press the [OK] softkey. Release 1.0 September 2010 Edge 5000 Installation / Configuration Guide... -
Page 74: Internal Phone Book
Select the [Delete] softkey and confirm by selecting the [Yes] softkey. Caution this action deletes the record from the Phone Book. • The IP Phone deletes the contact from the Phone Book and returns to the Phone Book list. Release 1.0 September 2010 Edge 5000 Installation / Configuration Guide... - Page 75 5.Directory using the [Next]-[Previous] softkeys and press the [OK] softkey. • Press the digit, or move the cursor to 1.Phone Book using the [Next]-[Previous] softkeys and press the [OK] softkey. Release 1.0 September 2010 Edge 5000 Installation / Configuration Guide...
-
Page 76: Remote Phone Book
Press the [Yes] softkey to set the IP Phone to the default configuration, or press the [No] softkey to cancel. • Move to another parameter with the navigation buttons and continue the session or press the Settings ( ) button to exit the configuration session. Release 1.0 September 2010 Edge 5000 Installation / Configuration Guide... -
Page 77: Reboot
Settings ( ) button to exit the configuration session without activating the changes. Any parameter changes will update during the next reboot. Release 1.0 September 2010 Edge 5000 Installation / Configuration Guide... - Page 78 THIS PAGE INTENTIONALLY LEFT BLANK. Release 1.0 September 2010...
-
Page 79: Using Web Manager For Configuration
Login & Site Map Point your browser at the IP5000 series phone IP address and port 8000, <http://150.150.255.251:8000>, which returns the IP Phone Login page as shown below. Release 1.0 September 2010 Edge 5000 Installation / Configuration Guide... -
Page 80: Login & Site Map
Login & Site Map Chapter 4: Using Web Manager for Configuration • Click LOGIN; the password page displays as below. Release 1.0 September 2010 Edge 5000 Installation / Configuration Guide... - Page 81 On the left is the Web Manager page-link window and in the main screen is a more detailed site map. • Select the desired page from either the page-link or the site map window. Release 1.0 September 2010 Edge 5000 Installation / Configuration Guide...
-
Page 82: Voip Configuration
VoIP Configuration Chapter 4: Using Web Manager for Configuration VoIP Configuration Release 1.0 September 2010 Edge 5000 Installation / Configuration Guide... - Page 83 Registration Timer is the interval, in seconds, between SIP registration renewal attempts. • Local UDP Port is the UDP port used on the LAN for sending and receiving SIP packets. Release 1.0 September 2010 Edge 5000 Installation / Configuration Guide...
- Page 84 UDP port requires a reboot of the IP Phone. When you leave the menu, you will receive a reboot notice. The IP Phone must reboot to utilize the new values entered. Release 1.0 September 2010 Edge 5000 Installation / Configuration Guide...
-
Page 85: Lan Configuration
Mac Address is the MAC address of the IP Phone, view only. • Primary DNS is the IP address of DNS server. • Secondary DNS is the IP address of an auxiliary DNS server. Release 1.0 September 2010 Edge 5000 Installation / Configuration Guide... - Page 86 Changing any value in the LAN screen requires a reboot of the IP Phone. When you leave the menu, you will receive a Reboot notice. The IP Phone must reboot to utilize the new values entered. Release 1.0 September 2010 Edge 5000 Installation / Configuration Guide...
-
Page 87: Call Preferences
Call Waiting Function, when enabled, visually notifies the user of an incoming call while in a conversation. If disable, when in a conversation, a new call is refused and the call server routes the call. Release 1.0 September 2010 Edge 5000 Installation / Configuration Guide... - Page 88 Select the desired parameter and enter new values, or select values from the drop-dow menus. • When complete, select the button to load new values to the IP Phone memory. Release 1.0 September 2010 Edge 5000 Installation / Configuration Guide...
-
Page 89: Dial Plan
Specific entries for the Routing Table are: Number is the digit pattern to match with the user-dialed digits. TRNC defines the number of digits to delete, truncate, from the dialed number. Release 1.0 September 2010 Edge 5000 Installation / Configuration Guide... - Page 90 After the pause, if no additional digits are dialed, the phone places a call to the Operator. In addition, after the user dials any seven digits, the call is processed. Release 1.0 September 2010 Edge 5000 Installation / Configuration Guide...
- Page 91 To change Routing Table parameters: • Assure the Routing Table radial button is selected under the Dial Plan Type • Enter the desired values into the respective boxes. • Select the button. Release 1.0 September 2010 Edge 5000 Installation / Configuration Guide...
-
Page 92: Digit Map Table
A '.' matches any number of occurrences of a digit, including zero occurrences and includes special character matches. A '+' matches any number of occurrences of the previous match, including special characters. Release 1.0 September 2010 Edge 5000 Installation / Configuration Guide... - Page 93 To provide second dial tone after a '9' is dialed, establish a Dial Plan as below. In the Digit Map (2nd Dial Tone) text box, the dial plan for this is (9|). Release 1.0 September 2010 Edge 5000 Installation / Configuration Guide...
- Page 94 • Enter the digits in the Digit Map (Process) boxes. • Click the button. To delete a Digit Map process: • Select the DEL check box. • Click the button. Release 1.0 September 2010 Edge 5000 Installation / Configuration Guide...
-
Page 95: Phone Information
To change the password: • Enter the existing password. • Enter the new password and confirm. • When complete, select the button to load new values to IP Phone memory. Release 1.0 September 2010 Edge 5000 Installation / Configuration Guide... -
Page 96: Phone Settings
Phone Settings 4-18 Chapter 4: Using Web Manager for Configuration Phone Settings Release 1.0 September 2010 Edge 5000 Installation / Configuration Guide... - Page 97 Ring Settings • Ringer Type sets the default ring type, select one of 14 ring signals for audible notification of incoming calls, • Ringer turns the ring signal On or Off. Release 1.0 September 2010 Edge 5000 Installation / Configuration Guide...
- Page 98 Changing DTMF Payload, Frame Duration or DTMF Relay requires a reboot of the IP Phone. NOTE When you leave the menu, you will receive a Reboot notice. The IP Phone must reboot to utilize the new values entered. Release 1.0 September 2010 Edge 5000 Installation / Configuration Guide...
-
Page 99: Phone Book
To add a Phone Book entry: • Click the button and enter the new values in the Phone Book Entry screen. The Address field is the contact's phone number or SIP user id. Release 1.0 September 2010 Edge 5000 Installation / Configuration Guide... - Page 100 To delete specific entries from the Phone Book: • Click the 'Clear' box for the desired records and select the button to delete checked records. To delete all entries from Phone Book: • Select the button. Release 1.0 September 2010 Edge 5000 Installation / Configuration Guide...
- Page 101 The IP Phone can access and dial from an external Phone Book. The Remote Phone Book is an xml file managed remotely. To use the Remote Phone Book feature, the URL of the HTTP server hosting the Phone Book must be entered. Release 1.0 September 2010 Edge 5000 Installation / Configuration Guide...
-
Page 102: Flexible Button
For a Message button, enter the address or phone number of the Voice Mail Server. Each button of the LIP-8812LSS DSS can display a 10-character label. • Click the button to store changes. Release 1.0 September 2010 Edge 5000 Installation / Configuration Guide... -
Page 103: Call Log
From the Call log, the user can call a contact or store a call log record directly to the Phone Book. The Call Log will be lost if the phone loses power or reboots. Release 1.0 September 2010 Edge 5000 Installation / Configuration Guide... - Page 104 Caution: selecting the button will delete all records in the Call Log. To call a party from the Call Log: • Click the button associated with the desired Call log record. Release 1.0 September 2010 Edge 5000 Installation / Configuration Guide...
-
Page 105: Network Time Configuration
Network Time Configuration 4-27 Chapter 4: Using Web Manager for Configuration Network Time Configuration Release 1.0 September 2010 Edge 5000 Installation / Configuration Guide... - Page 106 To modify parameters on the Network Time screen, select the desired parameter and enter new values or select values from the drop-down menus. When complete, select to load new values in the IP Phone memory. Release 1.0 September 2010 Edge 5000 Installation / Configuration Guide...
-
Page 107: Upgrade Configuration
Upgrade Configuration 4-29 Chapter 4: Using Web Manager for Configuration Upgrade Configuration Release 1.0 September 2010 Edge 5000 Installation / Configuration Guide... - Page 108 Root CA in this area of web page. • File to Upgrade defines the files (software and configuration) to download during a reboot. • Decryption Key sets the hexadecimal key required to decrypt configuration files. Release 1.0 September 2010 Edge 5000 Installation / Configuration Guide...
- Page 109 Changes made to the Upgrade screen require a reboot of the IP Phone. When you leave the menu, you will receive a Reboot notice. The IP Phone must reboot to utilize the new values entered. Release 1.0 September 2010 Edge 5000 Installation / Configuration Guide...
-
Page 110: Qos Configuration
Id are accepted and frames sent by the IP Phone include the LAN port Id and priority. In addition, the PC, LAN switch ports and the default gateway must be assigned to employ the VLAN tags for proper operation. Release 1.0 September 2010 Edge 5000 Installation / Configuration Guide... - Page 111 If CDP is enabled, manual VLAN settings are overwritten during a reboot of the IP Phone. To use manually defined VLAN settings, disable CDP, see page 4-7. Release 1.0 September 2010 Edge 5000 Installation / Configuration Guide...
-
Page 112: Load Default
“Default Settings” on page A-1 To set the IP Phone memory to the default configuration: • Select and confirm. • The IP Phone loads the default configuration and reboots. Release 1.0 September 2010 Edge 5000 Installation / Configuration Guide... -
Page 113: Reboot
To reboot the IP Phone: • Select the button. • The IP Phone saves and loads any changes in the configuration to active memory and reboots using the updated configuration. Release 1.0 September 2010 Edge 5000 Installation / Configuration Guide... - Page 114 THIS PAGE INTENTIONALLY LEFT BLANK. Release 1.0 September 2010...
-
Page 115: Troubleshooting
SNTP server), and results of the last file download attempt. • Press the Settings ( ) button. • Press the digit, or move cursor to 8.Information using the [Next]-[Previous] softkeys, and press the [OK] softkey. Release 1.0 September 2010 Edge 5000 Installation / Configuration Guide... -
Page 116: Troubleshooting Guide
Make sure your network supports DHCP. 2. Network Mode: Static Make sure Network Mode is static. If you entered the IP Address through a phone, make sure you reset your IP Phone. Release 1.0 September 2010 Edge 5000 Installation / Configuration Guide... - Page 117 7. At the “Do you want to apply default?” prompt select the [Yes] softkey to use default or [No] softkey to use previously assigned parameters. The IP Phone will reboot and return to normal operation. Release 1.0 September 2010 Edge 5000 Installation / Configuration Guide...
- Page 118 THIS PAGE INTENTIONALLY LEFT BLANK. Release 1.0 September 2010...
-
Page 119: Default Settings
Line 1 line type Private Line 1 BLA primary line Not assigned Extension for DSS line 1 Not assigned Ring Type for line 1 default ring Delayed ring for line 1 0 seconds Release 1.0 September 2010 Edge 5000 Installation / Configuration Guide... - Page 120 Local UDP port 5060 Register expires 3600 seconds SIP session timer** SIP T1 timer** 500 msec. SIP T2 timer** 4000 msec. Stun server address** Not assigned Number of lines* Preferred codec* G729/G723/PCMU/PCMA/G722 Release 1.0 September 2010 Edge 5000 Installation / Configuration Guide...
-
Page 121: Factory Default Configuration
External call cadence (1)** 800, 400, 800, 4000, 0, 0 Group call cadence (2)** 400, 200, 400, 200, 800, 4000 Internal call cadence (3)** 300, 200, 1000, 200, 300, 4000 Release 1.0 September 2010 Edge 5000 Installation / Configuration Guide... - Page 122 Function cdp enabled Function download_flag* disabled Function onetouch_pickup* enabled Function dnd* enabled Web Manger login name* private Web Manager login password* [NETTIME] NTP server address Not assigned Synchronization Interval** 24 hours Release 1.0 September 2010 Edge 5000 Installation / Configuration Guide...
- Page 123 [PROG] Flex buttons 1 & 2 private lines [CALL] Caller id block disabled Anonymous caller id block disabled Call waiting enabled Call waiting tone enabled Call hold ringback tone enabled Release 1.0 September 2010 Edge 5000 Installation / Configuration Guide...
- Page 124 Auto answer disabled Forwarding condition* 0 off Forwarding address* Not assigned Forwarding no-answer time* 10 seconds Direct call* disabled Direct call number* Not assigned Direct call timer* 5 seconds Release 1.0 September 2010 Edge 5000 Installation / Configuration Guide...
-
Page 125: Ip5000 Specifications
0 - 40 Storage Temperature -20 - 60 Operation Humidity 10 - 85 % RH, non-condensing Audio Acoustic Echo Canceller & Voice Active Detection Codecs G.711, G.723.1/a, G.729a/b, and G.722 Release 1.0 September 2010 Edge 5000 Installation / Configuration Guide... - Page 126 THIS PAGE INTENTIONALLY LEFT BLANK. Release 1.0 September 2010...
-
Page 127: Download Lcd Messages
The S/W image size is 0 or larger than maximum size INVALID ID OR PW The current Id or password for authentication is invalid NEW VERSION LOADED S/W was successfully loaded UPDATE NOT NEEDED The current version is the latest Release 1.0 September 2010 Edge 5000 Installation / Configuration Guide... -
Page 128: Configuration Download Messages
The configuration file contains an erroneous value; the value has been automatically converted to previous value INVALID ID OR PW The current Id or password for authentication is invalid DOWNLOAD OK Configuration was successfully downloaded Release 1.0 September 2010 Edge 5000 Installation / Configuration Guide... -
Page 129: Using The Configuration File
Deleting an unused field line from the configuration file also reduces traffic between the provisioning server and the IP Phone during a boot cycle. Release 1.0 September 2010 Edge 5000 Installation / Configuration Guide... - Page 130 Default is blank. dns2_address Optional IP address for a secondary DNS server; used if the primary DNS server is unavailable. Valid value is an IP address. Default is blank. domain_name Not used Release 1.0 September 2010 Edge 5000 Installation / Configuration Guide...
- Page 131 Valid values are time zones shown on page Default is 3, Pacific Standard time. time_format Sets the LCD display format for time. Valid values are 0 (off), 1 (12-hour) or 2 (24-hour). Default is 2. Release 1.0 September 2010 Edge 5000 Installation / Configuration Guide...
- Page 132 The default is 2 for the United States. dst_stop_month Sets month DST ends. Valid values are 1 to 12 with 1 being January and 12 being December. The default is 11 for the United States. Release 1.0 September 2010 Edge 5000 Installation / Configuration Guide...
- Page 133 Valid values are 1024 to 32000. Default is 5060. message_url Defines the voice mail address, IP address or phone number format. The valid value is an IP address or telephone number. Default is blank. Release 1.0 September 2010 Edge 5000 Installation / Configuration Guide...
- Page 134 A value of ‘0’ is a de-registration. Valid values are 0 to 6400. Default is 3600. timer_session Specifies the SIP session timer, in seconds. Valid values are 0 to 640. Default is 0. Release 1.0 September 2010 Edge 5000 Installation / Configuration Guide...
- Page 135 Valid values are enable or disable Default is enable. stun_server Sets the STUN server IP address or FQDN Valid value is an IP address or FQDN. Default is blank. Release 1.0 September 2010 Edge 5000 Installation / Configuration Guide...
- Page 136 The n variable is the line button and can be from 1 to the max_line_num. Valid value is up to 50 characters. The default is blank. Release 1.0 September 2010 Edge 5000 Installation / Configuration Guide...
- Page 137 1 to the max_line_num. linen_delayed_ring Delayed ring is adjustable from 0 to 10 seconds in 1-second increments. Valid values are 0 to 10 seconds. The default is 0. Release 1.0 September 2010 Edge 5000 Installation / Configuration Guide...
- Page 138 Specifies the gain level for the phone’s handsfree speaker. Valid values are 1 through 11. The default is 6. handset Specifies the gain level for the phone’s handset. Valid values are 1 through 11. The default is 6. Release 1.0 September 2010 Edge 5000 Installation / Configuration Guide...
- Page 139 Sets the DTMF payload type for RFC2833. Valid values are 96 through 255. The default is 101. dtmf_duration Sets the DTMF duration. Valid values are 50 through 300 ms. The default is 120. Release 1.0 September 2010 Edge 5000 Installation / Configuration Guide...
- Page 140 The valid value is an eight value time array (on off on off on off on off). The valid range is 0 to 30000 milliseconds total time. The default is 1500-500-1500-2500-0-0-0-0 Release 1.0 September 2010 Edge 5000 Installation / Configuration Guide...
- Page 141 Phone will wait longer for receipt of packets. However, large values may delay voice packet processing. Smaller values may produce more packet loss but quicker voice packet processing. Valid values are 0 to 150. The default is 30. Release 1.0 September 2010 Edge 5000 Installation / Configuration Guide...
- Page 142 The default is 0 (not defined by configuration file). forwarding_address Sets the address to receive forwarded calls. The valid value is a maximum of 60 characters. The default is blank. Release 1.0 September 2010 Edge 5000 Installation / Configuration Guide...
- Page 143 32 digits. • post: digits to insert at the end of the number, maximum 32 digits. The default is blank. Release 1.0 September 2010 Edge 5000 Installation / Configuration Guide...
- Page 144 The maximum length is 15-characters, 12 display on IP8840, 10 display on IP8812LSS. The default is blank. CALL callnum_in_line Defines the number of active calls on a line. Valid value is 1-3. The default value is 3. Release 1.0 September 2010 Edge 5000 Installation / Configuration Guide...
- Page 145 Sets the delay for Warm Line operation. After the timer expires, the direct call is made. Set to zero (0) for Hotline. Valid values are 0 to 10 seconds delay. Default is 5. Release 1.0 September 2010 Edge 5000 Installation / Configuration Guide...
- Page 146 Disables dnd function for the phone. Valid values are disable or enable. Default is enable. function cdp Enables cdp on reboot to define VLAN. Valid values are enable or disable. Default is enable. Release 1.0 September 2010 Edge 5000 Installation / Configuration Guide...
- Page 147 The valid value is a URL of less than 255 characters. The default is blank. https_opt Defines the DHCP Option for the HTTP/HTTPS server URL. Valid values are 1 to 255. Default is 160. Release 1.0 September 2010 Edge 5000 Installation / Configuration Guide...
- Page 148 Valid values are 0 to 23 o’clock. Default is 00:00. smartup_confirm Enables user confirmation of firmware download from the provisioning server. Valid values are enable or disable. Default is enable. Release 1.0 September 2010 Edge 5000 Installation / Configuration Guide...
- Page 149 The default is blank. phonebook_url Defines the http server url for the external (Remote) Phone Book. The valid value is a URL of less than 255 characters. The default is blank. Release 1.0 September 2010 Edge 5000 Installation / Configuration Guide...
-
Page 150: Sample - Blank Configuration File
‘;’. ;comments start with ';' and end with carriage return. ;========================================================================= [LAN] ;Lan configuration network_mode ipAddress defaultGateway subnetMask dns1_address dns2_address domain_name tftp_server_address pc_802_priority phone_802_priority pc_vlan_id phone_vlan_id Release 1.0 September 2010 Edge 5000 Installation / Configuration Guide... - Page 151 [VOIP] ;VoIP configurations outbound_proxy_server outbound_proxy_port backup_proxy_server backup_proxy_port message_url SIP_service_domain preferred_codec rtp_port outbound_proxy_register outbound_proxy_mode prack_mode user param Release 1.0 September 2010 Edge 5000 Installation / Configuration Guide...
- Page 152 Release 1.0 September 2010 Edge 5000 Installation / Configuration Guide...
- Page 153 [DSP] ;DSP configurations handsfree handset headset ring ringer_off ring_type ringdata dtmf_payload dtmf_duration cadence0 cadence1 cadence2 cadence3 cadence4 cadence5 cadence6 cadence7 cadence8 cadence9 cadence10 cadence11 frame_duration jitterbuffer_min_delay jitterbuffer_nom_delay jitterbuffer_max_delay headset_mode dtmf Release 1.0 September 2010 Edge 5000 Installation / Configuration Guide...
- Page 154 2 for Phone Book 3 for Call Log 4 for Mute 5 for Headset 6 for Redial 7 for Return 8 for FWRD 9 for CONF 10 for TRNS 11 for Hold Release 1.0 September 2010 Edge 5000 Installation / Configuration Guide...
- Page 155 [SYSTEM] ;System Configurations phone_name lang lock_outgoing_call use_speed_number web_server_port web_server telnet_server function private_hold function barge_in function cdp function download_flag function onetouch_pickup function dnd phone_password Release 1.0 September 2010 Edge 5000 Installation / Configuration Guide...
- Page 156 Sample - Blank Configuration File D-28 Appendix D: Using the Configuration File [PROVISION] ;Provisioning Configurations type cfg_download sw_download dhcp_get_tftp dhcp_get_http https_url https_opt https_id https_password https_macform verifying_cert smartup_use smartup_type smartup_interval smartup_time smartup_confirm decrypt_key phonebook_url Release 1.0 September 2010 Edge 5000 Installation / Configuration Guide...
-
Page 157: Time Zones Chart
GMT+01:00 Berlin, Germany GMT+10:00 Guam Standard GMT+01:00 Bern, Switzerland GMT+11:00 Solomon Islands GMT+01:00 Brussels, Belgium GMT+12:00 Marshall Islands GMT+01:00 Central European GMT+12:00 Auckland, Wellington GMT+01:00 Copenhagen, Denmark GMT+13:00 Nuku’alofa GMT+01:00 Madrid, Spain Release 1.0 September 2010 Edge 5000 Installation / Configuration Guide... - Page 158 THIS PAGE INTENTIONALLY LEFT BLANK. Release 1.0 September 2010...
-
Page 159: Dial Pad Mode
Appendix E Dial Pad Mode The Edge 5000 dial pad inputs digits or alphanumeric characters for specified entries such as hostname. The table below provides the input information for dial pad mode. Alphanumeric Character Set Dial Pad Mode Digit Upper Case... - Page 160 THIS PAGE INTENTIONALLY LEFT BLANK. Release 1.0 September 2010...
-
Page 161: Auto Provisioning Routine
DHCP Option #50 IP address of the phone DHCP Option #66 TFTP Server Name DHCP Option #150 TFTP Server IP Address has priority over Option 66 when set. DHCP Option #160 default HTTP/HTTPS URL for provisioning Release 1.0 September 2010 Edge 5000 Installation / Configuration Guide... -
Page 162: Tftp Downloads
These files along with the version file are available from Vertical. If desired, comments may be added to the version file using "#" as the leading character of the comment line. -
Page 163: Http/Https Downloads
These files along with the version file are available from Vertical. If desired, comments may be added to the version file using "#" as the leading character of the comment line. -
Page 164: Sip Server Check-In Request
During the process, the IP Phone downloads any configuration file changes as well as new software regardless of the settings for the software and configuration download flags. Release 1.0 September 2010 Edge 5000 Installation / Configuration Guide... -
Page 165: User Defined And Fixed Ring Tones
"8" l - note A is 3.52 KHz b = default beats per minute, If not specified, defaults are: d = 4, ¼ note o = 6, note A = 880Hz b = 63 beats per minute Release 1.0 September 2010 Edge 5000 Installation / Configuration Guide... - Page 166 Ring type 205 = full note A at 880Hz followed by a ½ note E at 880Hz both at 60 beats. For additional information about constructing Ring types with RTTTL, go to http://www.activexperts.com/xmstoolkit/sms/rtttl/ Release 1.0 September 2010 Edge 5000 Installation / Configuration Guide...
-
Page 167: Ip Phone Icons
Appendix H IP Phone Icons The Edge 5000 displays various icons in the upper line of the LCD to assist the user in understanding the status of the phone. Below is a list of icons and their meaning. UPPER LINE ICONS LAN or Network connection icon indicates the status of the LAN connection to the IP Phone. - Page 168 Unavailable icon indicates the line is not available for use Phone Book icon indicates the Phone Book is being displayed Conference icon indicates the line is presently in a conference call Release 1.0 September 2010 Edge 5000 Installation / Configuration Guide...
Need help?
Do you have a question about the Edge 5000 and is the answer not in the manual?
Questions and answers