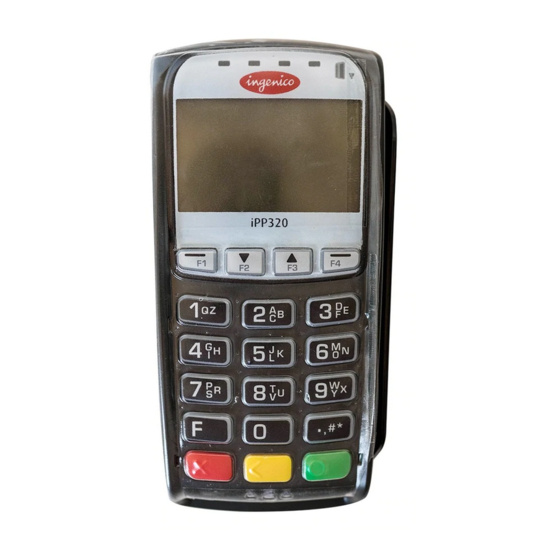
Ingenico FLEX IPP320 Installation Manual
Hide thumbs
Also See for FLEX IPP320:
- User manual ,
- Installation manual ,
- Troubleshooting manual (57 pages)

Related Manuals for Ingenico FLEX IPP320


Summary of Contents for Ingenico FLEX IPP320
- Page 1 FLEX iPP320 PAYMENT TERMINAL INSTALLATION GUIDE Prepared by : Frédérick Matte Technical Support Advisor Bell Canada Created : January 24 , 2012 Revised : July 11 , 2014...
-
Page 2: History Of Updates
June 14 , 2013 Modifications for application release 5.xx Frédérick Matte Version 1.40 April 4 , 2014 Modifications for application release 6.1x Frédérick Matte Version 1.50 July 10 , 2014 Modifications for application release 7.0x FLEX iPP320 - Installation Guide_v1.50.docx... -
Page 3: Table Of Contents
Table of Contents FLEX IPP320 PIN pad installation ......................4 Required hardware ..........................5 Connecting the terminal ........................6 Connect the communication cable(s) (based on the installation type) ......... 6 Serial connection to the Point-of-sale System ................6 IP connection to Point-of-sale System ..................7 Connect the power supply ...................... -
Page 4: Flex Ipp320 Pin Pad Installation
FLEX IPP320 PIN pad installation This guide is intended for the distributor mandated by the merchant to install the Desjardins iPP320 PIN pad terminals required for use with the FLEX integrated payment solution in the store. It provides details of all the steps the installer must complete to prepare, start up and present the terminal to the merchant. -
Page 5: Required Hardware
DB9-M/FSPEC-10) - User guide Documentation - “Introduction to the chip card” brochure - Credit test card (magnetic stripe) - Credit test card (chip) Cards - Debit test card (magnetic stripe) - Debit test card (chip) FLEX iPP320 - Installation Guide_v1.50.docx... -
Page 6: Connecting The Terminal
• The PIN pad must first be connected to a special adaptor called “Magic box” (part number 296121027). This adaptor has several interfaces, thus allowing for different types of connection to the Point-of-sale System and to the host. FLEX iPP320 - Installation Guide_v1.50.docx... -
Page 7: Ip Connection To Point-Of-Sale System
IP communication to the Desjardins host – Ethernet iPP320 cable (part no 296106335). No additional connection is required. (Note that the “Magic box” adaptor with a category 5 networking cable could also be used) FLEX iPP320 - Installation Guide_v1.50.docx... -
Page 8: Connect The Power Supply
Connection of power supply for a serial link to Point-of-sale System N.B. The power supply cable must be the last one connected in order to ensure that the PIN pad detects and initializes the appropriate interfaces during start-up. FLEX iPP320 - Installation Guide_v1.50.docx... -
Page 9: Starting Up The Terminal
III. Starting up the terminal This section describes the steps for starting up the FLEX IPP320 PIN pad. It contains the procedure for validating the device configuration and initializing the Payment Terminal as well as for downloading and activating the required application. -
Page 10: Check The Communication Mode To The Point-Of-Sale System
The terminal displays (Please wait). The three required initialization types will launch automatically: • Keys initialization • Terminal initialization • Public keys initialisation o During the entire initialization process the terminal displays (Please wait). FLEX iPP320 - Installation Guide_v1.50.docx... -
Page 11: Download
On the idle screen, if «MENU» is not displayed above the F1 key, press the yellow key followed by the “0” key to unlock the terminal menus. Required only for IP communication between the Payment Terminal and the Point-of-sale System. FLEX iPP320 - Installation Guide_v1.50.docx... - Page 12 Upon receipt of the request, the terminal will display the IP address of the Point-of-sale System that sent the request, along with the message (Accept?). o Press F4 to accept the association or F1 to clear the current association and return the terminal to wait mode. FLEX iPP320 - Installation Guide_v1.50.docx...
-
Page 13: Training
• The FLEX PIN pad will automatically return to locked FLEX mode when a service request is received from the merchant’s Point-of-sale System. The user must repeat the unlock procedure as needed to come back to the configuration and troubleshooting mode. FLEX iPP320 - Installation Guide_v1.50.docx... -
Page 14: Procedures To Be Used In The Event Of A Failure
Ask the customer to use another payment method Problem closing a batch • Advise the merchant that, if unable to obtain the batch closing report due to a technical problem, the TPV100 report can be requested from Business Customer Services. FLEX iPP320 - Installation Guide_v1.50.docx... -
Page 15: Completing The Installation
Toll free: 1-888-285-0015 Business Customer Service Montreal: 514 397-4737 Toll free: 1-888-378-8472 Accord D Desjardins Financing Service Montreal: 514 281-2880 Toll free: 1-800-363-3514 Technical support for payment terminals Montreal: 514 875-8750 Toll free: 1-800-361-8120 Authorization centre FLEX iPP320 - Installation Guide_v1.50.docx... -
Page 16: Appendix A - Config. Report
« Services » submenu: shows the activated services « Cards and AID » submenu: shows supported cards and permitted reading method for each (chip or magnetic stripe) « Modem & Network » submenu: shows configuration parameters for authorization host communication. FLEX iPP320 - Installation Guide_v1.50.docx... - Page 17 ---------------- POS COMM |Active YES| comm. with Point-of-sale System activated or not |Comm. modeSerial| communication mode with Point-of-sale System |BaudRate 9600BPS| serial port speed 8,N,1 | |Settings serial port settings ---------------- FLEX iPP320 - Installation Guide_v1.50.docx...
- Page 18 |Comm. mode communication mode with Point-of-sale System 2200 | |Port TCP port used for Point-of-sale System communication. |POS IP address ---------------- | POS COMM |192.168.12.24 IP address of associated Point-of-sale System ---------------- FLEX iPP320 - Installation Guide_v1.50.docx...
-
Page 19: Appendix B - Configuration
To assist you in correcting such a situation, this appendix describes the steps required to customize the FLEX IPP320 PIN pad configuration. It contains the detailed procedure to configure the required communication information – both with the host and with the Point-of-sale System – and to assign the terminal number to the device. - Page 20 • Using F2 or F3 to navigate, select (Diagnostic) and press the green key. • Select (IP Status) then press the green key. • Select (DESJARDINS) then press the green key. • Select (Status) then press the green key. FLEX iPP320 - Installation Guide_v1.50.docx...
-
Page 21: Configuration Of Communication Mode To Point-Of-Sale System
• Select (IP) then press the green key. • The terminal displays (IP activated). Next, the IP address of the Point-of-sale System from which transactions will be sent must be registered on the FLEX terminal FLEX iPP320 - Installation Guide_v1.50.docx... -
Page 22: Terminal Number Configuration
The terminal displays the terminal number that is currently in memory. o Press the yellow key to clear the number from memory and enter the terminal number in MMMMMMSS format, where: • MMMMMM = merchant number FLEX iPP320 - Installation Guide_v1.50.docx... - Page 23 • SS = terminal sequence number o Press the green key to confirm the entry. FLEX iPP320 - Installation Guide_v1.50.docx...
-
Page 24: Appendix C - Ip Status
F2 / F3 to navigate between screens | Status |Connectivity type of test |00-Success result ---------------- The result data is broken down as follows: The first section “Physical Link” provides information on network detection. FLEX iPP320 - Installation Guide_v1.50.docx... - Page 25 The most frequently encountered status codes are: Code Message IP parameters section Successful Network not initialized Cable disconnected DHCP error Other initialization error SSL section Successful Initialization error Invalid CA certificate Invalid POS certificate Connectivity section Successful DNS error Gateway error FLEX iPP320 - Installation Guide_v1.50.docx...
- Page 26 Internet error Unconfigured DNS Cable disconnected Connection errors section Disconnected cable Connection error Revoked POS certificate Invalid data centre certificate Other SSL error FLEX iPP320 - Installation Guide_v1.50.docx...
-
Page 27: Appendix D - Troubleshooting
This section is intended as a guideline for diagnosing communication problems that may arise when using FLEX IPP320 PIN pad Terminals. These preliminary checks can be done before contacting Technical support for payment terminals. Note that the Technical Support agent might ask to check the same items to support their own troubleshooting. - Page 28 Reboot terminal if problem of connection. persists. Connection None. establishment aborted by user. Host rejected Error related to None. request received communication protocol: from terminal. unexpected “NAK” character received. FLEX iPP320 - Installation Guide_v1.50.docx...
-
Page 29: Between The Pin Pad And The Point-Of-Sale System
Confirm that the IP address registered in the terminal corresponds to the Point- of-sale System IP address. o Confirm that the Point-of-sale System permits communications on TCP port 2200. • Disconnect then reconnect the terminal’s power cord. FLEX iPP320 - Installation Guide_v1.50.docx... - Page 30 Manual entry required. Unauthorized use. Transaction cancelled by user or timed out during user entry. Call card issuer (referral). Card not supported. Communication error to the Host. Host not available. Transaction not authorized. Transaction not allowed. FLEX iPP320 - Installation Guide_v1.50.docx...
- Page 31 Other error (general error). Processing of requested FLEX service not allowed in current context. Transaction not allowed. Terminal busy. Terminal cannot process new transaction at the moment. SPSI_SERVICE_REQ_NUM assigned to service request already used in previous request. FLEX iPP320 - Installation Guide_v1.50.docx...
-
Page 32: Appendix E - Quick Start
2. Initialization and download of the terminal 3. Registering of the Point-of-sale System 4. Test transaction 5. Explanation of the terminal’s basics to the merchant. Required only for IP communication between the Payment Terminal and the Point-of-sale System FLEX iPP320 - Installation Guide_v1.50.docx...
Need help?
Do you have a question about the FLEX IPP320 and is the answer not in the manual?
Questions and answers