Table of Contents
Advertisement
Advertisement
Table of Contents

Related Manuals for MHM Synchroprint X-Type plus


Summary of Contents for MHM Synchroprint X-Type plus
-
Page 1: Operating Instructions
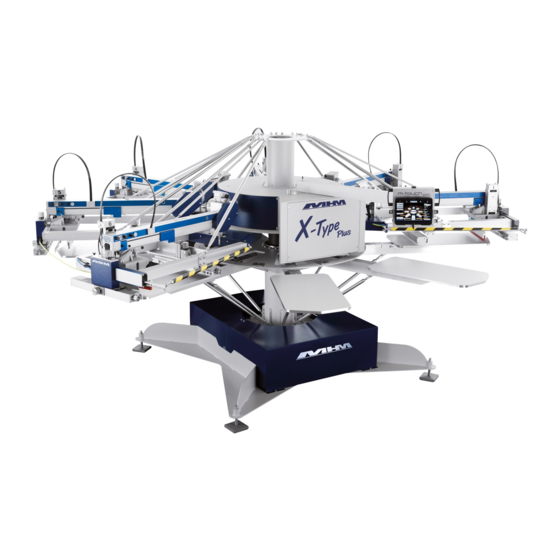
Operating Instruction X-Type plus OPERATING INSTRUCTIONS (Translation of the original instructions) MHM SCREEN PRINTING MACHINE SYNCHROPRINT X-Type plus ©2012-2016 Machines Highest Mechatronic GmbH, Erl, Austria Operating instructions X-Type plus V1-3.docx Page 1 of 45... -
Page 2: Preface
Machines Highest Mechatronic GmbH Important Advice Regarding These Operating Instructions These Operating Instructions form an integral part of the Synchroprint X-Type plus and must be made available to all authorized personnel at all times. No particular sections or pages must be removed from these Operating Instructions, and any missing sections or pages should be replaced immediately, in particular with regard to section “1. -
Page 3: Table Of Contents
Operating Instruction X-Type plus Content: Preface ..............................2 Important Advice Regarding These Operating Instructions ..............2 Safety Instructions........................5 1.1. Description of Key Words and Symbols in the Operating Instructions ........ 5 1.2. General Information ......................6 1.3. Qualification of Operating and Service Staff ................ 6 1.4. - Page 4 Operating Instruction X-Type plus 7.9.8. Dryer connector ......................21 7.9.9. Control Keypad ......................21 7.9.10. Squeegee Carriage ....................23 7.10. Additional equipment ...................... 24 7.10.1. Flash Cure Units ....................... 24 7.10.1. Flocking Devices ...................... 25 Danger Zones ..........................26 Control of the Machine ......................27 9.1.
-
Page 5: Safety Instructions
Operating Instruction X-Type plus 1. Safety Instructions This section describes the safety instructions for the correct and safe operation of the Synchroprint X-Type plus. In addition, this section also contains references to the European rules and regulations concerning the guarantee of industrial safety along with safety at the workplace. These rules and regulations provide the basis for these operating instructions. -
Page 6: General Information
Operating Instruction X-Type plus 1.2. General Information The Synchroprint X-Type plus (hereon named Synchroprint) is built in accordance to all appropriate safety regulations. Owing to its complex design, the Synchroprint must only be operated and maintained by suitably skilled staff. -
Page 7: Required Qualification For Operations
Operating Instruction X-Type plus 1.4. Required qualification for operations Operating Maintenance Service Skill Assistant personnel personnel personnel Colour refill (only at standstill) Unloading substrates Cleaning of the machine (only at standstill) Setting screens Equip flood and print squeegees Equip the screens Adjust squeegees Clean of the screens in clean mode Equip machine with dryer or changing the position... -
Page 8: Safety Instructions For The Operating Staff
(Emergency STOP), before commencing use of the Synchroprint. No modifications to any part of the machine or its assembly system that may adversely affect safety must be carried out without the prior approval of MHM. Program modifications in the control program and changes of settings which may affect the Synchroprint’s operation should only be carried out by an MHM... -
Page 9: Additional Risks
Operating Instruction X-Type plus 1.7. Additional Risks Even though the Synchroprint has been designed and built according to the most stringent safety criteria, as with all machinery we have to anticipate certain additional risks, which are detailed below: Danger Description Behavior/Action Electrical threats: Danger of life-threatening... -
Page 10: Safety Signs On The Machine
Operating Instruction X-Type plus 1.8. Safety Signs on the Machine The following safety signs are attached to the corresponding points of the machine: Danger Description Location Warning against squashing of parts At squeegee carriages. of the body, in particular arms or hands. -
Page 11: Dimensions
Operating Instruction X-Type plus 3.2. Dimensions 3.3. Specifications Specifications X-Type plus SPXC 04 SPXC 08 SPCX 10 SPXC 12 SPXC 14 number of pallets max. number of printstations / colors max. image area (standard version) 43 x 50 cm (17 x 19,5") max. -
Page 12: Transportation And Packaging
Operating Instruction X-Type plus 4. Transportation and packaging This section provides an overview of the proper transportation of the Synchroprint. 4.1. General Notes with Regard to Transportation and Danger Warnings Danger of falling objects! The following instructions must be observed 1. -
Page 13: Assembly
5.1. General Assembly Instructions The Synchroprint must only be installed / assembled by an authorized MHM service technician or by an authorized service technician from an official MHM dealer/agent. Any assembly/installation by any third party not listed above will result in immediate cancellation of the warranty. -
Page 14: External Supply/Connection Ports
Operating Instruction X-Type plus 5.4. External supply/Connection ports Connections for compressed air and mains electricity are located on the base unit of the Synchroprint as standard. Overhead supply connections may be ordered optionally but only at time of order, to enable supplies to enter the machine from above, through the centre column. Danger of tripping over! In case of laying supply lines on the floor, it is necessary to attach step covers. -
Page 15: Commissioning The Synchroprint
After the initial start-up of the machine, commissioning is to be completed in the presence of the authorized technician along with any persons authorized on the part of the customer. During this initial start-up and commissioning, all tasks carried out by the MHM service engineer or the technicians of an authorized dealer are recorded. -
Page 16: Overview Machine Parts
Operating Instruction X-Type plus 7.2. Overview Machine Parts Print station Control panel Safety cable Safety bars Foot switch Pallets 7.3. Control panel Main switch tablet Tablet m-touch pro Power supply Safety level key tablet Control ON/OFF Reset button Skip EMERGENCY STOP button (push button) Operating instructions X-Type plus V1-3.docx... -
Page 17: Safety Devices
Operating Instruction X-Type plus The main control panel includes the following features: Machine feature Description Tablet The tablet PC is used to control the main operating features of the Synchroprint. Touching (tapping) the command buttons displayed on m-touch pro the screen will operate various individual functions of the machine. You will find a detailed description of all functions in section “9 Control of the Machine”. -
Page 18: Pallets
Exceeding the maximum allowed weight of the pallets would increase the dynamic load to the machine and can cause material damage. The maximum weight of the pallets must be observed. Only pallets provided by MHM must be used for production. 7.6. Foot switch The foot switch is used to start an index movement when machine runs in manual mode. -
Page 19: Type Plate
Operating Instruction X-Type plus 7.8. Type Plate The type plate with type, serial number, year of manufacture, mains voltage, mains frequency, connected load and CE symbol is located on the machine base. 7.9. Print Stations 7.9.1. Overview Print Stations X-axis Y-axis Squeegee carriage Squeegee/print arm... -
Page 20: Squeegee Drive Motor
Operating Instruction X-Type plus 7.9.2. Squeegee Drive Motor The squeegee/print arm motor is used to drive the squeegee carriage back and forth, precisely controlled by the frequency converter. 7.9.3. Squeegee/Print Arm The squeegee carriage, squeegee stroke length adjustment, control keypad and control knobs for the squeegee carriage speed &... -
Page 21: Dryer Connector
Operating Instruction X-Type plus 7.9.8. Dryer connector The dryer connector is used to control external units like intermediate dryers or flock units. When the machine detects a 24-V signal at pin number 6 “Auto detect”, the dryer is detected automatically. The drier is started with a 24-V signal on pin 5. The duration of the drying process can be controlled internally through the control or externally through the drier. - Page 22 Operating Instruction X-Type plus The following functions are available from the control keypad: Function Pressing and holding ‘ADJUST’ on the keypad (approx. 3 sec.) puts the machine in the ‘ADJUST’ mode. A D J The ‘LOCK’ key is used to lock/unlock the screen pneumatically.
-
Page 23: Squeegee Carriage
Operating Instruction X-Type plus 7.9.10. Squeegee Carriage The squeegee carriage is equipped with two squeegees. Pulling the black ‘quick release’ knob (pic. opposite) will release the respective squeegee. Make sure that these locking knobs engage fully when loading squeegee. The maximum permitted squeegee width must be observed. -
Page 24: Additional Equipment
Operating Instruction X-Type plus 7.10. Additional equipment 7.10.1. Flash Cure Units Flash cure units may be installed into either an empty station or a print station. The flash cure unit must be powered by a separate supply, which should comply with the electrical data supplied by the manufacturer (see data sheet for flash cure units). -
Page 25: Flocking Devices
Operating Instruction X-Type plus 7.10.1. Flocking Devices The high voltage of several thousand volts required for the flocking process represents a great threat for man and machine. That’s why only specially qualified workers familiar with all potential risks are allowed to operate flocking devices. -
Page 26: Danger Zones
Operating Instruction X-Type plus 8. Danger Zones Danger zones are the areas of the machine which during operation involve a certain risk for people owing to mechanical movement. This comprises all areas of the machine which involve rotary motion, clamping or other movements. Area between two Print area Manual work area... -
Page 27: Control Of The Machine
Operating Instruction X-Type plus 9. Control of the Machine This section explains the control features of the machine from the control terminal. This section illustrates the most important of the command screens, not all of which may be illustrated due to the very complex software. The command screens not illustrated in particular are those of a self explanatory nature. -
Page 28: Switching The Machine Off After Normal Operation
Operating Instruction X-Type plus After starting up the tablet a reference drive must be made. Start with button “Start Reference Drive” when displayed. Move turntable to position until the message windows becomes green. After a short time at the right position the turntable will be locked automatically. 9.1.2. -
Page 29: Stopping The Machine In The Event Of Malfunction
Operating Instruction X-Type plus These safety devices must not be used to switch off the machine under normal operation. Any EMERGENCY STOP presents an exceptional loading to the servo-motor and transmission etc. Excessive use will result in damage to the machine along with subsequent cancellation of the warranty. -
Page 30: Menu Images
Operating Instruction X-Type plus Machine can be controlled by the following menu images: Adjust Manually Automatic Basic Setup Help To change between the menu images touch the respective area at the top of the screen. The active menu image can be identified by the grey background color. - Page 31 Operating Instruction X-Type plus The following control panels are available: Button Functional description Indexes/moves the turntable directly to the next print station on the left. Indexes/moves the turntable directly to the next print station on the right. Moves the turntable into the clean/half index position. Allows the operator to lock or release the pallets.
- Page 32 Operating Instruction X-Type plus If a print station is selected the following control panels are displayed. “On” activates a station, appending parameters are displayed. “Off” deactivates a station. Determines the number of print strokes at a print cycle. Determines the number of flood strokes at a print cycle. Select this when plastisol ink is used.
- Page 33 Operating Instruction X-Type plus When a dryer is detected by the machine the following control panels are displayed: “On” activates a station, appending parameters are displayed. “Off” deactivates a station. Determines the drying time. When time is set to 0, drying mode switches from internal to external automatically.
-
Page 34: Manually
Operating Instruction X-Type plus 9.3.2. Manually At manual-mode with button “Start” one index and working cycle will be processed. The following buttons are displayed: Button Functional description Is used for the sequential start of a new print job/run. It activates each selected print station/flash cure unit in sequence when commencing a production run. - Page 35 Operating Instruction X-Type plus Determines the desired quantity of the production job. The value can be changed with the up and down arrows or by direct number input after touching the field Displays the number of items which have been produced since the last “RESET”.
-
Page 36: Automatic
Operating Instruction X-Type plus 9.3.3. Automatic In automatic-mode index and working cycles start continuously. The following buttons are displayed: Button Functional description Is used for the sequential start of a new print job/run. It activates each selected print station/flash cure unit in sequence when commencing a production run. - Page 37 Operating Instruction X-Type plus Button Functional description Moves the turntable into the clean/half index position. Starts the automatic production. When a working cycle is finished the next index move starts automatically. An optional foot switch can be used to pause before next index move. Interrupts the actual print job after actual working cycle.
-
Page 38: Basicsetup
Operating Instruction X-Type plus 9.3.4. BasicSetup Elementary adjustment must be made in „BasicSetup“. The following buttons are displayed: Button Functional description Defines the direction of rotation. Switches between single and double index. At double index two index moves are made between one working cycle. -
Page 39: Help
Operating Instruction X-Type plus Button Functional description Activates optional “Multiprint”-function. A separate manual is available. „Service“-menu. Closes the controlling software and display start screen of the tablet. 9.3.5. Help “Help” supports you at troubleshooting and controlling the machine. 9.4. Error messages If an error is recognized by the control unit a message will be displayed on the tablet. -
Page 40: Blocked Operation
Operating Instruction X-Type plus 9.5. Blocked operation In several working positions operation will be blocked automatically. The reason for blocking will be displayed by a symbol or pressed buttons on the tablet. To operate the machine again the blocking reason must be eliminated. Blocking reason The following reasons block machine operation: Label... -
Page 41: Trouble Shooting
Pallet Unlocked: Signal pallets unlocked. Drive Pin: Error transport pin. Pos Sensor: Index position not reached “Diverse system System error Please contact MHM service department for further errors” + information. READJUST + error code + please call MHM-Service After the error reason is eliminated the message must be cleared by pressing the „Confirm-Button“. -
Page 42: Basic Errors (Without Error Message)
Operating Instruction X-Type plus 9.6.2. Basic errors (without error message) The following error reasons are not recognized by the control system and no error message is displayed: Error description Possible reasons Trouble-shooting It’s not possible to start Main power switch is Switch on main power switch! the tablet m-touch pro switched off and battery is... -
Page 43: Maintenance Of The Synchroprint
Operating Instruction X-Type plus 10. Maintenance of the Synchroprint Before doing maintenance work the machine must be cut off from the supply voltage using the main power switch). The Synchroprint has been designed to operate ‘maintenance-free’ as far as possible. Only a few important service measures are necessary by the operator. - Page 44 Every 6 months The fixing pin, the transport pin and the torque support must be lubricated every 6 months through the lubrication nipples. MHM recommends “Berner Heavy-Duty Multi- Purpose Grease” or a comparable grease with the following technical specifications: ...
-
Page 45: Operating Instructions X-Type Plus V1-3.Docx
Repair measures, maintenance or service work carried out by unauthorized persons. Use of lubricants other than those recommended by MHM. Operation of the machine under technical conditions other than those specified by MHM (e.g. excessive power supply voltage and/or excessive air pressure).
Need help?
Do you have a question about the Synchroprint X-Type plus and is the answer not in the manual?
Questions and answers