Table of Contents
Advertisement
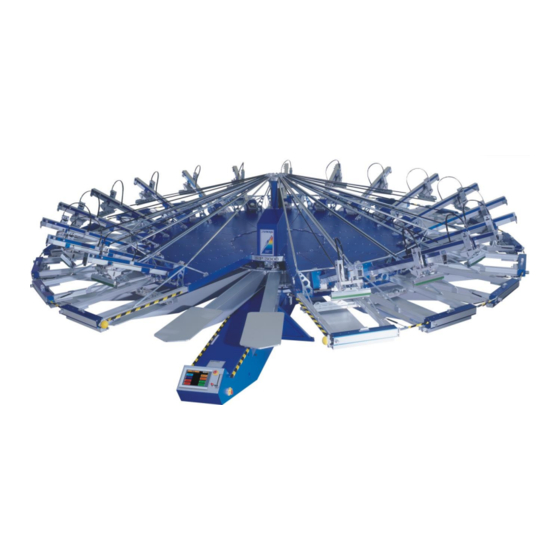
Operating Instructions - Synchroprint 3000 (Manual-Registration Version)
OPERATING INSTRUCTIONS
MHM SCREEN PRINTING MACHINE
SYNCHROPRINT 3000 (Manual-Registration Version)
English
©2012-2016 Machines Highest Mechatronic GmbH, Erl, Austria
________________________________________________________________________________
Operating Instructions - Synchrprint 3000 (Manual-Registration Version) V1-1
Page 1 of 49
Advertisement
Table of Contents

Related Manuals for MHM SYNCHROPRINT 3000


Summary of Contents for MHM SYNCHROPRINT 3000
-
Page 1: Operating Instructions
Operating Instructions - Synchroprint 3000 (Manual-Registration Version) OPERATING INSTRUCTIONS MHM SCREEN PRINTING MACHINE SYNCHROPRINT 3000 (Manual-Registration Version) English ©2012-2016 Machines Highest Mechatronic GmbH, Erl, Austria ________________________________________________________________________________ Operating Instructions - Synchrprint 3000 (Manual-Registration Version) V1-1 Page 1 of 49... -
Page 2: Preface
Highly innovative and precise MHM technology provides a combination of the finest build quality along with optimal safety. We trust these Operating Instructions will assist you in becoming familiar with the safe and efficient operation of the Synchroprint 3000. -
Page 3: Table Of Contents
3.1. General Notes with Regard to Transportation and Danger Warnings ....... 13 3.2. Packaging ........................... 13 3.3. Removal of the Synchroprint 3000 from the packaging ............ 13 Assembly ............................ 14 4.1. General Assembly Instructions ..................14 4.2. Positioning of the Synchroprint 3000 ................14 4.3. - Page 4 Operating Instructions - Synchroprint 3000 (Manual-Registration Version) 6.8.1. Flash Cure Units......................25 Control of the Machine ......................27 7.1. General ..........................27 7.1.1. Configuration of the Control ..................27 7.1.2. Operating the Touch Screen ..................27 7.1.3. Cleaning of the Touch Screen ..................28 7.2.
-
Page 5: Safety Instructions
3000 must only be operated and maintained by suitably skilled staff. If all operating instructions and safety requirements are observed and followed correctly, the Synchroprint 3000 does not present any risks for occupational health. With correct and proper operation the Synchroprint 3000 will cause no material damage of any kind. -
Page 6: Safety Instructions For The Operating Staff
Operating Instructions - Synchroprint 3000 (Manual-Registration Version) Every person instructed to perform any operation on the Synchroprint 3000 must be suitably trained and be aware of the dangers that may result from operating errors. He/she should: 1. Be physically and mentally capable of coping with the respective tasks. -
Page 7: Description Of Key Words And Symbols In The Operating Instructions
Operating Instructions - Synchroprint 3000 (Manual-Registration Version) 1.3. Description of Key Words and Symbols in the Operating Instructions In these operating instructions classified key words and symbols are used to identify dangers and items that require special attention. Particular attention is to be paid to the sections marked in this manner, because they contribute to personal safety as well as the prevention of damage to the Synchroprint 3000. -
Page 8: Additional Risks
Operating Instructions - Synchroprint 3000 (Manual-Registration Version) 1.4. Additional Risks Even though the Synchroprint 3000 has been designed and built according to the most stringent safety criteria, as with all machinery we have to anticipate certain additional risks, which are... -
Page 9: Qualification Of Operating And Service Staff
Operating Instructions - Synchroprint 3000 (Manual-Registration Version) 1.5. Qualification of Operating and Service Staff All procedures should only be carried out by properly trained and suitably qualified personnel. ‘Qualified personnel’ refers to people who are able to carry out the required procedures and be able to recognize as well as prevent potential risks, as a result of their training and experience. -
Page 10: Technical Data
Operating Instructions - Synchroprint 3000 (Manual-Registration Version) 2. Technical Data This section details the Synchroprint 3000 technical specifications. NB: As our policy is one of continuous improvement, we reserve the right to change specifications without prior notice. 2.1. Dimensions ________________________________________________________________________________... -
Page 11: Specifications
Operating Instructions - Synchroprint 3000 (Manual-Registration Version) 2.2. Specifications Model/Type SP 8 SP 10 SP 12 SP 14 Number of pallets Max. No. of print stations Max. print area 50 x 70cm 50 x 70cm 50 x 70cm 50 x 70cm (standard format) 20"... - Page 12 Operating Instructions - Synchroprint 3000 (Manual-Registration Version) ________________________________________________________________________________ Operating Instructions - Synchrprint 3000 (Manual-Registration Version) V1-1 Page 12 of 49...
-
Page 13: Transportation
3.3. Removal of the Synchroprint 3000 from the packaging The Synchroprint 3000 is to be unloaded by the customer. A forklift truck with adequate fork length and lifting capacity (see Fehler! Verweisquelle konnte nicht gefunden werden. Fehler! Verweisquelle konnte nicht gefunden werden.) will be required. The Synchroprint 3000 must be lifted carefully and only at the dedicated lifting points at the middle of the base unit. -
Page 14: Assembly
4.2. Positioning of the Synchroprint 3000 In order to ensure safe and correct assembly and smooth operation of the Synchroprint 3000, a minimum distance of 1metre should be maintained between the Synchroprint 3000 and any adjacent structures (walls, columns, etc.) and/or other machinery. -
Page 15: External Supply/Connection Ports
Connections for compressed air and mains electricity are located on the base unit of the Synchroprint 3000 as standard. Overhead supply connections may be ordered optionally but only at time of order, to enable supplies to enter the machine from above, through the centre column. -
Page 16: Commissioning The Synchroprint 3000
This installation/jobsheet must be clearly signed by both parties, stating the date and location of the Synchroprint 3000 and will be legally binding hereon after. All further start-ups of the Synchroprint 3000 by the customer or its authorized staff should be done in accordance with the following procedures: 5.1. -
Page 17: Design And Operation
Operating Instructions - Synchroprint 3000 (Manual-Registration Version) 6. Design and Operation This section describes design and operation and indicates the individual assemblies. 6.1. Overview Machine Parts Print station ‘No shirt’/skip pallet buttons Pallets Safety barrier Safety bars Main control panel... -
Page 18: Danger Zones
(e.g. red/white or yellow/black stripes). If any work is to be carried out on the Synchroprint 3000 that requires entering, leaning into or placing one’s hands into any one of these safety areas, one of the following conditions must be met: 1. -
Page 19: Load/Un-Load' Stations
6.4. ‘Load/Un-load’ stations The Synchroprint 3000 has a load and unload station for a total of two operators. This is where the textiles to be printed on are applied to the pallets and removed from them at the end of the printing process. -
Page 20: Print Stations
Operating Instructions - Synchroprint 3000 (Manual-Registration Version) 6.7. Print Stations 6.7.1. Overview Print Stations Y-axis X-axis Squeegee/print arm Squeegee drive motor Squeegee carriage Frequency converter Screen adjustment Left/right - rear Screen adjustment Screen adjustment Left/right - front Forward/backward Control keypad... -
Page 21: Squeegee Arm Motor
6.7.3. Frequency Converter The frequency converter controls the squeegee drive motor. The motor and frequency converter have already been adjusted by MHM, and no further adjustment should be necessary. 6.7.4. Squeegee/print arm The squeegee carriage, squeegee stroke length adjustment, control keypad and control knobs for the squeegee carriage speed &... -
Page 22: Squeegee Carriage Speed And Pressure Controls
Operating Instructions - Synchroprint 3000 (Manual-Registration Version) 6.7.8. Squeegee carriage speed and pressure controls 1… Adjustment for squeegee carriage speed forwards 2… Adjustment for squeegee carriage speed backwards 3… Adjustment for squeegee pressure (with clear display gauge) 6.7.9. Control Keypad The control keypad is used to operate various functions without having to return to the main control panel. - Page 23 Operating Instructions - Synchroprint 3000 (Manual-Registration Version) The following functions are available from the Control Keypad: Function Pressing and holding ‘ADJUST’ on the keypad (approx 3 sec.) places the machine into the ‘ADJUST’ mode. A D J The ‘LOCK’ key is used for locking/unlocking the screen.
-
Page 24: Squeegee Carriage
Operating Instructions - Synchroprint 3000 (Manual-Registration Version) 6.7.10. Squeegee Carriage The squeegee carriage is equipped for two squeegees. Pulling the black ‘quick release’ knob (pic. opposite) will release the respective squeegee. Make sure that these locking knobs engage fully when loading squeegee. -
Page 25: Additional Equipment
Operating Instructions - Synchroprint 3000 (Manual-Registration Version) 6.8. Additional equipment 6.8.1. Flash Cure Units Flash cure units may be installed into either an empty station or a print station. The flash cure unit must be powered by a separate supply, which should comply with the electrical data supplied by the manufacturer (see data sheet for flash cure units). - Page 26 Operating Instructions - Synchroprint 3000 (Manual-Registration Version) ________________________________________________________________________________ Operating Instructions - Synchrprint 3000 (Manual-Registration Version) V1-1 Page 26 of 49...
-
Page 27: Control Of The Machine
7.1. General 7.1.1. Configuration of the Control The control of the Synchroprint 3000 consists of an IPC (Industrial PC) with touch screen and external inputs and outputs. Operation is carried out through the touch screen, which is attached to the main control panel. -
Page 28: Cleaning Of The Touch Screen
MHM recommends covering the touch screen with a self-adhesive clear protective foil, which may be applied to the actual touch screen and taken off and renewed at any time. -
Page 29: Start-Up Of The Machine
7.3. Start-up of the Machine The start-up of the machine by the customer is only permitted after the initial start-up upon completion of commissioning by one of MHM’s service engineers or a technician of a dealer authorised by MHM. Before starting up the machine all points listed in chapter 5.1 “Start-up Instructions”... -
Page 30: Command Screen 'Menu
Operating Instructions - Synchroprint 3000 (Manual-Registration Version) 4. Command screen ‘TABLE POSITION’ Pressing ‘START’ will perform a reference of the turntable and then change to the command screen ‘MENU’. Pressing ‘MENU’ leads directly command screen ‘MENU’ without performing a reference of the turntable. In this... -
Page 31: Command Screen 'Setup
Operating Instructions - Synchroprint 3000 (Manual-Registration Version) 7.5. Command screen ‘SETUP’ This screen allows the operator to enter all parameters required in order to set-up the machine for each particular print job/run. DELAY POS Allows the operator to choose whether the screens will be in their raised or lowered position during the waiting time between printing cycles. -
Page 32: Command Screen 'Select Station
Operating Instructions - Synchroprint 3000 (Manual-Registration Version) 7.5.1. Command screen ‘SELECT STATION’ In this screen the settings for each individual station may be entered. Station No. (X?) Displays the particular station number selected. To quickly ‘one touch’ set the print station to one flood/print stroke. -
Page 33: Command Screen 'Adjust
Operating Instructions - Synchroprint 3000 (Manual-Registration Version) 7.6. Command screen ‘ADJUST’ This screen is used to enter the parameters required for the set-up of the printing process. The parameters listed below may all be accessed from this screen. SCREEN UP/DOWN Raises/lowers ALL screens. -
Page 34: Command Screen 'Change Pallets
Operating Instructions - Synchroprint 3000 (Manual-Registration Version) 7.6.1. Command screen ‘CHANGE PALLETS’ This screen allows the operator to lock or release the pallets by the touch of a single key and rotate/index the turntable to facilitate remarkably fast pallet changeover. -
Page 35: Command Screen 'Manual
Operating Instructions - Synchroprint 3000 (Manual-Registration Version) 7.7. Command screen ‘MANUAL’ This screen allows the machine to be operated in manual production mode. INLET MODE Used for the sequential start of a new print job/run. Activates each selected print station/flash cure unit in sequence when commencing a production run. -
Page 36: Command Screen 'Warmup Pallets
Operating Instructions - Synchroprint 3000 (Manual-Registration Version) Pieces/counter displays: During production will display the production speed/rate of the machine (Pieces per hour). Displays the total number of pieces to be produced During production will display the number of pieces remaining During production will display the number of pieces already produced This will display the number of mis-loaded/faulty or incorrect prints. -
Page 37: Command Screen 'Automatic
Operating Instructions - Synchroprint 3000 (Manual-Registration Version) 7.8. Command screen ‘AUTOMATIC’ From this screen the automatic production process may be controlled. Once production has commenced (active), the display will change to the screen in section 7.8.2. shown on the next page. -
Page 38: Automatic Production (Active)
Operating Instructions - Synchroprint 3000 (Manual-Registration Version) 7.8.2. Automatic Production (Active) DRYERTIME Allows the drying time to be set for each flash cure unit individually. (A separate command screen will be displayed for these settings). DELAY-TIME Controls displays dwell-time between turntable movements/indexes. -
Page 39: Service 1
Opens the ‘ERROR’ screen, displaying all pending errors. ALARM Servicecode Access code input field for authorised MHM service technicians only. Exits this screen and returns to the ‘MENU’ screen. MENU ________________________________________________________________________________... -
Page 40: Service 2
7.10. SERVICE 2 Pressing ‘SERVICE 2’ in the ‘MENU’ screen will display the ‘TIME-SETUP-SQUEEGEE’ screen. Important Note: This screen should ONLY be accessed by authorised MHM service technicians. ________________________________________________________________________________ Operating Instructions - Synchrprint 3000 (Manual-Registration Version) V1-1 Page 40 of 49... -
Page 41: Fault/Malfunction Notification (Self-Diagnostic)
Operating Instructions - Synchroprint 3000 (Manual-Registration Version) 7.11. Fault/malfunction Notification (Self-diagnostic) In case of a fault or malfunction, the display will automatically change to the ‘ERROR’ screen. Command screen ‘ERROR’ 7.11.1. ERROR MESSAGE Clear display of the pending error. Pressing ‘RESET’ will acknowledge any pending errors. If the cause of RESET error has been resolved the text ‘ERROR MESSAGE’... - Page 42 Operating Instructions - Synchroprint 3000 (Manual-Registration Version) ________________________________________________________________________________ Operating Instructions - Synchrprint 3000 (Manual-Registration Version) V1-1 Page 42 of 49...
-
Page 43: Error History
Operating Instructions - Synchroprint 3000 (Manual-Registration Version) 7.12. Error History A record of all errors will be stored automatically in the error history, together with the corresponding date and time. This record is displayed in the ‘ERROR LIST’ screen. Command screen ‘ERROR HISTORY’... -
Page 44: Error Messages
Operating Instructions - Synchroprint 3000 (Manual-Registration Version) 8. Error Messages Possible error messages are listed as follows: Error message Error description Action Malfunction of CAN Check CAN-cabling. Replace ERROR CANBUS 1 - 5 communication to the indicated affected component. CAN-junction. -
Page 45: Shutting Down The Synchroprint 3000
Lower all the print stations into the correct registration points by pressing the ‘SCREEN UP/DOWN’ key in the ‘ADJUST’ screen. Switch off the Synchroprint 3000 by the main power switch (see 6.1 Overview Machine Parts). If the compressed air supply is turned off (e.g. overnight), the print stations will lower or drop uncontrolled. -
Page 46: Permanent Shutdown Of The Machine
The operating staff must be aware of its location in order to stop the machine in the event of an emergency as quickly as possible. If the operator detects any danger to personnel or the Synchroprint 3000, he can immediately shut down the machine by pressing the EMERGENCY STOP push button. -
Page 47: Maintenance Of The Synchroprint 3000
Operating Instructions - Synchroprint 3000 (Manual-Registration Version) 10. Maintenance of the Synchroprint 3000 The Synchroprint 3000 has been designed to operate ‘maintenance-free’ as far as possible. Only a few important service measures are necessary by the operator. Task Frequency Comment/Action... - Page 48 Operating Instructions - Synchroprint 3000 (Manual-Registration Version) Task Frequency Comment/Action Check Daily The inspection glass of the water separator/trap must be inspection glass checked for condensed water. The level must not exceed on water the red mark; otherwise the automatic relief aperture may separator/trap become clogged or defective.
-
Page 49: Warranty
Improper use of the Synchroprint 3000. Incorrect assembly, operation or maintenance of the Synchroprint 3000 by the operator. Operation of the machine with defective safety devices and/or safety devices which are missing/removed or not in correct working order.
Need help?
Do you have a question about the SYNCHROPRINT 3000 and is the answer not in the manual?
Questions and answers