Table of Contents
Advertisement
Advertisement
Table of Contents

Related Manuals for Orbit OBR8718


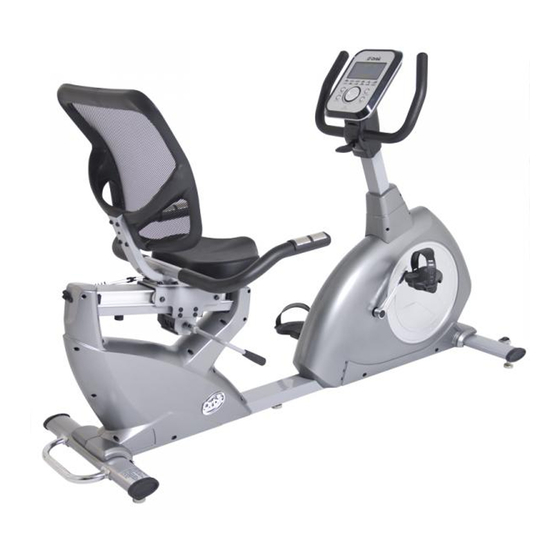
Summary of Contents for Orbit OBR8718
- Page 2 IMPORTANT SAFETY NOTICE Note the following precautions before assembling or operating the ★ machine. 01. Assemble the machine exactly as described in the instruction manual. 02. Check all the screws, nuts and other connections before using the machine, only exercise on the machine when it is in correct working order. Ensure that all users are adequately informed of all precautions.
- Page 3 EXPLOADED DIAGRAM...
- Page 5 PARTS LIST Part No. Description Part No. Description Main frame Seat Front stabilizer Adapter Rear stabilizer Crank Cover Handlebar post Flange bolt Fixed handlebar 58L/R Chain cover 1pr. Nylon nut M8 Hex nut Flat washer D8xΦ16x1.5 Adjusting bolt Roller U-shape washer Inner hexagon bolt M8x40xL12 Hex nut End cap...
- Page 6 Inner hexagon bolt M6x40 Axle Flat washer D6x1.2xΦ16 Spring washer Seat frame Cam lock wheel Square end cap Track Foam grip Tension control wire Round end cap Tools ASSEMBLY INSTRUCTIONS Step 1: A: Lock the lifting handle (27) to the rear stabilizer (3) with hex nut (26) and arc washer(20).
- Page 7 Step 3: Lock the handlebar (5) to the handlebar post (4) with the plastic handle knob(32),protective guard(25a),spacer(33) and flat washer(34). Step 4: A: Connect the extension pulse wire2 (37), extension wire(22) with the cables of the computer(38), then lock the computer(38) on the computer bracket of the handlebar post(4) with screws(58).
- Page 8 Step 6: A: Connect the pulse wire (45) with the extension pulse wire 3(44) of the main frame(1),then lock the seat frame (50) on the fixed bracket (46) with Inner hexagon bolt (28) and flat washer(43). B: Lock the handle (41) to the eccentric shaft (39) with Inner hexagon bolt (40). Step 7: A: Lock the seat (54) on the connecting base of the seat frame (50) with Inner hexagon bolt (19) and flat washer(43).
- Page 9 INSTRUCTION MANUAL OF SM8900-67 【BUTTON FUNCTIONS】 To make upward adjustment to each function data or increase training resistance. DOWN To make downward adjustment to each function data or decrease training resistance. MODE To confirm all setting. STAR/STOP To start or stop workout. RESET To reset current setting and have the monitor switch to initial training mode for selection.
- Page 10 3. Console will show “SELECT USER”, user may press mode to enter into user selection mode. Use joggle wheel to select U1 to U4 and press MODE for confirmation. And then preset user information for SEX, AGE, HEIGHT and WEIGHT. 4.
- Page 11 Workout in PROGRAM mode: In standby mode, select PROGRAM and press MODE to enter. User may turn joggle wheel up or down to select preferred program from 1 to 12, and press MODE to confirm. Program profile will flashing, user may turn up or down to adjust profile’s resistance level. TIME is fixed in 20:00, which is not adjustable.
- Page 12 After start, TIME will start counting down; the runway animation will follow user’s RPM input. User need to follow PC speed by checking below symbols to finish the entire 20 minutes training: ▲ :USER speed > PC RPM – user need to slow down ●...
- Page 13 Workout in WATT constant mode: In standby mode, select WATT and press MODE to enter. The preset watt value 120 is flashing on screen in WATT setting mode, select UP/DOWN/ENTER to set target value from 10 to 350. Pressing START button to start training. After start, Level is adjusted according to RPM to reach the setting WATT.
- Page 14 "E-4" - When you see this indication, it means the BODY FAT advice is exceeded the available area which is fixed in the program. After BODY FAT testing, press BODY FAT button to have the computer back to working continues from the previous data before testing.
- Page 15 RECOVERY: After exercising for a period of time, keep holding on handgrips and press “RECOVERY” button. All function display will stop except “TIME” starts counting down from 00:60 to 00:00. Screen will display your heart rate recovery status with the F1,F2….to F6. F1 is the best, F6 is the worst.
- Page 16 WARM-UP and COOL-DOWN A successful exercise program consists of a warm-up, aerobic exercise, and a cool-down. Do the entire program at least two and preferably three times a week, resting for a day between workouts. After several months, you can increase your workouts to four or five times per week. WARM-UP The purpose of warming up is to prepare your body for exercise and to minimize injuries.
Need help?
Do you have a question about the OBR8718 and is the answer not in the manual?
Questions and answers
Where do you plug in the charger
Plug the charger into the DC JACK of the Orbit OBR8718.
This answer is automatically generated
Our Orbit Model OBR8718 has developed what I would describe as rubbing noise when you pedal ; its only for part of the revolution and it appears to require some lubrication ( that is the obvious thought but it may be something else ) What do you suggest to resolve this
The rubbing noise during pedaling on the Orbit Model OBR8718 could be caused by the belt. The noise matches the rotation of the main wheel, indicating it is not from the flywheel or parts with different RPMs. Rubbing a candle on the belt ribs temporarily stopped the noise, confirming the belt as the source. Replacing the belt resolved the issue and made the bike quiet.
This answer is automatically generated