Advertisement
Advertisement
Table of Contents

Related Manuals for Orbit OBK8612


Summary of Contents for Orbit OBK8612
-
Page 2: Important Safety Notice
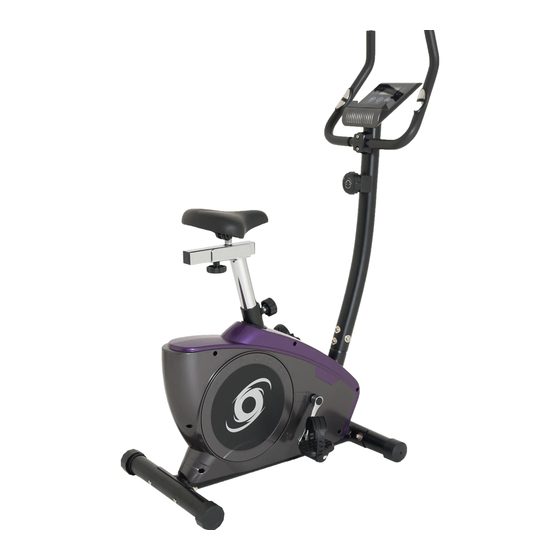
Before You Start Thank you for purchasing this Magnetic Bike! For your safety and benefit, read this manual carefully before using the machine. Prior to assembly, remove components from the box and verify that all the listed parts were supplied. Assembly instructions are described in the following steps and illustrations. -
Page 3: Exploded Diagram
WARNING: BEFORE BEGINNING ANY EXERCISE PROGRAM, CONSULT YOUR PHYSICIAN. THIS IS ESPECIALLY IMPORTANT FOR INDIVIDUALS OVER THE AGE OF 35 OR PERSONS WITH PRE-EXISTING HEALTH PROBLEMS. READ ALL INSTRUCTIONS BEFORE USING ANY FITNESS EQUIPMENT. Maximum user’s weight: 100KG EXPLODED DIAGRAM... -
Page 4: Part List
PART LIST Description Description Main frame Chuck cover Front stabilizer Inner hex bolt Roller end cap Spring washer Rear stabilizer Flat washer Adjustable end cap Handlebar Carriage bolt Handlebar wire Screw Foam grip Arc washer Screw Acorn nut End cap 10L/R Crank Pr 1... -
Page 5: Assembly Instruction
ASSEMBLY INSTRUCTION PREPARATION: Before assembling, make sure that you will have enough space around the item. Use the present tooling for assembling. Before assembling, please check whether all needed parts are available. It is strongly recommended that this machine to be assembled by two or more people to avoid possible injury. - Page 6 STEP 3 While another person holds the u (17) near the (1), connect the extension wire (15) pright post main frame to the sensor wire (13). Next, connect the (14) to the (12) (See tension controller tension control cable drawing A). Do not pinch the wires and cables. Insert the upright post (17) into the main frame (1). Attach the upright post with four screws (16) and four (8).
- Page 7 STEP 5 Connect the handlebar wire (25) and the extended wire (15) to the wires of the computer (29), then attach the computer (29) onto the computer bracket of the upright post (17) with the screw (27). STEP 6 Assemble the horizontal post (36) to the saddle post (31), and fasten it by the flat washer (33) & knob nut (32), and then insert the saddle (37) to the post of the horizontal post(36) and fasten it .
-
Page 8: Warm-Up And Cool-Down
Insert the saddle post (31) which fixed with the saddle (37) into the post of the main frame(1), and adjust the length then tighten them with the pop pin knob(30) Now, your machine is ready for use. WARM-UP and COOL-DOWN A successful exercise program consists of a warm-up, aerobic exercise, and a cool-down. - Page 9 WARM-UP The purpose of warming up is to prepare your body for exercise and to minimize injuries. Warm up for two to five minutes before strength-training or aerobic exercising. Perform activities that raise your heart rate and warm the working muscles. Activities may include brisk walking, jogging, jumping jacks, jump rope, and running in place.
Need help?
Do you have a question about the OBK8612 and is the answer not in the manual?
Questions and answers