
Related Manuals for Sony SRG-360SHE


Summary of Contents for Sony SRG-360SHE
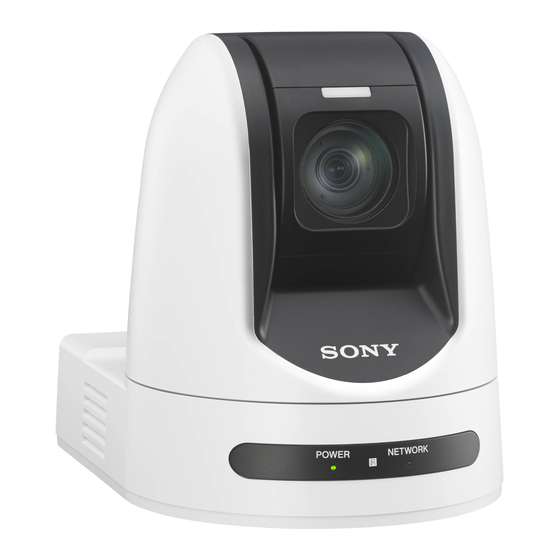
- Page 1 C-289-100-11 (2) HD Color Video Camera Operating Instructions Before operating the unit, please read this manual thoroughly and retain it for future reference. SRG-360SHE © 2016 Sony Corporation...
-
Page 2: Table Of Contents
Adjusting and Setting with Menus Table of Contents About On-Screen Menus ......23 Main Menu..........23 Setting Menus......... 23 Overview Control Button Display Section ....23 Features ............5 EXPOSURE Menu........24 How to Use This Operating Instructions...6 WHITE BALANCE Menu......25 Camera and Supplied Accessories ...6 PICTURE Menu .......... - Page 3 Operation Using the Remote Operating the Camera Via a Network Controller Accessing the Camera Using the Web Browser ..........46 Preparation ..........34 About Viewers........46 Operating a Camera Using the Remote Controller ..........35 Operating the Camera....... 47 Operating Multiple Cameras Using Multiple Main menu ..........
- Page 4 Appendix Message List..........67 Troubleshooting ........68 Menu Configuration ........69 Initial value and preset......71 Specifications ..........72 Using the VISCA RS-422 connector pin assignments ........74...
-
Page 5: Overview
Overview NOTICE TO USERS © 2014 Sony Corporation. All rights reserved. This manual or the software described herein, in whole or in part, may not be reproduced, translated or reduced Features to any machine readable form without prior written approval from Sony Corporation. -
Page 6: How To Use This Operating Instructions
Some displays may be different from the ones that appear in actual use. The illustrations of the camera and menu display in the Operating Instructions show the SRG-360SHE as an example. Printing the Operating Instructions Depending on your system, certain displays or... -
Page 7: Optional Products
The joystick of the IP remote controller offers comfortable pan/tilt and zoom operations. Up to seven cameras can be operated via the RS-232 connection or RS-422 connection. However, for SRG-360SHE, only one camera can be operated via the RS-422 connection. Screw +M3 × 8 (9) Screw +M2.6 ×... -
Page 8: Location And Functions Of Parts And Controls
Rear Location and Functions of Parts and Controls Camera Front 9 q; qaqsqd qf qg qh qj f BAUD RATE switch Used to switch between 9,600bps and 38,400bps for the RS-422 baud rate. g MIC input a Lens Input for commercially-available MIC or LINE to connect an Audio device. - Page 9 HDMI OUT/SDI OUT connectors. o SDI OUT connector Outputs video from this product as an HD SDI (3G- SRG-360SHE HD SDI compatible) video signal. p LAN connector (RJ-45 8-pin) Network communication and PoE+* power supply are performed by using the network cable (category 5e or higher, shielded twist pair).
-
Page 10: Infrared Remote Commander
Infrared Remote Commander Note The pan/tilt operation will be disabled when MENU is displayed (except: PAN/TILT LIMIT or PTZ TRACE settings). d PAN-TILT buttons Press the arrow buttons to adjust the direction of the camera. Press the HOME button to face the camera back to the front. - Page 11 To install batteries Two R6 (size AA) batteries (not supplied) CAUTION Danger of explosion if battery is incorrectly replaced. Replace only with the same or equivalent type recommended by the manufacturer. When you dispose of the battery, you must obey the law in the relative area or country.
-
Page 12: System Configuration
System Configuration This camera has various system configuration capabilities using optional products. This section describes typical system examples with the required components and the main usage of each system. Operating the Camera Via a Network What you can do with this system Multiple users can view video and audio from one camera via a network at the same time. -
Page 13: Operating A Camera Using The Remote Controller
*1 If you use Windows 8.2, use the Internet Explorer for the desktop user interface (desktop UI). *2 If you use Windows 10, turn off the tablet mode. Operating a Camera Using the Remote Controller What you can do with this system To perform pan/tilt and zoom operations using the joystick of the remote controller, and to perform the Preset operation using the button. -
Page 14: Operating Multiple Cameras Using Multiple Remote Controllers
Operating Multiple Cameras Using Multiple Remote Controllers What you can do with this system • You can connect up to 112 cameras and five remote controllers. • The joystick of the remote controller allows comfortable pan/tilt and zoom operations. System Configuration HD video monitor Camera Camera... -
Page 15: Precautions For Preventing Access To The Camera By An Unintended Third Party
Precautions for Preventing Access to the Camera by an Unintended Third Party The camera may be accessed by an unintended third party on the network, depending on the usage environment. Changing the user name and password of the camera administrator from the default settings is highly recommended for security reasons. -
Page 16: Installation And Connection
Installing the Camera Using the M3 Installation and Connection Fixing Screw Holes Attach the camera using 4 M3 fixing screw holes located on the bottom of the camera. Installing the Camera Attach the camera to a fitting with a flat surface using M3 screws with the following specifications. - Page 17 Installation Attach the ceiling bracket (B) to the ceiling. When attaching the ceiling bracket (B) to the ceiling, it is recommended to fix at the 4 positions illustrated Attach the wire rope to the ceiling. below. There are elongated holes for the screws along the Ceiling rounded edges of the ceiling bracket (B).
- Page 18 Attach the ceiling bracket (A) to the bottom of the Insert the protrusions raised on the ceiling bracket (A) × camera using the 4 screws (M 3 8) supplied. into the spaces prepared in the ceiling bracket (B), Align the bracket holes with the screw holes on the and temporarily attach them by pushing the ceiling camera, and attach the bracket to the camera.
-
Page 19: Connections
M2.6 × 6 (Supplied) adapter Use the supplied AC power adaptor and AC power cord to connect the camera to an AC outlet. SRG-360SHE Banding band Note to AC Do not attach the HDMI cable on the camera unit, if... -
Page 20: Connecting To The Poe+ (Power Over Ethernet Plus) Power Supply System
PoE+ (complied with IEEE802.3at) power supply Connect to the IP remote controller using the connection equipment supplies power via a commercially-available cable. network cable. For details, refer to the instruction manual SRG-360SHE of your power supply device. SRG-360SHE To the AC power adaptor... -
Page 21: Lan Connection With Ip Remote Controller Rm-Ip10
HDMI cable, some picture noise may occur. It is to the LAN connector of one camera and one IP remote recommended to use a Sony high-speed HDMI cable. controller without using a switching hub. • If the volume of the monitor is set to maximum, a sound may emit for a moment when activated, depending on the product. -
Page 22: Connecting With Monitors With Sdi Input Connectors
Connecting with monitors with SDI Connection with commercially- input connectors available microphones etc. Connect a commercially-available microphone, mixer, SRG-360SHE etc. Input audio will be superimposed to the HDMI OUT/SDI OUT/IP video output via stereo. Switch between the microphone input and line input by selecting either input on the web browser. -
Page 23: Adjusting And Setting With Menus
Setting Menus Adjusting and Setting with Menus The setting menu selected on the main menu is displayed. About On-Screen Menus You can change various settings, such as shooting conditions and system setup of the camera, while observing menus displayed on a connected computer screen. -
Page 24: Exposure Menu
Technical Manual of the camera. For details on obtaining a Technical Manual, When you select one from among the various exposure consult your Sony dealer. modes, some of the following setting items that are required for the selected mode appear. -
Page 25: White Balance Menu
WDR (VIEW-DR): When MODE (exposure mode) is WHITE BALANCE Menu set to FULL AUTO, the camera distinguishes light and dark areas in the same scene, adjusts the brightness for dark areas, and also controls the blown out highlights. The WHITE BALANCE menu is used to select the white You can select the wide dynamic range mode from balance mode. -
Page 26: Picture Menu
• The image stabilizer may not be effective in an PICTURE Menu installation environment where high frequency vibration is present. In this case, set the image stabilizer function to OFF. The PICTURE menu is used to set the items related to the picture. -
Page 27: Pan Tilt Zoom Menu
Setting the range of LEFT/RIGHT movement PAN TILT ZOOM Menu (IMAGE FLIP : OFF) CENTER (0°) – 170° +170° The PAN TILT ZOOM menu is used to select the pan/tilt/ zoom mode. This can be set via the Web browser. See “PTZF control Tab”... -
Page 28: System Menu
SYSTEM Menu STATUS Menu As this menu is for maintenance purpose, users cannot The STATUS menu is used to display the settings operate it. selected with the menus. The STATUS menu consists of PAGE1 to PAGE4. This menu only displays the current menu settings, and you cannot change them with this menu. -
Page 29: Operation Using The Supplied Infrared Remote Commander
Operation Using the Supplied Turning on the Power Infrared Remote Commander SRG-360SHE Before Operating Before operating the camera, check that the camera and peripheral devices are properly installed and connected. For details, see “Setting of the SYSTEM SELECT switch” (page 9), “Installing the Camera” (page 16) and “Connections”... -
Page 30: Pan/Tilt And Zoom Operation
Turn on the peripheral devices. If the camera moves in a different direction from the one you intended To switch ON/OFF the video output using the The camera is preset so that the image output from the infrared remote commander camera is rotated toward the right whenever you press the You can switch ON/OFF the video output using the b button. -
Page 31: Zooming
Zooming Adjusting the Camera Press either of the ZOOM buttons. Subject appears closer. (Telephoto) Subject appears farther away. (Wide angle) Zooms in or out fast (FAST side) Zooms in or out slowly (SLOW side) Note Focusing on a Subject When you perform pan/tilt operation while the camera is in the telephoto mode, the moving speed of the image on the screen may be a little jerky. -
Page 32: Presetting Feature
Notes Presetting Feature • When the power is turned on, the camera starts with the settings stored in POSITION 1. • If you want to retain the previous pan and tilt positions, Up to 6 combinations of settings (6 positions) including etc. -
Page 33: Ptz Trace Feature
Playing back pan/tilt/zoom PTZ TRACE Feature operations When the menu is not displayed, press the POSITION You can record and playback up to eight different NO button of the same number as the TRACE NO operations of pan, tilt, and zoom to the maximum length you want to playback once. -
Page 34: Operation Using The Remote Controller
Operation Using the Remote Preparation Controller This chapter describes how to operate the camera using the optional remote controller. When you make the settings of the camera using the remote controller, see “Setting with the Remote Controller” on page 40. Before operating, check that the camera, the remote controller, and peripheral devices are properly installed RESET... -
Page 35: Operating A Camera Using The Remote Controller
Operating a Camera Pan/Tilt and Zoom Using the Remote Operation Controller Panning and Tilting When the camera and the remote controller are connected with RS-422, only one camera can be connected to one PAN-TILT RESET remote controller. When this camera is connected with RS-422, Camera JOYSTICK Address 1 is automatically assigned. -
Page 36: Zooming
If the camera moves in a different Adjusting the Camera direction from that you intended The camera is preset to face toward the right whenever the joystick is inclined to the right. If you wish to face the camera toward the opposite direction from the direction BACK LIGHT ONE PUSH AWB in which you inclined the joystick, for example, when you... -
Page 37: Shooting With Back Lighting
Shooting with Back Lighting Presetting Feature When you shoot a subject with a light source behind it, the subject becomes dark. In such a case, press the BACK Up to 16 combinations of settings (16 positions), LIGHT button. including camera position, zooming, focusing, and To cancel the function, press the BACK LIGHT button backlighting, can be stored in the memory of the camera again. - Page 38 • When you toggle the pan/tilt limit OFF to ON, the While holding down (for POSITION 1 to 8) remembered position will be cleared. Press a POSITION button Perform the pan/tilt limit, then preset. you want to set. RESET • Please note that if you flip the image, the set position PRESET will be cleared.
-
Page 39: Ptz Trace Feature
Playing back pan/tilt/zoom PTZ TRACE Feature operations When the menu is not displayed, press the POSITION You can record and play back up to eight different NO button of the same number as the TRACE NO operations of pan, tilt, and zoom to a maximum length of you want to playback once. -
Page 40: Setting With The Remote Controller
Main Menu Setting with the Remote Controller Press the MENU button on the remote control and hold it for about 1 second to display the main menu. About On-Screen Menus This section explains the conditions and system setup to shoot referring to the menu items displayed on the screen of the external monitor connected to the HDMI OUT/SDI OUT connector. -
Page 41: Control Button Display Section
To cancel the menu EXPOSURE Menu When the main menu is displayed, press the MENU button once. When the sub menu is displayed, press the MENU button twice. The EXPOSURE menu is used to set the items related to the exposure. Control Button Display Section You can also set via a Web browser. -
Page 42: White Balance Menu
WHITE BALANCE Menu Notes • You can set WDR (VIEW-DR) only when MODE is set to FULL AUTO. • When changing WDR (VIEW-DR), a change in screen The WHITE BALANCE menu is used to select the white luminance occurs for a moment. balance mode. -
Page 43: Picture Menu
• The image stabilizer may not be effective under PICTURE Menu environments with high frequency vibration. To use the camera in such environments, set the image stabilizer function to OFF. The PICTURE menu is used to set the items related to the picture. -
Page 44: Pan Tilt Zoom Menu
Setting the range of the RIGHT/LEFT movement PAN TILT ZOOM Menu (Eflip: OFF) CENTER (0°) – 170° +170° The PAN TILT ZOOM menu is used to select the pan/tilt/ zoom mode. You can also set via a Web browser. See “PTZF control Tab” on page 63. PAN/TILT LIMIT (pan/tilt limit) Setting the range of the UP/DOWN movement Set PAN/TILT LIMIT to ON to limit the range of pan/tilt. -
Page 45: System Menu
SYSTEM Menu STATUS Menu As this menu is for maintenance purpose, users cannot The STATUS menu is used to display the settings operate it. selected with the menus. The STATUS menu consists of PAGE1 to PAGE4. This menu only displays the current menu settings, and you cannot change them with this menu. -
Page 46: Operating The Camera Via A Network
Display sample: Operating the Camera Via a Network This section explains how to monitor the image from the camera using your Web browser. The functions of the camera should be set by the Administrator. For the setting of the camera, see “Setting the Camera Via a Network”... -
Page 47: Operating The Camera
When using antivirus software, etc., on Operating the Camera the computer • When you use antivirus software, security software, personal firewall or pop-up blocker on your computer, This section explains the functions of the parts and the camera performance may be reduced, for example, controls of the live viewer. -
Page 48: Operation Panels
Image action Operation panels Select the mode of image operation between Off and Area zoom. The advanced settings screen will be hidden when you click for each panel. It will be shown when you click Pan/Tilt control again. Click the arrow button the direction in which you want to move the camera. -
Page 49: Pan/Tilt And Zoom Operation
Pan/Tilt and Zoom Note No audio is output if the Plug-in free viewer is used. Operation To operate pan/tilt/zoom of the camera, there are three operations: “Controlling via the control panel,” “Controlling via the preset position panel,” and “Controlling using the monitor screen.” “Controlling using the monitor screen”... -
Page 50: Controlling Via The Preset Position Panel
Controlling via the preset position panel Note When the specified area is zoomed in, the center may be shifted or some portion of the image may appear out of The preset position registered in the memory is displayed the monitor image section. In this case, click the point you on the preset position panel. -
Page 51: Setting The Camera Via A Network
Select the required tab above the menu, and set each Setting the Camera Via a Network setting option in the tab. This section explains how to set the functions of the Example: “Installation” tab of “System” menu camera by an Administrator. For details concerning the monitoring of the camera image, see “Operating the Camera Via a Network”... -
Page 52: System Menu
Security System Menu Displays the Security menu for setting the login user specification and the computer(s) can connected to the camera. (“Security Menu” on page 61) When you click System in the Administrator menu, the PTZF control System menu appears. Displays the PTZF menu for setting pan, tilt, zoom, and Use this menu to perform the principal settings of the focus operations. -
Page 53: Initialize Tab
Video format Initialize Tab 59.94 Hz system 1920 × 1080p/59.94 (A) 1920 × 1080p/59.94 (B) 1920 × 1080i/59.94 1920 × 1080p/29.97 1280 × 720p/59.94 1280 × 720p/29.97 50 Hz system 1920 × 1080p/50 (A) 1920 × 1080p/50 (B) 1920 × 1080i/50 1920 ×... -
Page 54: System Log Tab
Firmware Upgrade Video Menu Use this to upgrade the firmware. Click Select the file and select the firmware to upgrade, then click Open. The confirmation dialog is displayed. Operate according to the contents. When you click Video in the Administrator menu, the Video menu appears. -
Page 55: White Balance
WDR (VIEW-DR) Note In high-contrast scenes such as against a back light, this When you change the current F value to a value that function reduces overexposure and underexposure. This differs greatly, it may take some time to reflect the setting function is enabled if the setting values other than Off are value. -
Page 56: Video Codec Tab
Picture Notes You can also set from the remote controller. The selectable image size, frame rate, and image quality See “PICTURE Menu” on page 43. for Image 2 and Image 3 may be limited, depending on the setting of codec type, image size, and frame rate for High resolution mode Image 1. -
Page 57: Superimpose Tab
Bit rate Position When the Bit rate control is set to CBR, you can set the Select the number of the display position or logo, on the bit rate for each line of image distribution. When the bit preview screen. When Logo is selected, the logo file rate is set to a high level, a high image quality can be setting is displayed. -
Page 58: Audio Menu
Mode Audio Menu Select the day/night ICR mode. This function has the following modes. Auto When you click Audio in the Administrator menu, the Normally works in day mode; switches automatically to Audio menu appears. night mode in a dark place. Use this menu to set the audio functions of the camera. -
Page 59: Network Menu
AAC (64kbps): Select this type when you prioritize the Network Menu data capacity. This setting will not effect on the audio signal superimposed. When you click Network in the Administrator menu, the Network menu appears. Use this menu to configure the network to connect the camera and the computer. - Page 60 Secondary DNS server To obtain the IPv6 address automatically Displays the current secondary DNS server. Select Obtain IP address automatically. The IP address, prefix length, default gateway are IPv6 address 1, 2 assigned automatically. Displays the current IPv6 address. Note IPv6 default gateway Displays the current IPv6 default gateway.
-
Page 61: Security Menu
User Tab Security Menu When you click Security in the Administrator menu, the Security menu appears. The security menu consists of the User, Access limit, and Referer check tabs. Administrator and User This camera identifies those who log in as the Administrator or User. -
Page 62: Access Limit Tab
Authentication mode If you set 192.168.0.0/24 and Allow, you can allow access from computers having an IP address between Set the authentication method for user authentication. “192.168.0.0” and “192.168.0.255”. Basic authentication: Use the basic access authentication. Note Digest authentication: Use the digest access You can access the camera even from a computer with an authentication. -
Page 63: Ptzf Control Menu
PTZF control Menu Register the values of the Host name and Port number you typed to the list of the selected number. When you click PTZF control in the Administrator menu, Delete the PTZF control menu appears. Delete the contents of the list selected in No.. The PTZF operation menu is configured with the PTZF operation, Preset positions tabs. -
Page 64: Preset Position Tab
Manual: The focus can be adjusted by using the Preset position Tab buttons of the control panel displayed in the main viewer. Slow Pan-Tilt mode When set to Slow Pan-Tilt mode for the panning/tilting, select On. Focus near limit Set the range at which to automatically focus. If a subject is nearer than the set range, it will not be focused. -
Page 65: Streaming Menu
Streaming Menu Save the current pan, tilt and zoom positions as a new preset. You can also store the camera settings in the preset positions from 1 to 16. For the setting items that can be stored, see “Initial value and preset” on page 71. When you click Streaming in the Administrator menu, the... - Page 66 port number will be used for every transmission, based on the port number specified here. Multicast streaming Set whether the camera uses multicast streaming for H.264 video data and audio data or not. It reduces the transmission load on the camera by having a computer of the same segment network receive the same transmitting data.
-
Page 67: Message List
Appendix Message List The following messages and indications may appear for this camera. Perform the following as necessary. Lamp display Lamp Meaning and solution POWER and NETWORK lights A hardware failure (internal temperature abnormal or FAN motor faulty) is detected. flash simultaneously. -
Page 68: Troubleshooting
Troubleshooting Before bringing in your camera for servicing, check the following as a guide for troubleshooting the problem. If the problem cannot be corrected, consult your Sony Service Center. Symptom Cause Remedy The power of the camera is not turned... -
Page 69: Menu Configuration
Menu Configuration The menus of the camera are configured as described below. For more details, refer to the pages in parentheses. The initial settings of each item are in bold. (See page 33, 39.) (See page 24.) (See page 25.) (See page 26.) - Page 70 (See page 27.) ON, OFF (See page 28.) (See page 28.)
-
Page 71: Initial Value And Preset
Initial value and preset • The initial values are the factory settings. • When the power is turned on, this unit starts operation with the settings stored in preset 1. • In “Preset 1 to 256”, the items that are preserved even after the power from the camera is turned off are indicated by a circle (a), and the items that are not preserved are indicated by a cross (×). -
Page 72: Specifications
MIC input connector Specifications Mini jack (x2) USB connector USB connector (for maintenance) System General Video signal 1920 × 1080p/59.94(A) Input voltage DC 12 V (AC adaptor 100 to 240 V, 1920 × 1080p/59.94(B) 50/60Hz) 1920 × 1080p/29.97 PoE+ (IEEE802.3at compatible) 1920 ×... - Page 73 Dimensions Back Front Side 79.5 (3 (200.5 (8)) 46 (1 46 (1 Ceiling bracket (B) Bottom ø5, depth5 36 (1 36 (1 54 (2 28.7 (1 1/4-20UNC, depth7 Hole 34 (1 4-ø8(A) (Leg) Hole Hole 44 (1 44 (1 122 (4 66 (2 66 (2 144 (5...
-
Page 74: Using The Visca Rs-422 Connector Pin Assignments
Pin No. Function TX – TX + RX – RX + Connection diagram of a Remote Control unit (RM-IP10) RM-IP10 SRG-360SHE TX – TX + RX – Shield RX – RX + RX + TX – TX + Notes •... - Page 75 Sony Corporation...
Need help?
Do you have a question about the SRG-360SHE and is the answer not in the manual?
Questions and answers