Sign In
Upload
Download
Table of Contents
Contents
Add to my manuals
Delete from my manuals
Share
URL of this page:
HTML Link:
Bookmark this page
Add
Manual will be automatically added to "My Manuals"
Print this page
×
Bookmark added
×
Added to my manuals
Manuals
Brands
Lighthouse Manuals
Monitor
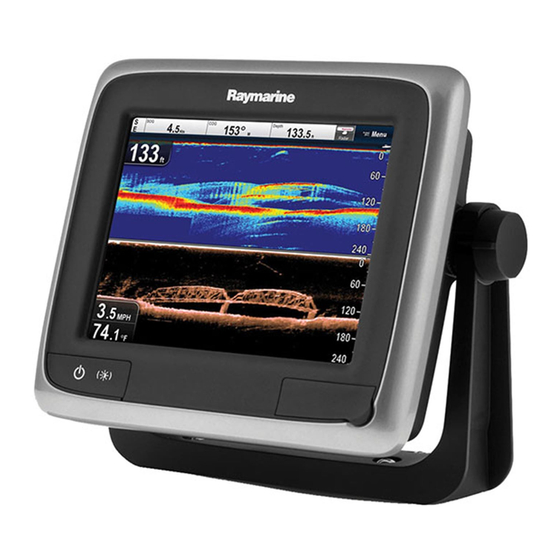
a65 WiFi
Installation and operation instructions manual
Lighthouse a65 Installation And Operation Instructions Manual
Multifunction/sonar display
Hide thumbs
1
2
3
4
5
6
Table Of Contents
7
8
9
10
11
12
13
14
15
16
17
18
19
20
21
22
23
24
25
26
27
28
29
30
31
32
33
34
35
36
37
38
39
40
41
42
43
44
45
46
47
48
49
50
51
52
53
54
55
56
57
58
59
60
61
62
63
64
65
66
67
68
69
70
71
72
73
74
75
76
77
78
79
80
81
82
83
84
85
86
87
88
89
90
91
92
93
94
95
96
97
98
99
100
101
102
103
104
105
106
107
108
109
110
111
112
113
114
115
116
117
118
119
120
121
122
123
124
125
126
127
128
129
130
131
132
133
134
135
136
137
138
139
140
141
142
143
144
145
146
147
148
149
150
151
152
153
154
155
156
157
158
159
160
161
162
163
164
165
166
167
168
169
170
171
172
173
174
175
176
177
178
179
180
181
182
183
184
185
186
187
188
189
190
191
192
193
194
195
196
197
198
199
200
201
202
203
204
205
206
207
208
209
210
211
212
213
214
215
216
217
218
219
220
221
222
223
224
225
226
227
228
229
230
231
232
233
234
235
236
237
238
239
240
241
242
243
244
245
246
247
248
249
250
251
252
253
254
255
256
257
258
259
260
261
262
263
264
265
266
267
268
269
270
271
272
273
274
275
276
277
278
279
280
281
282
283
284
285
286
287
288
289
290
291
292
293
294
295
296
297
298
299
300
301
302
303
304
305
306
307
308
309
310
311
312
313
314
315
316
317
318
319
320
321
322
323
324
325
326
327
328
329
330
331
332
333
334
335
336
337
338
339
340
341
342
343
344
345
346
347
348
349
350
351
352
353
354
355
356
357
358
359
360
361
362
363
364
365
366
367
368
369
370
371
372
373
374
375
376
377
378
379
380
381
382
383
384
385
386
387
388
389
390
391
392
393
394
395
396
397
398
399
400
401
402
403
404
405
406
407
408
409
410
411
412
413
414
415
416
417
418
419
420
421
422
423
424
425
426
427
428
429
430
431
432
433
434
435
436
437
438
439
440
441
442
443
444
445
446
447
448
449
450
451
452
453
454
455
456
457
458
459
460
page
of
460
Go
/
460
Contents
Table of Contents
Troubleshooting
Bookmarks
Table of Contents
Installation and Operation
Table of Contents
Chapter 1 Important Information
Certified Installation
TFT Displays
Water Ingress
Disclaimers
Memory Cards and Chart Cards
EMC Installation Guidelines
RF Exposure
Fcc
Compliance Statement (Part 15.19)
FCC Interference Statement (Part 15.105 (B))
Industry Canada
Industry Canada (Français)
Japanese Approvals
Third Party Software License Agreements
Suppression Ferrites
Connections to Other Equipment
Declaration of Conformity
Product Disposal
Pixel Defect Policy
Warranty Registration
IMO and SOLAS
Technical Accuracy
Chapter 2 Document and Product Information
Handbook Information
Handbook Conventions
Handbook Illustrations
Product Overview
System Feature Highlights
Chapter 3 Planning the Installation
System Integration
Installation Checklist
System Limits
Multiple Data Sources (MDS) Overview
Identifying Your Display Variant
Networking Constraints
Typical Systems
System Protocols
Data Master
A6X and A7X Parts Supplied
A9X and A12X Parts Supplied
E7 / E7D Parts Supplied
Series and E Series Parts Supplied
Tools Required for Installation
Selecting a Location
Chapter 4 Cables and Connections
General Cabling Guidance
Connections Overview
A9X and A12X Connections Overview
Power Connection - A6X and A7X
Power and Data Connection
Network Connections
Keypad Connection
Radar Connection
Sonar Connection
Thermal Camera Connection
IP Camera Connections
Weather Receiver Connection
Fusion Link Connection
GPS Connection
GA150 Connection
AIS Connection
Fastheading Connection
Seatalk Ng Connections
NMEA 2000 Connection
Seatalk Connection
NMEA 0183 Connection
A6X and A7X to NMEA 0183 DSC VHF Radio Connection
Camera / Video Connection
Camera / Video In-Out Connection
Media Player Connection
Bluetooth Remote Control Connection
Remote Control Functions
Wifi Connections
Chapter 5 Mounting
Mounting - a Series
Mounting - C Series and E Series
Chapter 6 Getting Started
Display Power
Series Controls
E7 / E7D Controls
C95 / C97 / C125 / C127 / E95 / E97 / E125 / E127 / E165 Controls
Homescreen Overview - Touch Only Displays
Homescreen Overview - C Series / E Series
Databar Status Symbols
Pages
Applications
Splitscreen Controls
Screen Overview
Basic Touchscreen Operations
Multi-Touch Gestures
Initial Set up Procedures
GPS Status
Enabling Autopilot Control
Engine Identification
Enabling AIS Functions
Shared Preferences
Software Updates
Learning Resources
Chapter 7 System Checks
GPS Check
Radar Check
Sonar Check
Thermal Camera Setup and Checks
Chapter 8 Managing Display Data
Memory Cards and Chart Cards
A6X and A7X
A9X and A12X
C and E Series
Saving User Data and User Settings
Screenshots
Resetting Your System
Chapter 9 Customizing Your Display
Language Selection
Boat Details
Units Set-Up
Time and Date Set-Up
Display Preferences
Databar and Databox Overview
List of Data Items
System Set-Up Menus
Maintenance Menu
Chapter 10: Document Viewer Application
Document Viewer Overview
Chapter 11 Autopilot Control
Autopilot Control Overview and Features
Enabling Autopilot Control
Engaging the Autopilot
Adjusting the Current Locked Heading
Disengaging the Autopilot
Manually Displaying the Pilot Control Dialog Box
Pilot Control Dialog
Pilot Bar
Pilot Set-Up
Pilot Settings
Commissioning
Autopilot Status Symbols
Autopilot Alarms
Chapter 12 Alarm Management
Alarms Overview
Alarm Manager Overview
Alarm Options
Chapter 13 Man Overboard (MOB)
Man Overboard
Chapter 14 DSC VHF Radio Integration
DSC VHF Radio Integration
Enabling DSC VHF Radio Integration
Chapter 15 Fuel Manager
Fuel Manager Overview
Chapter 16 AIS Function
AIS Overview
AIS Prerequisites
AIS Context Menu
Enabling AIS
Displaying AIS Vectors
AIS Status Symbols
AIS Silent Mode
AIS Target Symbols
Displaying Detailed AIS Target Information
Viewing All AIS Targets
Using AIS to Avoid Collisions
Target Options
AIS Alarms
Buddy Tracking
Chapter 17 Waypoints, Routes and Tracks
Waypoints Overview
Routes
Tracks
Import and Export
Waypoints, Routes and Tracks Storage Capacity
Chapter 18 Chart Application
Chart Application Overview and Features
Electronic Charts Overview
Navigation Options
Chart Ranging and Panning
Chart Selection
Vessel Position on the Chart Display
Chart Orientation
Chart Motion Mode
Chart Views
Chart Display
Overlays
Chart Vectors
Cartography Objects
Object Information
Depth & Contour Options
My Data Options
Multiple Chart Synchronization
Measuring Distances and Bearings
Chapter 19 Fishfinder Application
Fishfinder Overview and Features
Sonar Technologies
Raymarine Sonar Modules
Multiple Sonar Module Support
Sonar Crosstalk Interference
Custom Channels
The Sonar Image
Depth Range
Sidevision Range
Fishfinder Scrolling
Sidevision TM Range
Fishfinder Display Modes
Sidevision Views
Sidevision TM Views
Presentation Menu Options
Depth and Distance
Waypoints in the Fishfinder Application
Sensitivity Settings
Fishfinder Alarms
Frequency Tuning
Sounder Set-Up Menu Options
Transducer Set-Up Menu Options
Resetting the Sonar
Chapter 20 Radar Application
Radar Overview
Radar Scanner Status Symbols
Radar Display Overview
Radar Range and Image Quality
Target Tracking
Distances, Range, and Bearing
Radar Mode and Orientation
Radar Presentation Menu Options
Radar Tuning: On-Screen Gain Controls
HD and Superhd Radar Adjustments
Non-HD Digital Radomes Adjustments
Dual Range Radar Operation
Radar Scan Speed
Radar Set-Up Menu
Resetting the Radar
Chapter 21 Data Application
Data Application Overview
Selecting Datapages Using Touch
Selecting Datapages
Customizing the Data Application
Engine Identification
Setting Boat Details
Setting Maximum Engine RPM
Color Theme
Units Set-Up
List of Data Items
Resetting Minimum and Maximum Readings
Resetting All Datapages
Chapter 22 Thermal Camera Application - Pan and Tilt Cameras
Thermal Camera Application Overview
Thermal Camera Image
Controls Overview
Camera Control
Image Adjustments
Pan and Tilt Camera - New Camera Interface
High Power and High Torque Modes
Pan and Tilt Camera - Old Camera Interface
Osd Menu Options
System Setup Menu
Chapter 23 Thermal Camera Application - Fixed Mount Cameras
Thermal Camera Application Overview
Thermal Camera Image
Controls Overview
Camera Control
Image Adjustments
Fixed Mount Camera Menu
Chapter 24 Camera Application
Camera Application Overview
Camera Cycling
Naming Camera / Video Feeds
Adjusting the Video Image
Selecting the Aspect Ratio
Selecting a Location to Store Recordings
Record and Playback
Taking Photos
Chapter 25 Fusion Link Application
Fusion Link Overview
Media Sources
Browsing Music
Selecting Shuffle and Repeat Functions
Adjusting Volume Levels for each Zone
Selecting the Zone to Control
Adjusting the Tone Controls
Selecting the System to Control
Menu Options
Chapter 26 Weather Application (North America Only)
Weather Application Overview
Weather Application Set up
Weather Application Display Overview
Weather Map Navigation
Weather Context Menu
Weather Information
Weather Reports
Animated Weather Graphics
Weather Application Menu Options
Glossary of Weather Terms
Chapter 27 Sirius Audio Application (North America Only)
Sirius Audio Overview
Chapter 28 Mobile Applications
Raymarine Mobile Apps
Enabling Wi-Fi
Enabling Mobile Apps
Setting up Wi-Fi Security
Selecting a Wi-Fi Channel
Advertisement
Quick Links
1
Installation and Operation
2
Memory Cards and Chart Cards
Download this manual
a Series
c Series
e Series
Release 11
Installation and operation
instructions
Date: 08-2014
Document number: 81337-1 1-EN
© 2014 Raymarine UK Limited
Table of
Contents
Previous
Page
Next
Page
1
2
3
4
5
Advertisement
Table of Contents
Troubleshooting
Chapter 30 Troubleshooting
401
Troubleshooting
402
Power up troubleshooting
403
Radar troubleshooting
404
GPS troubleshooting
405
Troubleshooting Autorouting
406
Sonar troubleshooting
408
Thermal camera troubleshooting
411
System data troubleshooting
413
Video troubleshooting
414
Wi-Fi troubleshooting
415
Bluetooth troubleshooting
416
Touchscreen troubleshooting
417
Miscellaneous troubleshooting
419
Need help?
Do you have a question about the a65 and is the answer not in the manual?
Ask a question
Questions and answers
Related Manuals for Lighthouse a65
Monitor Lighthouse Raymarine gS95 Installation And Operation Instruction Manual
Multifunction display (440 pages)
Monitor Lighthouse A136-15-OB Operation Manual
All-in-one led display a modular system for indoor applications (37 pages)
This manual is also suitable for:
A67 wifi
A68
A75
A77
A78
A95
...
Show all
A97
A98
A125
A127
A128
E7
E7d
C95
C97
C125
C127
E95
E97
E125
E127
E165
Gs95
Gs125
Gs165
Gs195
Table of Contents
Print
Rename the bookmark
Delete bookmark?
Delete from my manuals?
Login
Sign In
OR
Sign in with Facebook
Sign in with Google
Upload manual
Upload from disk
Upload from URL


Need help?
Do you have a question about the a65 and is the answer not in the manual?
Questions and answers