Samsung Galaxy S4 mini User Manual
Hide thumbs
Also See for Galaxy S4 mini:
- User manual (459 pages) ,
- User manual (224 pages) ,
- User manual (182 pages)
Table of Contents
Advertisement
Quick Links
Download this manual
See also:
User Manual
Advertisement
Table of Contents

Related Manuals for Samsung Galaxy S4 mini


Summary of Contents for Samsung Galaxy S4 mini
-
Page 1: User Guide
User Guide (UG template version 13a) SPT_L520_MR4_KK_UG _Eng_NE3_TE_071614_F3... -
Page 2: Table Of Contents
Table of Contents Get Started ..........................Your Phone at a Glance ...................... Set Up Your Phone ......................Turn the Phone On ...................... Activate Your Phone ......................Complete the Setup ......................Set Up Voicemail ........................ Sprint Account Information and Help ................... Sprint Account Passwords ................... - Page 3 Enter Text .......................... Touchscreen Keyboards ..................... Text Input Methods ..................... Select a Default Text Input Method ................Google Voice Typing ....................Samsung Keyboard ....................Swype ......................... Editing Text ......................... Phone Calls ..........................Make Phone Calls ......................Call Using the Keypad ....................
- Page 4 Sign in to Your Google Account .................. Access Gmail ......................Send a Gmail Message ....................Read and Reply to Gmail Messages ................Samsung Account ......................Email ..........................Add an Email Account ....................Add a Microsoft Exchange ActiveSync Account ............Compose and Send Email ..................
- Page 5 Delete an Email Account ..................... Text and Multimedia Messaging ..................Send a Message ......................New Messages Notification ..................Managing Messages ....................Messaging Settings ....................Social Networking Accounts ....................Flipboard ........................Google+ ........................Hangouts ........................YouTube ........................Facebook ........................Apps and Entertainment ......................
- Page 6 TripAdvisor ......................... Samsung Apps ........................Samsung Hub ........................Samsung Link ........................Configure Samsung Link Settings ................Use Samsung Link to Share Media with Another Device ..........Sprint Zone ........................Story Album ........................WatchON ........................... Web and Data ........................... Wi-Fi ..........................
- Page 7 Advanced Camera Settings ..................Gallery ..........................View Photos and Videos ................... Zoom In or Out on a Photo ..................Edit Photos ....................... Share Photos and Videos ..................Video ..........................Tools and Calendar ......................... 1Weather ......................... Calendar .......................... Add an Event to the Calendar ...................
- Page 8 Reconnect to a Bluetooth Device ................Disconnect or Unpair from a Bluetooth Device ............Send Information Using Bluetooth ................Receive Information Using Bluetooth ................ Memory Card ........................Install a microSD Card ....................Remove a Memory Card ................... View Memory Card Usage ..................
- Page 9 NFC Settings ........................Turn NFC On or Off ....................Android Beam ......................Tap and Pay ......................S Beam ..........................Turn S Beam On or Off ..................... Nearby Devices ....................... Screen Mirroring ......................Lock Screen Settings ....................... Screen Lock ......................Display Settings .......................
- Page 10 Screen Lock Sound ....................Emergency Tone ...................... Samsung Applications Settings ................. Samsung Keyboard Settings ..................Adapt Sound ......................Home Screen Mode ......................Call Settings ........................Set Up Call Rejection Messages ................Answering/Ending Calls .................... Turn Off Screen During Calls ..................
- Page 11 Swype Settings ......................Voice Search Settings ....................Text-To-Speech Options ................... Pointer Speed ......................Motions and Gestures ...................... Smart Screen ........................Smart Stay ........................ Voice Control ........................Accounts .......................... Add an Account ......................Backup Options ......................Location Settings ......................Security ..........................Encryption ........................
-
Page 12: Get Started
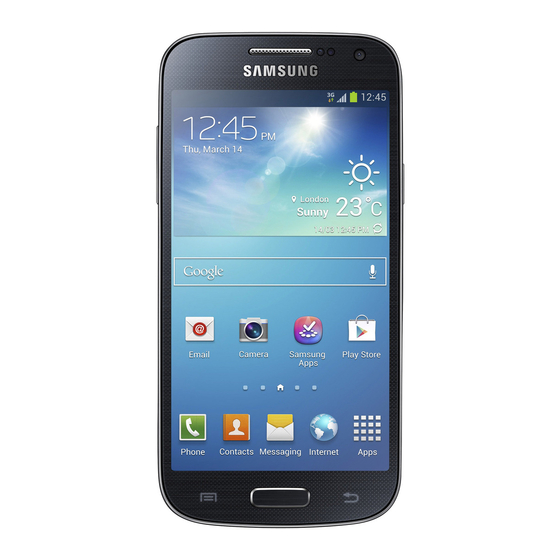
Get Started The following topics give you all the information you need to set up your phone and Sprint service the first time. Your Phone at a Glance The following illustration outlines your phone’s primary features. Get Started... -
Page 13: Set Up Your Phone
Set Up Your Phone Prior to using the phone, it is necessary to install and charge the battery. An optional microSD memory card (not included) can also be installed at this time. Remove the Back Cover ■ Using the slot provided, gently lift the cover off the phone. Get Started... - Page 14 Install an Optional Memory Card ■ To insert an optional microSD card (not included), carefully slide an optional memory card under the top metal plate into the microSD card socket until the card locks into place. For more information, see Memory Card.
- Page 15 Replace the Back Cover ■ Replace the battery compartment cover, making sure all the tabs are secure and there are no gaps around the cover. Charge the Battery Your phone is powered by a rechargeable, standard Li-Ion battery. A Wall/USB Charger (Charging Head and USB cable) is included with the phone for charging the battery.
-
Page 16: Turn The Phone On
3. When charging is finished, remove the USB cable from the charger/accessory jack on the phone. Turn the Phone On Use the Power/Lock Key to turn the phone on. ■ Press and hold the Power/Lock Key to turn the phone on. If your phone is activated, it will turn on, search for Sprint service, and begin the ... -
Page 17: Complete The Setup
● If you received your phone in the mail and you are activating a new phone for an existing number on your account (you’re swapping phones), you can activate on your computer online or directly on your phone. Activate on your computer: •... -
Page 18: Set Up Voicemail
Samsung Account: Your Samsung Account is used for access to Samsung apps and services, such as Samsung Hub, Samsung Apps, Samsung Link, and much more. Complete the steps to sign in to your current Samsung Account, or sign up for a new Samsung Account. 2. Touch Finish to complete setup. -
Page 19: Manage Your Account
Voicemail Password You’ll create your voicemail password when you set up your voicemail. See Set Up Voicemail for more information on your voicemail password. Data Services Password With your Sprint phone, you may elect to set up an optional data services password to control access and authorize Premium Service purchases. -
Page 20: Sprint Support Services
Sprint Support Services Sprint 411 and Sprint Operator Services let you easily access information and calling assistance from your Sprint phone. Sprint 411 Sprint 411 gives you access to a variety of services and information, including residential, business, and government listings; movie listings or show times; driving directions, restaurant reservations, and major local event information. -
Page 21: Phone Basics
Phone Basics Your phone is packed with features that simplify your life and expand your ability to stay connected to the people and information that are important to you. The following topics will introduce the basic functions and features of your phone. Your Phone’s Layout This illustration outlines your phone’s basic layout. - Page 22 ● Front Camera allows you to take pictures and videos of yourself. ● Power/Lock Key lets you turn the phone on or off, turn the screen on or off, or lock the screen. Press and hold for a Device options menu, where you can turn the phone off or restart it, or for easy access to Airplane mode, and to Mute, Vibrate, and Sound modes.
-
Page 23: Turn Your Screen On And Off
Turn Your Phone On and Off Use the Power/Lock Key to turn the phone on or off. Turn Your Phone On ■ Press and hold the Power/Lock Key. Turn Your Phone Off 1. Press and hold the Power/Lock Key to open the Device options menu. 2. -
Page 24: Touchscreen Navigation
Touchscreen Navigation Your phone’s touchscreen lets you control actions through a variety of touch gestures. Touch When you want to type using the on-screen keyboard, select items on-screen such as application and settings icons, or press on-screen buttons, simply touch them with your finger. Phone Basics... - Page 25 Touch and Hold To open the available options for an item (for example, a contact or link in a Web page), touch and hold the item. Phone Basics...
- Page 26 Swipe or Slide To swipe or slide means to quickly drag your finger vertically or horizontally across the screen. Phone Basics...
- Page 27 Drag To drag, touch and hold your finger with some pressure before you start to move your finger. While dragging, do not release your finger until you have reached the target position. Phone Basics...
- Page 28 Flick Flicking the screen is similar to swiping, except that you need to swipe your finger in light, quick strokes. This finger gesture is always in a vertical direction, such as when flicking the contacts or message list. Phone Basics...
- Page 29 Pinch and Spread “Pinch” the screen using your thumb and forefinger to zoom out or “spread” the screen to zoom in when viewing a picture or a Web page. (Move fingers inward to zoom out and outward to zoom in.) Tip: Pinching any Home screen will let you see thumbnails of all seven Home screens.
- Page 30 Rotate For most screens, you can automatically change the screen orientation from portrait to landscape by turning the phone sideways. When entering text, you can turn the phone sideways to bring up a bigger keyboard. Note: Screen rotation needs to be enabled for the screen orientation to automatically change. Touch and touch >...
-
Page 31: Your Home Screen
Your Home Screen The home screen is the starting point for your phone’s applications, functions, and menus. You can customize your home screen by adding application icons, shortcuts, folders, widgets, and more. Your home screen extends beyond the initial screen. Swipe the screen left or right to display additional screens. -
Page 32: Customize The Home Screen
● Current Screen: Indicates which Home screen is being displayed. For more information, Extended Home Screens. ● Apps: Displays the Apps screen. ● Primary Shortcuts: Shortcuts to common features. Primary Shortcuts appear on every Home screen. ● Apps Shortcuts: Shortcuts to common applications. ●... -
Page 33: Extended Home Screens
Extended Home Screens In addition to the main home screen, your phone has six extended home screens to provide more space for adding icons, widgets, and more. Press and then swipe across the screen to move from the main screen to an extended screen. There are up to six extended screens available in addition to the main Home screen. -
Page 34: Status Bar
4. Choose a source for wallpaper: Gallery: Select a picture from Gallery. Follow the prompts to crop the picture and save it as wallpaper. ID wallpapers: Select a wallpaper from the currently assigned ID pack (Home screen only). Live wallpapers: Select a moving scene for the background (Home screen only). - Page 35 Icon Description Location Battery is charging Battery is fully charged Smart stay enabled USB connection Failed USB connection Bluetooth on Connected to a Bluetooth device Notification Icons Icon Description Call in progress Missed call Microphone muted Speaker on New voicemail New email New message New Gmail...
-
Page 36: Notification Panel
Icon Description New Sprint Zone message Headset connected SD card error Hands free mode enabled Downloading Download complete Update available for Play Store Keyboard in use Screenshot saved Blocking mode on More notifications Notification Panel The Notification Panel displays information about connections, alerts, new messages, and more. - Page 37 ● Settings: Access System settings. For more information, see Settings. ● Quick Settings (Grid): Display Quick setting buttons in a grid. ● Quick Settings (Scrolling): Display Quick setting buttons in a scrollable list. ● Brightness Control: Adjust the brightness of the display. ●...
-
Page 38: Quick Settings
Access the Notifications Panel 1. Touch and slide downward from the top of the screen to display the Notification Panel. Slide the Notification Panel upward to close it. 2. Touch ongoing events or notifications to view details, or to launch the related app or feature. -
Page 39: Features
NFC: Enable NFC (Near Field Communication) to share information between your phone and another NFC device by touching the devices together, typically back-to- back. For more information, see NFC. Hands free mode: Read new notifications aloud. For more information, see Hands- ... -
Page 40: Smart Screen
Mute/pause: Mute incoming calls and pause playback by turning the phone screen- side down. ● Palm motion: Control the phone by touching the screen with the palm of your hand. Mute/pause: Mute incoming calls and pause playback by covering the screen with ... -
Page 41: Assistant Menu
● Camera: When enabled, you can take pictures with the voice commands “Smile”, “Cheese”, “Capture” and “Shoot”. ● Music: When enabled, you can control the music player with the voice commands “Next”, “Previous”, “Pause”, “Play”, “Volume Up”, and “Volume Down”. Enable Voice Control Enable Voice control features, and learn about using them. -
Page 42: Galaxy Gear
> Reset to revert back to the default settings. Galaxy Gear Your phone is Galaxy Gear compatible. For more information about using Galaxy Gear with your phone, refer to the documentation provided with your Galaxy Gear, or visit samsung.com/us/mobile/wearable-tech. Phone Basics... -
Page 43: Enter Text
Google voice typing allows you to speak your entries. ● Samsung keyboard allows you to enter text by touching keys on a virtual QWERTY keyboard. Samsung keyboard includes optional predictive text, which matches your key touches to common words so you can select a word to insert it into your text. -
Page 44: Google Voice Typing
2. Touch keys to enter text. While entering text, use these options: If you make a mistake, touch to delete incorrect characters. Touch and hold to delete a whole word or field. Letter Case: By default, Samsung Keyboard starts with a capital at the beginning of text. • Touch to change to upper case. -
Page 45: Swype
Configure Samsung Keyboard ■ Press and touch > Settings > My device tab > Language and input, and then touch next to Samsung keyboard. For more information, see Samsung Keyboard Settings. Swype Swype lets you enter words by tracing over the letters on the virtual QWERTY keyboard. -
Page 46: Editing Text
Delete: If you make a mistake, touch to delete a single character. Touch and hold to delete an entire word or field. Letter Case: By default, Swype starts with a capital at the beginning of text. • Touch to change to upper case. - Page 47 Copy, Delete, or Replace Text 1. Touch and hold the text or word you want to select. The selected text is highlighted between selection cursors 2. Touch and drag either cursor to select more or less text. 3. Touch an option from the Edit text menu bar. You can drag your finger along the menu bar to see all the options: Select all: Highlight all the text in the field.
-
Page 48: Phone Calls
Phone Calls With the Sprint National Network and your phone’s calling features, you can enjoy clear phone calls across the country. Make Phone Calls There are several convenient ways to place calls from your phone. Call Using the Keypad The most “traditional” way to place a call is by using the phone’s dialer screen. 1. -
Page 49: Call From Contacts
Call from Contacts You can place phone calls directly from entries in your Contacts list. 1. Press and touch Contacts. 2. Touch a contact and then touch next to the number you want to call to place a call. For more information, see Contacts. Tip: You can also place a call directly from the Contacts list. -
Page 50: Receive Phone Calls
When the Phone’s Screen Is Locked 1. Unlock the screen. For more information, see Turn Your Screen On and Off. 2. Touch Emergency call on the screen. 3. Touch When Your Account Is Restricted 1. Unlock the screen. For more information, see Turn Your Screen On and Off. -
Page 51: Mute The Ringing Sound
Mute the Ringing Sound To mute the ringer without rejecting the call, you can do either of the following: ■ Press the Volume Key down. – or – ■ Place the phone face down on a level surface. See Motions and Gestures for options, including the Mute/pause Motion to mute incoming calls by turning over the phone. -
Page 52: Voicemail Notification
2. Press and hold 3. Follow the system prompts to: Create your password. Record your name announcement. Record your greeting. Note: Voicemail Password—Sprint strongly recommends that you create a password when setting up your voicemail to protect against unauthorized access. Without a password, anyone who has access to your phone can access your voicemail messages. -
Page 53: Visual Voicemail
Note: You can also access Visual Voicemail from the Phone keypad by touching Use Another Phone to Access Messages 1. Dial your wireless phone number. 2. When your voicemail answers, press the asterisk key on the phone (*). 3. Enter your password. Visual Voicemail Visual Voicemail offers a new way to manage your voicemail. -
Page 54: Phone Call Options
Phone Call Options The Phone app provides many useful features and options to help you make the most of your calling experience. Dialing Options There are several helpful options available as you dial a number. 1. Press and touch Phone > Keypad tab. 2. -
Page 55: In-Call Options
In-Call Options While you’re on a call, you will see a number of on-screen options. Touch an option to select it. ■ Touch for more in-call options: Contacts: Display your contacts list. Memo: Create a new S Memo during a call. ... -
Page 56: Caller Id
Caller ID Caller ID identifies a caller while the phone is ringing, by displaying the number of the incoming call. Block Caller ID You can block your Caller ID (visible to other when you make a call), before making a call. The blocking only lasts for that call;... -
Page 57: Conference Calling
Conference Calling With conference calling (also known as 3-way calling), you can talk to two people at the same time. When using this feature, the normal airtime rates will be charged for each of the two calls. 1. Press and touch Phone >... -
Page 58: Speed Dials
Speed Dials You can assign a shortcut number to a phone number in your Contacts List for speed dialing. There are one hundred available numbered spaces. Speed dial 1 is reserved for Voicemail. Assign Speed Dials 1. Press and touch Phone >... -
Page 59: Logs
Logs The Logs tab of the Phone application lists all recent incoming, outgoing, and missed calls. View Logs The following procedures will guide you through viewing your call logs list. 1. Press and touch Phone > Logs tab to display call activity. 2. -
Page 60: Contacts
Contacts The Contacts application lets you store and manage contacts from a variety of sources, including contacts you enter and save directly in your phone as well as contacts synchronized with your Google Account, your PC, compatible email programs (including Exchange Server), and your Facebook friends. -
Page 61: Add A Contact
Add a Contact You can add contacts directly from the Contacts application. Enter details such as name, phone numbers, email addresses, mailing addresses, and more. 1. Press and touch Contacts. 2. Touch at the top of the screen. 3. Touch Device to store the contact on your phone, or touch an account to store the contact. -
Page 62: Edit A Contact
Edit a Contact Once you’ve added a contact, you can add or edit any of the information in the entry, assign a caller ID picture, customize with a unique ringtone, and more. Add or Edit Information for a Contact You can modify existing contact information to keep your information up-to-date. 1. -
Page 63: Assign A Ringtone To A Contact
Assign a Ringtone to a Contact You can assign a special ringtone to individual contacts for more personalization. 1. Press and touch Contacts. 2. Touch a contact to display it. 3. Touch the Ringtone field and choose a ringtone. You can choose a ringtone preloaded on your phone, or touch Add to choose a sound from Music. -
Page 64: Share A Contact
Share namecard via: Share contact(s) with others using Bluetooth, Drive, Email, Gmail, Messaging, or Wi-Fi Direct. Merge accounts: Combines phone contacts with a Google or Samsung Account. Accounts: Displays accounts set up on your phone. Speed dial setting: Allows you to assign a speed dial number to a selected contact. -
Page 65: Favorites
Favorites The Favorites tab is a listing that can help you quickly access your most used or preferred Contacts entries. Accessing Favorites 1. Press and touch Contacts > Favorites tab. 2. Touch an entry to view it. Create Favorite Contacts 1. - Page 66 Add a Contact to a Group 1. Press and touch Contacts. 2. Touch the Groups tab, and then touch a group. 3. Touch at the top of the screen. 4. From the list of contacts, touch the contact(s) you want to add. 5.
-
Page 67: Accounts And Messaging
Accounts and Messaging With Sprint service and your phone’s messaging capabilities, you have the opportunity to share information through many different channels and accounts, including Gmail (Google), personal and corporate email, text and multimedia messaging, social networking accounts, and Google Hangouts. -
Page 68: Sign In To Your Google Account
Sign in to Your Google Account If you have a Google Account but have not yet signed in with your phone, follow these instructions to sign in to your Google Account. 1. Press and touch > Settings. 2. Touch Accounts tab > Add account > Google > Existing. 3. -
Page 69: Read And Reply To Gmail Messages
Note: To send a carbon copy (Cc) or a blind carbon copy (Bcc) of the Gmail to other recipients, touch > Add Cc/Bcc. 4. Touch the Subject field and enter the Gmail subject. 5. Touch the Compose Gmail field and type your message. To add an attachment, touch >... -
Page 70: Samsung Account
Samsung Account Create a Samsung Account for access to Samsung apps and services, such as Samsung Hub, Samsung Apps, Samsung Link, and much more. 1. Press and touch > Settings. 2. Touch Accounts tab > Add account >Samsung Account, and then touch Sign in or Create new account. -
Page 71: Compose And Send Email
Note: You can set up multiple Microsoft Exchange ActiveSync accounts on your phone. 1. Press and touch > Settings > Accounts tab > Add account > Microsoft Exchange ActiveSync. 2. Enter your email address in the Email address field. 3. Enter your password in the Password field. To see your password as you enter it, touch Show password. -
Page 72: Reply Or Forward Email
• Record audio: Launch Voice Recorder to record a new sound. • S Memo: Launch S Memo to choose or create a memo. For more information, Memo. • Calendar: Add an event from your calendar. • Contacts: Add a contact entry (namecard) to the message. •... - Page 73 Synchronize an Email Account Whatever your automatic synchronization settings are, you can also synchronize your sent and received email messages manually at any time. 1. Press and touch Apps > Email. 2. Select an email account. If you are already in an email account, touch the account name field (upper-left) to ...
-
Page 74: Email Settings
Email Settings You can edit general preferences, which apply to all email accounts, or configure settings for specific email accounts, such as email address and password, name display and signature, frequency of retrieval, etc. Edit General Preferences Settings listed below General settings affect all email accounts. 1. - Page 75 Edit Account Settings You can edit settings for your individual email accounts, such as email address and password, name display and signature, frequency of retrieval, etc. Note: Accounts settings may vary, depending on the type of email account and service provider. Listed below are some common email account settings.
-
Page 76: Delete An Email Account
More settings: Configure other options. • Account name: Enter a name to identify this email account. • Your name: Enter your name to be displayed in lieu of the actual email address. • Always Cc/Bcc myself: Choose options for sending a copy of emails you send to yourself, as a copy (Cc) or blind copy (Bcc). -
Page 77: Send A Message
Send a Message Quickly compose and sent text and multimedia messages on your phone. 1. Press and touch Messaging. 2. Touch 3. Touch Enter recipient, and then enter a contact name, a mobile phone number, or an email address. As you type, possible matches from your accounts and contacts display on the screen. -
Page 78: New Messages Notification
New Messages Notification Depending on your notification settings, the phone will play a ringtone, vibrate, or display the message briefly in the Status bar when you receive a new message. To change the notification for new messages, see Messaging Settings for details. -
Page 79: Messaging Settings
Reply to a Message 1. Press and touch Messaging. 2. From the message list, touch a message to display it. 3. Touch the Enter message field and then type your reply message. 4. When finished, touch Delete a Message 1. Press and touch Messaging. - Page 80 3. Configure message settings: Default messaging app: Set the default app for messaging with your phone. This app will launch when you choose messaging from another app on your phone. Note: If you choose a default messaging app other than Messaging (for example, Google Hangouts), you will not be able to use the standard Messaging app unless you restore it as the default messaging app.
- Page 81 Select ringtone: Set the ringtone for your message notifications. Vibrate: Set whether vibration plays along with the ringtone for new message notifications. Message alert repetition: Set how often your phone notifies you of new message(s). Preview message: Control whether a preview of a new message appears in the ...
-
Page 82: Social Networking Accounts
Social Networking Accounts Stay in touch on the go with all your social networking accounts. Flipboard Use Flipboard to create a personalized digital “magazine” out of everything being shared with you. Access news stories, personal feeds and other related material. Flip through your Facebook newsfeed, tweets from your Twitter account, photos from friends and much more. -
Page 83: Facebook
Note: YouTube is a data-intensive feature. Sprint recommends that you upgrade to an unlimited data plan to avoid unexpected data charges. ■ Press > Apps > YouTube. Facebook Post updates, read what your friends are up to, upload pictures and check-ins, and more with on-the-go Facebook access. -
Page 84: Apps And Entertainment
Apps and Entertainment All your phone’s features are accessible on the Apps screen. Google Play Store The Google Play Store app is the place to go to find new Android apps, games, movies, music, and books for your phone. Choose from a wide variety of free and paid apps ranging from productivity apps to games. -
Page 85: Create A Google Wallet Account
Warning! Read the notification carefully! Be especially cautious with apps that have access to many functions or a significant amount of your data. Once you agree to the download and installation on this screen, you are responsible for the results of using this item on your phone. Create a Google Wallet Account You must have a Google Wallet account associated with your Google Account to purchase items from the Google Play Store app. -
Page 86: Google Play Books
Google Play Books Discovering your favorite books and authors has never been easier. With Google Play Books, you can shop the world's largest selection of e-books and read them anywhere you like—on a tablet, phone, e-reader, or the Web. Visit play.google.com/store/books to learn more. -
Page 87: Sprint Tv & Movies
Sprint TV & Movies The Sprint TV & Movies application offers access to a wide variety of channels. Subscription options include comprehensive basic packages, as well as a full menu of “a la carte” channels. Note: Available categories and content are subject to change. Visit sprintchannels.mobitv.com for more information on channels and pricing. -
Page 88: Group Play
Group Play Use Group Play to share media from your phone to other devices, via Wi-Fi, using your phone as an AP (Access Point). Many of your phone’s apps offer sharing via Group Play. Touch to find sharing options, usually from the Share via list of options. To use Group Play, all participants must be connected to the same Wi-Fi network. -
Page 89: Cbs Sports
Join a Group 1. Press and touch Apps > Group Play. 2. Touch Join Group. Your phone scans for nearby available groups. Your phone can only detect groups on the same Wi-Fi network your phone is connected to. 3. Select a group to join. After connecting, you can see and interact with the group’s shared media. -
Page 90: Music
Music The Music app plays music files. Use Music to browse your music library, play songs, and create playlists. You can also set songs as ringtones for incoming calls, or as alarm tones. Note: For information about loading music onto your phone, see Transfer Files Between Your Phone and a Computer. - Page 91 4. While playing music, use these controls: Select Device: Streams the current music file to another device using Screen Mirroring. For more information, see Screen Mirroring. Favorite: Assign the current song as a Favorite. Shuffle: Shuffles the current list of songs randomly, or play songs in order. ...
- Page 92 Note: While playing music, you can touch and hold on a song to choose Add to playlist. Set a Song as a Ringtone or Alarm Tone You can set a song as a ringtone for all incoming calls, or for a contact. You can also set a song as an alarm tone.
-
Page 93: Sprint Music Plus
Settings: Configure settings for music and playback, including: • Music menu: Choose categories for the tabs on the main Music screen. • SoundAlive: Choose a setting to match the type of music. • Adapt Sound: Customize sound output when you are listening with earphones. Only available when earphones are inserted into the earphone jack. -
Page 94: Navigation
3. Tap a store option from the main page (Ringbacks Store, Music Store, or Ringtones Store), or tap > Music (under Library) to access your music. Tap the onscreen navigation tools to skip ahead or rewind. Touch at any time to ... -
Page 95: Tripadvisor
Apps > TripAdvisor. 2. Follow the on-screen instructions. Samsung Apps Browse, search, and find apps to download and install on your phone. Log in to your Samsung Account to manage your downloads. ■ Press and touch Apps >... -
Page 96: Samsung Hub
Samsung Hub Samsung Hub is your one stop for the hottest movie and TV content. With hundreds of titles available, entertaining your family on the go was never easier. You can rent or purchase your favorite content and watch from any location. Featuring the stunning viewing quality Samsung is known for, Samsung Hub is your gateway to mobile video like you've never experienced it before. - Page 97 ● Media Content that is purchased and downloaded may be viewed concurrently on up to five (5) devices with Samsung Hub (or “the service”) that are also registered to the same account. ● You may remove a device from your account no more than once every 90 days.
-
Page 98: Samsung Link
Samsung Link. 2. Follow the prompts to sign in to your Samsung Account and learn about Samsung Link. 3. On the Samsung Link screen, swipe your finger left or right across the screen to scroll between: ALL CONTENT: Media you’ve recently viewed. -
Page 99: Configure Samsung Link Settings
Video optimization: When turned On, video quality for streamed video content is optimized depending on current network conditions. Password lock: When turned On, access to Samsung Link on your phone is password-protected. You must enter your Samsung Account password to start Samsung Link. -
Page 100: Sprint Zone
5. Follow the prompts on the target device to allow sharing. Sprint Zone The Sprint Zone app will keep you up-to-date on all the Sprint information that matters most to you. This includes access to your account information, the latest Sprint promotions and customer news, help with your device and account, and Sprint’s suggestions for apps. - Page 101 2. From the toolbar, touch the icon, and then touch Continue. 3. Follow the prompts to find your TV or other devices and configure your phone to control their operation. Note: Touch > Help to learn more about WatchON. Apps and Entertainment...
-
Page 102: Web And Data
Web and Data The following topics address your phone’s data connections and the built-in Web browser. Additional data-related features can be found in Accounts and Messaging, Apps and Entertainment, and Tools and Calendar. Your phone’s data capabilities let you wirelessly access the Internet or your corporate network through a variety of connections, including: Wi-Fi Wi-Fi provides wireless Internet access over distances of up to 300 feet. -
Page 103: Connect To A Different Wi-Fi Network
Scan and Connect to a Wi-Fi Network 1. Press and touch > Settings > Connections tab > Wi-Fi. 2. The network names and security settings (Open network or Secured with xxx) of detected Wi-Fi networks are displayed. When you select an open network, you will be automatically connected to the ... -
Page 104: Hotspot
Hotspot Use your phone as an Internet Access Point (AP) using Hotspot. This allows up to eight other devices to connect to the AP via a Wi-Fi network—giving the connected devices access to the Internet. Turn On Hotspot 1. Press and touch >... -
Page 105: Connections Optimizer
Delete a Device 1. Press and touch > Settings > Connections tab > Hotspot. 2. Touch Allowed devices > Delete. 3. Touch each device you want to delete, or touch Select all. 4. Touch Delete. Connections Optimizer The Connections Optimizer is a tool that automatically selects the best mobile network for your phone, including "remembered"... -
Page 106: Data Services General Information (Sprint Spark Lte And 3G Networks)
Data Services General Information (Sprint Spark LTE and 3G Networks) With your Sprint service, you are ready to start enjoying the advantages of data services. The following topics will help you learn the basics of using your data services, including managing your user name, launching a data connection, and navigating the Web with your phone. -
Page 107: Virtual Private Networks (Vpn)
Set Your Network Options 1. Press and touch > Settings > Connections > More networks > Mobile networks > Network mode. 2. Select LTE/CDMA or CDMA. The phone will scan for the best available Sprint network and will automatically connect to it. When your phone is connected to the Sprint Spark enhanced LTE network, the Sprint Spark icon appears in the status bar. -
Page 108: Add A Vpn
1. Press and touch > Settings > My device tab. 2. Touch Lock screen > Screen lock. 3. Choose a screen lock, from PIN or Password. 4. Follow the prompts to configure the screen lock. For more information, see Screen Lock. -
Page 109: Chrome
2. Touch the VPN connection to return to the VPN settings screen, and then touch the VPN connection to disconnect from it. When your phone has disconnected from the VPN, the VPN disconnected icon displays in the notification area of the title bar. Chrome Use Chrome for Mobile to browse fast and sign in to bring your Chrome experience from your computer, anywhere you go. -
Page 110: Camera And Video
Camera and Video Camera You can use the camera or camcorder to take and share pictures and videos. Taking pictures with your phone’s built-in camera is as simple as choosing a subject, pointing the camera, and then pressing the camera key. ■... -
Page 111: Take A Picture
Take a Picture You can take pictures with your phone’s front or back camera, or combine shots with Dual mode. 1. Press and touch Apps > Camera. 2. Using the phone’s screen as a viewfinder, compose your shot by aiming the camera at the subject. -
Page 112: Camera Options
3. Touch Record Video to begin recording. While recording, you can use these options: Touch the screen to change the focus area to the area you tapped. Touch Capture to take a still picture while continuing recording. Touch Pause to temporarily stop recording. -
Page 113: Quick Camera Settings
• Beauty face: Automatically enhances facial features. • Best photo: Allows you to select the best shot from multiple shots you take at the same time. • Continuous shot: Captures a series of photo continuously at a rate of 3 per second for as long as you touch and hold the Capture button (maximum of 20 photos at a time). -
Page 114: Advanced Camera Settings
Recording mode: Touch to choose a mode for recording. Choose Limit for MMS to restrict recordings to a size that can be attached to a multimedia message. Choose Normal to control the speed of recording. Share: Touch to choose a method for sharing pictures and videos. You can ... -
Page 115: Gallery
• Review pics/videos: Display pictures and videos briefly after you take them so you can review them. • Volume Key: Choose a function for the Volume Key while using the Camera. • Timer: Choose a timer setting to delay the taking of pictures or recording. •... -
Page 116: View Photos And Videos
Touch the menu in the toolbar to display files by Albums, All, Locations, People, or Favorites. Touch a picture or video to display it in full screen view. Touch and hold thumbnails to select them (indicated by a check mark). ... - Page 117 3. Touch for more options (options vary according to item being viewed): Edit: Edit the photo using Photo Editor (available for download from Samsung Apps). Play continuous shot: View Continuous shot photos in quick secession. For more ...
-
Page 118: Zoom In Or Out On A Photo
• SNS data management: Enable Sync only via Wi-Fi to only sync photos and videos when connected to a Wi-Fi network. • Tags: Enable Tag buddy and Face tag. Tag buddy identifies each photo with information such as the weather, location, people in the photo, or date created. Face tag scans each photo to detect people’s faces, which you can then tag with their name. -
Page 119: Share Photos And Videos
4. To adjust the crop box size, touch and drag the edges of the box. 5. To move the crop box to the part of the photo that you want to crop, touch anywhere inside the box and drag it to the desired position. 6. - Page 120 5. Compose your message. For more information, see Send a Message. Send Photos or Videos Using Bluetooth You can select several photos, videos, or both and send them to someone’s phone or your computer using Bluetooth. 1. Press and touch Apps >...
-
Page 121: Video
Share Videos on YouTube You can share your videos by uploading them to YouTube. Before you do this, you must create a YouTube account and sign in to that account on your phone. 1. Press and touch Apps > Gallery. 2. - Page 122 Viewing Videos 1. Touch a video to play it. While playing a video, touch the screen to display or hide playback controls: Select device: Send the video to a nearby device. Pause: Pause the video. Play: Start the video after being paused. ...
- Page 123 Trim: Adjust the beginning and ending points of the video. Via Bluetooth: Share video using Bluetooth. Video auto off: Set the option Off or set your video to turn off automatically by touching one of the time values. Subtitles (CC): View subtitles for the video (if available).
- Page 124 3. Touch to continue playing the video in a floating window. Drag the window to any location on the screen, and use two fingers to pinch or spread to resize the floating window. Camera and Video...
-
Page 125: Tools And Calendar
Tools and Calendar Learn how to use many of your phone’s productivity-enhancing apps and features. 1Weather Receive real-time local weather information at any location in the world. Access 7-day and hourly weather forecasts for your area. Install the 1Weather App on Your Phone Before you use 1Weather on your phone, you must download and install the app from the Google Play Store. - Page 126 3. Assign the new calendar event to sync with an email account (such as Gmail) by touching the Calendar field and selecting an account. My calendar stores calendar entries locally on the phone and not as part of an email ...
-
Page 127: Event Alerts
Event Alerts When your phone is turned on and you have an event alarm scheduled, your phone alerts you and displays the event summary. There are several ways your phone alerts you to scheduled events: ● By playing the assigned ringtone. ●... -
Page 128: Delete Events
4. To display an event’s details, touch it from the current screen. 5. Touch and hold a day or time slot to create a new Memo. 6. Double-tap a day or time slot to create a new Event. Delete Events The following procedures show you how to delete your calendar events. -
Page 129: Calculator
Desk clock: Display a clock and calendar on the screen, with shortcuts to your favorite apps. Create an Alarm Create an alarm event. You can set one-time or recurring alarms, and choose options for how to be notified for the alarm. 1. -
Page 130: Manually Uploading A Picture To Dropbox
Manually Uploading a Picture to Dropbox Follow the below procedures to manually upload pictures to the Dropbox app. 1. Press and touch Apps > Camera. 2. After the photo is taken, view the photo in the Gallery. 3. Touch screen to reveal the image options. 4. -
Page 131: Help
Help Help provides online information to help with your questions. ■ Press and touch Apps > Help. My Files My files allows you to manage your manage your sounds, images, videos, Bluetooth files, Android files, and other memory card data in one convenient location. This application allows you to launch a file if the associated application is already on your phone. -
Page 132: S Memo
Set as: Set the memo as a contact icon, Home screen wallpaper, Lock screen wallpaper, or Home and lock screens wallpapers. Print: Print a memo to a compatible Samsung printer (not included) via Wi-Fi. 4. When you are finished creating your memo, touch Save on the top menu bar. - Page 133 S Memo Options Configure S Memo options. 1. Press and touch Apps > S Memo. 2. From the S Memo screen, touch to access the following options: Search: Search for a saved memo. Delete: Permanently delete a memo. Sort by: Sort the memo list by Date (most recent), Date (oldest), Name, Tag, ...
-
Page 134: Voice Services
Voice Services The following information will guide you through using Voice Services. S Translator Easily translate words and phrases, either spoken or in text. ■ Press and touch Apps > S Translator. S Voice Your phone’s S Voice is a voice recognition application used to activate a wide variety of functions on your phone. -
Page 135: Voice Search
4. Touch for options: Share via: Share your recording using such methods as Dropbox, Bluetooth, Drive, Email, Gmail, Messaging, and Wi-Fi Direct. Delete: Delete one or more voice recordings. Touch the recordings to delete and touch Delete. Touch OK to confirm the deletion. ... -
Page 136: Bluetooth
Bluetooth Bluetooth is a short-range communications technology that allows you to connect wirelessly to a number of Bluetooth phones, such as headsets and hands-free car kits, and Bluetooth-enabled handhelds, computers, printers, and wireless phones. The Bluetooth communication range is usually approximately 30 feet. Turn Bluetooth On or Off When Bluetooth is On, you can scan and find other Bluetooth devices, to share information between the devices. -
Page 137: Reconnect To A Bluetooth Device
Reconnect to a Bluetooth Device When you have paired your phone with another device, you should be able to reconnect it automatically by turning on Bluetooth on your phone. 1. Press and touch > Settings > Connections tab. 2. Touch the Bluetooth OFF/ON slider to turn Bluetooth on. 3. -
Page 138: Send Information Using Bluetooth
Send Information Using Bluetooth You can use Bluetooth to transfer information between your phone and another Bluetooth- enabled device such as a phone or notebook computer. The first time you transfer information between your phone and another device, you need to enter or confirm a security passcode. After that, your phone and the other device are paired, and you will not need to exchange passcodes to transfer information in the future. -
Page 139: Receive Information Using Bluetooth
Receive Information Using Bluetooth Your phone is capable of receiving a wide variety of file types with Bluetooth, including photos, music tracks, and documents such as PDFs. Note: Your phone must already be paired to the Bluetooth device in order to receive files. See Pairing with a Bluetooth Device for more information. -
Page 140: Remove A Memory Card
1. Using the slot provided, gently lift the cover off the phone. 2. With the gold contacts facing down, slide the card into the slot. Note that the microSD card slot is on top of the SIM card. The SIM card holds ... -
Page 141: View Memory Card Usage
View Memory Card Usage Use the following procedure to view memory usage information for an optional installed memory card. ■ Press and touch > Settings > More > Storage. The total space, the amount of space occupied by files, and available space are displayed. See Storage more information. -
Page 142: Update Your Phone
2. Your phone will automatically detect the connection. When appears in the Status bar, swipe your finger down from the Status bar to open the Notification Panel. 3. On the Notification Panel, the type of connection is displayed: Media device (MTP): Connect as a media device to transfer files. You can transfer ... -
Page 143: Update Your Phone
Preserve Data on an Optional Installed Memory Card As an added precaution, to preserve any data on an optional installed memory card (not included), please remove it from your phone prior to starting the update process. Update Your Phone 1. Press and touch >... -
Page 144: Settings
Settings Use Settings to configure your phone to your preferences. Access Settings Settings are arranged on tabs by category to quickly access options. 1. Press and touch > Settings. – or – Press and touch Apps > Settings. – or – Pull down the Notification panel, and then touch Settings. -
Page 145: Wi-Fi Calling Settings
Wi-Fi Calling Settings You can make and receive calls via a Wi-Fi network. Wi-Fi Calling is an excellent solution for coverage issues in and around the home or wherever cellular coverage is limited. When Wi-Fi Calling is enabled, all incoming and outgoing calls will be made via your Wi-Fi network. -
Page 146: Other Wi-Fi Settings
3. Configure these settings: Add Wi-Fi network: Connect to a new Wi-Fi network. For more information, see Wi-Fi. Scan: Search for available Wi-Fi networks. Wi-Fi Direct: Connect to other Wi-Fi Direct devices. For more information, see Wi-Fi Direct. -
Page 147: Wi-Fi Direct
WPS push button: Set up a connection to a WPS (Wi-Fi Protected Setup) router or other equipment. WPS PIN entry (not configurable): View the PIN used by your phone to set up a PIN- secured connection to a Wi-Fi router or other equipment. Help: Learn about setting up and using Wi-Fi networks, and other settings. -
Page 148: Bluetooth Settings
3. Touch Configure for options: Network SSID: Enter a name for your phone. This name will be displayed in the other device’s Wi-Fi networks listing. Hide my device: Do not display your phone’s name in the other device’s Wi-Fi ... -
Page 149: Turn Bluetooth On Or Off
Turn Bluetooth On or Off When Bluetooth is On, you can scan and find other Bluetooth devices to share information between the devices. Turn Bluetooth Off when not in use to conserve battery power. 1. Press and touch > Settings > Connections tab. 2. -
Page 150: Data Usage
Data Usage Monitor data usage, and control your phone’s connection to mobile data service. Note: Data is measured by your phone. Your service provider may account for data usage differently. 1. Press and touch > Settings > Connections tab. 2. Touch Data usage to set options: Mobile data: Enable or disable Mobile data. -
Page 151: More Networks Settings
More Networks Settings More networks settings provide additional options for configuring connections between your phone and other devices. Airplane Mode Enabling Airplane mode turns off calling, messaging, and data network features. It also turns off other connectivity features, such as Wi-Fi and Bluetooth. While in airplane mode, you can use other features of your phone, such as playing music, watching videos, or other applications. - Page 152 2. Tap More networks > Printing, and then choose a print service from the list. The Samsung Print Service Plugin is available by default. 3. Tap the ON/OFF switch to turn the service on or off. The service must be on to configure settings or print.
-
Page 153: Mobile Networks
Confidential Print: If the optional printer supports confidential printing, and it is enabled, you must enter a User ID and Password to retrieve your printouts. Tap Confidential Print, and then enter a User ID and Password. Job Accounting: If the optional printer supports job accounting, and it is enabled, ... -
Page 154: Vpn Settings
VPN Settings Set up and manage Virtual Private Networks (VPN). Note: VPN settings include storage of login credentials on your phone. You must configure a screen unlock PIN or password before setting up a VPN. 1. Press and touch > Settings > Connections tab. 2. -
Page 155: Android Beam
Android Beam When Android Beam is activated, you can beam app content to another NFC-capable device by holding the devices close together. You can beam browser pages, YouTube videos, contacts, and more. The app determines what kind of data is beamed. 1. -
Page 156: Nearby Devices
Nearby Devices Share files with devices using DLNA (Digital Living Network Alliance) standards, over Wi-Fi. To use Nearby devices, you must connect to the same Wi-Fi network as the devices you wish to share with, and the other devices must support DLNA. Note: Use care when enabling file sharing. -
Page 157: Lock Screen Settings
Lock Screen Settings Configure settings for locking the screen, to improve security. Screen Lock Choose a screen lock, to dim and lock the screen. 1. Press and touch > Settings > My device tab. 2. Touch Lock screen. 3. Touch Screen lock and follow the instructions to select a screen lock. Then configure the displayed options for that screen lock. - Page 158 Face and voice: Unlock your phone by looking at the screen and speaking. This option offers low security, because someone who looks and/or sounds similar to you could unlock your phone. Touch the option for more information, and to set up Face and voice unlock.
-
Page 159: Display Settings
Password: Enter an alphanumeric password to unlock your phone. • Lock screen widgets: Customize your clock and personal message. • Lock automatically: Automatically lock your phone 5 seconds after the screen turns off. • Lock instantly with power key: Instantly lock your phone by pressing the Power/Lock Key. -
Page 160: Notification Panel Settings
Notification Panel Settings Configure options for the Notification panel, available when you swipe your finger down from Status bar at the top of the screen. At the top of the Notification panel, you can control settings with the Quick setting buttons. Choose quick setting buttons in Notification panel settings. -
Page 161: Auto Rotate Screen
Auto Rotate Screen When Auto rotate screen is enabled, the screen automatically updates when you rotate the phone. 1. Press and touch > Settings > My device tab. 2. Touch Display, and then touch Auto rotate screen to enable or disable the setting. Screen Timeout Screen timeout lets you select how long the display screen remains lit after you press any key. -
Page 162: Font Style
Font Style You can set the font for all text that displays on the screen. 1. Press and touch > Settings > My device tab. 2. Touch Display, and then touch Font style to choose a font. Follow the prompts to set it as the default. -
Page 163: Auto Adjust Screen Tone
Auto Adjust Screen Tone When Auto adjust screen tone is enabled, your phone automatically analyzes the screen and adjusts the brightness to conserve battery power. 1. Press and touch > Settings > My device tab. 2. Touch Display, and then touch the check box beside Auto adjust screen tone to enable or disable the option. -
Page 164: Ringtones
System Ringtones Choose a ringtone for incoming calls. 1. Press and touch > Settings > My device tab. 2. Touch Sound, and then touch Ringtones to choose a ringtone: Touch a ringtone to select it. As you touch a ringtone, a sample plays. ... -
Page 165: Dialing Keypad Tone
Alert: A tone plays during emergency calls. Vibrate: A vibration plays during emergency calls. Samsung Applications Settings Configure options for featured apps on your phone. 1. Press and touch > Settings > My device tab. 2. Tap an option, and then configure settings:... -
Page 166: Samsung Keyboard Settings
Settings. Calendar: Configure calendar sounds. Samsung Keyboard Settings You can choose whether sounds play when you tap keys on the Samsung Keyboard while entering text. 1. Press and touch > Settings > My device tab. 2. Tap Sound, and then tap Sound when tapped to enable or disable the option. -
Page 167: Call Settings
Call Settings Configure options for calling with your phone. Set Up Call Rejection Messages Create and manage text messages to send to callers when rejecting incoming calls. Messages you create here are available from the incoming call screen when you use the Reject with message option. -
Page 168: Call Alerts
Call Alerts Set options for sounds and vibrations to occur during calls. 1. Press and touch > Settings > My device tab > Call. 2. Touch Call alerts to configure options: Vibrate on connection to network: Vibrate the phone when a call connects to the ... -
Page 169: Ringtones And Keypad Tones
Ringtones and Keypad Tones Choose tones and vibrations to play for incoming calls and keypad taps. 1. Press and touch > Settings > My device tab > Call. 2. Touch Ringtones and keypad tones to configure options: Ringtones: Select a ringtone for incoming calls. ... -
Page 170: Noise Reduction
Noise Reduction When enabled, Noise reduction suppresses background noise from your environment during calls. 1. Press and touch > Settings > My device tab > Call. 2. Touch Noise reduction to enable the setting. Increase Volume In Pocket When enabled, this setting uses the proximity sensor to detect when the phone is in a pocket or other close-fitting location such as a purse or bag, and increases the volume for incoming call ringtones. -
Page 171: Tty Mode
TTY Mode A TTY (teletypewriter, also known as a TDD or Text Telephone) is a telecommunications device that allows people who are deaf, hard of hearing, or who have speech or language disabilities, to communicate by telephone. Your phone is compatible with select TTY devices. Please check with the manufacturer of your TTY device to ensure that it supports digital wireless transmission. -
Page 172: Blocking Mode
Blocking Mode When Blocking mode is enabled, notifications for selected features are blocked, and you only receive the notifications you choose. You can choose to block notifications by feature or contact, and choose blocking all the time, or during a specific time period. 1. -
Page 173: Hands-Free Mode
Hands-free Mode When enabled, alarm and scheduled alarm information is read aloud. 1. Press and then touch > Settings > My device tab > Hands-free mode. 2. Touch OFF/ON to enable the setting and configure options: Incoming call: Read out callers’ information when receiving incoming calls. ... -
Page 174: Accessibility
Automatic unlock: Flip the S View cover open to unlock the screen when the secure lock is disabled and the phone is docked. Accessibility Your phone offers features to make using the phone easier for those with certain physical disabilities. - Page 175 Samsung subtitles: Tap to choose options for subtitles. Tap the ON/OFF switch beside Samsung subtitles (CC) to turn the option on or off, and then configure options for alignment, text font and size, and window appearance. Assistant menu: Display a special menu to improve phone accessibility for users ...
-
Page 176: Language And Input
Language and Input Use Language and input settings to choose a default language for your phone’s operations, plus settings for text entry and other inputs. Choose a Default Language Choose the language for operating your phone. 1. Press and touch >... -
Page 177: Samsung Keyboard Settings
Samsung Keyboard Settings The Samsung Keyboard is an on-screen QWERTY keyboard, so you can enter text by “typing” on the keyboard. Samsung keyboard is enabled by default, and you can choose options for using it. 1. Press and touch > Settings > My device tab. -
Page 178: Swype Settings
Sound: When enabled, the keyboard plays a sound for your key taps. • Character preview: When enabled, the character displays in a bubble as you tap each key. Help: Learn about Samsung Keyboard. Reset settings: Return settings to the defaults. ... -
Page 179: Voice Search Settings
• Long-press delay: Set the time needed to select alternate characters. • Show complete trace: When enabled, Swype displays the trace of each word until you start the next word. • Auto-capitalization: When enabled, Swype automatically capitalizes the first word of sentences. •... -
Page 180: Text-To-Speech Options
Text-to-speech (TTS) provides audible readout of text, such as the contents of text messages. 1. Press and touch > Settings > My device tab. 2. Touch Language and input, and then touch Text-to-speech options: Preferred TTS engine: Select Samsung text-to-speech engine, or Google Text- to-speech Engine. Touch to configure options. ... -
Page 181: Motions And Gestures
Motions and Gestures Configure various motion and gestures services. 1. Press and touch > Settings > My device tab. 2. Touch Motions and gestures to configure features. Touch the OFF/ON switch to turn a feature on, and then touch the feature to configure options: Motion: Control your phone with natural movements, like putting the phone to your ... -
Page 182: Smart Stay
“Pause”, “Play”, “Volume up”, and “Volume down”. Accounts When you set up accounts on your phone, such as your Google or Samsung Accounts, and your email or social networking accounts, you can synchronize account information between your phone and the account. Types of information you can synchronize include contacts, pictures, videos, and other types of files. -
Page 183: Backup Options
Cloud: Configure options for synchronizing and backing up information. • Touch Add account to sign in to your Samsung Account, or create a new Samsung Account. You can sync contacts, calendar events, memos, and Internet shortcuts. You can back up Logs, SMS and MMS messages, and current wallpaper settings. -
Page 184: Location Settings
Location Settings Control apps’ access to your location, and configure location sources. Some apps may require one or more location services be turned On for full app functionality. GPS signals may be affected by your surroundings, including: ● Buildings ● Tunnels or underground structures ●... -
Page 185: Security
• Tap Home, Office, or Car, and then follow the prompts to configure options for identifying the location. • to set up a new location. Security Configure options for securing information on your phone. Encryption You can encrypt accounts, settings, downloaded apps and their data, media, and other files. After encryption, you must enter the PIN or password you set each time you turn on your phone. -
Page 186: Security Update Service
Send security reports: When enabled, your phone will send security reports to Samsung for threat analysis when connected to Wi-Fi. Credential Storage You can install credentials from an optional installed memory card (not included), and use the Credential storage settings to allow applications to access the security certificates and other credentials. -
Page 187: Application Manager
Application Manager You can download and install applications from the Google Play Store or Samsung Apps, or create applications using the Android SDK and install them on your phone. Use Application manager to manage applications on your phone. Warning! Because this phone can be configured with system software not provided by or supported by Google or any other company, end-users operate these devices at their own risk. -
Page 188: Storage
Storage Manage the use of memory resources in your phone’s Device memory, and on an optional installed memory card (not included). 1. Press and touch > Settings > More tab. 2. Touch Storage to view information about memory usage, and for other options: Device memory: View memory usage for the different types of information stored on ... -
Page 189: Activate This Device
Select time zone: Choose your local time zone (only available when the Automatic setting is disabled). Use 24-hour format: Set the format for time displays. Select date format: Set the format for date displays. Activate This Device Connect to the network and activate your phone. - Page 190 Hardware version: View the hardware version of your phone. Status: View information about your phone’s current status, including the phone number assigned to the phone. Legal information: Display Open source licenses, Google legal, and Privacy Alert. Device name: View your phone’s name, and enter a new name if desired. ...
-
Page 191: Copyright Information
©2014 Sprint. Sprint and the logo are trademarks of Sprint. Other marks are trademarks of their respective owners. ©2014 Samsung. Samsung, Galaxy S, and S Beam are trademarks of Samsung Electronics Co., Ltd. ©2014 Google Inc. All rights reserved. Google, the Google logo, Android, Chrome, Gmail,... -
Page 192: Index
View Events, 116 Call Forwarding, 46 Email, 59 Gmail, 57 Call Settings Google, 56 Answering/Ending Calls, 156 Samsung, 59 Call Accessories, 157 Settings, 171 Call Alerts, 157 Social Network, 71 Increase Volume In Pocket, 159 Activation, 5, 178 International Dialing, 159... - Page 193 Assign a Ringtone, 52 Favorites, 54 Delete, 52 Files Edit, 51 Transfer to/from Computer, 130 Groups, 54 Flash, 11 Linking, 52 Flick Gesture, 17 Flipboard, 71 Options, 53 Save a Number, 52 Folder, 21 Share, 53 Front Camera, 11 Galaxy Gear, 31 Cover Release, 11 Credential Storage, 175 Gallery, 104...
- Page 194 Lumen Toolbar, 98 Google Play Music, 78 Keyboard Music App, 79 Samsung Keyboard, 33 Music (App), 79 Samsung Keyboard Settings, 166 Options, 81 Play Music, 79 Swype, 34 Swype Keyboard Settings, 167 Set a Song as a Ringtone or Alarm, 81...
- Page 195 Create a New Memo, 121 Emergency Numbers, 38 Options, 122 In-Call Options, 44 S Translator, 123 Make Calls, 37 S Voice, 123 Mute the Ringer, 40 Samsung Account, 59 Options, 43 Samsung Apps, 84 Receive, 39 Samsung Hub, 85 Index...
- Page 196 Samsung Keyboard Adapt Sound, 155 Settings, 166 Speaker, 11 Using, 33 Speed Dialing, 47 Samsung Link, 87 Spread Gesture, 18 Settings, 88 Sprint Account Information, 7 Share Media with Another Device, 88 Scout, 83 Account Passwords, 7 Screen Account Services, 9...
- Page 197 TTY Mode, 160 Voicemail, 40 Turn Device Off, 12 Notification, 41 Turn Device On, 12 Password, 8 Typing, 32 Retrieve Voicemail, 41 Update Phone Firmware, 131 Settings, 160 Setup, 7 US Dialing, 159 USB Charger/Accessory Port, 11 Visual Voicemail, 42 Vibrations Volume Ringtones, 153...
Need help?
Do you have a question about the Galaxy S4 mini and is the answer not in the manual?
Questions and answers