
Related Manuals for Splicecom PCS 410


Summary of Contents for Splicecom PCS 410
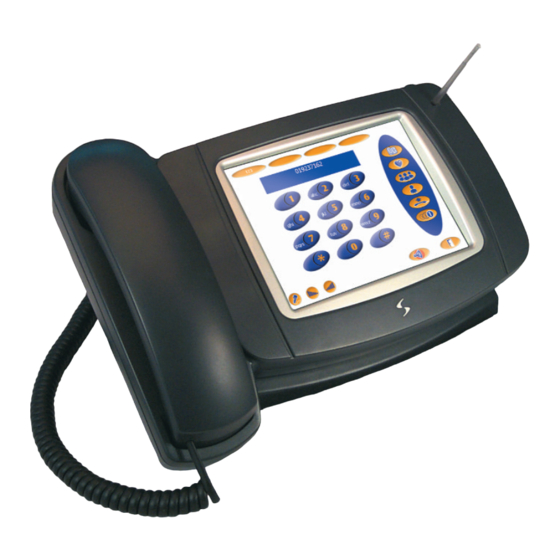
- Page 1 PCS 410, 400 & PCS 50 User Manual Version 3.2 November 2007 Part No. DOC-MN-PCS400/50-00...
-
Page 3: Table Of Contents
PCS 400/410 and 50 User Manual Contents Introduction ..............................1 Home Page ..............................3 Your PCS Off-hook ........................... 5 Making a Call ............................... 6 Answering a Call ............................7 End a Call ..............................8 Call Status ..............................9 Place a Call on Hold ..........................10 Transfer a Call ............................ -
Page 5: Introduction
PCS 400/410 and 50 User Manual Introduction SpliceCom’s range of Proactive Communication Stations (PCS) delivers the ultimate in service to the desktop for those seeking the real business benefits that can be gained from the convergence of voice, data, video and web enabled applications. When used in conjunction with the maximiser, PCS allows the relevant information from your core business applications to be “pushed”... - Page 6 - 2 - PCS 400/410 and 50 User Manual Introduction PCS 50 is also the key component in SpliceCom’s unique Extension Anywhere feature set for remote, mobile and home based employees. IP Extension Anywhere sees it used as an IP Softphone (as an alternative to PCS 400/410 or PCS 100, Analogue Extension Anywhere utilises PCS 50 as a “Partner”...
-
Page 7: Home Page
- 3 - PCS 400/410 and 50 User Manual Home Page The display on your PCS when first connected to the maximiser system is called your Home Page. This is a web page, the link to which is specified by your System Administrator. Your Home Page can be linked to a web page stored on the Internet, on your company’s intranet or on the telephone system’s internal web server. - Page 8 - 4 - PCS 400/410 and 50 User Manual Home Page By selecting the Home icon. By default, between 7 pm and 8 am each day a screen saver will replace your Home Page. Touch or click on the screen to return to your Home Page. However, the time that the screen saver will appear can be changed by your System Administrator or it could appear after a specific idle time.
-
Page 9: Your Pcs Off-Hook
- 5 - PCS 400/410 and 50 User Manual Call Handling Your PCS Off-hook When your PCS is off-hook the following Dial Pad will appear allowing you to make calls, view the Directories, change the volume etc. All the icons displayed are explained in further detail in the appropriate section of this User Guide. -
Page 10: Making A Call
- 6 - PCS 400/410 and 50 User Manual Call Handling Making a Call Lift the handset or select the Speaker icon You will be presented with the Dial Pad Dial the number required (internal or external number) The Call Status screen will appear displaying whom you are ringing, your name and any other information held on the system if available. -
Page 11: Answering A Call
- 7 - PCS 400/410 and 50 User Manual Call Handling Select the Department required. Select the Dial icon or press Enter. The Call Status screen will appear displaying the extension and Department you are ringing and your name. For further information on working with Departments please refer to page 48. Making an External Call Lift the handset or select the Speaker icon. -
Page 12: End A Call
- 8 - PCS 400/410 and 50 User Manual Call Handling On receiving a call the Call Status screen will appear displaying: the incoming number or caller’s name (if known by the system), • your name or Department name or your colleague’s name if their calls •... -
Page 13: Call Status
- 9 - PCS 400/410 and 50 User Manual Call Handling Note – When using a PCS 400/410:- The Speaker icon will only end the call if used in hands free mode otherwise this icon will • switch from handset to hands free mode – please refer to page 16 for further details. If a call is made or answered using the handset, when the distant end clears the call the Call •... -
Page 14: Place A Call On Hold
- 10 - PCS 400/410 and 50 User Manual Call Handling If you are making a call the Remote Person/Number section displays the details of number yo are calling and the Local Person/Number section displays your details. You can increase the size of the Remote Person/Number pane, Local Person/Number pane, Call Notes pane and Call History pane by clicking or pressing within the required pane. - Page 15 - 11 - PCS 400/410 and 50 User Manual Call Handling Sele ct the Reject Call icon or press Esc to clear the call you are currently connected to and return to the other call (or wait for the other end to han up).
-
Page 16: Call History
- 12 - PCS 400/410 and 50 User Manual Call Handling Transfer a Call via the Directories If you do not know the number of the person to whom you wish to transfer the call you can look up the information in one of the directories available. Select the Look Up icon Select either Users or Departments or Contacts. -
Page 17: Add A Note To A Call
- 13 - PCS 400/410 and 50 User Manual Call Handling Add a Note to a Call During a call you may wish to make notes about the call, for example, the caller’s name, the details of his enquiry etc. This information not only acts as an aide memoir for you but will also be passed to another User of a PCS when the call is transferred. - Page 18 - 14 - PCS 400/410 and 50 User Manual Call Handling with the Name of the User/Contact, if this information is available, and the number that you dialled. Select the call to be redialled (by clicking in the Time column). Select the Dial icon or press Enter and the call will be made (or double click the entry).
-
Page 19: Displaying A Web Page Or Directory
- 15 - PCS 400/410 and 50 User Manual Call Handling Displaying a Web Page or Directory Using a Web Page Each User of the telephone system including yourself can be configured so that a specific web page is displayed when you make a call and/or receive a call. This could be a web page accessed via the Internet or stored on your company’s Intranet or the telephone system’s internal web server. -
Page 20: Call Pick Up
- 16 - PCS 400/410 and 50 User Manual Call Handling The details of the caller will be displayed on the Park icon. Pick up a Parke d Ca l Lift your handset or select the Speaker icon and you will be presented with the Dial Pad. - Page 21 - 17 - PCS 400/410 and 50 User Manual Call Handling Please note: • If you are currently on a call when you pick up a ringing call your original call will be parked in the first available park slot. Please refer to page 15 for further information on parking a call.
-
Page 22: Switch To Hands Free
- 18 - PCS 400/410 and 50 User Manual Call Handling Switch to Hands Free (PCS 400/410 only) You may wish to switch between hands free and handset operation without interrupting the call. From handset to hands free – select the Speaker icon and replace the handset From hands free to handset –... -
Page 23: Incoming Call History
- 19 - PCS 400/410 and 50 User Manual Call Handling Select the Volume Up or Down icons as required. The ringing volume will increase or decrease. Changing the Volume during a call Answer the call in the normal way. Select the Volume Up or Down icons as required. - Page 24 - 20 - PCS 400/410 and 50 User Manual Call Handling The time and date of the call will be displayed; together with the caller’s number and, if this number is recognised by the system, the Name of the caller. The Mailbox column will indicate the recipient of the call (this is relevant if you are a member of a Department –...
-
Page 25: Missed Calls
- 21 - PCS 400/410 and 50 User Manual Call Handling Delete an Incoming Call The Incoming Call History will display the last 10 answered calls and will delete the oldest once this number has been exceeded, however you can manually delete an entry if required. From the Call Control toolbar select the Messages icon. - Page 26 - 22 - PCS 400/410 and 50 User Manual Call Handling The red icon indicates a missed call. The time and date of the call will be displayed; together with the caller’s number and, if this number is recognised by the system, the Name of the caller. Entries are listed in date and time order with the newest at the top.
-
Page 27: Conferencing
- 23 - PCS 400/410 and 50 User Manual Call Handling Double click the number and the call will be made. If the caller’s number has been withheld or not received by the system this facility will not be available. The Number column will indicate if the caller’s telephone number has been received. Delete a Missed Call The Incoming Call History will display the last 10 missed calls and will delete the oldest once this number has been exceeded, however you can manually delete an entry if required. -
Page 28: End A Conference Call
- 24 - PCS 400/410 and 50 User Manual Call Handling Cancel a Conference call You may wish to cancel the conference and return to a 2-way conversation with your two calls. Select the In Conference icon. You will return to the call displayed in Call Status. -
Page 29: User Configuration
- 25 - PCS 400/410 and 50 User Manual User Configuration Configuration of your extension settings and details can be changed via the User Configuration form. From the Call Control toolbar select the More Option icon. Select the User Preferences icon. When using a PCS 400/410 an on-screen keyboard can be displayed with this form via the following methods: Beside any field where text can be entered the More button is available. -
Page 30: Call Waiting
- 26 - PCS 400/410 and 50 User Manual User Configuration Calibration (PCS 400/410 only) This facility will allow you to ensure that the stylus is pointing to the correct place on the screen. Call Waiting The Call Waiting feature allows you to receive a second call while connected to another call. Turn on Call Waiting Select the User Preferences icon. - Page 31 - 27 - PCS 400/410 and 50 User Manual User Configuration The Switch icon will appear on the right hand side of the screen. Select the Switch icon to view the caller’s details. Your first call will be placed on hold.
-
Page 32: Call Forwarding
- 28 - PCS 400/410 and 50 User Manual User Configuration Turn off the Intermittent Beep When Call Waiting is enabled you may not wish to hear the intermittent beep when a second call is received and may wish to be informed visually on the PCS only. This tone can be turned off as follows: Select the User Preferences icon. - Page 33 - 29 - PCS 400/410 and 50 User Manual User Configuration Please note: When Follow Me or Forwarding has been set your PCS or analogue handset will provide • a broken dial tone to remind you that this feature has been enabled. If your calls are forwarded to an internal extension and that extension is not answered or •...
- Page 34 - 30 - PCS 400/410 and 50 User Manual User Configuration Please note: When you have Dual Personal or Dual All set you can set a different ring tune to play on your PCS to remind yourself that this feature has been set. Please refer to page 40 for further details.
-
Page 35: Out Of Office Message
- 31 - PCS 400/410 and 50 User Manual User Configuration Using Forward on No Answer You may wish to forward your calls only when you are unable to answer your phone when, for example, you have left your desk temporarily or are in a meeting. Select the User Preferences icon. - Page 36 - 32 - PCS 400/410 and 50 User Manual User Configuration From the Out of Office list box select either: In Meeting • At Lunch • On Holiday • Off Site • In the Out of Office text box enter the message that will accompany the above message eg “until Monday”, “until 3 pm”...
-
Page 37: Do Not Disturb
- 33 - PCS 400/410 and 50 User Manual User Configuration Remove an Out of Office message Select the User Preferences icon. Select the General tab. From the Out of Office list box select “In the Office”. Select OK. You do not need to remove the text from the Out of Office text box. This text can remain to be used next time you turn on an Out of Office message. - Page 38 - 34 - PCS 400/410 and 50 User Manual User Configuration Please note: When Do Not Disturb has been set: Your PCS or analogue handset will provide a broken dial tone to remind you that this feature has been enabled. Your Speaker icon will be displayed with a blue background Turn off Do Not Disturb Select the User Preferences icon.
-
Page 39: Entering Further Numbers
- 35 - PCS 400/410 and 50 User Manual User Configuration Remove a Do Not Disturb Exception Number Select the User Preferences icon. Select the DND Exceptions tab. Select the number to be removed. Select Del. Select OK. When you turn off Do Not Disturb you do not need to delete your Exception numbers at the same time. -
Page 40: Speed Dials (Favourites)
- 36 - PCS 400/410 and 50 User Manual User Configuration These numbers are used: To identify you when you make a call from your home or mobile telephones. Your name and details will appear in Call Status. By the Users Directory (please refer to page 45 for further details) By voicemail when accessing your messages from an external telephone (please refer to your System Administrator for further details) Please note that:... - Page 41 - 37 - PCS 400/410 and 50 User Manual User Configuration external number). Select Add. PCS 400/410 only: Select Add In the Description field enter any text (alpha-numeric characters only) that will identify this Speed Dial. In the Telephone Number field enter the number to be dialled (internal or external number).
- Page 42 - 38 - PCS 400/410 and 50 User Manual User Configuration Transfer a call via a Speed Dial Your Speed Dials are displayed within Call Status to allow you to quickly and easily transfer a call. Select the Speed Dial required. The original call will be placed on hold and the new call will be made.
- Page 43 - 39 - PCS 400/410 and 50 User Manual User Configuration Assigning a Short Code to a Speed Dial For the numbers that you dial regularly you may find it easier to assign a short code to a Speed Dial so, for example, you could dial just 33 to ring 01639253492. Select the User Preferences icon.
-
Page 44: Changing Your Ring Tunes
- 40 - PCS 400/410 and 50 User Manual User Configuration Please note: Ensure that the Short Code that you use is not the same as a short code you are already using for other system functionality provided by your System Administrator. Amending a Speed Dial Select the User Preferences icon. - Page 45 - 41 - PCS 400/410 and 50 User Manual User Configuration From the Type list box select Caller ID. In the Telephone Number field enter the incoming number. This can be an internal or external number. From the Tune list box select the Tune required. Select the Add button.
- Page 46 - 42 - PCS 400/410 and 50 User Manual User Configuration Select the User Preferences icon. Select the Ring Tunes tab. From the Type list box select Dual Ringing. From the Tune list box select the Tune required. Select the Add button. The new entry will appear in the Ring Tunes list. Select OK.
-
Page 47: Using With The System Directories
- 43 - PCS 400/410 and 50 User Manual Using with the System Directories Provided with the maximiser system is the ability to set up a database of contact information that can be accessed by your PCS. Your System Administrator is responsible for the maintenance of this database and will be able to assist you with your queries. - Page 48 - 44 - PCS 400/410 and 50 User Manual Using the System Directories Each column displayed in a directory can be resized by pointing at the line to the right of the column title with your mouse, finger or stylus. A double headed arrow shape will appear. Hold down your mouse/finger/stylus and move the column to the left or right.
-
Page 49: Users Directory
- 45 - PCS 400/410 and 50 User Manual Users Directory The Users Directory allows you to quickly and easily call a colleague without having to remember their extension numbers. It also makes it easy to transfer and re-direct calls. You can also use this directory to view information stored on the system database, for example, a colleague’s mobile or home number. - Page 50 - 46 - PCS 400/410 and 50 User Manual Users Directory Transfer a Call via the Users Directory Select the Look Up icon. Select Users. Select the User required then select the Dial icon or press Enter. Double click on the User required. The original call will be placed on hold and the new call will be made.
- Page 51 - 47 - PCS 400/410 and 50 User Manual Users Directory Please note that you will only be able to amend your own details. Select OK to save any changes. Making a call to a User’s mobile or home number From the Call Control toolbar select the Users icon.
-
Page 52: Departments
- 48 - PCS 400/410 and 50 User Manual Departments Departments are a feature of the maximiser system that allows calls to be routed efficiently to a group of Users by dialling one number either internally or externally. The following describes the usage of your PCS when Departments are used on your maximiser system. - Page 53 - 49 - PCS 400/410 and 50 User Manual Departments When using a PCS 50 the floating text displayed on your PC screen when a call is received will also display the name of the Department being called. (To enable or disable this feature please refer to page 76.) Changing the Ring Tune for a Department call You may wish to recognise that you are receiving a Department call via a different ring tune.
- Page 54 - 50 - PCS 400/410 and 50 User Manual Departments Double click the Department required and the call will be made. The Call Status screen will appear displaying the extension and Department you are ringing and your details. To exit from the Departments Directory select the Exit icon or press Esc. Transfer a Call via the Department Directory Select the Look Up icon.
- Page 55 - 51 - PCS 400/410 and 50 User Manual Departments answered or after a Department call is answered. This could be a web page stored on the Internet or on your company’s Intranet or on the telephone system’s internal web server. This is useful if a script must be followed when answering a call or, for example, you wish to access sales information to assist a caller.
- Page 56 - 52 - PCS 400/410 and 50 User Manual Departments Lift your handset or select the Speaker icon. Select the Pick Up icon. Each Department with calls waiting to be answered will be displayed together the number of calls. Click on the relevant icon to pick up the call. For further information on Call Pick Up please refer to page 16.
-
Page 57: Contacts
- 53 - PCS 400/410 and 50 User Manual Contacts The Contacts Directory on the PCS will display the list of external contacts, for example, customers, suppliers etc, entered on the database on your telephone system. This information can be used to make calls quickly and easily, and identify incoming calls. Receiving a call from a Contact Call Status will display the name and number of the person calling. - Page 58 - 54 - PCS 400/410 and 50 User Manual Contacts To exit from the Contacts Directory select the Exit icon or press Esc. Transfer a Call to a Contact Select the Look Up icon. Select Contacts. Select the Contact required. Select the Dial icon or press Enter.
-
Page 59: Viewing Contact Details
- 55 - PCS 400/410 and 50 User Manual Contacts (PCS 400/410 – if a keyboard is not available select the More button to … access the on-screen keyboard. Select OK when ready.) Click on Add to Contact. The text plus the date and name of the originator of the note will appear in the Call Status screen and will be passed on with the call if transferred. - Page 60 - 56 - PCS 400/410 and 50 User Manual Contacts Making a Call to a Contact’s other stored numbers From the Call Control toolbar select the Contacts icon. A list of Contacts stored on your system’s database will be displayed. Select the Contact required.
- Page 61 - 57 - PCS 400/410 and 50 User Manual Contacts Select the Further Numbers icon. If you wish to dial the Mobile number select the Mobile button, if you wish to dial the Home number select the Home button etc. The original call will be placed on hold and the new call will be made.
- Page 62 - 58 - PCS 400/410 and 50 User Manual Contacts (PCS 400/410 – if a keyboard is not available select the More button to … access the on-screen keyboard. Select OK when ready.) Please note that a new Contact will be saved in the centralised database and therefore will be available to your colleagues also using a PCS.
- Page 63 - 59 - PCS 400/410 and 50 User Manual Contacts Select OK to save the new Contact or Cancel to cancel the new entry. Create a new Contact from the Redial Number list If you have made a call to an external contact this call will be logged in your Redial Number list (please refer to page 13 for further details).
- Page 64 - 60 - PCS 400/410 and 50 User Manual Contacts To display the configured web page, select the Information icon. If a web page appears when you make a call to or receive a call from a Contact and you wish to display Call Status select the Exit icon. Configuring a Contact to display a web page Please note: you will only be able to make a change to a Contact’s details if given the required permission.
- Page 65 - 61 - PCS 400/410 and 50 User Manual Contacts answered. This is useful if, for example, a call from a customer needs to be handled quickly and efficiently. Handling a call when a Directory is displayed If on answering a call from a Contact a directory is displayed please refer to the relevant section in this manual to find out how to handle the call using this directory –...
- Page 66 - 62 - PCS 400/410 and 50 User Manual Contacts Using an Ambiguous Number When a company has a large DDI number range a Contact can be created that will match any incoming call from this company so that you and your colleagues are always aware when a call is received from this company.
-
Page 67: Voicemail
- 63 - PCS 400/410 and 50 User Manual Voicemail The voicemail facility allows your callers to leave a message if you are on the phone or do not answer a call. However, this facility must be configured to enable you to use this service, please refer to your System Administrator for further details. - Page 68 - 64 - PCS 400/410 and 50 User Manual Voicemail A new message will be indicated by a blue envelope symbol. Select this message (click under the Time column). Select the Listen to Message icon (or double click on the message). The message will be played and the screen on your PCS will display the time and date of the call and details of the caller.
-
Page 69: Message Handling
- 65 - PCS 400/410 and 50 User Manual Voicemail Message Handling While listening to your messages the following icons help you to handle these messages: Forward the message you are currently listening to Delete the message you are currently listening to Save the message you are currently listening to Rewind message by 2 seconds Forward message by 2 seconds... -
Page 70: Changing Your Greeting
- 66 - PCS 400/410 and 50 User Manual Voicemail Select the Save icon. Ring back the Caller Select the Messages icon. The Incoming Call History will appear. Select the message to be deleted. Select the Dial icon and a call to the source of the message will be made. This facility is available for internal and external numbers, however if the caller’s number has been withheld or not received by the system this facility will not be available. -
Page 71: Using An Assistant Telephone Number
- 67 - PCS 400/410 and 50 User Manual Voicemail Press # and the new greeting will be played back to you. Select Exit to finish and save the new greeting (or hang up) If you wish to re-record the greeting select the Record icon and repeat steps 3 to 5. - Page 72 - 68 - PCS 400/410 and 50 User Manual Voicemail Once this feature has been configured your caller can press 0 while listening to your greeting and be transferred to your Assistant telephone number. You will need to re-record your greeting to inform your callers that facility is available. Please note that if the Assistant field is grey then you are unable to edit this field.
-
Page 73: Leave A Message For A Colleague
- 69 - PCS 400/410 and 50 User Manual Voicemail To forward the message to a specific User(s) select Users. You will be given a list of the Users on your system. (Use the Search facilities as described on page 43 to help you find the User you require.) Select the User or Group you require and select the Add to Forward List icon (or double click on the User or Group). -
Page 74: Record A Call
- 70 - PCS 400/410 and 50 User Manual Voicemail Select the Messages icon. Replace your handset or select the Speaker icon. Alternatively, Select the Transfer icon or press Enter. The call will be put on hold. Select the Users icon. (Use the Search facilities as described on page 43 to help you find the User you require.) Select the User required. -
Page 75: Record A Memo
- 71 - PCS 400/410 and 50 User Manual Voicemail Once listened to the recording becomes an old message and is deleted after 7 days. The recording can be saved or deleted in the normal way. Record a Memo You may wish to record a message to yourself, for example when you wish to record a reminder to perform a particular task, for example book a meeting, phone a customer etc. - Page 76 - 72 - PCS 400/410 and 50 User Manual Voicemail Retrieving Voicemail for a Department If you have been elected to control voicemail messages for a Department (your System Administrator will inform you if this is the case) you can retrieve and handle the messages in the same way as your personal messages.
- Page 77 - 73 - PCS 400/410 and 50 User Manual Voicemail Leave a message when requested. Transfer a call to a Department’s Voicemail Place the call on hold (select the New Call icon). Dial the Department’s extension number. Select the Messages icon. Replace your handset or select the Speaker icon.
-
Page 78: Hot Desking
- 74 - PCS 400/410 and 50 User Manual Hot Desking If you are a Hot Desking User, in other words a User who has been given the ability to log in to any phone on the system because, for example, you need to move around the building or you are rarely in the office and do not need a permanent telephone, you can log in to a PCS as follows. - Page 79 - 75 - PCS 400/410 and 50 User Manual Hot Desking Select the Log In icon. Select the Log Off icon or press Delete. The phone will return to the User assigned to this extension dependent on the configuration of the system. Note: The system may be configured to automatically log you off after the extension is not used for a specified amount of time.
-
Page 80: System Administration
- 76 - PCS 400/410 and 50 User Manual System Administration View the PCS set up information From the Call Control toolbar select the More Options icon twice. Select the Information icon. The following information will be displayed: • Software version •... - Page 81 - 77 - PCS 400/410 and 50 User Manual System Administration Using the PCS 50 as a partner to any handset: the Port, Partner Login Code, Hot Desk Number and Hot Desk Code fields can be used to assist you if you are a hot desking User. These fields can be configured to allow you to log on to more than one choice of handset and your PCS 50 will automatically partner any of these handsets.
-
Page 82: Access Manager
- 78 - PCS 400/410 and 50 User Manual System Administration Remote BLF: this option will enable or disable the busy lamp field feature when this PCS 50 is used across, for example, a VPN connection. Please note: do not use this feature when this PCS 50 is used on the local LAN. -
Page 83: Icons In Brief
- 79 - PCS 400/410 and 50 User Manual Icons in Brief The following lists the function of each icon when displayed with a particular screen or when performing a particular function. Home Page Home – return to your Home Page Contacts –... - Page 84 - 80 - PCS 400/410 and 50 User Manual Icons in Brief Browsing Web Pages Accessed from the Call Control toolbar by pressing the More Options icon once. Back Forward Stop Refresh User Preferences – to access the User Configuration form More Options –...
- Page 85 - 81 - PCS 400/410 and 50 User Manual Icons in Brief Dial Pad Park Slots – set by default for slots 1-4 Mute off Mute on Handset volume down Handset volume up Speaker On (off-hook) Messages – to access your Incoming Call History and voicemail messages Contacts –...
- Page 86 - 82 - PCS 400/410 and 50 User Manual Icons in Brief Ringing volume down Ringing volume up Speaker (on-hook) Information – to display the web page configured for this caller Making a Call Reject Call – to cancel the call being made Messages –...
-
Page 87: Call On Hold
- 83 - PCS 400/410 and 50 User Manual Icons in Brief Look up – access the Users, Departments and Contacts directories and Favourites Record Call – to record your current conversation Recording in progress – to end the recording of your current conversation Mute off Mute on Volume of conversation down... - Page 88 - 84 - PCS 400/410 and 50 User Manual Icons in Brief Switch – toggle between the two connected calls Look Up Contacts – to access the Contacts directory Users – to access the Users directory Departments – to access the Departments directory Favourites –...
- Page 89 - 85 - PCS 400/410 and 50 User Manual Icons in Brief Line down Exit – to return to the previous screen Favourites Speed Dial – if configured for an internal extension this icon also indicates that the User’s extension is free Unavailable –...
- Page 90 - 86 - PCS 400/410 and 50 User Manual Icons in Brief Dial – to ring back the caller Further Numbers – dial another number stored for the selected User or Contact Listen to Message – to play the selected voicemail message Record Greeting –...
-
Page 91: Keyboard Short Cuts
- 87 - PCS 400/410 and 50 User Manual Icons in Brief Play next message Exit – to return to Incoming Call History Recording a Voicemail Greeting Record – re-record greeting Delete – to cancel the new greeting and return to the previous greeting Exit –... - Page 92 - 88 - PCS 400/410 and 50 User Manual Icons in Brief Dial Pad Fn+F1 Pick up call from Park icon 1 Fn+F2 Pick up call from Park icon 2 Fn+F3 Pick up call from Park icon 3 Fn+F4 Pick up call from Park icon 4 CTRL+M Cmd+M Go to Incoming Call History Receiving a Call...
- Page 93 - 89 - PCS 400/410 and 50 User Manual Icons in Brief Delete Delete Delete the selected entry Exit – return to the previous screen Further Numbers Dial the Telephone number Dial the Mobile number Dial the Home number Dial the Spare1 number Dial the Spare2 number Alt+T Alt+T...
- Page 94 - 90 - PCS 400/410 and 50 User Manual Icons in Brief CTRL+N Cmd+N Play next message CTRL+O Cmd+O Play old messages CTRL+P Cmd+P Play previous message CTRL+S Cmd+S Save the message Delete Delete Delete the message Forwarding a voicemail message Enter Enter Enter the selected User or Group to the Forward List...
-
Page 95: Index
- 91 - PCS 400/410 and 50 User Manual Index Add a Note Groups ..............48 during a call.............. 13 Incoming Call History ..........51 to a Contact ............. 54 Ring Tunes ............... 49 Ambiguous Number voicemail ..............71 Contacts ..............62 Dial Pad ................ - Page 96 - 92 - PCS 400/410 and 50 User Manual Index keyboard short cuts ..........90 Incoming Call History ..........20 Icons ................79 Redial Number list ..........13 Incoming Call History ..........19 Redial Number List column width ............20 icons ................
- Page 97 - 93 - PCS 400/410 and 50 User Manual Index keyboard short cuts ..........89 ring back the caller ..........66 leave a message............69 save a message ............65 Message Handling ........... 65 transfer a call to voicemail ........69 play next message ...........
- Page 98 SpliceCom Limited The Hall Business Centre, Berry Lane, Chorleywood, Hertfordshire WD3 5EX Tel: 01923 287700 Fax: 01923 287722 Email: info@splicecom.com Website: www.splicecom.com...
Need help?
Do you have a question about the PCS 410 and is the answer not in the manual?
Questions and answers