
Related Manuals for Kompernass DASHCAM CR 5 A1


Summary of Contents for Kompernass DASHCAM CR 5 A1
- Page 1 DASHCAM CR 5 A1 DASHCAM CAMÉRA EMBARQUÉE Bedienungsanleitung Mode d'emploi TELECAMERA PER AUTO DASHBOARD CAMERA Istruzioni per l'uso Operating instructions IAN 47583...
- Page 2 Klappen Sie vor dem Lesen die Seite mit den Abbildungen aus und machen Sie sich anschließend mit allen Funktionen des Gerätes vertraut. Avant de lire le mode d'emploi, ouvrez la page contenant les illustrations et familiarisez-vous ensuite avec toutes les fonctions de l'appareil. Prima di leggere aprire la pagina con le immagini e prendere confi...
- Page 3 DASHBOARD CAMERA CR 5 A1 DASHBOARD CAMERA KOJELAUTAKAMERA Operating instructions Käyttöohje BILKAMERA DASHCAM Bruksanvisning Betjeningsvejledning DASHCAM Bedienungsanleitung IAN 47583...
-
Page 4: Table Of Contents
Inhaltsverzeichnis Einführung ........... . 2 Informationen zu dieser Bedienungsanleitung . -
Page 5: Einführung
Einführung Informationen zu dieser Bedienungsanleitung Herzlichen Glückwunsch zum Kauf Ihres neuen Gerätes. Sie haben sich damit für ein hochwertiges Produkt entschieden. Die Bedie- nungsanleitung ist Bestandteil dieses Produkts. Sie enthält wichtige Hinweise für Sicherheit, Gebrauch und Entsorgung. Machen Sie sich vor der Benutzung des Produkts mit allen Bedien- und Sicherheitshinweisen vertraut. -
Page 6: Sicherheit
WARNUNG Ein Warnhinweis dieser Gefahrenstufe kennzeichnet eine mögliche gefährliche Situation. Falls die gefährliche Situation nicht vermieden wird, kann dies zu Verletzungen führen. ► Die Anweisungen in diesem Warnhinweis befolgen, um Verletzungen von Personen zu vermeiden. ACHTUNG Ein Warnhinweis dieser Gefahrenstufe kennzeichnet einen möglichen Sachschaden. - Page 7 ■ Schützen Sie das Gerät vor Spritz- und Tropfwasser und dem Eindringen von Flüssigkeiten. ■ Setzen Sie das Gerät nie extremer Hitze oder hoher Luftfeuchtigkeit aus. Dies gilt insbesondere für eine Lagerung im Auto. Bei längeren Standzeiten und warmer Witterung mit Sonneneinstrahlung entstehen Temperaturen von mehr als 40°C in Innenraum und Handschuhfach.
-
Page 8: Mögliche Verletzung Von Rechten Dritter
■ Beachten Sie alle vor Ort geltenden Gesetze. Die Verwendung einer Cockpitkamera ist in einigen Ländern verboten und ggf. strafbar. Während der Fahrt darf die Kamera nicht bedient werden. Die Verkehrssicherheit muss beim Fahren immer Vorrang haben. Verwenden Sie das Gerät nur, wenn keine Gefahr in irgendeiner Fahrsituation entstehen kann. -
Page 9: Bedienelemente
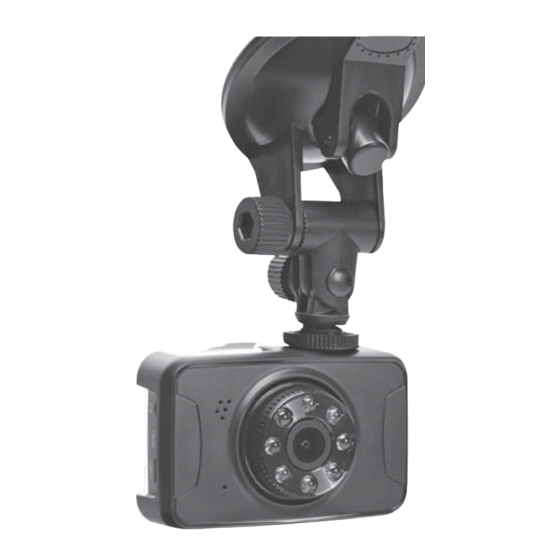
Bedienelemente (Abbildungen siehe Ausklappseite) Abbildung A: Verriegelungshebel Halterung mit Saugnapf Rändelschrauben zur dreidimensionalen Arretierung Abbildung B: Kameraobjektiv ▲-Taste ▼-Taste MENU-Taste MODE-Taste Mikrofon USB*-Anschluss RESET-Öff nung AV-Anschluss Lautsprecher Infrarot-LEDs Abbildung C: Betriebsanzeige Abdeckung Mini-HDMI-Anschluss Micro-SD-Karteneinschub Bildschirm Abbildung D: Gewinde zur Aufnahme der Stativhalterung Ein-/Aus-Taste / -Taste zum Starten /Stoppen der Videoaufnahme, zum Auslösen einer Fotoaufnahme oder Aufrufen von Menüpunkten... -
Page 10: Lieferumfang Und Transportinspektion
Lieferumfang und Transportinspektion Bitte prüfen Sie den Lieferumfang (siehe Ausklappseite). Der Lieferumfang besteht aus folgenden Komponenten: ● Cockpit-Rekorder CR 5 A1 ● Schutzgehäuse ● Halterung mit Saugnapf ● USB* auf Mini-USB Kabel ● 12/24 V Kfz-Adapter ● AV-Kabel (3,5 mm Klinke auf Cinch-Stecker) ●... -
Page 11: Inbetriebnahme
Inbetriebnahme Micro-SD-Karte einstecken / entfernen ACHTUNG ► Installieren und entfernen Sie die Micro-SD-Karte (nicht im Lieferumfang enthalten) nicht, während das Gerät eingeschaltet ist. Dies kann zu Daten- verlust auf der Micro-SD-Karte führen. ♦ Stecken Sie eine Micro-SD-Karte so in den Micro-SD-Karteneinschub dass die goldenen Kontakte in Richtung Display zeigen. -
Page 12: Kamera An Der Windschutzscheibe Montieren
Kamera an der Windschutzscheibe montieren 1) Um den Schutz für die Kamera zu erhöhen, können Sie die Kamera in das Schutzgehäuse einsetzen und leicht hineindrücken, bis die Kamera spürbar einrastet. 2) Schrauben Sie die Halterung in das Ge- winde der Kamera ein. Positionieren Sie den Saugnapf an der Windschutzscheibe. -
Page 13: Bedienung Und Betrieb
ACHTUNG ► Bei Fahrzeugen, bei denen der Zigarettenanzünder auch bei ausge- schalteter Zündung funktioniert, muss das Gerät nach der Nutzung von der Zigarettenanzünder-Buchse getrennt werden. Anderenfalls kann die Fahrzeugbatterie über einen längeren Zeitraum entladen werden, da das Gerät auch im Ruhezustand Strom aufnimmt. Der Fahrzeugmotor könnte dann nicht mehr gestartet werden. - Page 14 Zeit & Datum Wenn Sie diese Menüfunktion aufrufen, können Sie anschließend mit den ▲▼-Tasten auswählen, ob die Aufnahmen mit oder ohne eingeblendetes Datum gespeichert werden. Wählen Sie „Zeit- & Datums-Stempel ein“, um diese Funktion zu aktivieren, oder „Zeit- & Datums-Stempel aus“ um sie zu deaktivieren. Rufen Sie zum Einstellen des aktuellen Datums „Zeit &...
- Page 15 Display-Abschaltung Wenn Sie diese Menüfunktion aufrufen, können Sie anschließend mit den ▲▼-Tasten die Zeitspanne auswählen, nach deren Ablauf sich das Display automatisch abschaltet: „1 Min.“, „3 Min.“ und „5 Min.“ stehen dazu zur Auswahl. Wählen Sie „Display immer an“, wenn sich das Display nicht abschalten soll.
-
Page 16: Video-Aufnahmebereitschaft
Video-Aufnahmebereitschaft In der Video-Aufnahmebereitschaft zeigt der Bildschirm folgende Übersicht an: A – Anzeige der Rest-Aufzeichnungsdauer in Abhängigkeit von Aufl ösung und verfügbarem Speicherplatz B – Aktuelle Video-Aufl ösung C – Symbol für eingesetzte Micro-SD-Karte D – Ladezustandsanzeige des internen Geräteakkus E –... - Page 17 Wenn Sie in der Video-Aufnahmebereitschaft die MENU-Taste drücken, öff net sich das folgende Menü: Mit den ▲▼-Tasten können Sie den Auswahlbalken auf den gewünschten Eintrag verschieben und diese Menüfunktion dann mit der / -Taste auf- rufen. Um einen aufgerufenen Menüpunkt ohne Änderung wieder zu verlassen, drücken Sie die MODE-Taste .
- Page 18 Reicht die Kapazität der eingesetzten Speicherkarte nicht für die eingestellte Dauer der Endlosschleife, wird die Aufnahme abgebrochen. Verringern Sie dann die Dauer der Endlosschleife oder verwenden Sie eine Speicherkarte mit größerer Kapazität. Bewegungserkennung (Motion-Detection) Wenn Sie diese Menüfunktion aufrufen, können Sie anschließend diese Funktion mit den ▲▼-Tasten ein- oder ausschalten.
-
Page 19: Foto-Aufnahmebereitschaft
Foto-Aufnahmebereitschaft Bei geschlossenem Menü drücken Sie in der Video-Aufnahmebereitschaft die MODE-Taste , um in die Foto-Aufnahmebereitschaft umzuschalten. Das Gerät zeigt dann folgende Übersicht auf dem Bildschirm A – Anzeige der Fotoanzahl, die in Abhängigkeit von Aufl ösung und verfügbarem Speicherplatz noch aufgenommen werden können B –... -
Page 20: Wiedergabemodus
drücken Sie die MODE-Taste . Unten rechts wird die aktuelle Menütafel sowie die Gesamtzahl der Menütafeln angezeigt. Wenn der unterste Menüeintrag auf einer Menütafel angewählt ist, auf die noch eine weitere Tafel folgt, drücken Sie die ▼ Taste , um zum ersten Eintrag auf der folgenden Menütafel zu springen. Um das Menü... - Page 21 Wenn Sie ein Foto anwählen, zeigt der Bildschirm diese Übersicht an: A – Anzeige der aktuellen Aufnahmenummer / Gesamtzahl der Aufnahmen B – Aufl ösung des gerade angewählten Fotos C – Ladezustandsanzeige des internen Geräteakkus D – Datums- / Zeitstempel E –...
- Page 22 Schreibschutz Wenn Sie diese Menüfunktion aufrufen, können Sie anschließend mit den ▲▼-Tasten auswählen, ob die gerade angewählte Datei gegen Löschen geschützt werden soll („Diese Datei schreibschützen“), der Schutz der gerade angewählte Datei aufgehoben werden soll („Diese Datei entsperren“), alle Dateien gegen Löschen geschützt werden sollen („Alle Dateien schreibschützen“) oder der Schutz aller Dateien gegen Löschen aufgehoben werden soll („Alle Dateien entsperren“).
-
Page 23: Aufnahmen Auf Externem Monitor Anzeigen
Mit den ▲▼-Tasten können Sie den Auswahlbalken auf den gewünschten Eintrag verschieben und diese Menüfunktion dann mit der / -Taste auf- rufen. Um einen aufgerufenen Menüpunkt ohne Änderung wieder zu verlassen, drücken Sie die MODE-Taste . Um das Menü zu schließen, drücken Sie die MENU-Taste Löschen Wenn Sie diese Menüfunktion aufrufen, können Sie anschließend mit den... -
Page 24: Aufnahmen Auf Einen Computer Überspielen
Aufnahmen auf einen Computer überspielen Stecken Sie den Mini-USB-Stecker des mitgelieferten USB-Kabels in den -Anschluss der Kamera und den USB-Stecker in einen freien USB-Anschluss eines eingeschalteten Computers. Dieser erkennt das Gerät nun als „Massen- speicher“, dann verbindet sich die Kamera mit dem Computer und anschließend erscheint der Inhalt der Micro-SD-Karte in der Kamera als neues Laufwerk im Computer. -
Page 25: Reinigung
Reinigung ACHTUNG Beschädigung des Gerätes! ► Stellen Sie sicher, dass bei der Reinigung keine Feuchtigkeit in das Gerät eindringt, um eine irreparable Beschädigung des Gerätes zu vermeiden. ■ Reinigen Sie die Oberfl ächen des Gerätes mit einem weichen, trockenen Tuch. Verwenden Sie bei hartnäckigen Verschmutzungen handelsübliche Spülmittel und Wasser. - Page 26 Mögliche Fehler Behebung Ursache Die Kamera nimmt Es kommt zu Aktivieren Sie den eingebauten Bewe- während der Fahrt nicht Störungen mit gungssensor (Funktion „Bewegungs- ordnungsgemäß auf. dem eingebauten erkennung“ im Setup-Menü) nur bei Bewegungssen- geparktem Fahrzeug. sor. Erhöhen Sie die Empfi ndlichkeit des Bewegungssensors.
-
Page 27: Lagerung / Entsorgung
Lagerung / Entsorgung Lagerung Sollten Sie das Gerät längere Zeit nicht benutzen, lagern Sie es an einem sauberen, trockenen Ort ohne direkte Sonneneinstrahlung. In diesem Falle sollten Sie den eingebauten Akku von Zeit zu Zeit aufl aden. Gerät entsorgen Das nebenstehende Symbol einer durchgestrichenen Mülltonne auf Rädern zeigt an, dass dieses Gerät der Richtlinie 2012/19/EU unterliegt. -
Page 28: Technische Daten
Technische Daten Cockpit Recorder 5 V , über integrierten Lithium-Ionen-Akku Betriebsspannung (3,7 V / 350 mAh) oder USB-Anschluss Eingangsspannung des 12 V / 24 V , max. 700 mA über Kfz-Bordnetz KfZ-Adapters Sicherung des KfZ- T 2 AL / 250 V Adapters Ausgangsspannung des 5 V , 1 A KfZ-Adapters Micro-SD-Karte, FAT-Dateisystem, Karten bis zu Speichermedium einer Größe von 32 GB werden unterstützt 2,7“... -
Page 29: Garantie
Service Schweiz Tel.: 0842 665566 (0,08 CHF/Min., Mobilfunk max. 0,40 CHF/Min.) E-Mail: kompernass@lidl.ch IAN 47583 Erreichbarkeit Hotline: Montag bis Freitag von 8:00 Uhr – 20:00 Uhr (MEZ) Importeur KOMPERNASS HANDELS GMBH BURGSTRASSE 21 44867 BOCHUM GERMANY www.kompernass.com CR 5 A1... - Page 30 Table des matières Introduction ..........28 Informations relatives à...
-
Page 31: Introduction
Introduction Informations relatives à ce mode d'emploi Toutes nos félicitations pour l'achat de votre nouvel appareil. Ainsi, vous venez d'opter pour un produit de grande qualité. Le mode d'emploi fait partie de ce produit. Il contient des remarques importantes concernant la sécurité, l'usage et la mise au rebut. -
Page 32: Sécurité
AVERTISSEMENT Un avertissement de ce niveau de danger signale une situation potentiellement dangereuse. Au cas où la situation dangereuse ne peut être écartée, cela peut entraîner des blessures. ► Il faut suivre les instructions signalées par cet avertissement, pour éviter que des personnes ne se blessent. - Page 33 ■ Protégez l'appareil de la projection ou des gouttes d'eau et de la pénétration de liquides. ■ N'exposez jamais l'appareil à des chaleurs extrêmes ou à une humidité de l'air élevée. Ceci vaut en particulier s'il est entreposé dans une voiture. Lors d'une immobilisation prolongée et par temps chaud avec fort ensoleillement, des températures supérieures à...
-
Page 34: Violation Éventuelle Des Droits De Tierces Personnes
■ Respectez toutes les législations locales en vigueur. L'utilisation d'une caméra d'habitacle est interdite et le cas échéant peut être sanctionné dans certains pays. La caméra ne doit pas être manipulée durant la conduite. La sécurité routière doit toujours être une priorité lors de la conduite. Utilisez l'appareil uniquement lorsqu'aucun danger ne peut survenir dans n'importe quelle situation de conduite. -
Page 35: Éléments De Commande
Éléments de commande (Figures voir la page dépliante) Figure A : Levier de verrouillage Support avec ventouse Vis moletée pour un blocage tridimensionnel Figure B : Objectif de la caméra Touche ▲ Touche ▼ Touche MENU Touche MODE Microphone Branchement USB* Ouverture RESET Branchement AV Haut-parleur DEL infrarouges... -
Page 36: Contenu De La Livraison Et Inspection Après Transport
Contenu de la livraison et inspection après transport Veuillez vérifi er l'étendue de la livraison (voir page dépliante). Les accessoires comprennent les éléments suivants : ● Caméra embarquée de voiture CR 5 A1 ● Boîtier de protection ● Support avec ventouse ● USB* sur câble Mini-USB ●... -
Page 37: Mise En Service
Mise en service Enfi cher / retirer la carte Micro SD ATTENTION ► N'installez et ne retirez pas la carte Micro SD (non incluse dans l'étendue de la livraison) pendant que l'appareil est allumé. Ceci peut entraîner une perte de données sur la carte Micro SD. ♦... -
Page 38: Monter La Caméra Sur Le Pare-Brise
Monter la caméra sur le pare-brise 1) Pour encore mieux protéger la caméra, vous pouvez la placer dans le boîtier de protec- tion et appuyer légèrement dessus jusqu'à ce que la caméra s'enclenche de manière audible. 2) Vissez le support dans le fi... -
Page 39: Utilisation Et Fonctionnement
ATTENTION ► Pour les véhicules dont l'allume-cigare fonctionne également lorsque le contact est coupé, l'appareil doit être débranché de la prise de l'allume- cigare après l'utilisation. Sinon la batterie du véhicule peut être déchargée sur une plus longue période, l'appareil absorbant également de l'électricité en veille. - Page 40 Time & date (Heure & date) Si vous affi chez cette fonction de menu, vous pouvez ensuite sélectionner avec les touches ▲▼ si les enregistrements doivent être enregistrés avec ou sans date affi chée. Sélectionnez "Time- & date-stamp on", pour activer cette fonction ou "Time- &...
- Page 41 Auto display off (Extinction automatique de l'écran) Si vous affi chez cette fonction du menu, vous pouvez ensuite sélectionner avec les touches ▲▼ la durée suite à laquelle l'écran s'éteint automatiquement : "1 Min.", "3 Min." et "5 Min." sont disponibles. Choisissez "Display always on", lorsque l'écran ne doit pas s'éteindre.
-
Page 42: Attente D'enregistrement Vidéo
Attente d'enregistrement vidéo En attente d'enregistrement vidéo, l'écran vous présente la vue d'ensemble suivante : A – Affi chage de la durée d'enregistrement restante en fonction de la résolution et de l'espace mémoire disponible. B – Résolution vidéo actuelle C – Icône de carte Micro SD introduite D –... - Page 43 REMARQUE ► Dès que la caméra est alimentée via le réseau de bord du véhicule, l'enregis- trement débute. Pour mettre fi n à l'enregistrement, appuyez sur la touche Si vous appuyez sur la touche MENU en attente d'enregistrement vidéo, le menu suivant s'ouvre : Motion detection Les touches ▲▼...
- Page 44 Ayez à l'esprit que la carte Micro SD utilisée doit avoir une capacité suffi sante en fonction de la taille de l'image vidéo réglée pour pouvoir atteindre la durée de boucle souhaitée. Si vous sélectionnez "Loop recording off ", l'enregistrement s'arrête une fois la limite de capacité...
-
Page 45: Attente De Prise De Photo
Attente de prise de photo Menu fermé, appuyez en attente d'enregistrement vidéo sur la touche MODE pour passer en attente de prise de photo. L'appareil affi che ensuite l'aperçu suivant à l'écran : A – Affi chage du nombre de photos qui peuvent encore être prises en fonction de la résolution et de l'espace mémoire disponible. -
Page 46: Mode Lecture
Les touches ▲▼ vous permettent de déplacer les barres de sélection sur l'entrée souhaitée et d'accéder ensuite à cette fonction du menu avec la touche . Pour quitter à nouveau un point de menu affi ché sans modifi cation, appuyez sur la touche MODE . - Page 47 diaporama en boucle. Appuyez à nouveau sur la touche pour quitter le diaporama. Si vous sélectionnez une vidéo et appuyez sur la touche la vidéo sera lue. Si vous sélectionnez une photo, l'écran affi che cet aperçu : A – Affi chage du numéro de prise actuel / du nombre total de prises de photos B –...
- Page 48 Write protection (Protection contre l'écriture) Si vous affi chez cette fonction du menu, vous pouvez ensuite sélectionner avec les touches ▲▼ si le fi chier actuellement sélectionné doit être protégé contre la suppression ("Write-protect this fi le"), si la protection du fi chier actuellement sélectionné...
-
Page 49: Affi Cher Les Enregistrements Sur Un Moniteur Externe
Les touches ▲▼ vous permettent de déplacer les barres de sélection sur l'entrée souhaitée et d'accéder ensuite à cette fonction du menu avec la touche . Pour quitter à nouveau un point de menu affi ché sans modifi cation, appuyez sur la touche MODE . -
Page 50: Copier Les Enregistrements Sur Un Ordinateur
Copier les enregistrements sur un ordinateur Branchez la fi che Mini-USB du câble USB livré dans le branchement de la caméra et la fi che USB dans un branchement USB libre d'un ordinateur allumé. Ce dernier reconnait maintenant l'appareil en tant que "Mémoire de masse", puis la caméra se connecte avec l'ordinateur et le contenu de la carte Micro SD s'affi... -
Page 51: Nettoyage
Nettoyage ATTENTION Endommagement de l'appareil ! ► Lors du nettoyage de l'appareil, veillez à ce qu'aucune humidité ne pénètre dans ce dernier afi n d'éviter tous dégâts irréparables. ■ Nettoyez les surfaces de l'appareil à l'aide d'un chiff on doux et sec. En cas de salissures coriaces, utilisez un produit de nettoyage disponible dans le commerce et de l'eau. - Page 52 Cause Défaut Remède possible La caméra n'enregistre Des perturba- Activez le capteur de mouvement inté- pas correctement lors de tions surviennent gré (fonction "Motion detection" dans la conduite. avec le capteur le menu Setup) uniquement lorsque le de mouvement véhicule est à l'arrêt. intégré.
-
Page 53: Stockage / Mise Au Rebut
Stockage / Mise au rebut Stockage Lorsque l'appareil n'est pas utilisé pour une longue période, rangez-le dans un endroit propre, à l'abri de l'humidité, non exposé à l'ensoleillement. Dans ce cas, la batterie intégrée doit être rechargée de temps en temps. Mise au rebut de l'appareil Le symbole ci-contre d'une poubelle à... -
Page 54: Caractéristiques Techniques
Caractéristiques techniques Caméra embarquée de voiture 5 V , via une batterie lithium-ion intégrée Tension de service (3,7 V / 350 mAh) ou une connexion USB Tension d'entrée de 12 V / 24 V , max. 700 mA via l'adaptateur de voiture le réseau de bord du véhicule Fusible de l'adaptateur T 2 AL / 250 V de voiture Tension de sortie de... -
Page 55: Garantie
Tel.: 0842 665566 (0,08 CHF/Min., mobile max. 0,40 CHF/Min.) E-Mail: kompernass@lidl.ch IAN 47583 Heures de service de notre hotline : du lundi au vendredi de 8 h à 20 h (HEC) Importateur KOMPERNASS HANDELS GMBH BURGSTRASSE 21 44867 BOCHUM GERMANY www.kompernass.com... - Page 56 Indice Introduzione..........54 Informazioni sul presente manuale di istruzioni .
-
Page 57: Introduzione
Introduzione Informazioni sul presente manuale di istruzioni Congratulazioni per l'acquisto del Suo nuovo apparecchio. È stato acquistato un prodotto di alta qualità. Il manuale di istruzioni è parte integrante del presente prodotto. Esso contiene importanti indicazioni per la sicu- rezza, l'uso e lo smaltimento. Prima di utilizzare il prodotto, familiarizzarsi con tutte le indicazioni relative ai comandi e alla sicurezza. -
Page 58: Sicurezza
AVVERTENZA Un'avvertenza contrassegnata da questo livello di pericolo indica una situazione potenzialmente pericolosa. Qualora fosse impossibile evitare tale situazione pericolosa, essa può dare luogo a lesioni. ► Seguire le istruzioni contenute in questa avvertenza per evitare lesioni personali. ATTENZIONE Un'avvertenza contrassegnata da questo livello di pericolo indica la possibilità... - Page 59 ■ Proteggere l'apparecchio dall'umidità, da spruzzi e gocce d'acqua e dalla penetrazione di liquidi. ■ Non esporre mai l'apparecchio al calore estremo o a un'elevata umidità ambientale. Ciò vale in particolare per la conservazione in auto. In caso di lunghi tempi di permanenza e di condizioni meteorologiche calde con esposizione ai raggi solari, si sviluppano temperature superiori ai 40°C all'interno dell'abitacolo e nel cruscotto.
-
Page 60: Possibile Violazione Di Diritti Di Terzi
■ Rispettare tutte le leggi locali vigenti. In alcuni paesi l'utilizzo di una telecamera per abitacolo è vietato e perseguito penalmente. Durante la guida è vietato utilizzare la telecamera. La sicurezza nel traffi co durante la guida ha sempre la priorità. Utilizzare l'apparecchio solo se esso non rappresenta alcun tipo di pericolo per la guida. -
Page 61: Elementi Di Comando
Elementi di comando (illustrazioni vedere pagina apribile) Figura A: leva di bloccaggio supporto con ventosa viti a testa zigrinata per l'arresto tridimensionale Figura B: obiettivo della telecamera tasto ▲ tasto ▼ tasto MENU tasto MODE microfono porta USB* foro RESET porta AV altoparlante LED a raggi infrarossi... -
Page 62: Volume Della Fornitura E Ispezione Per Eventuali Danni Da Trasporto
Volume della fornitura e ispezione per eventuali danni da trasporto Si prega di controllare la fornitura (vedere pagina ripiegabile). Il volume di fornitura comprende i seguenti componenti: ● Videoregistratore per abitacolo CR 5 A1 ● Involucro di protezione ● Supporto con ventosa ●... -
Page 63: Messa In Funzione
Messa in funzione Inserimento / Rimozione della scheda micro-SD ATTENZIONE ► Non installare o rimuovere la scheda micro-SD (non compresa nel volume di fornitura) mentre l'apparecchio è acceso. Ciò può provocare una perdita di dati sulla scheda micro-SD. ♦ Infi lare una scheda micro-SD nell'apposita fenditura per schede micro-SD in modo tale che i contatti dorati siano rivolti in direzione del display. -
Page 64: Montaggio Della Telecamera Sul Parabrezza
Montaggio della telecamera sul parabrezza 1) Per aumentare la protezione per la telecamera, la si può inserire nell'involucro di protezione e premere leggermente fi no a che non se ne avverte l'inserto in posizione. 2) Avvitare il supporto nella fi lettatura della telecamera. -
Page 65: Comandi E Funzionamento
ATTENZIONE ► Nel caso di vetture nelle quali l'accendisigari funziona anche se l'accensione è spenta, l'apparecchio dopo l'utilizzo deve venire staccato dalla presa dell'accendisigari. Altrimenti la batteria della vettura potrebbe scaricarsi per un periodo piuttosto lungo, in quanto l'apparecchio assorbe corrente anche in stato di riposo. - Page 66 Time & date (Ora e data) Dopo aver richiamato questa funzione del menu, si può selezionare con i tasti ▲▼ se si desidera memorizzare le riprese con o senza visualizzazione della data. Selezionare "Time- & date-stamp on" per attivare questa funzione o "Time- &...
- Page 67 Auto display off (Spegnimento automatico del display) Dopo aver richiamato questa funzione del menu, si può selezionare con i tasti ▲▼ il periodo di tempo dopo il quale il display si spegne automatica- mente. Si può scegliere tra "1 min.", "3 min." e "5 min". Qualora il display non si spegnesse, selezionare "Display always on".
-
Page 68: Pronto Alla Ripresa Video
Pronto alla ripresa video Nel pronto alla ripresa video il display mostra la seguente panoramica: A – Visualizzazione della durata di ripresa residua in funzione della risoluzione e dello spazio di memoria disponibile B – Risoluzione video attuale C – Simbolo della scheda micro-SD inserita D –... - Page 69 Se in condizioni di pronto alla ripresa video si preme il tasto MENU , si apre il seguente menu: Motion detection Con i tasti ▲▼ si può spostare la barra di selezione portandola sulla voce desiderata e richiamare così questa funzione di menu con il tasto Per abbandonare un punto del menu richiamato senza modifi...
- Page 70 Se la capacità della scheda di memoria inserita non è suffi ciente per la durata del ciclo continuo impostata, la registrazione viene interrotta. In tal caso ridurre la durata del ciclo continuo o utilizzare una scheda di memoria di maggiore capacità.
-
Page 71: Pronto Allo Scatto Di Foto
Pronto allo scatto di foto Per passare al pronto allo scatto di foto, a menu chiuso premere nel pronto alla ripresa video il tasto MODE . L'apparecchio mostra ora sul display la seguente panoramica A – Visualizzazione del numero di foto che è ancora possibile scattare in funzione della risoluzione e dello spazio di memoria disponibile B –... -
Page 72: Modalità Di Riproduzione
Per abbandonare un punto del menu richiamato senza modifi ca, premere il tasto MODE . In basso a destra vengono visualizzati la tabella di menu attuale non- ché il numero complessivo di tabelle di menu. Se è selezionata l'ultima voce di menu di una tabella di menu alla quale ne segue un'altra, premere il tasto ▼... - Page 73 Se si seleziona una foto, il display mostra questa panoramica: A – Visualizzazione del numero della ripresa attuale / della quantità complessiva di riprese B – Risoluzione delle foto selezionate C – Indicazione dello stato di carica della batteria interna all'apparecchio D –...
- Page 74 Write protection (Protezione di scrittura) Dopo aver richiamato questa funzione del menu, si può selezionare con i tasti ▲▼ se si intende proteggere il fi le selezionato dalla cancellazione ("Write- protect this fi le") (Imposta una protezione di scrittura sul fi le), sbloccare la pro- tezione del fi...
-
Page 75: Visualizzazione Delle Riprese Su Un Monitor Esterno
Con i tasti ▲▼ si può spostare la barra di selezione portandola sulla voce desiderata e richiamare così questa funzione di menu con il tasto Per abbandonare un punto del menu richiamato senza modifi ca, premere il tasto MODE . Per chiudere il menu premere il tasto MENU Delete (Cancella) Dopo aver richiamato questa funzione del menu, si può... -
Page 76: Trasferimento Delle Riprese Su Un Computer
Trasferimento delle riprese su un computer Inserire la chiavetta mini-USB nella porta della telecamera e la chiavetta USB in una porta USB libera di un computer acceso. Quest'ultimo riconosce ora l'apparecchio come "memoria di massa", poi la telecamera si collega al computer e infi ne comare il contenuto della scheda micro-SD presente nella telecamera come nuovo drive nel computer. -
Page 77: Pulizia
Pulizia ATTENZIONE Danneggiamento dell'apparecchio! ► Per evitarne l'irreparabile danneggiamento, assicurarsi che durante la pulizia non penetri umidità nell'apparecchio. ■ Pulire le superfi ci dell'apparecchio solo con un panno morbido e asciutto. In caso di sporco ostinato utilizzare acqua e detergenti comunemente reperibili in commercio. - Page 78 Possibile Guasto Rimedio causa Durante la marcia la Si verifi cano Attivare il sensore di movimento incor- telecamera non riprende problemi con porato (funzione "Motion detection correttamente. il sensore di (Rilevamento del movimento)" nel menu movimento di set-up) solo quando la vettura è in incorporato.
-
Page 79: Conservazione / Smaltimento
Conservazione / Smaltimento Conservazione Se si prevede di non utilizzare l'apparecchio per un periodo di tempo prolungato, conservarlo in un luogo pulito e asciutto non esposto all'irradiazione solare diretta. In questo caso si consiglia di caricare di tanto in tanto la batteria incorporata. Smaltimento dell'apparecchio Il simbolo qui accanto che mostra un bidone dell'immondizia su rulli sbarrato, segnala che questo apparecchio è... -
Page 80: Dati Tecnici
Dati tecnici Videoregistratore per abitacolo 5 V , tramite batteria agli ioni di litio integrata Tensione di esercizio (3,7 V / 350 mAh) o porta USB Tensione in entrata 12 V / 24 V , max. 700 mA tramite dell'adattatore per auto rete di bordo dell'auto Fusibile dell'adattatore T 2 AL / 250 V per auto Tensione in uscita 5 V ... -
Page 81: Garanzia
Assistenza Svizzera Tel.: 0842 665566 (0,08 CHF/Min., telefonia mobile max. 0,40 CHF/Min.) E-Mail: kompernass@lidl.ch IAN 47583 Raggiungibilità della hotline: dal lunedì al venerdì, dalle 8.00 alle 20.00 (CET) Importatore KOMPERNASS HANDELS GMBH BURGSTRASSE 21 44867 BOCHUM GERMANY www.kompernass.com CR 5 A1... - Page 82 Contents Introduction ..........80 Information concerning these operating instructions .
-
Page 83: Introduction
Introduction Information concerning these operating instructions Congratulations on the purchase of your new device. You have selected a high-quality product. The operating instructions are part of this product. They contain important information on safety, usage and disposal. Before using the product, familiarise yourself with all handling and safety guidelines. Use the product only as described and for the range of applications specifi... -
Page 84: Safety
WARNING A warning at this hazard level indicates a potentially hazard- ous situation. Failure to avoid this hazardous situation could result in physical injury. ► Follow the instructions in this warning to prevent physical injury. CAUTION A warning at this hazard level indicates potential material damage. - Page 85 ■ Never subject the device to extreme heat or humidity. This applies especially to storage in a car. If the car is stationary for long periods and the weather is warm and sunny, temperatures of more than 40°C can arise in the car interior and the glove compartment.
-
Page 86: Possible Infringements Of The Rights Of Third Parties
■ The device contains a lithium-ion battery. Therefore, the device must not be thrown into the fi re. There is a risk of explosion! ■ Do not exert any pressure on the display. If it should break, touching the sharp edges could cause injury. Possible infringements of the rights of third parties Please note the following when using the cockpit camera: Copyright protection... -
Page 87: Controls
Controls (For illustrations see the fold-out page) Figure A: Locking lever Cradle with suction cups Knurled screws for three-dimensional locking Figure B: Camera lens ▲ button ▼ button MENU button MODE button Microphone USB* port Reset opening AV connection Loudspeaker Infrared LEDs Figure C: Operating display... -
Page 88: Contents Of Package And Transport Inspection
Contents of package and transport inspection Please check the contents of the package (see fold-out page). The following components are included in delivery: ● Cockpit recorder CR 5 A1 ● Protective housing ● Cradle with suction cups ● USB* to mini-USB cable ●... -
Page 89: Initial Operation
Initial operation Inserting/removing the microSD card CAUTION ► Do not install or remove the microSD card (not supplied) while the device is switched on. This can cause loss of data on the microSD card. ♦ Insert a microSD card into the microSD card slot so that the golden contacts are facing toward the display. -
Page 90: Mounting The Camera On The Windscreen
Mounting the camera on the windscreen 1) To increase the protection for the camera, you can place the camera in the protective housing and push it gently into place until the camera clicks into place. 2) Screw the cradle into the thread of the camera Position the suction cup on the wind- screen. -
Page 91: Handling And Operation
CAUTION ► In vehicles in which the cigarette lighter also works with the ignition switched off , the device must be disconnected from the cigarette lighter socket after use. Otherwise, the vehicle battery may be discharged over a long period of time, since the device also uses power when it is idle. -
Page 92: Beep Sound
Time & date If you access this menu option, you can then use the ▲▼ buttons to select whether the recordings are to be made with or without a date stamp. Select "Time & date stamp on" to activate ths function or "Time & date stamp off " to deactivate it. - Page 93 Auto display off If you access this menu option, you can then use the ▲▼ buttons to select the period after which the display automatically switches off : "1 Min", "3 Min" and "5 Min" are the available options. Select "Display always on" if the display is to remain on permanently.
-
Page 94: Video Standby Mode
Video standby mode In video standby mode, the screen shows the following overview: A – displays the remaining recording time depending on resolution and available storage space B – current video resolution C – symbol to indicate an inserted microSD card D –... - Page 95 If you now press the MENU button in video standby, the following menu opens: Motion detection Using the ▲▼ buttons you can move the selection bar to the desired entry and then call up this menu item with the button .
-
Page 96: Motion Detection
Motion detection If you access this menu option, you can then use the ▲▼ buttons to activate or deactivate this function. Confi rm your selection with the button return to the list of menu items. When this function is activated, the device will automatically stop the video recording when no moving images are detected. -
Page 97: Photo Standby
Photo standby With the menu closed, press the MODE button during video standby to switch to photo standby. The device then displays the following overview on the screen A – displays the remaining number of photos that can still be taken depending on resolution and available storage space B –... -
Page 98: Playback Mode
Resolution If you access this menu option, then you can use the ▲▼ buttons to select the desired resolution for your photos: "12MP (interp.*)", "7MP (interp.*)", "5MP", "3MP", "2MP", "1.3MP" oder "0.3MP" are the available options. "MP" stands for megapixel, e.g. the "5MP" setting creates a photo of 2592 × 1944 pixels, which is about 5 million pixels. - Page 99 If you select a photo, the screen will display the following overview: A – display of the current recording number/total number of recordings B – resolution of the currently selected photo C – battery charge level of the internal battery D –...
- Page 100 Write protection If you access this menu option, you can then use the ▲▼ buttons to select whether to protect the currently selected fi le from deletion ("Write-protect this fi le"), to remove the write protection for the selected fi le ("Unlock this fi le"), protect all fi...
-
Page 101: Showing Recordings On An External Monitor
Using the ▲▼ buttons you can move the selection bar to the desired entry and then call up this menu item with the button . To exit the activated menu item without making a change, press the MODE button . To close the menu, press the MENU button Delete If you access this menu option, you can then use the ▲▼... -
Page 102: Transferring Recordings To A Computer
Transferring recordings to a computer Connect the mini-USB plug of the supplied USB cable to the port the camera and the USB plug to a free USB port of a switched-on computer. The computer now recognises the device as "mass storage", the camera connects to the computer and then the content of the SD/SDHC memory card appears as a new drive on the computer. -
Page 103: Cleaning
Cleaning CAUTION Damage to the device! ► To avoid irreparable damage, ensure that no moisture penetrates the device during cleaning. ■ Clean the surfaces of the device with a soft, dry cloth. Use a normal commercial detergent and water to remove stubborn residue. Ensure that no water gets into the device. - Page 104 Fault Possible cause Rectifi cation The device does not There is a defect. Use a pointed object, e.g. a paper clip, respond as expected to to carefully press the switch behind the your operation. RESET opening in the housing to restart the device.
-
Page 105: Storage / Disposal
Storage / Disposal Storage If you plan not to use the device for a long period, store it in a clean, dry place away from direct sunlight. In this case you should charge the built-in battery from time to time. Disposal of the device The adjacent symbol of a crossed-out wheelie bin means that this device is subject to Directive 2012/19/EU. -
Page 106: Technical Data
Technical data Cockpit recorder 5 V , via the integrated lithium-ion battery Operating voltage (3.7 V / 350 mAh) or USB connection Input voltage of the car 12 V / 24 V , max. 700 mA via adapter the car's electrical system Car adapter fuse T 2 AL / 250 V Output voltage of the 5 V , 1 A car adapter... -
Page 107: Warranty
Repairs made after the lapse of the warranty period are subject to charge. Service Service Great Britain Tel.: 0871 5000 720 (£ 0.10/Min.) E-Mail: kompernass@lidl.co.uk IAN 47583 Hotline availability: Monday to Friday 08:00 - 20:00 (CET) Importer KOMPERNASS HANDELS GMBH BURGSTRASSE 21 44867 BOCHUM GERMANY www.kompernass.com CR 5 A1... - Page 108 KOMPERNASS HANDELS GMBH BURGSTRASSE 21 44867 BOCHUM DEUTSCHLAND / GERMANY www.kompernass.com Stand der Informationen · Version des informations Versione delle informazioni · Last Information Update: 04 / 2014 · Ident.-No.: CR5A1-022014-4 IAN 47583...
Need help?
Do you have a question about the DASHCAM CR 5 A1 and is the answer not in the manual?
Questions and answers