Heta SCAN-LINE 40 Operating Instructions Manual
Hide thumbs
Also See for SCAN-LINE 40:
- Operating and installation instructions (28 pages) ,
- Manual (16 pages) ,
- Operating and installation instructions (28 pages)
Table of Contents
Advertisement
Quick Links
Advertisement
Table of Contents

Related Manuals for Heta SCAN-LINE 40


Summary of Contents for Heta SCAN-LINE 40
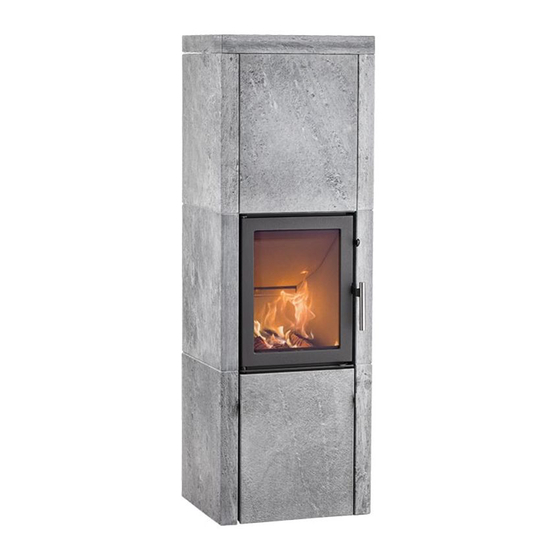
- Page 1 SCAN-LINE 40 SCAN-LINE 50 www.heta.dk www.heta.dk...
- Page 2 The Scan-Line 40 and 50 have been With your new stove you should have approved according to the EN 13240 / received the following: NS 3058.
-
Page 3: Draft Conditions
a damper is fitted in the flue gas pipe, stion in stoves of this kind is 12 PA. there must always be at least 20 cm However, there will still be a risk of free passage, even when the damper is smoke emission if the firing door is in its “closed”... -
Page 4: First Firing
INSTRUCTIONS FOR USE First firing storing. The pieces of firewood should be of an appropriate length (approx. The stove has been treated with a 25–30 cm) so that they can lie flat on heat-resistant coating which hardens the bed of embers. If you store your at a temperature of approximately wood outdoors, it is best to cover it. -
Page 5: Reduced Burning
Lighting embers. Gentle heat is released when the fire settles - i.e. when the wood no To ignite the fuel, use fire lighters, longer generates flames and has been small paraffin ignition bags or small converted to glowing embers. pieces of wood placed on the bottom grate. -
Page 6: Operational Problems
Stove data table in accordance with EN 13240 testing. Stove Nominal Smoke Fuel Draught Nominal Heat Distance to flammable Distance to Stove fluegas type stub volume output output materials in mm furnitures from weight Scan-Line tempera- tested behind at the the stove in series ture c°... - Page 7 Cleaning after sweeping the chimney and replacing the stones. Fig 3-6 GUARANTEE Damage resulting from incorrect use Transport costs in connection with The model Scan-Line 500 stoves are repairs carried out under guarantee subjected to stringent quality con- Installation/disassembly in connection trol procedures both throughout the with repairs carried out under guaran- produc-tion process and immediately...
-
Page 8: Fresh Air
CONNECTION OF EXTERNAL AIR FLOW Snittet af ovnen er set fra oven og ned mod bunden (Gulvet) (FRESH AIR) vn med Fronten af ovnen tstenen m ud en som There is 102 cm from the out- side of rear soapstone to the center of the hole for the exter- nal air flow connection through the floor. -
Page 9: Installation Instructions
INSTALLATION INSTRUCTIONS Scan-Line 40 and 50 Please read carefully before installing We recommend installation of the the stove. NB! Before assembling the soapstones is carried out by two people. soapstones, ensure that the underlay/ floor is level and that the distance... - Page 10 SCAN-LINE 40 16 x standard brackets 12 x standard pins Scan-Line 40...
- Page 11 The handle is fitted by placing it into the groove in the stone and the ash pan frame. Adjust the handle so that is it placed in the middle of the ash pan frame. Tighten the handle with the supplied two M5x6 screws. Scan-Line 40...
- Page 12 The open cover should be placed here. Fig. 3 Continue with sidestones as shown i fig. 4. and place Brackets under. Then place the backstone with hole for convection and finish the first round with af sidestone. Fig. 4 Scan-Line 40...
- Page 13 Scan-Line 40...
- Page 14 Scan-Line 40...
- Page 15 Scan-Line 40...
- Page 16 Put brackets and pins in as shown. fig. Fig. 5 Continuing with the next row. Start with sidestone, backstone and then sidestone again. Place brackets and pins. fig. 6 Scan-Line 40...
- Page 17 Step 4 Continue with the 3. row. Start with the front stone with the two brackets beneath (resting on the metal frame) and then a side stone, which should be placed on the pins/brackets. fig. 7 Fig. 7 Scan-Line 40...
- Page 18 Place brackets loose on top. If the stove has a top on top. No pins are nessesary Fig. 8 flue, break of the inner ring. Fig. 9 Fig. 8 Fig. 9 Top flue - break of the inner ring. Scan-Line 40...
- Page 19 Regulate the convection air flow by turning the handle on the side of the stove. Open Closed Scan-Line 40...
- Page 20 SCAN-LINE 50 20 standard brackets 20 standard pins Scan-Line 50...
- Page 21 Place the stone into the groove on the door so that it is equidi- stant to both sides. Important! The stone must be manually held in place until the handle is fitted. Fig. 2 The handle is fitted by placing it into the groove in the stone and the ash pan frame.
- Page 22 NB: Behind the stove, the stone with hole for convection, must be placed at the bottom. The next stone with hole is put on top if there is smoke outlet behind. Fig. 3 The closed cover should be placed here unless the stove should be mounted with back outlet The open cover should be placed here.
- Page 23 Scan-Line 50...
- Page 24 Scan-Line 50...
- Page 25 Scan-Line 50...
- Page 26 Put brackets and pins in as shown. fig. Fig. 5 Continuing with the next row. Start with sidestone, backstone and then sidestone again. Place brackets and pins. fig. 6 Scan-Line 50...
- Page 27 THERMASTONES Optional thermastones are also availa- The thermastones must be added after ble. Six thermastones can be installed the soapstones have been placed and in this stove. the stove/firebox has been adjusted. Step 1 Step 2 Step 3 Continue with the 3. row. Start with the front stone with the two brackets beneath (resting on the metal frame) and then a side stone, which should be...
- Page 28 Continue with the back stone and Place the last row of soapstone. Start then another side stone. Place brack- with the front stone, then side stone, ets and pins. See fig. 8 then back stone and side stone again. Place brackes (no pins are required). See fig.
- Page 29 Finish with the topstone - place it Fig. 10 loose on top. If the stove has a top flue, break of the inner ring. Fig. 10 Top flue - break of the inner ring. Scan-Line 50...
- Page 30 Regulate the convection air flow by turning the handle on the side of the stove. Open Closed Scan-Line 50...
Need help?
Do you have a question about the SCAN-LINE 40 and is the answer not in the manual?
Questions and answers