
Related Manuals for Heta SCAN-LINE TURIN CLASSIC


Summary of Contents for Heta SCAN-LINE TURIN CLASSIC
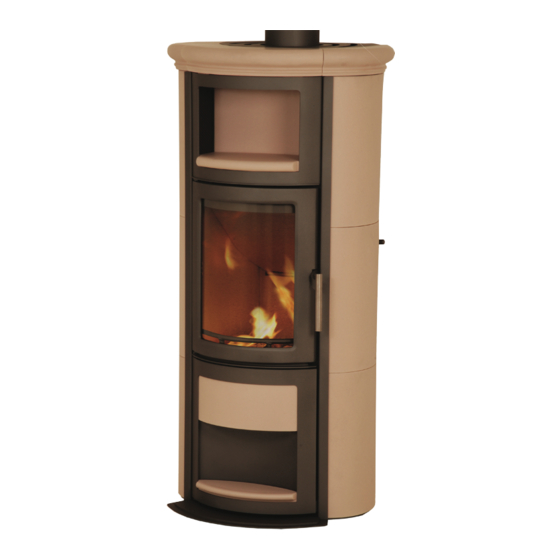
- Page 1 ClassiC sCan-line tUrin MoDern eCoDesiGn reaDy www.heta.dk Danish DesiGn . Danish QUality . Danish ProDUCtion...
-
Page 2: Declaration Of Performance
Signed on behalf the manufacturer of 04.12.2018 ____________________________________________________________________________________________________________________ In case of any change of the above-mentioned production type this Declaration of Performance becomes invalid. Heta A/S, Jupitervej 22, DK-7620 Lemvig, Tlf. +45 9663 0600, www.heta.dk Page 1 of 1... -
Page 3: Table Of Contents
Congratulations on your new wood stove, we are confident that you will be more than satisfied with your new Heta stove. Especially if you follow the following advice and instructions. Scan-Line Turin have been approved according to the EN 13240, NS 3058, NS 3059, and A15 Austria. -
Page 4: Before Installation
It is important that upon receipt check your Heta product completely and report any damage or defects to your dealer. The packaging must be disposed of as follows: Wood is untreated and able to burn in the stove. -
Page 5: Operating Instructions
1. oPeratinG instrUCtions 1.1 Before using Before the wood stove is used make sure required installation conditions, are met. See page 1.2 first firing The stove paint is fully cured from the factory, but a minor unpleasant odour could still arise. some firelighters onto the grate with some kind- 1.3 regulating the air flow ling or small pieces of wood to the fire once... -
Page 6: Emptying The Ash
stove and/or chimney cools down too much, it Be careful when emptying the may be necessary to have the door ajar. ashes out. There can be hot embers left for a long time. The wood will then ignite within a very short time Never empty ash into a combusti- (Typically 1 to 3 minutes). -
Page 7: Draft Conditions In The Chimney
Good draft will allow the stove to achieve op- above the stove, and clear of the roof ridge timal combustion and the highest possible ef- ficiency. Heta wood stoves are constructed so 1.10 fuel that it itself provides an optimal blend of com- bustion air. -
Page 8: Operating Problems
pear up the chimney. Thus, it is important to use being produced, you must first check to see dry, well seasoned wood, for eg. wood with a whether the chimney is blocked. moisture content of less than 20 %. Achieve this The chimney must, of course, always provide the by storing the wood for 1–2 years before use. -
Page 9: Troubleshooting
1.13 troubleshooting table - applies to all stove types Fault Cause Troubleshooting Solution Inadequate chimney draft. Lighting problems. When the You can test using a lighter whether Improve the chimney. The chimney only has stove is cold, smoke seeps flame is drawn into the combustion sufficient draft when it is hot. -
Page 10: Maintenance
1.14 Maintenance 1.15 Cleaning the glass Incorrect firing, for example using wet wood, The surface of the stove is treated with a heat- can result in the viewing window becoming co- resistant paint. The stove should be cleaned vered in soot. This soot can be easily and effec- with a damp cloth. -
Page 11: Cleaning/Replacing Bicks After Chimney Sweeping
1.17 scan-line turin. Cleaning after sweeping or before replacing vermiculite stones Note: it may be necessary to clean/vaccum the holes and air ducts behind the rear stone. Order of removing Fire bricks. The stove is prepared for fresh air intake. -
Page 12: Stove Data Table En 13240
Testing is conducted with the combustion air around 38% open. 1.19 Guarantee - Damage caused by improper use. - Transportation costs for warranty repair. Heta wood stoves, subjected to a strict quality control during production and before delivery to - Assembly / disassembly of warranty repair. the dealer. -
Page 13: Installation Instructions
installation instructions Contents Installation instructions ..............14 Distance requirements ..............14 Floor ....................14 Chimney connection ................. 14 Combustion air and ventilation ............15 Stovedrawings/measurments ............. 16-17 Changing to a back flue outlet ............18 Clearances for installation ..............23 Installing ceramic panels ..............19 Installing soapstone elements ............22 Appendix A .................. -
Page 14: Installation Instructions
/ or In front of the fireplace insert, the substrate beading. Heta A/S stresses that it is of utmost importance that this is done correctly with very must consist of non-combustible material, for ex. -
Page 15: Combustion Air And Ventilation
• Only approved materials may be used from that setup and installation be left to a profes- the ventilation unit to the air inlet vent. sional Heta dealer. • The air inlet vent must be fitted correctly and Connection to a steel chimney insulated to prevent formation of condensate. -
Page 16: Stovedrawings/Measurments
2.5 stovedrawings/measurments scan-line turin ø100... - Page 17 scan-line turin B ø100...
-
Page 18: Changing To A Back Flue Outlet
2.6 Changing to a back outlet – only when necessary – Fig. 1-10 Fig. 1 Fig. 6 Cut the small metal Insert the flue outlet bridge connecting through the back the cover to the back panel and place panel using side cut- against the combu- ters. -
Page 19: Clearances For Installation
2.7 Clearances for installation en 13 240 Clearances for installation Stove Distance to flamable materials Minimum rear the at the dimensions stove sides furnitures Scan-Line Turin 1000 Furnitures Not combustible Combustible The dimensions are the minimum di- material mensions, unless other-wise stated. Furnitures 2.8 installing ceramic panels 1.0 overview of the components:... - Page 20 1.2.1 1.1 Preparation Insert the bottom right panel in behind the back 1.1.1 wall and rotate the front towards the stove. If the stove is connected using the top flue pipe, metal grate B must be installed before the flue pipe is connected. 1.1.1 1.2.1 1.2.2...
- Page 21 1.2.7 1.2.4 Place the shelf panel (J) at an angle inside the Place the base panel (G) at an angle inside the cooking section and rotate into position ash door and rotate into position. 1.2.4 1.2.7 1.2.8 1.2.5 Place the top panel (E) on the stove. If the flue Open the ash door and loosen the hex screws pipe is connected at the top outlet, metal grate on the holding brackets.
-
Page 22: Installing Soapstone Elements
2.9 installing soapstone elements The stove is ready for installation of 1. Remove the lid. the soapstone. 2. Remove the top part of the box. 7. Attach the bottom side stone. 3. The soapstone elements are ready to be unpacked. 8. - Page 23 Repeat this process with the second and third Correct position of the spring for the top stone. side stones. Watch the height on both sides when installing Use a rubber mallet to gently adjust the sides the side stones. so there are no gaps. First side.
- Page 24 Insert the horizontal stone at an angle and ro- Insert the pack panel for the shelf from above tate it gently into place. and push carefully backwards into its final po- sition. 24. Remove the rear screw in the top plate. Before installing the horizontal stone, attach the sealing strip provided to the back.
- Page 25 The pins should face forward so they fit the Adjust the top panel so that it is correctly holes in the top soapstone element. positioned. The slotted holes allow for adjustment. Take hold of the top panel as shown in photo. These two milled holes fit over the bracket just When the top panel is in position, tighten these installed, holding the top panel in place.
- Page 26 Once the stone is in place, carefully re-tighten 34. Place the ventilation top as shown. the screws so that the stone cannot move. 35. Tighten the screws. Place the base stone at an angle inside the ash door and rotate into position. Loosen the screw before installing the vertical stone in the ash door.
- Page 27 3. appendix a The Clean Air Act 1993 and Smoke Control Areas. Under the Clean Air Act local authorities may gulatory Reform (Scotland) Act 2014. In Wales declare the whole or part of the district of the and Northern Ireland these are authorized by authority to be a smoke control area.
Need help?
Do you have a question about the SCAN-LINE TURIN CLASSIC and is the answer not in the manual?
Questions and answers