Table of Contents
Advertisement
Quick Links
Advertisement
Table of Contents

Related Manuals for Heta Scan-Line 70


Summary of Contents for Heta Scan-Line 70
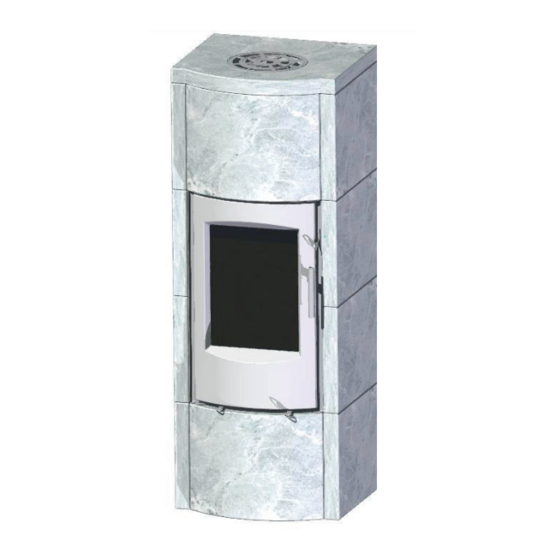
- Page 1 Scan-Line 70 www.heta.dk www.heta.dk...
-
Page 2: Installation Instructions
Congratulations on your new stove. We ded to ensure that the materials used are sure that you will be happy with are of good quality, that the stove does your investment, especially if you follow not adversely affect the environment, the advice and instructions we have put and hat it is economical to use. -
Page 3: Draft Conditions
even when the damper is in its “closed” ful firing. The flue gas temperature at position. If local regulations permit, two nominal output is 237°C when expelled contained fireplaces can be connected to an exterior temperature of 23°C. The to the same chimney. However, you must flue gas mass flow is 3.2 g/sec. -
Page 4: First Firing
INSTRUCTIONS fOR USe Examples of recommended First firing The stove has been treated with a heat- woods types resistant coating which hardens at a and their typical specific gravity per temperature of approximately 250 ºC. cubic meter stated as 100% wood with a This hardening process causes the moisture content of 18% production of smoke and malodorous... -
Page 5: Reduced Burning
close the door and shut off the seconda- Refiring ry/start-up air supply to smother the fire. You should normally refire the stove Call the fire department. while there is still a good layer of embers. Distribute the embers across the bot- Lighting and combustion tom grate, place pieces of fuel (max 0.7 kg) on the embers in a single layer... -
Page 6: Risk Of Explosion
pletely clear of soot as the secondary Risk of explosion air “washes” down over it. Please note After you add new fuel, it is that the stove will, naturally, produce very important that you do not soot if both the start-up mechanism and leave the stove unattended secondary air intakes are closed complet- until the wood is burning con-... -
Page 7: Maintenance
(See figure Cleaning the glass GUARANTee The model Scan-Line 70 stoves are • The smoke baffle • The glass subjected to stringent quality control • The sealing rope •... - Page 8 Warning Any unauthorised The stove is modification of the prepared for stove and any use of non-original spares will a fresh air void the guarantee. intake. Emptying the ash pan, fig. 3-5 Cleaning after sweeping the chimney and replacing the stones. Fig 6-10...
- Page 9 Changing to back smoke outlet Fig. 11-18...
- Page 10 Scan-Line 70 Please read carefully before installing the stove. NB! Before assembling the soapstones, ensure that the underlay/floor is level and that the distance from the floor to the top plate is 1035 mm. The stove must be level.
- Page 11 10 x standard brackets. 4 x left brackets 4 x right brackets 18 x pins...
- Page 12 Optional accumulating stones are also The accumulating stones must be laid available for Scan-Line 70. after the soapstones have been laid and Up to two accumulating stones can be the stove/firebox has been adjusted. installed in this stove.
- Page 13 When the stove is positioned precisely, position the lower front stone up against the stove base leg and secure with 1 x right and 1 x left bracket. right Left Fit both side stones, positioning the rear brackets under the soapstones. When fitting the right and left brackets onto the front and side soapstones, tip the stove backwards.
- Page 14 Then fit the rear stones and check that the soapstones are at right angles. Fit the next rear stone and both side stones. Position the brackets and pins in the holes in the soapstones Continue fitting the next rear stone and both side stones.
- Page 15 To continue, fit the next rear stone and both side stones. Position the brackets and pins into the holes. Position the right and left bracket on the side stones and over the top plate on the stove. Fit the side and rear stones before fitting the front stone.
- Page 16 Position the standard, right and left brackets and fit the top plate Rear flue can be positioned as shown. When fitting outside air flue, remove the inner plate from the grille. Air intake – convection...
- Page 17 There is a 3 mm gap between the front and top stones to allow for stove/firebox expansion during use If the stove has a top flue, break off the inner ring Regulate the convection air flow by turning the handle on the side of the stove. Convection open: Handle up.
Need help?
Do you have a question about the Scan-Line 70 and is the answer not in the manual?
Questions and answers