
Related Manuals for Heta Scan-Line 800 Series


Summary of Contents for Heta Scan-Line 800 Series
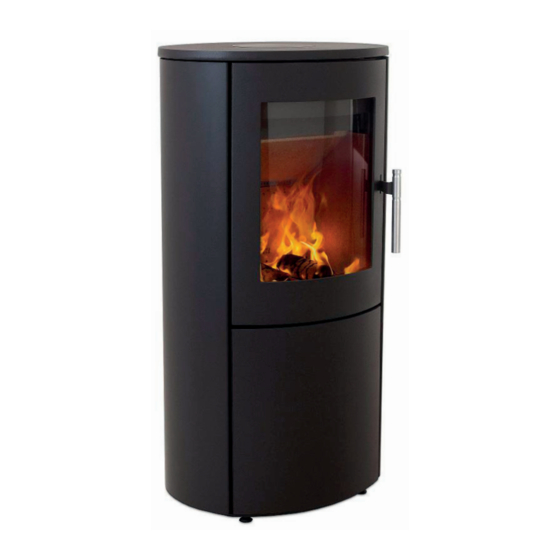
- Page 1 800 series eCoDesiGn reaDy www.heta.dk Danish DesiGn . Danish QUality . Danish ProDUCtion...
-
Page 2: Table Of Contents
Heta stove. Especially if you follow the following advice and instructions The Scan-Line 800 series and the Scan-Line 800 Side windows series have both been approved according to the EN 13240, NS 3058/3059, 15a B-VG and approved for use in smoke control areas throughout the UK. -
Page 3: Before Installation
It is important that upon receipt check your Heta product completely and report any damage or defects to your dealer. The packaging must be disposed of as follows: Wood is untreated and able to burn in the stove. - Page 4 With your new wood stove you should find the following: Q.C. check Operating / Instruction manual Tool set Heta glove Data plate required tools are not supplied. 8057 0000-DK Heta A/S Jupitervej 22 . DK-7620 Lemvig . Denmark EN 13240:2001/A2:2004 - AEA - NS 3058/3059, Aus §15A Testrapport: 300-ELAB-2276-EN SN No.
-
Page 5: Operating Instructions
1. oPeratinG instrUCtions 1.1 Before using 1.4 lighting the stove Before the wood stove is used make sure required Place two pieces of wood on the bottom. Stack installation conditions, are met. See page kindling on top in layers with air between. Set ting fire starter (bag, brick, paraffin) on the top, Shaking now you are ready to light the fuel. -
Page 6: Emptying The Ash
1.6 emptying the ash dows series) on top of the embers in one layer, perpendicular to the chamber opening. By using the shaker grate, it rotates back and See fig. 5. forth so the ash falls through the holes and into the ash pan. -
Page 7: Risk Of Explosion
Nominal fluegas temperature: 222° Scan-Line 800 series, relative to 20°C. Never use the stove if the 277° Scan-Line 800 Side windows series, seals are loose. -
Page 8: Fuel
wood with a moisture content of less than 20 %. as new efficient stoves create lower flue tempe- Achieve this by storing the wood for 1–2 years ratures. Wind and weather conditions also in- fluence draft, in some cases it may be disad- before use. -
Page 9: Chimney Fire
The chimney must, of course, always provide the minimum draft necessary to ensure that it is pos- sible to regulate the fire. Please note, how-ever, that chimney draft is dependent on the weather conditions. In high winds, the draft can become so powerful that it may be necessary to fit a dam- per in the flue gas pipe to regulate the draft. -
Page 10: Diagram For Maintenance
Therefore, the duration of the warranty is 5 years on this product, covering manufactu- rer’s defects, 1 year on paint adhesion defects from purchase date from Heta and a 3 months total warranty for seals, vermiculite and glass from the date of sale from the dealer. -
Page 11: Garantee
1.18 troubleshooting table - applies to all stove types Fault Cause Troubleshooting Solution Inadequate chimney draft. Lighting problems. When the You can test using a lighter whether Improve the chimney. The chimney only has stove is cold, smoke seeps flame is drawn into the combustion sufficient draft when it is hot. - Page 12 1.19 scan-line 800 series. Cleaning after sweeping or before replacing vermiculite stones Note: it may be necessary to clean/vaccum the holes and air ducts behind the rear stone. Order of removing Fire bricks. lubricate ash pan Grease not included. Replace in reverse order. Starting with Fig. 6.
-
Page 13: Scan-Line 800 Series
1.20 scan-line 800 side windows series. Cleaning after sweeping or before replacing vermiculite stones Note: it may be necessary to clean/vaccum the holes and air ducts behind the rear stone. Order of removing Fire bricks. Replace in reverse order. Starting with Fig. 8. -
Page 14: Scan-Line 800 Side Windows Series
The nominal output is the output to which the stove has been tested. Testing is conducted with the combustion air open 80% for Scan-Line 800 series. 80% for Scan-Line 800 Side windows series Scan-Line 800 B = Baking oven Scan-Line 800 S = Therma stones... -
Page 15: Stove Data Table En 13240
1.22 scan-line 800 series Parts - inside fire chamber Pos. Name Qty. 0023-0117 Baffle 0023-0118 Side stones right 0023-0119 Side stones left 0023-0236 Back stone (two-part) 0030-0018 Casted bottom 0030-0201 Grate ø195 mm 0023-3017 Gasket L= 910 mm 4018-0030 Ash pan... -
Page 16: Parts
scan-line 800 side windows series Parts - inside fire chamber Pos. Name Qty. 1 0008-9086 6x40 Pin 2 0023-0130 Back stone 3 0023-0131 Side stones left 4 0023-0132 Side stones right 5 0023-0133 Side stones left front 6 0023-0134 Side stones right front 7 0023-0135 Baffle 8 0030-0201... - Page 17 Parts - Door Pos. Name Qty. 0008-1002 M6x6 set screw 0008-2005 M5x10 screw 0008-2304 M4x6 screw 0008-9082 6x35 Round head rivet 0016-0084 Handle 0021-0042 Glass 0023-3008 Glass gasket ø12 L=1,8 m 0023-3013 Glass band 3x8 L=1,8 m 1013-0432 Glasclips 4005-0036 Stove door...
- Page 18 Parts - Baking oven door Pos. Name Qty. 1 0008-1002 M6x6 Set screw 2 0008-1006 M6x14 Set screw 3 0008-2306 M4x8 Screw 4 0008-9082 6x35 Round head rivet 5 0016-0080 Handle 6 0021-0046 Glass 7 0023-3013 3x8 Glassband L=1,07 m 8 0050-0302 Baking racks 9 1013-0432...
- Page 19 Parts - Xl Baking oven door Pos. Name Qty. 1 0008-1002 M6x6 Set screw 2 0008-1006 M6x14 Set screw 3 0008-2306 M4x8Screw 4 0008-9082 6x35 Round head rivet 5 0016-0080 Handle 6 0021-0058 Glass 7 0023-3013 3x8 Glassband L=1,07 m 8 0050-0301 Rails for baking racks 9 0050-0302...
- Page 20 installation instructions Contents Installation instructions ..............21 Distance requirements ..............21 Floor ....................21 Chimney connection ................. 21 Combustion air and ventilation ............22 Stovedrawings/measurments ............22 Installing the HAC unit ............... 25 Connecting direct air below or behind ..........26 Optional connection of external air flow (fresh air) Scan-Line 850 on column ..............
-
Page 21: Installation Instructions
16 of this manual. must be sealed with fireproof material and / or beading. Heta A/S stresses that it is of utmost 2.2 floor importance that this is done correctly with very tight joints. -
Page 22: Combustion Air And Ventilation
Combustion air and Ventilation The Scan-Line 800 series and Scan-Line 800 The stove is approved as a room air dependent Side windows series have a nominal output of stove in accordance with EN 13240. - Page 23 Scan-Line 810 Series Scan-Line 820 B Series ø 100 ø 100 Steel top High top/ Steel top Steel top High top/ Steel top Stone top for M series Stone top for M series SL 800 B and SL 800 B and SL 820 B SL 820 MB SL 810...
- Page 24 Scan-Line 840 B Series Scan-Line 830 S Series ø100 ø100 Steel top High top/Stone top Steel top High top/Stone top SL 840 B SL 840 B SL 840 B SL 830 S SL 830 S SL 830 S Stone Steel side Steel side Stone and ceramics Steel side...
-
Page 25: Installing The Hac Unit
Scan-Line 850 Fixed pedestal Scan-Line 850 Wall hanging ø200 ø100 Steel top High top/ Steel top Stone top for M series Steel top High top/ Steel top Stone top for M series SL 850 SL 850 SL 800 Stone SL 850 M and Steel side Steel side and ceramics... -
Page 26: Connecting Direct Air Below Or Behind
ø100 mm, the draught in the flue depends on this air for optimal combustion. Heta recommends max. 4 meters of direct air pipe, with max. 3, 90° bends and a min. of ø100 mm. -
Page 27: Connection Of External Air Flow (Fresh Air) Via Rotating Floor Base
2.9 Connection of external air flow (fresh air) via rotating floor base • Tap or screw to remove and detach the four - in the base plate. • To mount the rotating base, follow instructions in ”Scan-Line Rotating Base Instructions for Use”, without tightening the central screw. -
Page 28: Clearances For Installation En 13 240
2.11 Clearances for installation en 13 240 sl 800 series Combustible material The dimensions are the minimum dimensions, unless otherwise stated. Clearances Oventype Distance from oven to combustible material Stove Rear At the Corner Minimum side furnitures distance dimensions in stove 45°... -
Page 29: Assembling The Thermal Stones
2.12 assembling the thermal stones Removal of steel sides Removal of stones Mounting of steel sides. Mounting of stones. Scan-Line 830 4 stk. Adjust sides and top in place. Adjust the stone and top in place. Scan-Line 840 2 stk. -
Page 30: Mounting Of Still Feet
2.13 Mounting of still feet 5032-0034 3. appendix a The Clean Air Act 1993 and Smoke Control Areas. Under the Clean Air Act local authorities may gulatory Reform (Scotland) Act 2014. In Wales declare the whole or part of the district of the and Northern Ireland these are authorized by authority to be a smoke control area. -
Page 31: Eu Declaration Of Conformity
Certifikat no. 1447 Manufacturer Heta A/S Ecodesign Adress Jupitervej 22, DK 7620 Lemvig EU Declaration of Conformity E-mail heta@heta.dk Website www.heta.dk DoC Scan-Line 800 1447-2017 Telephone +45 9663 0600 Product fiche Model identifier Scan-Line 800, 810, 820, 820B, 820S, 830B, 830S, 840, 840B, 850, 80XL, 80XLB serie... - Page 32 Certifikat no. 1660 Manufacturer Heta A/S Ecodesign Adress Jupitervej 22, DK 7620 Lemvig EU Declaration of Conformity E-mail heta@heta.dk Website www.heta.dk DoC Scan-Line 800 1660-2012 Telephone +45 9663 0600 Product fiche Model identifier Scan-Line 800 Side windows, 820B Side windows, 820S Side windows, 850 Side windows serie...
Need help?
Do you have a question about the Scan-Line 800 Series and is the answer not in the manual?
Questions and answers