
Subscribe to Our Youtube Channel
Related Manuals for Eiki EK-501W


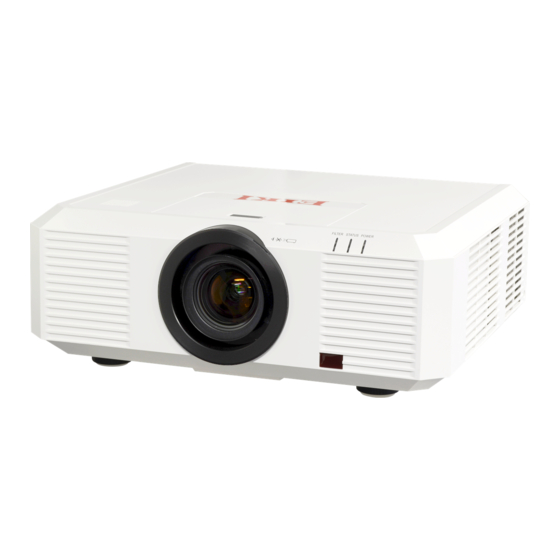
Summary of Contents for Eiki EK-501W
- Page 1 Owner's manual Multimedia Projector EK-501W EK-502X EK-501WL* EK-502XL* *Projection lens is optional...
-
Page 2: Features And Design
Features and Design This Projector is designed with the most advanced technology for portability, durability, and ease of use. This projector utilizes built-in multimedia features, a palette of 16.77 million colors, and matrix liquid crystal display (LCD) technology. Simple Computer System Setting Security Function The projector has the Multi-scan system to The Security function helps you to ensure... -
Page 3: Table Of Contents
Table of contents Features and Design Setting ......... 2 Table of contents Language ............48 ..........3 OSD Setting ............48 Safety operation guideline ......4 Auto Setup ............49 Compliance ............11 Keystone ............50 Accessory ............12 Blue Back ............50 Display ............... -
Page 4: Safety Operation Guideline
Safety operation guideline Safety instructions This document and your projector employ certain symbols to illustrate how to use your projector safely. They are described below: Please get yourself familiar with them before going through this document. Ignoring messages indicated by this symbol may lead to personal injuries Caution or deaths due to human errors. -
Page 5: Safety Precautions
Safety operation guideline Notes Caution Safety precautions: ● GROUND your projector. ● Lens of your projector projects strong light. DO NOT look at the light beam directly. You may get your eyesight hurt. This is especially the case with children. ●... - Page 6 Safety operation guideline Note: Precautions on location of your projector: ● Place your projector in a proper location or it may result in fire. ● DO NOT expose your projector in rain or high humidity environments or it may result in fire or electric shock.
- Page 7 Safety operation guideline Note: Precautions on using your projector: ● DO NOT project the same image for long time as residual images may be left in the panel. This is a property of LCD panel. ● Use power as indicated in tags attached to your projector. If you have doubts over available power type, consult your dealer or local power company first.
- Page 8 Safety operation guideline Air ventilation Openings in the casing are designed for ventilation and overheating prevention. DO NOT block or cover these openings to keep your projector in normal operation and from overheating. Note: Heat exhaust at the air outlet Keep the following in mind when using or installing your projector: –...
- Page 9 Safety operation guideline Place your projector correctly Use your projector at specified location in correct way. Invalid projector location may shorten life-cycle of lamps or even lead to severe incidents or fire. Note: • Enable the “Ceiling” function if flip over screen is required. DO NOT install your projector in ways as illustrated below.
- Page 10 Safety operation guideline Moving your projector When moving your projector close its adjustment legs as they may damage the lens and casing. Keep your projector in suitable box when it is not to be used for a long time. Note: Precautions on moving or shipping your projector: ●...
-
Page 11: Compliance
Do not make any changes or modifications to the equipment unless otherwise specified in the instructions. If such changes or modifications should be made, you could be required to stop operation of the equipment. Model Number : EK-502X, EK-501W Trade Name : EIKI Responsible party : EIKI International, Inc. -
Page 12: Accessory
Accessories Remote control with batteries Owner's Manual(CD) AC Power cord (AA or LR6) US Type x1 Euro Type x1 VGA cable Quick start guide Lens Cover... -
Page 13: Overview
Overview This chapter presents names and functions of individual component. -
Page 14: Front/Top
Name and function of your projector Front/top Projection lens Air intake with filter POWER indicator (Refer to Page 69) – The power indicator turns steady red when your projector is in standby mode – It turns steady green when your projector is in normal operation STATUS indicator (Refer to Page 69) It flashes red when internal temperature of your projector is out of operation range FILTER indicator (Refer to Page 69) -
Page 15: Rear
Name and function of your projector Rear DVI-D P/PR B/PB H/HV MONITOR OUT VIDEO S-VIDEO AUDIO AUDIO AUDIO RS-232C AUDIO VOL- VOL+ 360.2 ON/STAND-BY LENS SHIFT Power on or off your projector Enter the lens moving mode Arrow ENTER – Select items or adjust values in the Enter the OSD menu or select options in OSD menu. -
Page 16: Terminal
Name and function of your projector Terminal DVI-D P/PR B/PB H/HV MONITOR OUT DVI-D P/PR B/PB H/HV MONITOR OUT VIDEO S-VIDEO AUDIO AUDIO AUDIO RS-232C AUDIO VOL+ VIDEO S-VIDEO AUDIO AUDIO AUDIO RS-232C AUDIO VOL+ AUDIO (S-Video) Connect network cable to this port for con- Connect audio signal from to this terminal. -
Page 17: Remote Controller
Name and function of your projector Remote controller Select DVI input source ② ① PATTERN Select built-in test pattern of your projector ⑥ ⑦ ③ Select VGA input source ④ ⑧ VIDEO ⑤ ⑨ Select VIDEO input source ⑩ ⑪ RGBHV ⑯... -
Page 18: Remote Controller Operation Range
Name and function of your projector TIMER ② ① Enable the timer function LENS SHIFT ⑥ Enter the lens moving mode ⑦ ③ FREEZE ④ ⑧ Freeze projected images ⑤ ⑨ ⑩ ⑪ KEYSTONE Keystone calibration ⑯ ⑫ The keystone calibration mode changed as: H/V Keystone ->... -
Page 19: Install Battery Of Remote Controller
Name and function of your projector Install battery of remote controller Open the battery cover. Insert a new battery in it. Two AA batteries Place your batteries with its anode and cathode (+ and -) in correct direction. Keep both poles in good connection to the contacts within the compartment. -
Page 20: Installation
Installation This chapter introduces the information of install. -
Page 21: Lens Installation
Installation Lens installation Please follow steps given below to install lens after its replacement or when optional ones are employed. Please consult your dealers for details on optional lenses. Lens release button Remove the lens Installing lens 1 Center the lens with its movement func- 1 Turn the lens counterclockwise and tion. -
Page 22: Lens Movement Adjustment
Installation Lens shift adjustment The electric lens shift function may adjust your lens in all four directions. This function enables easy image position adjustment. The projection location of your image may be Move lens to it top moved upward a distance up to 70%(WXGA) position / 60%(XGA) of the length of the image. -
Page 23: Set Up Your Projector
● Ambient brightness may affect your projection image quality. For the optimal image effect, it is recommended to control brightness in your environment. ● Values shown in figure below are approximates only. They may differ from the actual ones. 300" 200" 150" 100" 30" EK-501W(16:10) Unit:cm Lens Model No. AH-E22010 AH-E22020 AH-E21010 AH-E23010 AH-E23020... -
Page 24: Connect The Ac Power Cord
Installation Connect the AC power cord Standard voltage employed by your projector is AC 100-240V. It adapts to different input voltage automatically. Your projector employs 2-phase power cord with neutral ground cable. Do not use any other type of power cords or you may face the risks of electric shock. -
Page 25: Connection To Equipment
Connection to equipment Connection to computer Cables for connection: ● VGA cable ● DVI cable* ● BNC cable* ● HDMI cable* (* This cable is optional. ) Ports on your projector Connection cable Equipment DVI-D(HDCP) DVI cable DVI-D B/PB H/HV HDMI HDMI cable DVI-D... -
Page 26: Connection To Audio Equipment
Connection to equipment Connection to audio equipment Cables for connection: Audio cable* ● (* This cable is optional.) Ports on your projector Connection cable Equipment DVI-D P/PR B/PB H/HV MONITOR OUT MONO L/R Audio cable DVI-D VIDEO S-VIDEO AUDIO AUDIO AUDIO RS-232C AUDIO... -
Page 27: Operation
Operation This chapter introduces you to basic operation of your projector. -
Page 28: Basic Operation
Basic operation Power on your projector DVI-D Power P/PR B/PB H/HV MONITOR OUT VIDEO S-VIDEO AUDIO AUDIO AUDIO RS-232C AUDIO VOL- VOL+ Power 360.2 1. Connect all external equipment to your projector (e.g. computer or camera) before powering it on. 2. -
Page 29: Power Off Your Projector
Basic operation Power off your projector Power P/PR B/PB 1. Press the Power button at the rear control MONITOR OUT panel or the remote controller, the “Power VIDEO S-VIDEO AUDIO AUDIO AUDIO RS-232C VOL- VOL+ off?” message displays. 2. Press the Power button again in 4 seconds after the “Power off?”... -
Page 30: Zoom /Focus Function
Basic operation DVI-D P/PR B/PB H/HV Auto setup MONITOR OUT INPUT VIDEO S-VIDEO AUDIO AUDIO AUDIO RS-232C AUDIO VOL- VOL+ ZOOM/FOCUS FOCUS ZOOM LENS SHIFT LENS SHIFT 360.2 Zoom /focus function Zoom / focus 1. Press the ZOOM / FOCUS button on the rear control panel or remote controller for zooming and focusing. -
Page 31: Adjustment Pad
Basic operation Adjustment pad You may use the adjustment leg to raise your pro- jector up to 5.0 degree. Turn the pad to tilt your projector to required height. To raise your projector, turn both pads clockwise. To lower down your projector or close the pad, turn both pads counterclockwise. -
Page 32: Menu Item Overview
Basic operation Menu item overview ① ② ③ ④ ⑤ ⑥ ⑦ ⑧ ⑨ Main menu PC adjust 设置 Auto PC adj. Fine sync Total dots Horizontal Vertical Submenu Clamp Display area H Display area V Reset Mode free Store PC Adjust Select Auto PC Adjust, Fine sync., Total Dots, Horizontal and Vertical position, Clamp function, Display area H, Display area V, Reset, Mode free and Store to align each... -
Page 33: How To Use The Osd
Basic operation How to use the OSD Main menu PC adjust 设置 Auto PC adj. Fine sync Total dots Horizontal Vertical Submenu Clamp Display area H Display area V Reset Mode free Store Menu operation 1. Press the MENU button on the rear control panel or remote controller and the OSD P/PR displays. -
Page 34: Remote Controller Operation
Basic operation Remote controller operation Use your remote controller for common operations. Screen size selection (SCREEN) Press the SCREEN button on remote controller to select required screen size mode. Digital Zoom (D.ZOOM+/-) Press the D.ZOOM+/- button on remote con- troller to enter the Digital Zoom mode. *Only for input as VGA, RGBHV, and the screen size setting as Normal or Wide. -
Page 35: Input Source (Computer Signals)
Input source (Computer signals) Basic operation Press the INPUT button on the control panel to select one of the following input: VGA, RGBHV, HDMI or DVI. Alternatively, you may press the VGA, RGBHV, HDMI, DVI button on remote control- ler to select individual source directly. DVI-D P/PR B/PB... -
Page 36: Input Source Selection (Vga / Rgbhv)
Input source (Computer signals) Input source selection (VGA / RGBHV) VGA 1 Select input VGA if a PC is connected to the VGA IN port with a VGA cable. RGBHV Select input RGBHV if a PC is connected to the BNC terminal with a 5 BNC cable. Input source selection (HDMI / DVI) HDMI Select input HDMI if a device is connected to... -
Page 37: System Selection
Input source (Computer signals) System selection The scanning system and auto computer adjustment function may detect scores of signal format. If a PC is selected as the input signal source, your projector will detect and adapt to its signal for- mat automatically. -
Page 38: Auto Pc Adjusting
Input source (Computer signals) Auto PC Adjusting The Auto PC Adjusting function may get Total Dots, Horizontal and Vertical position, Display area H, and Display area V aligned with computer input. Auto PC Adjusting 1 Press the MENU button on remote controller PC adjust 设置... -
Page 39: Manual Computer Adjustment
Input source (Computer signals) Manual computer adjustment The scan system of your projector may fail to detect signal format used by certain computers as they opted some special signal format. The manual computer adjustment function of your projector enables you to adjust individual parameter to align with most special signal format. Your projector comes with up to storage area to keep parameters manually adjusted by you. -
Page 40: Image Mode Selection
Input source (Computer signals) Image mode selection Direct operation Press the Image Select button on remote controller to select required image mode. Menu operation 1 Press the MENU button on remote controller and the OSD displays. Press button select image select icon , press button or OK button to confirm your selection. -
Page 41: Image Adjust
Input source (Computer signals) Image Adjust 1 Press the MENU button on remote controller and the OSD displays. Press button to select the Image Adjust icon, press button or OK button to confirm your selection. 2 Press button to select item for adjustment, press button or OK button to confirm your selection. -
Page 42: Screen Size Adjustment
Input source (Computer signals) Screen size adjustment Your projector comes with screen size adjustment function for you to display required image size. 1 Press the MENU button on remote controller and the OSD displays. Press button to select Screen icon, press button or OK button to confirm your selection. -
Page 43: Input Source (Video Signals)
Input source (VIDEO signals) Basic operation Press the INPUT button on control panel to select Component, S-Video or VIDEO. Press COMPO- NENT, S-VIDEO or VIDEO button on remote controller to select individual item directly. DVI-D P/PR B/PB H/HV MONITOR OUT Component INPUT VIDEO... -
Page 44: Video System Selection
Input source (VIDEO signals) Video system selection 1 Press the MENU button on remote controller and the OSD displays. Press button to point to the Input icon, press button or OK button to confirm your selection. 2 Press button to select Component, VIDEO, or S-Video, and then press OK button. 3 Press button to select system, and then press OK button. -
Page 45: Image Mode Selection
Input source (VIDEO signals) Image select 1 Press the MENU button on remote controller and the OSD displays. Press button to select the Image icon, press button then press OK button. 2 Press button to point to required item, then press OK button. Image select 设置... -
Page 46: Image Adjust
Input source (VIDEO signals) Image Adjust 1 Press the MENU button on remote controller and the OSD displays. Press button to select the Image Adjust icon, press button or OK button to confirm your selection. 2 Press button to point to required item, press button or OK button to confirm your selec- tion. -
Page 47: Screen Size Adjustment
Input source (VIDEO signals) Screen size adjustment Your projector comes with screen size adjustment function for you to display required image size. 1. Press the MENU button on remote controller and the OSD displays. Press button to select Screen icon, press button or OK button to confirm your selection. -
Page 48: Setting
Setting Select the Setting menu to set up other functions of your projector. 1. Press the MENU button on remote controller and the OSD displays. Press button to select Setting, press button or OK button to enter the submenu. 2. Press button to point to required item, press button or OK button to confirm your selec- tion. -
Page 49: Auto Setup
Setting Auto Setup Press the AUTO button on your remote controller to execute functions including Auto Searching, Auto PC Adjusting, and Auto Keystone. These function settings may convert according to steps shown below: Input Search Select this function to auto detect input signal. Stop searching after valid signal was found. -
Page 50: Keystone
Setting Keystone Select this function to save or reset keystone adjustment of projection after your projector is dis- connected from AC power. Press button to navigate available options. Keystone....store/reset H/V Keystone..Press button to Setting 设置 adjust vertical and horizon- Keystone tal keystone. -
Page 51: Logo Screen
Setting Logo screen Logo (including Logo and Logo PIN Code lock setup) You may use this function to select Logo Setting 设置 screen, Logo PIN Code lock, change power on Logo password, and set up default logo screen. Logo select Default Logo PIN code lock Logo Select... -
Page 52: Rear
Setting Rear Select this function to mirror reflect the projected image. This function projects image to the back side of projection screen. Lamp Remote Control Setting 设置 Remote Control Remote Control Remote control Remote sensor Select this function to prevent one remote con- troller from interfering multiple projectors. -
Page 53: On Start
Setting Setting 设置 ⑫ On start ⑬ Standby mode Closed caption ⑭ Lamp control ⑮ Test pattern ⑯ Security ⑰ Cooling fast ⑱ High land ⑲ Filter counter ⑳ Warning log ㉑ Factory default ㉒ On Start Set this option to On to power on your projector automatically when it is connected to an AC power source. -
Page 54: Security
Setting Security Security: This option provides Key Lock and PIN Code Lock to ensure your projector’s Setting 设置 operation safety. Security Key lock Key Lock PIN code lock PIN code change Select this function to lock the control panel or remote controller keypad to prevent unauthorized personnel from operating your projector. -
Page 55: High Land
Setting High Land You may set up fan control function in the Setting menu. Set up fan speed according to the altitude your projector is operating. Off ..Normal speed Set this function to Off when your projector is in use in environment of low altitude. -
Page 56: Information
Information Select this function to detect projection image signal and operation status of your projector. Press button to select the Message icon. The Information menu displays. See below for messages shown in the menu. Information ① Input Video Auto H-sync freq. - - - - KHz ②... -
Page 57: Maintenance
Maintenance This chapter describes the regular maintenance procedure of your projector to ensure its optimal operation status for long. -
Page 58: Regular Maintenance
Regular maintenance Status light indicator The status light indicator shows status of projector protection function. Check status and POWER light indicator for good maintenance operation. Note: Unplug the AC power cord in case of any abnormality as it may lead to fire or electric shock. -
Page 59: Clean The Lens
Regular maintenance Clean your projector when it is contaminated by foreign matter or its display effects are getting worse. Note: Unplug the AC power cord before any cleaning operation. Clean the lens Wipe the lens with clean cloth dampened with non-abrasive camera lens cleaner or clean it with lens cleaning paper or air blower. -
Page 60: Reset The Filter Counter
Regular maintenance Reset the filter counter 1 Press MENU button and the OSD displays. Press button to select Setup menu, press button or OK. 2 Press button to select "Filter Counter", Setting 设置 press button or OK. Press button to Filter counter select “Reset the filter counter”... - Page 61 Regular maintenance Follow steps below to replace the lamp: 1. Power off your projector and unplug the AC power cord. Let it cool down for at least 45 min- utes. 2. Open the lamp cover after removing screws holding the cover. 3.
-
Page 62: Description On Network Control Operation
Description on network control operation... - Page 63 Description on network control operation Network control operation Function: This function is designed to remote control computer in the same LAN. Preparation 1 Required equipment: Projector, connection, network cable 2 Connection: Connect your projector to a router or switch in the LAN with normal or jumper network cable.
- Page 64 Description on network control operation 4. In the network menu, select network setting status, press OK button, check network IP address. 5. Open a browser program, e.g. IE, on any computer in the LAN. Enter the IP address you just acquired in the address field in format of http://IP address/.
- Page 65 Description on network control operation Projector status and control: Check projector’s current status and change its settings. Reminder email settings: Set up your email address to get reminder email in case of projector failure. Safety settings: Users may change login password. (Default value is without password.)
-
Page 66: Appendix
Appendix... -
Page 67: Troubleshooting
Appendix Troubleshooting Check the following before calling your dealer or service center: Troubleshooting Solution Power on failure – Plug the power cord of your projector in an AC socket. – Make sure the POWER light indicator turns red. – Restart your projector until the POWER light indicator turns red. It indicates your projector is ready for power on again. - Page 68 Appendix No image displays – Check for the connection between your projector and computer or image equipment. – Check for correct input signal from computer. Connection with certain notebook computer may mandate changes to its display output settings. See the user manual included with the computer for details on settings.
-
Page 69: Light Indicator Status
Appendix Light indicator turns on or – Check status of your projector according to the light indicator flashes status. Exclamation mark – Invalid operation, please operate your projector correctly. displays Control panel does not – Disable the key lock on control panel function in the Safety option function of the Setup menu. - Page 70 Appendix Light indicator status Check light indicator to learn status of your projector. Light indicator Status of your projector POWER STATUS FILTER Your projector is in Off status (without AC power supply). Your projector is in standby status. Press Standby button to turn it on. Your projector is in normal status.
-
Page 71: Compatible Computer Screen
Appendix Compatible computer screen Your projector is designed to accept every analog computer signal below Dot Clock 160MHz and digital computer signal below Dot Clock 140MHz. See table below for details on resolution and relevant frequency. Signal Frequency Signal Frequency Input Resolution Input... -
Page 72: Terminal Configuration
Appendix Terminal configuration VGA IN / MONITOR OUT Terminal (D-sub 15) Red (Input/output) ----- Green(Input/output) Grounding (field synchronizing) Blue(Input/output) Grounding ----- DDC data Grounding Horizontal synchronizing (line synchronizing) (compound sync.)input/output Vertical synchronizing input/ Grounding(red) output Grounding(green) DDC Clock Grounding(blue) SERIAL Terminal(D-SUB 9) ----- ----- -----... -
Page 73: Menu Tree
Appendix Menu Tree Input HDMI Image adjust Contrast 0-63 Brightness 0-63 (Computer Color temp. High/Mid/Low signals) 0-63 Component Green 0-63 S-video Blue 0-63 Sharpness 0-15 Video Gamma 0-15 RGBHV Image adjust 0-63 Contrast Volume Sound 0-25 0-63 Brightness (VIDEO signals) 0-63 Color On/Off... - Page 74 Appendix Network Setting Network setting Language 19 languages provided On/Off DHCP OSD setting Menu position On/Off Translucent IP address Background Color Subnet Auto setup On/Off Input search Gateway Auto PC adj. On/Off Auto Keystone On/Off Keystone Reset Keystone Cancel Store H/V Keystone Network information MAC address...
-
Page 75: Technical Specifications
Net Weight 9.98Kg Adjustable foot 5˚ LCD resolution LCD system 0.79" TFT, active matrix, 3-panel (EK-502X) 0.75" TFT active matrix, 3-panel (EK-501W) LCD resolution 1024X768 (EK-502X) /1280X800(EK-501W) Compatible signals Color standard PAL, SECAM, NTSC, NTSC4.43, PAL-M and PAL-N HDTV signal... - Page 76 Appendix Type Short Lens Short Zoom Lens Standard Lens Long Zoom Lens Long Zoom Lens Model Number AH-E22010 AH-E22020 AH-E21010 AH-E23010 AH-E23020 Zoom Fixed x1.3 Power zoom x1.8 Power zoom x1.35 Power zoom x1.36 Power zoom Iris (F) 2.0 - 2.6 1.8 - 2.6 2.2 - 2.8 2.2 - 2.8...
- Page 77 Appendix Dimensions Unit: mm Screw Holes for Ceiling Mount Screw: M6 Depth: 10.0 n 145.9 M6X10 181.3 221.3 371.3...
- Page 80 +420 241-403-095 Fax: +420 241-409-435 E-Mail: info@eiki.cz China South East Asia EIKI (Shanghai) Co., Ltd. EIKI Industrial (M) Sdn Bhd LAKESIDE OASIS MIDDLE RING No. 11, Nouvelle Industrial Park, BUSINESS CENTRE Lorong Teknologi B, Taman Sains Block 1,Room 606, Selangor 1, Kota Damansara PJU5,...
Need help?
Do you have a question about the EK-501W and is the answer not in the manual?
Questions and answers