Sign In
Upload
Manuals
Brands
Fuji Xerox Manuals
All in One Printer
ApeosPort-V C7775
Fuji Xerox ApeosPort-V C7775 Manuals
Manuals and User Guides for Fuji Xerox ApeosPort-V C7775. We have
4
Fuji Xerox ApeosPort-V C7775 manuals available for free PDF download: Administrator's Manual, User Manual, Quick Reference Notes
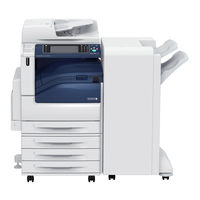
Fuji Xerox ApeosPort-V C7775 Administrator's Manual (771 pages)
Brand:
Fuji Xerox
| Category:
Printer
| Size: 35.64 MB
Table of Contents
Table of Contents
5
About the Machine
3
Change Overview of the Type 2 (T2) Model
3
Table of Contents
5
1 Before Using the Machine
17
Preface
18
Types of Manuals
19
Using this Guide
20
Organization of this Guide
20
Conventions
21
Interface Cables
23
Using the USB Interface
23
Using the Parallel Interface
24
Using the Ethernet Interface
25
Power Saver Mode
27
Changing the Interval for Entering Power Saver Mode
27
Deactivating Smart Welcomeyes
29
Customizing the Control Panel
31
Changing the Screen Default
31
Setting the Screen after Auto Clear
32
Customizing the Button Layout
33
Assigning Services to the Custom Buttons
37
Adjusting Screen Brightness
39
Touch Screen
40
Important Security Instructions (Type 2 (T2) Model Only)
42
Entering Text
43
2 Paper and Other Media
45
Paper Types
46
Loadable Quantity and Weight
47
Supported Paper
50
Usable Paper
52
Special Media
56
Loading Paper
62
Loading Paper in Trays 1 to 4
62
Loading Paper in Tray 3 (When Tandem Tray Module Is Installed)
63
Loading Paper in Tray 4 (When Tandem Tray Module Is Installed)
64
Loading Paper in Tray 5 (Bypass Tray)
65
Loading Paper in Tray 6 (HCF B1) (Optional)
66
Changing the Paper Size
68
Changing the Paper Size for Trays 1 to 4
68
Changing the Paper Size for Tray 3 (When Tandem Tray Module Is Installed)
69
Changing the Paper Size for Tray 4 (When Tandem Tray Module Is Installed)
70
Changing the Paper Size for Tray 6 (HCF B1) (Optional)
71
Changing the Paper Settings
74
3 Maintenance
77
Replacing Consumables
78
Replacing Toner Cartridges
80
Replacing Waste Toner Container R5
82
Replacing Drum Cartridges R1, R2, R3, or R4
85
(For Customers Having a Spot Maintenance Contract)
85
Replacing Staple Cartridge (for Finisher-A1)
89
Replacing Staple Cartridge (for Finisher-B1)
91
Replacing Staple Cartridge (for C3 Finisher or C3 Finisher with Booklet Maker)
92
Replacing Booklet Staple Cartridge (for Booklet Maker Unit for Finisher-B1)
94
Replacing Booklet Staple Cartridge (for C3 Finisher with Booklet Maker)
95
Emptying the Hole Punch Waste Container (for Finisher-B1)
97
Emptying the Hole Punch Waste Container (for C3 Finisher or C3 Finisher with Booklet Maker)
98
Replacing Stamp (for Duplex Automatic Document Feeder B1-C)
99
Replacing Stamp (for Duplex Automatic Document Feeder B1-PC)
101
Cleaning the Machine
102
Cleaning the Exterior
102
Cleaning the Interior (LED Printheads)
102
Cleaning the Touch Screen
104
Cleaning the Document Cover and Document Glass (for Duplex Automatic Document Feeder B1-C)
104
Cleaning Document Cover and Document Glass (for Duplex Automatic Document Feeder B1-PC)
105
Cleaning the White Chute and the Constant Velocity Transport Glass (for Duplex Automatic Document Feeder B1-C)
106
Cleaning White Chute and Constant Velocity Transport Glass (for Duplex Automatic Document Feeder B1-PC)
106
Cleaning the Document Feeder Rollers
108
Executing Calibration
109
Executing 2 Sided Color Scanning Calibration
112
Printing a Report/List
114
Deleting a Private Charge Print Job with an Invalid User ID
115
Setting Restore Tool
116
4 Machine Status
117
Overview of Machine Status
118
Machine Information
119
General Information
119
Paper Tray Status
120
Print Reports
120
Activity Report
121
Configuration Report
122
Printer Reports
122
Fax Reports
125
Automatically Printed Reports/Lists
129
Overwrite Hard Disk
130
Print Mode
130
Fax Receiving Mode
133
Press the <Machine Status> Button
133
Faults
134
Supplies
135
Billing Information
136
On the [Machine Information] Screen
136
User Account Billing Information
137
5 Tools
139
System Settings Procedure
140
Step 1 Entering System Administration Mode
140
Step 2 Entering the System Administrator User ID and Passcode
140
Step 3 Selecting [Tools]
141
Step 4 Selecting a Setting Item on the [Tools] Screen
141
Step 5 Setting a Feature
143
Step 6 Exiting System Administration Mode
143
Tools Menu List
144
Common Service Settings
160
Machine Clock/Timers
160
Time Zone
162
Power Saver Settings
163
Audio Tones
164
Screen/Button Settings
165
Default Language
167
Paper Tray Settings
170
Image Quality
173
Image Quality Adjustment
174
Reports
176
Maintenance
178
Delete All Data
179
Finisher Adjustment
179
Software Options
179
Software Upgrade
180
Watermark
181
Secure Watermark
183
Force Annotation
185
Print Universal Unique ID
186
Image Log Control (Apeosport Series Models Only)
187
Notify Job Completion by E-Mail
190
Other Settings
190
Plug-In Settings
190
Default Print Paper Size
191
Software Download
203
Copy Service Settings
205
Copy Tab - Features Allocation
205
Copy Defaults
206
Preset Buttons
206
Copy Output
210
Image Rotation
210
Original Orientation
210
Output Destination
210
Copy Control
212
Annotations - Create Comments
214
Custom Colors
214
Original Size Defaults
214
Reduce/Enlarge Presets
214
Connectivity & Network Setup
215
Port Settings
215
Upnp Discovery
219
Protocol Settings
221
Machine's E-Mail Address/Host Name
225
Proxy Server Settings
226
EP Proxy Server Setup
227
SIP Settings
228
Outgoing/Incoming E-Mail Settings
231
T.38 Settings
231
Remote Authentication/Directory Service
233
Authentication Method
234
Security Settings
238
Other Settings
243
Print Service Settings
244
Allocate Memory
244
Delete Form
245
Other Settings
246
Paper Type Mismatch
247
Print User ID
248
Banner Sheet
248
Scan Service Settings
251
Screen Defaults
251
Scan Defaults
252
Scan to PC Defaults
255
Original Size Defaults
255
Output Size Defaults
256
Reduce/Enlarge Presets
256
Other Settings
256
Color Space
257
Fax Service Settings
260
Screen Defaults
260
Fax Defaults
261
Fax Control
262
Fax Received Options
268
Local Terminal Information
270
Original Size Defaults
270
Reduce/Enlarge Presets
270
Internet Fax Control
272
E-Mail/Internet Fax Service Settings
275
E-Mail Control
275
Address Book Settings
278
Folder Service Settings
279
Job Flow Service Settings (Apeosport Series Models Only)
281
Media Print Service Settings
282
Stored File Settings
283
Web Applications Service Setup (Apeosport Series Models Only)
286
Server Certificate Verification Settings
286
Server Setup
288
Other Settings
289
Web Browser Setup
290
Setup
292
Create Folder
292
Stored Programming
294
Create Job Flow Sheet
294
Create Job Flow Sheet Keyword
303
Add Address Book Entry
303
Address Type
305
Fax Number
308
Relay Broadcast
309
Create Fax Group Recipients
311
Add Fax Comment
312
Paper Tray Attributes
312
Accounting
313
Create/View User Accounts
313
User Name
314
View Accounts
316
Reset User Accounts
317
Accounting Type
318
System Administrator's Meter (Copy Jobs)
318
Accounting Login Screen Settings
319
Accounting/Billing Device Settings
320
Fax Billing Data
320
Authentication/Security Settings
323
System Administrator Settings
323
Authentication
324
Access Control
325
Allow User to Disable Active Settings
332
Job Status Default
332
Overwrite Hard Disk
333
6 Centreware Internet Services Settings
335
Installation of Centreware Internet Services
336
Preparations
336
Configuration on the Machine
336
Starting Centreware Internet Services
338
Configuring Machine Settings Using Centreware Internet Services
339
7 Printer Environment Settings
343
Print Overview
344
Supported Operating Systems
345
Installation When Using Parallel Port
346
Step 1 Preparations
346
Step 2 Configuration on the Machine
346
Step 3 Configuration on the Computer
347
Centreware Internet Services Setting Items
347
Installation When Using USB Port
349
Step 1 Preparations
349
Step 2 Configuration on the Machine
349
Step 3 Configuration on the Computer
350
Centreware Internet Services Setting Items
350
Installation When Using TCP/IP (Lpd/Port 9100)
351
Step 1 Preparations
351
Step 2 Configuration on the Machine
351
Step 3 Configuration on the Computer
352
Centreware Internet Services Setting Items
352
Installation When Using Internet Printing Protocol (IPP)
354
Step 1 Preparations
354
Step 2 Configuration on the Machine
354
Step 3 Configuration on the Computer
355
Centreware Internet Services Setting Items
355
8 E-Mail Environment Settings
357
E-Mail Overview
358
Preparations
359
Installation Procedures
361
Step 1 Enabling Port and Setting up TCP/IP
361
Step 2 Configuring E-Mail Environment
362
Centreware Internet Services Setting Items
363
9 Scanner Environment Settings
365
Scan Service Overview
366
WSD Stands for Web Services on Devices
366
Configuration of Store to Folder
368
Step 1 Enabling Port and Setting up TCP/IP
368
Step 2 Registering a Folder
369
Step 3 Configuring on the Computer
369
Configuration of Scan to PC
370
Step 1 Preparations
370
Step 2 Enabling Port and Setting up TCP/IP
371
Step 3 Configuration on the Computer
372
Configuration of Store to USB
373
Step 1 Available USB Memory Devices
373
Step 2 Centreware Internet Services Setting Items
373
Configuration of Network Scanning (Job Template Scanning)
374
Step 1 Preparations
374
Step 2 Enabling Ports and Setting up TCP/IP
374
Step 3 Configuring the SNMP Port
375
Step 4 Configuration on the Computer
375
Configuration of Scan to My Folder (Apeosport Series Models Only)
377
Step 1 Preparations
377
Step 2 Enabling SMB Port and Setting up TCP/IP
378
Step 3 Configuring Remote Authentication
378
Step 4 Configuring Scan to My Folder
380
Step 5 Configuration on the Computer
381
Configuration of Job Flow Sheets
382
Step 1 Enabling Ports and Setting up TCP/IP
382
Step 2 Configuring the SNMP Port
383
Step 3 Configuration on the Computer
383
Configuration of Store & Send Link
384
Step 1 Configuring E-Mail
384
Step 2 Enabling Authentication
384
Step 3 Other Settings
384
Step 4 Centreware Internet Services Setting Items
384
Device Information
385
Configuration of Store to WSD
386
Step 1 Preparations
386
Step 2 Enabling Port
386
Step 3 Confirmation on the Computer
387
10 Using IP Fax (SIP)
389
IP Fax (SIP) Overview
390
Preparations
390
System Requirements for the Machine
390
Settings by System Configuration
390
Installation Procedures
391
Step 1 Enabling Port and Setting up TCP/IP
391
Step 2 Configuring the SIP User Name
392
Step 3 Configuring Fax Environment
392
Step 4 Configuring the SIP Server
393
Step 5 Registering the Voip Gateway
394
11 Using the Internet Fax Service
397
Internet Fax Overview
398
Preparations
398
System Requirements for the Machine
398
E-Mail Environment
398
Installation Procedures
400
Step 1 Enabling Port and Setting up TCP/IP
400
Step 2 Configuring E-Mail Environment
401
Step 3 Testing the Internet Fax
402
12 Using the Server Fax Service
403
Server Fax Overview
404
Preparations
404
System Requirements for the Machine
404
Installation Procedure
405
Installation Overview
405
Step 1 Fax Settings
405
Step 2 Setting the Server Fax Feature
406
13 Encryption and Digital Signature Settings
409
Encryption and Digital Signature Overview
410
Types of Certificate
410
Encryption Features for Communication
410
Encryption and Digital-Signature Features for Scan Files
411
Configuration of HTTP Communications Encryption
412
Installation Overview
412
Step1 Configuration on the Machine
412
Step2 Configuration on the Computer
413
Configuration of Encryption Using Ipsec
414
Installation Overview
414
Step1 Import and Configuration of a Certificate
414
Step2 Configuration on the Machine (Configuration of Ipsec)
415
Step3 Configuration on the Computer
416
Configuration of E-Mail Encryption/Digital Signature
417
Installation Overview
417
Step1 Configuration on the Machine
417
Step2 Configuration on Sender and Recipient
419
Configuration of Pdf/Docuworks/Xps Signature (Apeosport Series Models Only)
421
Installation Overview
421
Step1 Configuration on the Machine
421
Step2 Configuration on the Computer
423
14 Authentication and Accounting Features
425
Note
426
Access Control
427
Types of Authentication
428
Types of Account Administration
429
Overview of Authentication and Accounting Feature
426
Types of User
426
User Roles and Authorization Groups
426
Services Controlled by Authentication
434
Overview
434
Combination of Authentication and Account Administration Types
434
Authentication for Job Flow Sheets and Folders
437
Creating / Using Job Flow Sheet
437
Creating / Using Folder
438
Configuration for Authentication
440
Installation Overview
440
Enabling Authentication
440
Changing the Default Authorization Group Settings
443
Creating an Authorization Group
443
Configuration for IC Card Reader (Optional)
445
Step 1 Preparations
445
Step 2 Logout Method Using the Smart Card
445
Step 3 Registering Smart Card Information
446
Configuration for Account Administration
447
Step 1 Selecting an Accounting Type
447
Step 2 Registering User Information
447
User Authentication Operations
449
Authenticating Login Users
449
Changing Passcode
450
15 Problem Solving
451
Troubleshooting
452
Machine Trouble
453
Image Quality Trouble
458
Trouble During Copying
464
Unable to Copy
464
The Copy Result Is Not What was Expected
465
Trouble During Printing
468
Unable to Print
468
The Print Result Is Not What was Expected
469
Trouble During Faxing
471
Sending Problems
471
Receiving Problems
475
Trouble During Scanning
479
Unable to Scan with the Machine
479
Unable to Import Scanned Documents to the Computer
480
Unable to Send a Scanned Document over the Network (FTP/SMB)
481
Unable to Send E-Mail
482
The Image Is Not What was Expected
482
Network-Related Problems
484
When You Cannot Communicate with Other SMB Machines
484
When Using TCP/IP
484
Centreware Internet Services Problems
485
E-Mail Features Problems
486
Internet/Intranet Connection Problems
487
Ipv4 and Ipv6 Connection Problems
489
Media Print - Text Trouble
492
Media Print - Photos Trouble
493
Error Code
494
Other Errors
593
Paper Jams
594
Paper Jams in Top Left Cover a
595
Paper Jams in Bottom Left Cover C
596
Paper Jams in Top Left Cover D
596
Paper Jams in Trays 1 to 4
597
Paper Jams in Tray 3 (When Tandem Tray Module Is Installed)
598
Paper Jams in Tray 4 (When Tandem Tray Module Is Installed)
598
Paper Jams in Tray 5 (Bypass Tray)
599
Paper Jams in Tray 6 (HCF B1) (Optional)
600
Paper Jams in Duplex Module B
602
Paper Jams in Finisher-A1
602
Paper Jams in Finisher-B1
603
Paper Jams in the Center Unit 1
604
Paper Jams in C3 Finisher / C3 Finisher with Booklet Maker
604
Paper Jams in the Center Tray
604
Paper Jams in the Finisher Transport
605
Paper Jams at the Handle [3A]
606
Paper Jams at the Handle [3A] (Using the Knob [3B])
606
Paper Jams at the Handle [3C]
607
Paper Jams at the Handle [3D]
608
Paper Jams at the Handle [3D] (When the Paper Is Ejected at the Output Area)
609
Paper Jams in the Booklet Unit [4] (for C3 Finisher with Booklet Maker)
609
Paper Jams in the Booklet Tray [4A] (for C3 Finisher with Booklet Maker)
610
Paper Jams in the Folder Unit CD1
611
Document Jams
615
Duplex Automatic Document Feeder B1-C
615
Duplex Automatic Document Feeder B1-PC (Optional)
616
Stapler Faults
619
Staple Jams in Staple Cartridge (for Finisher-A1)
620
Staple Jams in Staple Cartridge (for Finisher-B1)
621
Staple Jams in Staple Cartridge (for C3 Finisher and C3 Finisher with Booklet Maker)
623
Booklet Staple Jams in Booklet Staple Cartridge (for C3 Finisher with Booklet Maker)
624
16 Appendix
627
Specifications
628
Printable Area
653
Standard Printable Area
653
Extended Printable Area
653
Internal Fonts
654
Optional Components
656
Fold Position Adjustment
659
Single Fold Position Adjustment
660
Booklet Position Adjustment
661
C Fold Position Adjustment
663
Z Fold Position Adjustment
664
Z Fold Half Sheet Position Adjustment
665
Adjust Image Transfer
667
ESC/P-K Emulation
670
Fonts
671
ESC/P-K Emulation Settings
672
Magnification Table
678
Paper Size and Number of Printable Characters
683
PDF Direct Print
685
Docuworks Direct Print
687
PCL Emulation
689
Fonts
690
Output Feature
691
HP-GL/2 Emulation
697
Output Feature
698
HP-GL/2 Emulation Settings
699
Basic Settings
700
Hard Clip Area
705
Printable Area
706
Auto Layout
708
Notes and Restrictions
715
Notes and Restrictions on the Use of the Copy Feature
720
Notes and Restrictions on the Use of the Print Feature
721
Notes and Restrictions on the Use of the Scan Features
724
Notes and Restrictions on the Use of the Fax Feature
730
Notes and Restrictions on the Use of the E-Mail/Internet Fax Feature
731
Notes and Restrictions for IP Fax (SIP)
736
Notes and Restrictions When Connecting with Internet Service Provider
738
Notes and Restrictions on the Interrupt Mode
740
Notes and Restrictions on Folders
742
Notes and Restrictions When Operating from Computers
743
Notes and Restrictions on Job Flows
744
Notes and Restrictions on the Security Features
745
Notes and Restrictions on the Authentication and Accounting Features
746
Notes and Restrictions for Using TCP/IP
747
Type 2 (T2) Model Only)
748
Notes and Restrictions for Using Bonjour
749
Notes and Restrictions for Print E-Mail
751
Using the Telephone
752
Activity Report
754
EP System
758
Glossary
759
Index
761
Advertisement
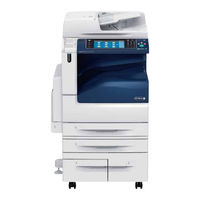
Fuji Xerox ApeosPort-V C7775 User Manual (463 pages)
Brand:
Fuji Xerox
| Category:
All in One Printer
| Size: 21.1 MB
Table of Contents
Table of Contents
5
Table of Contents
3
Table of Contents
5
Before Using the Machine
13
Preface
14
Types of Manuals
15
Using this Guide
16
Organization of this Guide
16
Conventions
17
Safety Notes
19
Electrical Safety
20
Machine Installation
21
Operational Safety
26
Location of Warning and Caution Labels
29
Consumable
30
Regulation
31
Others
31
Radio Frequency Emissions (Class B)
31
Regulatory Information for RFID
31
Environment
32
About License
33
Heimdal
33
JPEG Code
33
Libcurl
33
Rsa Bsafe
33
Freebsd
34
About License
35
Openldap
35
Des
36
Aes
37
EDICT and COMPDIC
37
ICC Profile (Little Cms)
37
TIFF (Libtiff)
37
XML Paper Specification (XPS)
37
Cyrus SASL
38
About QT
39
Lgpl2.1
39
Other Licenses
47
Legal Notice
48
2 Product Overview
49
Machine Components
50
Power Source
61
Switching the Main Power on
61
Switching the Power on
61
Switching the Power off
62
Switching the Main Power off
63
Circuit Breaker
64
Energy Saver Mode
66
Entering the Energy Saver Mode
66
Exiting the Energy Saver Mode
67
Smart Welcomeyes
67
Control Panel
68
Control Panel
70
Exiting the Energy Saver Mode
71
Large Size Color UI
72
Screens and Buttons Displayed
75
About the Services Home Screen
76
Message Field
76
Login Information Field
77
Service Buttons
77
Touch Screen
77
Print Mode
80
Touch Screen
81
Entering Text
83
Installing the Tray Attachment on the Finisher-B1
84
Copy
85
Copying Procedure
86
Document Feeder
86
Step 1 Loading Documents
86
Document Glass
87
Step 2 Selecting Features
88
Step 3 Entering a Quantity
89
Step 4 Starting the Copy Job
90
Step 5 Confirming the Copy Job in Job Status
91
Operations During Copying
92
Stopping the Copy Job
92
Changing the Number of Copies
93
Interrupting the Copy Job
94
Simple Copy
95
Paper Supply (Selecting the Paper for Copying)
95
Reduce/Enlarge (Making Enlarged/Reduced Copies)
96
Auto / Color / Black & White (Selecting the Color for Copying)
97
Sided Copying (Making 2 Sided Copies)
97
Simple Copy
97
Lighten/Darken (Adjusting the Copy Density)
98
Pages Per Side (Copying Two Pages Onto One Sheet)
98
Staple
99
Copy
100
Reduce/Enlarge (Making Enlarged/Reduced Copies)
100
Paper Supply (Selecting the Paper for Copying)
100
Step 1 Loading Documents
101
Paper Supply (Selecting the Paper for Copying)
103
Adjust Paper Curl
105
Paper Size
105
Paper Type
105
Output Color (Selecting the Color for Copying)
106
Sided Copying (Making 2 Sided Copies)
110
Copy Output (Specifying Finishing Options)
110
Pages Per Side (Copying Multiple Pages Onto One Sheet)
111
Lighten/Darken (Adjusting the Copy Density)
111
Image Quality
112
Original Type (Selecting the Document Type)
112
Image Options (Adjusting Copy Density/Sharpness/Saturation of Images)
113
Image Enhancement
114
(Erasing the Background Color of Documents/Adjusting Contrast)
114
Color Effects (Selecting an Image Quality)
115
Color Balance (Adjusting Color Balance)
116
Color Shift (Adjusting the Color Tone)
117
Layout Adjustment
118
Sided Copying (Making 2 Sided Copies)
118
Book Copying (Copying Facing Pages Onto Separate Sheets)
120
Sided Book Copying (Making 2 Sided Copies of Facing
121
Original Size (Specifying the Scan Size for the Document)
122
Mixed Size Originals (Scanning Different Size Documents Simultaneously)
123
Edge Erase (Erasing Edges and Margin Shadows of the Document)
124
Image Shift (Adjusting the Image Position)
126
Invert Image (Making Reversed Copies of Images)
128
Image Rotation (Changing the Orientation of Images)
129
Original Orientation (Specifying the Orientation of Loaded Documents)
129
Output Format Output Format
131
Output Format
131
Sided Copying (Making 2 Sided Copies)
131
Select [Copy] on the Services Home Screen
131
Booklet Creation (Creating a Bound Booklet)
132
Covers (Attaching Covers to Copies)
135
Pages Per Side (Copying Multiple Pages Onto One Sheet)
136
Poster (Making Enlarged Copies Spread over Multiple Sheets)
137
Repeat Image (Making Multiple Copies on One Sheet)
138
Annotations (Adding a Comment/A Date/Page Numbers to Copies)
139
Watermark (Printing Control Numbers on the Background of Copies)
144
Secure Watermark (Managing Document Security)
147
Folding (Outputting Bi-Folded/Tri-Folded Paper)
149
Preset Repeat Image (Making Multiple Copies on a Single Sheet)
150
Transparency Options (Inserting Blank Sheets between Transparencies)
151
Copy Output (Specifying Finishing Options)
152
Separator Tray
152
Handout Tray
152
ID Card Copy (Copying both Sides of an ID Card)
156
Job Assembly
158
Build Job
158
(Processing Documents Scanned with Different Settings as One Job)
158
Select [Copy] on the Services Home Screen
158
Booklet Creation (Creating a Bound Booklet)
159
Job Assembly
160
Sample Job (Checking the Finished Output of the Copy)
162
Combine Original Sets (Adding Originals)
163
Delete Outside/Delete Inside (Deleting Outside or Inside of the Selected Area)
164
Stored Programming (Calling a Stored Program for Build Job)
166
Fax
169
Fax Procedure
170
Step 1 Loading Documents
170
Step 2 Selecting Features
172
Step 3 Specifying Destinations
173
Step 4 Starting the Fax Job
175
Step 5 Confirming the Fax Job in Job Status
176
Operations During Faxing
177
Stopping the Fax Job
177
Previewing the Read Images During a Fax Job
178
Changing the Scan Settings
180
About Internet Fax
182
Internet Fax Features
182
Sending Internet Fax
182
Sending Internet Fax
184
Receiving Internet Fax
185
Useful Features
186
About IP Fax (SIP)
189
IP Fax (SIP) Features
190
Feature Comparison with Regular Fax
192
Sending IP Fax (SIP)
192
Receiving IP Fax (SIP)
193
About Server Fax
194
Sending Server Fax
194
Simple Fax
196
Specifying a Destination Using the Numeric Keypad
196
Speed Dialing (Specifying a Destination Using an Address Number)
197
Specifying a Destination Using a One Touch Button
198
Previewing the Read Images During a Simple Fax Job
198
Resolution (Specifying the Scanning Resolution)
199
Original Type (Selecting the Document Type)
199
Sided Scanning (Transmitting 2-Sided Originals)
200
Fax/Internet Fax
201
Internet Fax / Fax / IP Fax (SIP) (Selecting Internet Fax / Fax / IP Fax (SIP))
201
Add (Sending Faxes to Multiple Recipients)
202
Specifying a Destination Using the Address Book
202
Address Book (Specifying a Destination Using the Address Book [Type 1])
203
Address Book (Specifying a Destination Using the Address Book [Type 2])
206
List All Public Entries
206
Speed Dialing (Specifying a Destination Using an Address Number)
207
Add New Address (Registering a Destination on the Address Book)
208
Specifying a Destination Using a One Touch Button
210
Specifying a Destination Using the Keyboard Screen
211
Specifying a Destination Using the Redial Feature
212
Specifying a Line (Port)
212
Entering Specific Symbols
214
Removing/Confirming a Recipient
214
Lighten/Darken (Adjusting Fax Density)
215
Previewing the Read Images During a Fax/Internet Fax Job
215
Sided Scanning (Transmitting 2-Sided Originals)
216
Original Type (Selecting the Document Type)
217
Resolution (Specifying the Scanning Resolution)
218
Layout Adjustment
219
Sided Scanning (Transmitting 2-Sided Originals)
219
Original Type (Selecting the Document Type)
219
Resolution (Specifying the Scanning Resolution)
219
Mixed Size Originals (Scanning Different Size Documents Simultaneously)
220
Book Faxing (Scanning Facing Pages Onto Separate Sheets)
221
Reduce/Enlarge (Specifying a Scan Ratio)
222
Stamp (Adding a Stamp When Scanning a Document)
223
Fax/Internet Fax Options
225
Acknowledgement Report (Confirming Transmission Results)
225
Starting Rate (Selecting a Communication Mode)
227
Priority Send/Delay Start (Specifying Send Priority/Send Time)
228
Delay Start
229
Priority Send
229
Cover Page (Transmitting Documents with a Cover Page)
230
Transmission Header Text (Adding Sender Name and Phone Number to Faxes)
230
Internet Fax Message (Editing the Internet Fax Mail Contents)
232
Internet Fax Subject (Specifying the Internet Fax Subject)
232
Recipient Print Sets (Printing Multiple Sets at the Remote Machine)
233
Pages Per Side (Combining Multiple Pages into One Sheet)
234
Remote Folder (Using Remote Folder)
234
F Code (Using F Code Transmission)
237
Internet Fax Profile (Specifying Internet Fax Profiles)
240
Digital Signature (Sending Internet Fax with a Digital Signature by S/MIME)
242
Encryption (Sending Internet Fax Encrypted by S/MIME)
242
More Options
243
Remote Polling (Retrieving Files from Remote Machines)
243
Select [Fax/Internet Fax] on the Services Home Screen
243
Store for Polling
245
(Storing Files on the Machine that a Remote Machine Can Retrieve)
245
On-Hook (Confirming Remote Machine Response Prior to Transmission)
247
Line Cut
248
Broadcast
249
Broadcast Send (Transmitting to Multiple Recipients)
249
Relay Broadcast (Transmitting Documents through a Relay Station)
250
Fax Signal Method
251
F Code Method
252
Remote Relay Broadcast (Performing Relay Broadcast to Remote Locations)
253
Receiving Faxes
257
Switching between Auto Receive and Manual Receive
257
Using Auto Receive
258
Using Manual Receive
258
Using Folder Receive
258
Facsimile Information Services
260
Using the Receiver
260
When Not Using a Receiver
260
Scan
263
Scanning Procedure
264
Step 1 Loading Documents
264
Step 2 Selecting the Features
266
Step 3 Starting the Scan Job
269
Step 4 Confirming the Scan Job in Job Status
270
Step 5 Saving the Scanned Data
271
Operations During Scanning
272
Stopping the Scan Job
272
Previewing the Scanned Images During a Scan Job
273
Changing Scan Settings
276
E-Mail
277
Address Book
278
Address Book (Specifying a Destination Using the Address Book [Type 1])
278
Address Book (Specifying a Destination Using the Address Book [Type 2])
281
Search Network
282
Search Public
282
Add New Address (Registering a Recipient on the Address Book)
284
Specifying a Destination Using a One Touch Button
285
New Recipient (Specifying an E-Mail Address)
286
Add Me (Adding the Sender's Address)
287
Recipient(S) (Editing a Recipient)
288
From (Setting the Sender's Address)
289
Color Scanning (Selecting an Output Color)
290
Message (Entering the E-Mail Body)
290
Preview (Previewing the Scanned Images During a Scan Job)
290
Subject (Setting the Subject)
290
Sided Scanning (Scanning both Sides of a Document)
291
Original Type (Selecting the Document Type)
292
File Format (Selecting a File Format for Output Data)
293
Specific Color
296
Language of the Original
298
Network Scanning
305
Preview (Previewing the Scanned Images During a Scan Job)
306
Color Scanning (Selecting an Output Color)
306
Original Type (Selecting the Document Type)
306
File Format (Selecting a File Format for Output Data)
306
Scan to PC
307
Transfer Protocol (Selecting a Transfer Protocol)
308
Address Book
308
Address Book (Specifying a Destination Using the Address Book [Type 1])
309
Address Book (Specifying a Destination Using the Address Book [Type 2])
310
Add New Address (Registering a Destination PC on the Address Book)
311
Specifying a Destination PC Using a One Touch Button
313
Browse (Specifying a Destination PC by Browsing Your Network)
314
Specifying a Destination (Specifying a Destination PC Using the Screen Keyboard)
315
Shared Name
316
Preview (Previewing the Scanned Images During a Scan Job)
317
Color Scanning (Selecting an Output Color)
317
Sided Scanning (Scanning both Sides of a Document)
317
Original Type (Selecting the Document Type)
317
File Format (Selecting a File Format for Output Data)
318
Store to Folder
319
Color Scanning (Selecting an Output Color)
319
Sided Scanning (Scanning both Sides of a Document)
320
Original Type (Selecting the Document Type)
320
Preview (Previewing the Scanned Images During a Scan Job)
320
Store to USB
321
Save in (Specifying a Storage Location in the USB Memory Device)
325
Details (Displaying the Details of a Storage Location in the USB Memory Device)
325
Preview (Previewing the Scanned Images During a Scan Job)
326
Color Scanning (Selecting an Output Color)
326
Sided Scanning (Scanning both Sides of a Document)
326
Original Type (Selecting the Document Type)
326
File Format (Selecting a File Format for Output Data)
326
Store & Send Link
328
Scan to (Displaying the E-Mail Address of the Authenticated User)
328
From (Displaying the E-Mail Address of the Authenticated User)
329
Color Scanning (Selecting an Output Color)
329
Message (Entering the E-Mail Body)
329
Original Type (Selecting the Document Type)
329
Preview (Previewing the Scanned Images During a Scan Job)
329
Sided Scanning (Scanning both Sides of a Document)
329
Subject (Setting the Subject)
329
File Format (Selecting a File Format for Output Data)
330
Store to WSD
331
Computer (Starting a Scan Job Via Computer Operation)
331
This Device (Storing Data Scanned by the Machine on a Network Computer)
332
Advanced Settings
334
Color Scanning (Selecting an Output Color)
334
Original Type (Selecting the Document Type)
334
Image Options (Adjusting Scan Density and Image Sharpness)
335
Photographs (Scanning a Color Photograph)
335
(Erasing the Background Color of Documents/Adjusting Contrast)
336
Image Enhancement
336
Image Enhancement (Erasing the Background Color of Documents/Adjusting Contrast)
336
Color Space (Specifying the Color Space)
337
Shadow Suppression (Suppressing the Document Background)
336
Layout Adjustment
338
Resolution (Specifying a Scanning Resolution)
338
Sided Scanning (Scanning both Sides of a Document)
339
Book Scanning (Scanning Facing Pages on Separate Sheets)
339
Original Size (Specifying a Scan Size)
340
Mixed Size Originals (Scanning Different Size Documents Simultaneously)
341
Edge Erase (Erasing Edges and Margin Shadows in the Document)
342
Reduce/Enlarge (Specifying a Scanning Ratio)
343
Original Orientation (Specifying the Orientation of the Loaded Document)
344
E-Mail Options/Filing Options
345
On the Services Home Screen, Select [E-Mail], [Store to Folder], [Network Scanning], [Scan to PC], [Store & Send Link], or [Store to USB]
345
Quality/File Size (Specifying an Image Compression Ratio When Scanning)
345
File Format (Selecting a File Format for Output Data)
346
Read Receipts (Specifying Read Receipts)
346
File Name (Specifying a Name for the File to be Sent)
347
Split Send (Sending in Sections)
347
File Name Conflict (Setting the Action to be Taken for File Name Conflict)
348
Reply to (Specifying a Reply Address)
348
Encryption (Sending E-Mail Encrypted by S/MIME)
349
File Name (Specifying a Name for the File to be Saved)
349
Digital Signature (Sending E-Mail with a Digital Signature by S/MIME)
350
Login Name
350
Meta Data
350
Password
350
6 Send from Folder
351
Folder Operating Procedure
352
Step 1 Opening the [Send from Folder] Screen
352
Step 2 Selecting a Folder
352
Step 3 Checking/Selecting Files in a Folder
353
Step 4 Operating Files in a Folder
353
Selecting a Folder
354
Checking/Operating Files in a Folder
355
Checking File Details
357
Printing Files in a Folder
360
Batch Print
361
Configuring/Starting Job Flow
363
[Link Job Flow Sheet to Folder] Screen
364
Job Flow Restrictions
367
Job Flow Sheets (Apeosport Series Models Only)
369
Job Flow Procedure
370
Step 1 Opening the [Job Flow Sheets] Screen
370
Step 2 Selecting a Job Flow Sheet
370
Step 3 Confirming/Changing the Job Flow Sheet
371
Step 4 Starting the Job Flow Sheet
371
Selecting/Changing a Job Flow Sheet
372
Stored Programming
375
Stored Programming Overview
376
Registering/Deleting/Renaming Stored Programs
377
Notes and Restrictions on Registering Stored Programs
378
Registering Stored Programs
378
Deleting Stored Programs
380
Registering Stored Programs for Build Job
380
Assigning/Changing Icons for Stored Programs
381
Entering/Changing a Stored Program Name
381
Calling a Stored Program
383
Calling a Stored Program for Build Job
384
Web Applications (Apeosport Series Models Only)
385
Web Applications Overview
386
Accessing Web Applications
387
Accessing Using Buttons Registered on the Services Home Screen
388
Media Print (Text and Photos)
390
Overview of Media Print
390
Notes and Restrictions on Media Print
391
Supported Media and File Formats
391
Inserting USB Memory Device
393
Media Print - Text
396
Selecting Files
396
[Select from List] Screen
396
Media Print - Photos
398
Selecting Files
398
[Select from List] Screen
399
Selecting the Printing Options
400
Media Print - Photos
400
Media Print - Text
401
Index Print
402
Fuji Xerox ApeosPort-V C7775 User Manual (12 pages)
Digital Color Multifunction Device
Brand:
Fuji Xerox
| Category:
All in One Printer
| Size: 4.76 MB
Advertisement
Fuji Xerox ApeosPort-V C7775 Quick Reference Notes (5 pages)
Daily Care
Brand:
Fuji Xerox
| Category:
Printer
| Size: 0.59 MB
Advertisement
Related Products
Fuji Xerox ApeosPort-V C3376
Fuji Xerox ApeosPort-V 7080
Fuji Xerox ApeosPort-V 6080
Fuji Xerox ApeosPort-V C7780
Fuji Xerox ApeosPort-V C6680
Fuji Xerox ApeosPort-V C5580
Fuji Xerox apeosport-v c5585
Fuji Xerox ApeosPort-V 3060
Fuji Xerox ApeosPort-V 2060
Fuji Xerox ApeosPort-V 3065
Fuji Xerox Categories
All in One Printer
Printer
Copier
Scanner
Office Equipment
More Fuji Xerox Manuals
Login
Sign In
OR
Sign in with Facebook
Sign in with Google
Upload manual
Upload from disk
Upload from URL