Furuno FEA-2107-BB Operator's Manual
Electronic chart display and information system (ecdis)
Hide thumbs
Also See for FEA-2107-BB:
- Operator's manual (664 pages) ,
- Operator's manual (620 pages) ,
- Installation manual (168 pages)
Table of Contents
Advertisement
Quick Links
Download this manual
See also:
Installation Manual
Advertisement
Table of Contents
Troubleshooting

Related Manuals for Furuno FEA-2107-BB


Summary of Contents for Furuno FEA-2107-BB
- Page 1 OPERATOR'S MANUAL Electronic Chart Display and Information System (ECDIS) FEA-2107 FEA-2107-BB FEA-2807 MODEL (Applicable to program version no. 05.52) www.furuno.co.jp...
- Page 2 *00017269810* *00017269810* *00017269810* *00017269810*...
- Page 3 Electronics Industries Alliance (http://www.eiae.org/) for the correct method of disposal. How to discard a used battery Some FURUNO products have a battery(ies). To see if your product has a battery(ies), see the chapter on Maintenance. Follow the instructions below if a battery(ies) is used.
- Page 4 A warning label is attached to the processor on the top of the equipment. unit. Do not remove the label. If the label is missing or damaged, contact a FURUNO agent Fire or electrical shock can result if a or dealer about replacement.
-
Page 5: Table Of Contents
Table of Contents Foreword ..............................xv Introduction............................. 1-1 Manual Contents........................... 1-1 System Configuration........................... 1-2 1.2.1 Single workstation........................1-2 1.2.2 Multiple workstation configuration..................1-3 The Processor Unit ..........................1-4 Turning the Power On/Off........................1-4 How to Find Version Number of ECDIS Software ................1-4 Diagnostics ............................ - Page 6 Table of Contents Setting Chart Alarm Calculation ......................6-2 Creating or Updating a Route .......................6-2 6.6.1 Checking your route against chart alarms.................6-2 6.6.2 Recalculating timetable and ETA values..................6-3 Checking and Preparing Route to Monitor ...................6-4 6.7.1 Choosing TO waypoint ......................6-5 6.7.2 Choosing final waypoint ......................6-5 6.7.3 Confirming checked conditions of the route plan..............6-5...
- Page 7 Table of Contents RENC Security System ........................8-60 8.9.1 Standard messages in S57 chart load ..................8-60 8.9.2 Additional messages in S57 chart load .................. 8-60 8.9.3 Standard messages in S57 SENC conversion ................ 8-62 8.9.4 Additional messages in S57 SENC conversion ..............8-63 8.10 Vector Chart Display ..........................
- Page 8 Table of Contents 9.5.7 Controlling visible navigation features...................9-42 9.5.8 Storing and recalling chart display settings for visible chart and navigational features ..9-46 10. Manual Updates ..........................10-1 10.1 Introduction ............................10-1 10.2 Symbols to Use with Manual Updates ....................10-2 10.3 Displaying Manual Updates ........................10-2 10.3.1 Controlling visibility of orange symbols from manual updates..........10-2 10.3.2 Controlling visibility of true symbols from manual updates..........10-3 10.4...
- Page 9 Table of Contents 13.5.8 Importing waypoint from external device (GP-80 or GP-90) ..........13-15 13.5.9 Reversing sailing order of a route..................13-16 13.5.10 Geometry check of route..................... 13-16 13.6 Route Optimization .......................... 13-16 13.6.1 Available route optimization strategies ................13-16 13.6.2 Optimizing a route ......................
- Page 10 Table of Contents 17. Backup Operations........................17-1 17.1 Introduction ............................17-1 17.2 Choosing Appropriate File Category ....................17-2 17.3 Copying a File .............................17-2 17.4 Renaming a File ..........................17-2 17.5 Backing up a File to a Floppy Disk.....................17-3 17.6 Restoring a File from a Floppy Disk....................17-3 17.7 Deleting a File .............................17-3 17.8...
- Page 11 Table of Contents 20.3 Source of ARPA Radar Targets......................20-4 20.3.1 ARPA-related alarms ......................20-4 20.4 Displaying ARPA Target Past Positions ..................... 20-5 20.5 ARPA Target Recording Functions..................... 20-6 20.6 Using ARPA Targets for Chart Align....................20-6 21. AIS Target Functions........................21-1 21.1 Introduction ............................
- Page 12 27.3 Modes for Conning Display ......................27-13 27.3.1 Choosing mode for conning display..................27-13 27.3.2 Choosing background color of conning display..............27-13 27.3.3 Changing color palette of conning display................27-13 28. Steering with FURUNO Autopilot FAP-2000................28-1 28.1 Introduction ............................28-1 28.2 Steering Modes............................28-1 28.2.1 Hand steering.........................28-2 28.2.2 Autopilot FAP-2000 steering ....................28-2...
- Page 13 Table of Contents 28.5 Automatic Route Steering ........................28-8 28.5.1 "Goto waypoint" mode ......................28-9 28.5.2 "Goto track" mode ......................28-10 28.5.3 Summary of automatic route steering modes ..............28-10 28.5.4 Preconditions for automatic route steering ................. 28-11 28.5.5 How to activate automatic route steering ................28-12 28.5.6 Arriving to a waypoint ......................
- Page 14 Table of Contents 29.7 Expected Steering Performance Under Various Conditions .............29-12 29.7.1 Expected steering performance for going ahead ..............29-12 29.7.2 Expected steering performance for turns................29-13 29.8 Expected Steering Performance Under Critical Failure..............29-14 29.8.1 Lost heading from autopilot (ECDIS may also have lost heading)........29-14 29.8.2 Lost heading from ECDIS (Autopilot still has heading).............29-15 29.8.3 Lost speed ..........................29-16 29.8.4 Low speed..........................29-17...
- Page 15 Table of Contents 30.10 How to use the Curved EBL with TOKYO KEIKI Autopilot............30-35 30.11 Using the Predictor ........................... 30-36 31. Alarms ............................31-1 31.1 Overview ............................31-1 31.2 Alarms Generated by Navigation Calculation..................31-2 31.3 Alarms Generated by Chart Calculation .................... 31-2 31.4 Alarms Generated by Steering Calculation ..................
- Page 16 Table of Contents Appendix 5: C-MAP CM-93/2 Charts ..................... AP-45 A5.1 C-MAP Charts ..........................AP-45 A5.1.1 Introduction ........................AP-45 A5.1.2 S57 chart legend with C-MAP charts................AP-45 A5.2 Managing C-MAP charts........................AP-46 A5.2.1 Licensing system used by the C-MAP ................AP-46 A5.2.2 Getting started with C-MAP charts ..................AP-46 A5.2.3 Keeping C-MAP charts up to date..................AP-46 A5.2.4 Defining subscription of C-MAP charts................AP-47 A5.2.5 Loading C-MAP charts from a CD ROM into the system ..........AP-52...
-
Page 17: Foreword
FURUNO name has become synonymous with quality and reliability. For more than 60 years FURUNO Electric Company has enjoyed an enviable reputation for innovative and dependable marine electronics equipment. This dedication to excellence is furthered by our extensive global network of agents and dealers. - Page 18 Foreword This page intentionally left blank.
-
Page 19: Introduction
Introduction Manual Contents This manual provides the following information: • System configuration • Screen interpretation and use of the control unit • Set up before departure • Rules to replace paper charts with electronic ones • Chart material management • Manual updates, which are used to manually enter Notices to Mariners and Navtex warnings •... -
Page 20: System Configuration
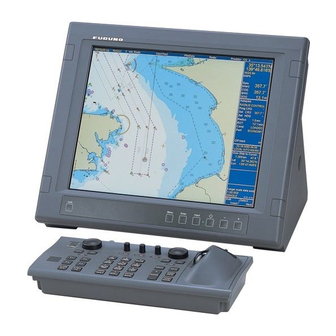
1. Introduction System Configuration The ECDIS EC1000C Workstation, comprised of the components shown in the illustration below, displays electronic sea charts and operates as the operator interface for the system. The ECDIS processor is connected to various sensors, and performs navigation calculations and route monitoring. Connections to interfaces are typically made with a LAN (Local Area Network) Adapter. -
Page 21: Multiple Workstation Configuration
1. Introduction 1.2.2 Multiple workstation configuration In the multiple workstation configuration, there can be two workstations connected together by a Local Area Network (LAN). In this configuration, one workstation is used as the "sensor source" for navigation sensors and the other workstation is used as the sensor source workstation to communicate with sensors, receiving and transmitting data from/to workstation via the LAN. -
Page 22: The Processor Unit
1. Introduction The Processor Unit The processor unit is the heart of the system, responsible for the loading, storing, updating and processing of electronic sea charts, with the DVD-ROM drive or floppy disk drive. The DVD-ROM and floppy disk drives are behind the lid on the front panel. -
Page 23: Navigation Tasks
Navigation Tasks Overview Navigation tasks can be divided into four basic tasks: Voyage Positioning planning Navigation tasks Monitoring Steering Navigation tasks Voyage Planning Voyage planning is the preparation phase for a coming voyage. Preparation includes route definition, route calculation and route optimisation. Required sea charts are also prepared in voyage planning, either by updating existing charts or creating new ones. -
Page 24: Route Planning
2. Navigation Tasks 2.2.1 Route planning A route can be created two ways: Modify an existing route to create a new route or create a new route from scratch. A route consists of the following: • • Position of each waypoint Safe water calculation based on safety limits •... -
Page 25: Positioning
2. Navigation Tasks Positioning Positioning means using all available methods available to calculate and keep ship’s position up-to-date during a voyage. The calculation of ship’s position is based on available navigation sensors. The system integrates valid information from different sensors and uses the Kalman filter technology for final position calculation. Direct Dead reck. -
Page 26: Monitoring
2. Navigation Tasks Monitoring Monitoring is a continuous check of navigation data, operator actions and performance of the system. Part of the monitoring is also the display of electronic sea charts and conning information. Electronic chart Data Alarms distribution Monitoring Data overboard logging... -
Page 27: Ecdis Display
ECDIS Display Overview The ECDIS (Electronic Chart Display and Information Systems) screen is divided into several areas. The Status bar, which is always shown at the top of the screen, mainly displays equipment status. The boxes at the right side of the screen comprise the Information areas. They are permanently displayed and show information such as your ship's position, alarms generated by the system, workstation mode and cursor position. -
Page 28: Electronic Chart Area
3. ECDIS Display Electronic Chart Area The ECDIS can use the following types of charts: • S57ed3 ENC charts (vector) • CM-93 charts (vector) • ARCS charts (raster) The following information can also be displayed: • Cursor (moved by trackball) •... - Page 29 3. ECDIS Display North Up TM ECDIS only 070.0° (CALC) (POSN) 045.1° (POSN) (POSN) Posn true S57 vector chart ARCS raster format ARCS charts are digital reproductions of British Admiralty (BA) paper charts. They retain the same standards of accuracy, reliability and clarity as paper charts. Zooming into the ARCS chart can be useful for magnifying a complex detail, however this decreases the density of the data displayed, and can give a false impression of the distance from danger.
-
Page 30: User Interface
3. ECDIS Display User Interface The operator interface is defined as the areas which are not displaying the electronic chart, either raster chart or vector chart. The operator interface contains information about settings, parameters and selections used by the ECDIS. The nature of the information displayed can be either static (such as name of a certain window, fields in chart legend, units, etc.) or dynamic (such as position of your ship, time, operator selections, etc.). -
Page 31: Information Area
3. ECDIS Display Information area The information area displays details about your ship's position, course and speed and the cursor's location on the chart Information from the positioning sensors: • Latitude and longitude position of your ship • Datum in use (WGS 72, WGS 84, European 1950, etc.), which is shown above positioning source. -
Page 32: Sidebar On Operator Interface
3. ECDIS Display 3.3.2 Sidebar on operator interface You may choose what kind of information to display in the sidebar (right side) of the ECDIS. The options shown below are available and the content of the sidebar windows change with the devices and sensors connected to the system. - Page 33 3. ECDIS Display Opening the sidebar on the display Sidebar(s) may be opened as shown below. Two sidebars may be displayed. 1. Place the cursor on the area shown. 2. "Select Sidebar" appears in the mouse functions area. See figure at right. 3.
- Page 34 • To WP: The waypoint which the ship is approaching. For FURUNO Autopilot FAP-2000, see Chapter 28. • Dist WOP (Wheel Over Point): Distance to the point where rudder order for course change at "To •...
- Page 35 3. ECDIS Display Information in autopilot sidebar The following information is shown in the autopilot sidebar, which shows settings and readings from an autopilot. • Steering mode (below "Autopilot") Autopilot • Prog CSE: If you use program track or program RADIUS CONTROL heading change steering modes, planned course is shown.
-
Page 36: Activating Dialog Boxes On The Display
3. ECDIS Display Information in chart legend sidebar For detailed information see the chapters on vector charts (S57) and raster charts (ARCS). 3.3.3 Activating dialog boxes on the display There are several dialog boxes which can be activated by mouse-clicking over certain areas on the ECDIS display. Place the cursor over the appropriate area then click the right or left mouse button to display the corresponding dialog box on the ECDIS display. - Page 37 3. ECDIS Display Additional menu functions in dialog boxes Dialog boxes which have a triangle at their upper left-hand corner contain a menu which provides additional functions. See the figure at right. Place the cursor on the triangle to show a menu from which to choose additional functions.
-
Page 38: Controlling Planning And Monitoring Modes On The Ecdis Display
3. ECDIS Display Controlling Planning and Monitoring Modes on the ECDIS Display A route, a user chart or pilot data can be displayed at the top of the electronic chart in the status bar, in either the planning mode or the monitoring mode. To choose desired mode, put the cursor on the text Route, User Chart or PilotData on the status bar. -
Page 39: Control Units
Control Units How the ECDIS is Controlled The operator controls the ECDIS with the Control Unit RCU-018 or the Control Unit RCU-015. Either unit is equipped with a trackball, right and left mouse buttons and a scrollwheel. The RCU-018 is additionally equipped with a keyboard. -
Page 40: Keys In Control Unit Rcu-018
4. Control Units 4.2.1 Keys in control unit RCU-018 Description Power Turns the system on/off. (This control does not switch the display on/off.) VRM rotary Adjusts active VRM. encoder VRM ON Activates and displays EBL1 if none is displayed or EBL 2 is active. Activates and displays EBL 2 if EBL1 is active. -
Page 41: Control Unit Rcu-015
4. Control Units (Continued from previous page) Description SHIFT/HELP SHIFT: Shifts between lower case and upper case alphabets. HELP: Activates info/help. (Mouse must not be over input field.) MENU Displays the Main menu. + RANGE – Adjusts charts scale. Inscribes MOB mark on the screen. EVENT Records textual information fixed to your ship's position. -
Page 42: Configuring Hot Keys F1-F4
4. Control Units 4.3.1 Configuring hot keys F1-F4 Hot keys (F1-F4 on the Control Unit RCU-015 and F1 and F2 on the Control Unit RCU-018) are provided to call a desired function/menu when pressed. How to configure keys F1-F4 You may choose desired function/menu from a predefined list. To choose desired function/menu for each key, do the following: 1. -
Page 43: Mouse Operations
4. Control Units Mouse Operations 4.4.1 Parts of the mouse Left Button The mouse consists of the trackball, Right Button scrollwheel, left mouse button and right mouse button. Scrollwheel Trackball... -
Page 44: How To Enter Alphanumeric Data
4. Control Units 4.4.2 How to enter alphanumeric data Entering alphanumeric data With trackball Alphanumeric input fields are activated for input by pointing with the mouse cursor and clicking the left mouse button. This action also displays minimum and maximum values beside the input field. The input value is chosen by spinning the scrollwheel, and the value is accepted by pushing the scrollwheel. - Page 45 4. Control Units Deleting a character A character can be deleted from text/numeric input field as follows: 1. Place the cursor to the right of the digit you want to delete then push the right mouse button. 2. Delete is chosen – push the scrollwheel to delete the alphanumeric chosen. The character is deleted and the window is closed.
-
Page 46: Using The Scrollwheel
4. Control Units 4.4.3 Using the scrollwheel Items directly controlled by the scrollwheel Selections can be made on the screen by pointing on the screen with the cursor then scrolling various options with the scrollwheel. When you put the cursor over text or numeric, it turns green, purple or blue (depending on Palette in use) to indicate that the scrollwheel can be used to scroll options available or change value of number. - Page 47 4. Control Units Choosing scrollwheel incrementing direction The scrollwheel incrementing direction can be chosen to forward or backward as desired. Open the Initial settings menu, and select Operation from the menu. Spin the scrollwheel to choose Wheel Drive then push the scrollwheel. 3.
-
Page 48: Calling Menus And Functions By The Mouse Buttons
4. Control Units 4.4.4 Calling menus and functions by the mouse buttons The mouse buttons can be used to call menus or functions on the display. At the lower right corner of the display the mouse functions area displays available function or menu name, as shown in the figure below. Spin the scrollwheel to choose menu or function desired, then push the left mouse button, scrollwheel or right mouse button as appropriate to access the menu or function desired. -
Page 49: Standby Mode
Standby Mode Switching Standby Mode ON and OFF The standby mode deactivates the audible alarms from the ECDIS. Use it while in harbour or other similar situation where use of the ECDIS is not required. To switch the Standby mode ON, do as shown in the procedure below. When you switch Standby mode ON, Human Interface, ARCS and S57 drawing processes are automatically restarted. - Page 50 5. Standby Mode This page intentionally left blank.
-
Page 51: Setup Before Departure
Setup Before Departure Update Chart Material Update your ARCS and S57 chart material before embarking on a new voyage. To get more information about updating ARCS charts, see Chapter 9 Raster Chart Material. For information about updating S57 charts, see section 8.2 S57 Charts. -
Page 52: Setting Chart Alarm Calculation
6. Setup Before Departure Setting Chart Alarm Calculation Set chart alarm areas suitable for your coming voyage. For more information, see Chapter 11 Chart Alarms. Creating or Updating a Route Create a new route or modify an existing one. For further information about creating or updating a route, see Chapter 13 Route Planning. -
Page 53: Recalculating Timetable And Eta Values
6. Setup Before Departure This route is unchecked. To store selections on the Alarms page, click the Start button. Also, the name of the user chart and the name of pilot data, which were chosen as planning mode, are stored in this route 6.6.2 Recalculating timetable and ETA values Timetable and ETA values can be recalculated from the Parameters page in the Plan Route dialog box. -
Page 54: Checking And Preparing Route To Monitor
6. Setup Before Departure Checking and Preparing Route to Monitor Choose a route for the next voyage: Choose Route on the status bar then click the Monitor button. For more information about route selection, see section 14.2 Choosing Route to Monitor. profile If the text "Checked conditions differ"... -
Page 55: Choosing To Waypoint
6. Setup Before Departure 6.7.1 Choosing TO waypoint The system chooses a TO waypoint automatically. Check that it is the correct one. Note that waypoint number 1 is not accepted. Use the Monitor Route dialog box to choose a waypoint. 6.7.2 Choosing final waypoint This selection is used ONLY when the last waypoint should be different than the one defined last in your route. -
Page 56: Using Planned User Chart
6. Setup Before Departure 6.7.4 Using planned user chart To check if planned user chart is chosen, open the Selections page in the Monitor Route dialog box to check that you have the correct user chart in the monitoring mode. If the text "Current selection is different"... -
Page 57: Using Planned Pilot Data
6. Setup Before Departure 6.7.5 Using planned pilot data To check if planned pilot data is chosen, open the Selections page in the Monitor Route dialog box to check that you have correct pilot data in the monitoring mode. If the text "Current selection is different"... -
Page 58: Verifying Configuration Of Navigation Sensors
6. Setup Before Departure Verifying Configuration of Navigation Sensors The operator can choose navigation sensors for use in navigation and view their current values. There are "pages" for speed and course and position. The figure below shows the Speed/Course page. Checkbox status shows whether the sensor is used for integrated navigation or not. - Page 59 6. Setup Before Departure Verifying position sensors (Posn page) On the Posn page of the Sensors dialog box, the data field of a position sensor contains a label(s) (in the figure at right it is DGPS, GPS+ZDA) which indicates the type of the sensor.
-
Page 60: Resetting Distance And Trip Counters
6. Setup Before Departure Resetting Distance and Trip Counters Reset menu Record menu To reset the distance and trip counters to zero, do the following: 1. Spin the scrollwheel to show Menu/Info/Chart Menu in the mouse functions area then push the left mouse button. -
Page 61: Conditions Required To Replace Paper Charts
Conditions Required to Replace Paper Charts Introduction Carriage requirements for adequate and up-to-date charts for a voyage can be found in SOLAS Chapter V/20 of 1974. In resolution A.817(19), IMO has specified how those requirements can be fulfilled with a device called ECDIS. - Page 62 7. Conditions Required to Replace Paper Charts Can your ECDIS replace paper charts Is ECDIS type- approved according IEC 61174? Do you have type approved electronic back-up arrangement? (i.e. second ECDIS) You should use paper charts Go to flow chart Are official ENCs available RCDS, on the for intended voyage?
- Page 63 7. Conditions Required to Replace Paper Charts RCDS (Raster Chart Display system) Is ECDIS type approved according IEC 61174 including RCDS mode (Appendix 7)? Are Raster charts available for intended You should use voyage? paper charts Have you included the latest updates into your ECDIS? Have you a...
-
Page 64: Detecting Enc Coverage In S57 Chart Display
7. Conditions Required to Replace Paper Charts Detecting ENC Coverage in S57 Chart Display The electronic chart system can display more than one S57 chart cell at a time. This feature is called multi-cell display. If one S57 chart cell does not cover the whole display, the system will open more S57 chart cells for display, if appropriate cells for the displayed area are available. -
Page 65: Vector Chart Material
Vector Chart Material Introduction Theoretically a chart can be coded for use on a computer as raster or vector chart. Vector-coded charts are coded using a variety of techniques. One technique is called S57ed3 and it has been chosen by IMO as the only alternative for SOLAS compliant electronic charts. -
Page 66: Definitions Of Terms
8. Vector Chart Material Each S57 chart may contain additional links to textual descriptions or pictures, besides the chart itself. Typically additional textual descriptions and pictures contain important sailing directions, tidal tables and other traditional paper chart features that do not have any other method to be included into the S57 chart. This ECDIS copies these textual descriptions and pictures into its hard disk so the operator may cursor-pick them for viewing purposes. -
Page 67: Chart Legend Of S57 Chart
8. Vector Chart Material 8.2.2 Chart legend of S57 chart The chart legend, which provides various data about the chart currently displayed, can be toggled on and off by placing the cursor in the sidebar, clicking the right mouse button, choosing Chart Legend from the menu then pushing the scrollwheel. -
Page 68: Permanent Warnings Of S57 Charts
8. Vector Chart Material Magnetic var.: Amount of magnetic variation. A positive value indicates a change in an easterly direction and a negative value indicates a change in a westerly direction. Depth: Unit of measurement for depth. Height: Unit of measurement for height above sea level (for example, clearance height). 8.2.3 Permanent warnings of S57 charts Permanent warnings help you keep the S57 charts up-to-date and these are shown at the top left corner on the... -
Page 69: Loading S57 Charts
8. Vector Chart Material Loading S57 Charts 8.3.1 Flow chart for loading S57 charts into ECDIS Load ENC into ECDIS. Load S57 charts from CD. - Open SENC Convert window. - Wait until all conversions are completed. - If any ENC conversion Do you want to see fails, a Failed Senc result of SENC conversion? - Page 70 8. Vector Chart Material POINT 1 During SENC conversion, the system sets Display Until date for the current system date. Visually inspect ENC for changes. - Added objects are marked with orange circles. Do you want to see changes - Deleted objects are marked before approving them? with orange slash marks.
-
Page 71: Loading S57 Charts From A Cd Rom, Floppy Disk Or Lan
8. Vector Chart Material 8.3.2 Loading S57 charts from a CD ROM, floppy disk or LAN When you load S57 charts by CD ROM catalogue, the system first loads a CD ROM catalogue, which stores certain information into your hard disk such as cell IDs, their position, and edition number, from your LAN (Local Area Network) connection, floppy disk or CD ROM. - Page 72 8. Vector Chart Material 5. In the Load or Update Charts from loaded CD ROM dialog box (see page 8-10), choose the charts to load into the ECDIS. Click the Load button to load charts into the ECDIS. See also "Interpretation of Load or Update Charts from loaded CD ROM dialog box"...
- Page 73 8. Vector Chart Material 7. Charts are loaded then automatically converted to SENC format, showing the SENC Conversion window. If an error is detected during conversion from ENC to SENC, the following window appears. To find the reason, click the Details button. Note that a chart and/or its update(s) in the conversion list are taken for use after conversion of all charts and updates are completed.
- Page 74 8. Vector Chart Material Interpretation of Load or Update Charts from loaded CD ROM dialog box This window provides information about the loaded CD-ROM. To display this window, open the Chart Menu and choose Load and Update Charts from the menu and "from loaded CD-ROM" from the sub menu. North Up TM ECDIS only 070.0°...
- Page 75 8. Vector Chart Material Note 1: If you want to make chart selection by group, click the Group button and choose desired group. If the same chart exists in both the group and the list, they are highlighted in the list box. Note 2: The system can make conversion into the SENC and set the "Display Until"...
- Page 76 8. Vector Chart Material Viewing load history of CD ROM You can view what is loaded from a CD ROM using Load History, which is in the Load or update Charts from CD ROM dialog box. 1. Show the Load or Update Charts from loaded CD ROM dialog box. (See page 8-10.) 2.
- Page 77 8. Vector Chart Material Removing an unnecessary CD ROM catalogue If you have unnecessary CD ROM catalogues on your CD ROM list, you can remove them as follows: ECDIS only North Up TM 070.0° (CALC) (POSN) (POSN) 045.1° (POSN) 1. Show the Load or Update Charts from loaded CD ROM dialog box. (See page 8-10.) Choose desired CD ROM.
- Page 78 8. Vector Chart Material Messages which contain only notice If you tried to load chart data that is older than you already have in your hard disk, you will get one of the following messages: This indicates that you are using a newer edition of the chart mentioned in the box.
- Page 79 8. Vector Chart Material ENC to SENC conversion fails or detects errors If the SENC conversions detect anything abnormal, you get the following message window: For further details, see section 8.4 S57 SENC Conversion Details. A new edition of the chart has been published and you missed it If you tried to load updates for a chart for which you do not have new enough Base cell or reissue in your...
-
Page 80: Loading S57 Charts That Are Not Fully Compliant With The Imo Standards
8. Vector Chart Material 8.3.3 Loading S57 charts that are not fully compliant with the IMO standards The ECDIS could in some cases load S57 charts that do not have full compliance with S57 standard coding for transfer media. Minimum requirements for loading manually is legally coded: •... -
Page 81: S57 Senc Conversion Details
8. Vector Chart Material S57 SENC Conversion Details S57 charts from Hydrographic Offices are called ENCs. An ENC has to be converted into SENC format before it can be used in the ECDIS. The ECDIS can convert ENC into SENC format automatically. If the conversion is successful, the Failed SENC conversion window does not appear. -
Page 82: Choosing Automatic Senc Conversion And Display Until Date
8. Vector Chart Material 8.4.2 Choosing automatic SENC conversion and display until date When you are loading new S57 charts Base cells and/or their updates into your hard disk, they can be automatically converted to SENC format. Further, display dates can be set as issue dates automatically. Do the following to set these options: 1. -
Page 83: Viewing Progress Of Senc Conversion
8. Vector Chart Material 8.4.3 Viewing progress of SENC conversion If you want to view the progress of SENC conversion, display the SENC Convert window as follows: 1. Spin the scrollwheel to display Menu/Info/Chart Menu in the mouse functions area then push the right mouse button. -
Page 84: Using The Failed Senc Conversion Window
8. Vector Chart Material 8.4.4 Using the failed SENC conversion window If the system is unable to convert ENC into SENC without any error or failure, the Failed SENC conversion window appears with a list of failed ENCs. Status of Failure means that the system completely failed to convert the ENC into the SENC and thus the ENC cannot be used. -
Page 85: Using Senc Conversion History Log
8. Vector Chart Material 8.4.5 Using SENC conversion history log The system automatically records the results of all conversions into the conversion history log. You can view the content of this log at any time by doing the following: 1. Spin the scrollwheel to display Menu/Info/Chart Menu in the mouse functions area then push the right mouse button. - Page 86 8. Vector Chart Material Conversion errors, but the chart is partly usable as NON ENC Use cell status to check details of errors. Note that the chart is no longer ENC if it was produced by a Hydrographic Office. You must refer to a paper chart as legal primary aid of navigation, when you navigate in the area covered by this chart.
-
Page 87: Using Senc Convert Window To Initiate Senc Conversion
8. Vector Chart Material 8.4.6 Using SENC convert window to initiate SENC conversion Normally automatic SENC conversion is chosen and there is no need to initiate SENC conversions from the SENC convert window. If you do not use the automatic SENC conversion, you need to manually initiate SENC conversion. Another case where you need to manually initiate SENC conversion is if you upgraded or reloaded the ECDIS software from the ECDIS software CD ROM. -
Page 88: Features Of The Chart Menu
8. Vector Chart Material Features of the Chart Menu 8.5.1 Overview of the chart menu The Chart menu provides various features for processing charts. To display the menu, spin the scrollwheel to display Menu/Info/Chart Menu in the mouse functions area then click the right mouse button. Activate ARCS chart: This function activates ARCS chart onto the screen. - Page 89 8. Vector Chart Material Chart Cell Status: You can view status of the cells (edition number and date number of updates of the cell) stored in your hard disk, CD ROMs or RENC. You can compare that you have the latest cell with latest update in use. For further details, see section 8.15 Other Features of Vector Charts.
-
Page 90: Catalogue Of S57 Cells
8. Vector Chart Material 8.5.2 Catalogue of S57 cells An S57 catalogue is used to view graphical coverage of the charts stored in your hard disk, available in a named "CD ROM" or available from an RENC. Available charts are displayed using their limits of charts. Note that sometimes the real coverage of the charts may be considerably less than the declared limits of it. - Page 91 8. Vector Chart Material 1. Source of Chart Catalogue • CD ROM: Display charts available in a named "CD ROM". • RENC: Display charts available from an RENC. • SENC: Display charts stored in your hard disk in SENC format. 2.
-
Page 92: Grouping S57 Chart Cells
8. Vector Chart Material 8.5.3 Grouping S57 chart cells You can define groups of S57 charts. This means you can collect related charts, for example, all cells that cover a route from Liverpool to New York or all cells available from a National Hydrographic Office. This makes it easier to perform many SENC maintenance functions such as loading Base cells and updates, setting Display Until and Approve Until dates, etc. - Page 93 8. Vector Chart Material 5. Click the Add Frame button. North Up TM ECDIS only 070.0° (CALC) (POSN) (POSN) 045.1° (POSN) 6. Use the trackball to define a frame then the push the left mouse button. North Up TM ECDIS only 070.0°...
- Page 94 8. Vector Chart Material 8. When you have completed entering frames, click the Close Edit button. North Up TM ECDIS only 070.0° (CALC) (POSN) (POSN) 045.1° (POSN) 9. Select Group as a qualifier for loading. North Up TM ECDIS only 070.0°...
- Page 95 8. Vector Chart Material Using Chart catalogue window Chart Catalogue can be used to define a group as follows: Select "Chart Catalogue" from the Chart menu window. North Up TM ECDIS only 070.0° (CALC) (POSN) 045.1° (POSN) (POSN) o CD RENC o SENC o C-Map...
- Page 96 8. Vector Chart Material Enter name for Group and click the OK button. North Up TM ECDIS only 070.0° (CALC) (POSN) (POSN) 045.1° (POSN) o CD RENC o SENC o C-Map Write name of the new Group Name 4. Press the Add Frame button. 5.
- Page 97 8. Vector Chart Material 6. Select Group to view content of group in Chart Catalogue window. North Up TM ECDIS only 070.0° (CALC) (POSN) (POSN) 045.1° (POSN) o CD RENC o SENC o C-Map 8-33...
- Page 98 8. Vector Chart Material Removing S57 chart cells from a group You can remove chart cells from a defined group as follows: 1. Select desired group. 2. Press the Edit Group button. 3. Use the Remove frame button to define area for charts or pick charts individually from the list. North Up TM ECDIS only 070.0°...
- Page 99 8. Vector Chart Material Deleting a group You can delete a defined group as follows: ECDIS only North Up TM 070.0° (CALC) (POSN) 045.1° (POSN) (POSN) RENC SENC C-Map 1. Choose group. 2. Click Remove Frame button to delete. Choosing active group for viewing with catalogue To choose active group do the following: 1.
- Page 100 8. Vector Chart Material Viewing active group with catalogue To view active group, check "Group" selection and select desired group from list box North Up TM ECDIS only 070.0° (CALC) (POSN) (POSN) 045.1° (POSN) RENC SENC C-Map Select "Group" to activate a Group selection.
-
Page 101: Viewing Status And Setting Viewing Dates Of S57 Chart Cells And Their Updates
8. Vector Chart Material 8.5.4 Viewing status and setting viewing dates of S57 chart cells and their updates When you load S57 chart cell(s) and/or their updates, the system sets Display Until of S57 chart cell(s) as current date of the system. To set Approve Until as current date of the system, you must open the Set Chart viewing dates dialog box and perform Approve Until. -
Page 102: Removing An S57 Chart Cell From The System
8. Vector Chart Material 8.5.5 Removing an S57 chart cell from the system To remove an S57 format vector chart cell from the system, do the following: Choose Remove Charts from the Chart menu. Choose chart cells to remove from the system. You can remove Base cell (000), updates (001…) and SENC format (snc). -
Page 103: S57 Chart Service From An Renc
8. Vector Chart Material S57 Chart Service from an RENC 8.6.1 Introduction Before you can use an RENC service, you have to be authorized as a customer of an RENC. To be authorized you have to contact an official distributor (chart agent) of RENC. Then, the following services are available: 8.6.2 Permits Permits are used to control the permission to use a chart. -
Page 104: Available Service Types
8. Vector Chart Material 8.6.5 Available service types CD ROM service If you are using a CD ROM service, you receive the following from an RENC: • Base CD ROM contains all Base cells that are available in an RENC CD ROM database when the CD ROM was released. -
Page 105: Services Provided By An Renc
8. Vector Chart Material Services Provided by an RENC 8.7.1 Viewing the coverage of an RENC service To view the Product List in graphical presentation, use the catalogue, which you may display by opening the Chart menu and choosing Chart Catalogue. The catalogue of S57 charts shows the situation when you last ordered the Product List from an RENC or loaded the latest Base or Update CD ROM into the ECDIS. -
Page 106: Knowing Up-To-Date Status Of A Chart From An Renc
8. Vector Chart Material 8.7.2 Knowing up-to-date status of a chart from an RENC To keep charts up-to-date, you should check for updates with an RENC weekly. The ECDIS compares charts used to Product List of an RENC. If a Permanent Warning appears on the chart display of ECDIS (at the upper left corner), this means that the charts used were checked against the Product List and at least one of the charts used is not up-to- date. -
Page 107: Knowing Up-To-Date Status Of An Renc Product List
8. Vector Chart Material Interpreting the chart viewing date window • RENC edt / upd: The chart's edition and its update in an RENC appear here. The information is based on the last- ordered Product List. • SENC edt / upd: The chart's edition and its update in the ECDIS appear here. •... -
Page 108: Managing Permits From An Renc
8. Vector Chart Material 8.7.4 Managing permits from an RENC • Permits are used to control the right to use a chart in the ECDIS. A permit in an RENC ENC service is connected to an edition of a chart. The expiry date of a permit controls the loading of Base charts and their updates to the ECDIS. -
Page 109: Managing Public Key From An Renc
8. Vector Chart Material Subscription warnings If you have at least one subscription-type permit, the system will automatically warn you about the expiration date of your subscription license. Warning about soon-to-be-expired subscription is activated every 12 hours when it is less than 30 days from the expiration date. - Page 110 8. Vector Chart Material The View Current button displays current public key. The Load New button loads a new public key from *.PUB file (for example, PRIMAR.PUB) and displays that file’s contents. Compare the content of the newly loaded public key with the known content of the public key of an RENC you use. If the contents are the same, you can accept the newly loaded public key by clicking the Accept New button.
-
Page 111: Cd Rom Service From An Renc
8. Vector Chart Material CD ROM Service From an RENC 8.8.1 Getting started with S57 charts using an RENC How to get started with a CD ROM service Make a Subscription / End User Agreement with your chart distributor. Send a list of charts to your distributor. -
Page 112: Keeping S57 Charts Up To Date Using An Renc
8. Vector Chart Material 8.8.2 Keeping S57 charts up to date using an RENC How to keep current Charts up-to-date in a CD-ROM service ? Subscription type: You do not receive Subscription automatically anything You received a weekly or montly packet Order new Permits If you received new Permits, and latest BASE and... -
Page 113: Enlarging Chart Coverage Using An Renc
8. Vector Chart Material 8.8.3 Enlarging chart coverage using an RENC How to enlarge coverage in a CD-ROM service Use Catalogue of S57 charts to select additional charts. Send a list of Charts to your Distributor. Remember subscription type. You received new Permits, etc. Load Permits into ECDIS. - Page 114 8. Vector Chart Material Check that you have already loaded correct Public key. This is very important if you receive CD ROMs for multiple RENC. For details, see section 8.7.5 Managing public key from an RENC. Input CD ROM to drive. Choose Load and Update Charts from the Chart menu and "from CD ROM"...
- Page 115 8. Vector Chart Material 6. In the Load or Update Charts from CD ROM dialog box, choose the charts to load into ECDIS, then click the Load button to load the charts into the ECDIS. For further details, see "Interpretation of Load or Update Charts from CD ROM"...
- Page 116 8. Vector Chart Material 9. If error is detected during conversion from ENC to SENC, the following window appears. 10. When conversion is completed, the following window appears. For further details, see "Viewing load history of CD ROM" on page 8-12. 8-52...
-
Page 117: Update Cd Rom From An Renc
8. Vector Chart Material 8.8.5 Update CD ROM from an RENC An Update CD ROM from an RENC contains all the updates included for charts stored in an RENC when the latest Base CD ROM was issued. When you load charts by a CD ROM catalogue the following information is also loaded into the ECDIS hard disk: •... - Page 118 8. Vector Chart Material 6. In the Load or Update Charts from loaded CD-ROM window, choose the charts to load. ECDIS only North Up TM 070.0° (CALC) (POSN) 045.1° (POSN) (POSN) 7. Then, click the Load button to load charts. See also "Interpretation of Load or Update Charts from loaded CD- ROM dialog box"...
- Page 119 8. Vector Chart Material 9. Charts are loaded into ECDIS then automatically converted to SENC format. The SENC Convert window appears. 10. If an error is detected during conversion from ENC to SENC, the following window appears. To find the reason click the Details button.
- Page 120 8. Vector Chart Material Interpretation of Load or Update Charts from loaded CD-ROM window ECDIS only North Up TM 070.0° (CALC) (POSN) 045.1° (POSN) (POSN) 1. The source and edition date of the CD is displayed here. 2. A list of charts stored in the CD-ROM, edition number of the chart and the number of updates included in the chart.
-
Page 121: Viewing Coverage Of A Base Or Update Cd Rom From An Renc
8. Vector Chart Material 8.8.6 Viewing coverage of a base or update CD ROM from an RENC Insert desired CD-ROM into CD-ROM drive. Select from Chart menu Load or Update Charts and next menu select from CD-ROM. ECDIS only North Up TM 070.0°... -
Page 122: Loading An Renc-Generated Permit Cd Rom Or Floppy Disk
8. Vector Chart Material 8.8.7 Loading an RENC-generated permit CD ROM or floppy disk An RENC can deliver permits in a CD ROM or a floppy disk. When you receive new permits from an RENC, you have to load them into the ECDIS. A permit is a key that is used to decrypt the chart you want to use in the ECDIS. To load permits, do the following: Choose Chart Permits from the Chart menu. - Page 123 8. Vector Chart Material Messages that may appear when loading a permit If you load permits from a different ECDIS, you get the following message: 8-59...
-
Page 124: Renc Security System
8. Vector Chart Material RENC Security System 8.9.1 Standard messages in S57 chart load When loading S57 charts into the ECDIS, messages appear to alert you to permits and authentication. These are described below and on the next several pages. 8.9.2 Additional messages in S57 chart load Issue control of Base and Update CD ROM from RENC... - Page 125 8. Vector Chart Material Messages that contain only notice If you tried to load charts for which you do not have a permit, you will get the following message: Messages that require careful attention All messages in this chapter change the legal status of the charts in your system. Study these messages carefully because you may need to use paper charts to fulfil SOLAS requirements.
-
Page 126: Standard Messages In S57 Senc Conversion
8. Vector Chart Material Authentication of chart failed The chart was not loaded because of missing signature. The chart was not loaded because of coding error in Signature. The chart was not loaded because of tampered Signature or invalid Public Key. -
Page 127: Additional Messages In S57 Senc Conversion
8. Vector Chart Material 8.9.4 Additional messages in S57 SENC conversion Messages that contain only notice You do not have a permit. Messages that require careful attention Permit for a chart has expired. You have a permit, but it is valid for another edition of the cell. -
Page 128: Vector Chart Display
8. Vector Chart Material 8.10 Vector Chart Display 8.10.1 Choosing vector chart material to use To activate S57 chart material onto the display, do the following: Place the cursor just above the chart scale indication in the information area. Activate S57 Chart appears in the mouse functions area; push the left mouse button. 8.10.2 Choosing charts for viewing Choosing a chart from a catalogue... -
Page 129: Choosing A Chart By Its Name On The Display
8. Vector Chart Material Looking for charts around your ship You can use either true motion or relative motion. In the true motion mode, your ship moves until it reaches the true motion reset borderline, where it jumps back to an opposite position on the screen based on ship’s course. In the relative motion mode, your ship stays in a fixed position, while the chart moves on screen. -
Page 130: Controlling Visible Chart Features
8. Vector Chart Material 8.10.4 Controlling visible chart features The Chart Display dialog box contains several pages of chart features that you may adjust as appropriate. To display this dialog box, spin the scrollwheel to show Chart Display/Info/Standard Display in the mouse functions area then push the left mouse button. - Page 131 8. Vector Chart Material Depths: Set how to display different depth zones on the chart display. For MULTICOLOUR, the chart display uses four different colors for contours: • Deeper than operator-chosen deep contour • Between deep contour and operator-chosen safety contour •...
-
Page 132: Display Base
8. Vector Chart Material "Standard, Other 1 and Other 2" pages The Standard page contains chart features defined by IMO that comprise a standard display. You can recall the standard display at any time using a single action, by displaying Chart Display/Info/Standard Display in the mouse function area and pushing the right mouse button. -
Page 133: Controlling Visible Navigation Features
8. Vector Chart Material 8.10.6 Controlling visible navigation features Visibility control of the navigation features is divided into four pages in the Chart Display menu. The "Route" page controls planned and monitored routes. The "Tracking" page controls past tracks and some other features. The "Target"... - Page 134 8. Vector Chart Material Tracking page Past tracks • Ship System: Choose Std or Other to plot your ship’s tracks using system-fed position. • Ship Primary: Choose Std or Other to plot your ship’s past track with position fed from the primary sensor. •...
- Page 135 8. Vector Chart Material Targets page ARPA Targets: • Choose Std or Other to show ARPA target labels. AIS Targets: • Symbol: Choose Std or Other to display AIS target symbols. • Max (count): Set the maximum number of AIS targets to display. •...
- Page 136 8. Vector Chart Material Mariner page *ALL-ON Pilot data: • Position: Choose Std or Other to show positions of pilot data records with symbols on the chart. • Range: Choose Std or Other to circumscribe pilot data records with circles on the display. The size of a circle depends on the value set in pilot data.
-
Page 137: Storing And Recalling Chart Display Settings For Visible Chart And Navigational Features
8. Vector Chart Material 8.10.7 Storing and recalling chart display settings for visible chart and navigational features You can define chart display settings for chart details that are displayed over S57 charts cells. You can save these chart display settings to your hard disk and recall them whenever you need them. Creating new chart display settings To create new settings for chart displays, do the following: 1. -
Page 138: Control Of Predefined Imo Chart Display Settings
8. Vector Chart Material 8.10.8 Control of predefined IMO chart display settings There are three sets of predefined Chart Display Settings that can be used to display Charts with certain chart features. In IMO Chart Display Settings you are not able to change visibility of chart feature using Chart Display Settings. -
Page 139: Sailing Directions, Tidal Tables, Etc., Features Of Vector Charts (S57)
8. Vector Chart Material 8.11 Sailing Directions, Tidal Tables, etc., Features of Vector Charts (S57) Vector charts (S57) contain sailing directions, tidal tables and other textual and picture information that is not immediately visible on the chart. This information forms an integral part of the legal ENC chart that can fulfil SOLAS requirements and thus replace a paper chart. -
Page 140: Chart Viewing Dates And Seasonal Features Of The Vector Chart
8. Vector Chart Material 8.12 Chart Viewing Dates and Seasonal Features of the Vector Chart 8.12.1 Introduction Vector charts (S57) contain date-dependent features. Updating in general, including reissues, new editions and updates, creates date dependency. In addition to the obvious date dependency, some features of the S57 charts create additional date dependency. -
Page 141: Setting "Display Until" Date
8. Vector Chart Material 8.12.3 Setting "display until" date Open the Chart menu. Choose Set Chart viewing dates from the menu. Set the cursor in the Display Until field, use the scrollwheel to set desired date, and confirm by pushing the scrollwheel. 8.12.4 Setting "approve until"... -
Page 142: About Chart Viewing Date Dependency Of S57 Standard
8. Vector Chart Material 8.12.5 About chart viewing date dependency of S57 standard How the issue date of updates changes the visibility of the changes Study the example below to understand the behavior of updates relative to date. The figure above shows how updates are dependent Chart viewing dates set in Display/Approve date settings by operator. - Page 143 8. Vector Chart Material An example of changes known to happen in the future Display/Approve date is set to 2005-01-02. You can see a box-shaped Caution area on the screen. Display date is now set to 2005-09-08 and Approve date is 2005-9-09. You can see a new area (Restricted Area) inserted into existing area (Caution Area).
- Page 144 8. Vector Chart Material How seasonal features are coded in vector charts (S57) Some chart producers may define a chart feature to use seasonal date start and end as shown below. • YYMMDD (Full date for date start and date end) •...
- Page 145 8. Vector Chart Material This example shows how a user can find, using the Info query (seasonal), the starting and ending month and day in every year (-MMDD). >> >> This example shows how a user can find, using the Info query (seasonal), the starting and ending month and day in every year (-MM).
- Page 146 8. Vector Chart Material An example of a seasonal chart feature The next two figures show a caution area that is valid from April 1 to November 15. The figure below shows the attributes of the caution area in the example above, in the Info request window. >>...
-
Page 147: Other Functions Of Chart Viewing Dates Window
8. Vector Chart Material 8.12.6 Other functions of chart viewing dates window Manual update dates You can check when a manual update has been added into the ECDIS. Click the Manual Update Dates button to open the Manual Update Chart viewing dates window. Enter date and edition, and a Manual Update symbol for that time appears on the display. -
Page 148: Symbology Used In Vector Charts
8. Vector Chart Material 8.13 Symbology Used in Vector Charts You can familiarize yourself with the symbology used by browsing IHO ECDIS Chart 1, which is included in this ECDIS. Note that it behaves as any S57 chart and it follows your selections. See section 8.10.4 Controlling visible chart features. -
Page 149: How To Change Presentation Library Used For Vector Chart Features
8. Vector Chart Material 8.13.1 How to change presentation library used for vector chart features The ECDIS uses the official IHO presentation library to draw vector charts (S57). The presentation library is replaceable, but this feature is only intended to be used by qualified service personnel and type approval authorities. When this manual was published the official presentation library was "pslb03_2.dai", known as "Official IHO presentation library for ECDIS Ed 3 revision 1, Edition: 3.2". - Page 150 8. Vector Chart Material 6. Detailed information for the chosen object appears in the Object window. >> >> 7. To close the windows, click the CANCEL key on the Control Unit RCU-018, or click the X on the window you wish to close.
-
Page 151: Viewing Properties Of A Vector Chart Object
8. Vector Chart Material 8.14.3 Viewing properties of a vector chart object After you have chosen a vector chart object, you can view detailed information about it in the Object window: Object name and validity period Pictorial presentation Additional coded text information Detailed properties of the object... -
Page 152: About Vector Chart Coding
8. Vector Chart Material 8.14.4 About vector chart coding Tidal information is available as a table >> >> 8-88... - Page 153 8. Vector Chart Material More information is available in text More information is available as a picture >> >> 8-89...
- Page 154 8. Vector Chart Material Linked objects Often a group of chart objects are linked together. The most common example of this practice is a beacon or buoy, in which the body and the top mark are defined separately. Another example is lights and recommended track. Still another example is measurement mile.
- Page 155 8. Vector Chart Material Recommended track defined by two beacons >> >> >> >> >> >> >> >> 8-91...
- Page 156 8. Vector Chart Material Recommended track defined by a building and a beacon >> >> >> >> >> >> >> >> 8-92...
- Page 157 8. Vector Chart Material Measurement mile >> >> >> >> tails >> >> >> >> tails 8-93...
-
Page 158: Other Features Of Vector Charts
8. Vector Chart Material 8.15 Other Features of Vector Charts There are some functions or features that are not used on a daily or weekly basis, but sometimes there is a need to use them. 8.15.1 Cell status Use the Chart Cell Status function in the Chart Menu to find out the status of individual cells in your system, in a CD ROM or in an RENC. -
Page 159: S57 Cell Details
8. Vector Chart Material 8.15.2 S57 cell details You may need to check when an update has been added into your ECDIS. Also you may need to check what was shown in your chart display three weeks ago. There are also many other cases where you need to find what was known by your ECDIS. -
Page 160: Using Cell Status Window To Initiate Senc Conversion
8. Vector Chart Material 8.15.3 Using cell status window to initiate SENC conversion The Cell Status window in the Chart menu can be used to force a new SENC conversion for any chart cell that is already in the SENC format. Normally you do not need this feature, but it could be useful if, for example, you need to analyze why an update cannot be converted, etc. -
Page 161: Raster Chart Material
Raster Chart Material ARCS Charts Approximately 2,700 ARCS charts are available on 11 chart CD ROMs, covering the world's major trading routes and ports. Regionally based chart CD ROMs RC1 to RC10 contain standard BA navigation charts, while RC11 contains ocean charts at scales of 1:3,500,000 and smaller. ARCS charts are facsimile copies of BA paper charts, and as such share a common numbering system. -
Page 162: T&P Notices, Details And Warnings Of Arcs
9. Raster Chart Material 9.1.2 T&P notices, details and warnings of ARCS Access to view T&P Notices, which are details or warnings of ARCS, is contained in the ARCS chart legend mentioned on the previous page. At the lower part of the legend there are three buttons to activate a corresponding window. - Page 163 9. Raster Chart Material Panels: Chooses desired inset (Panel) from the combo box. This function also works in conjunction with Locate, Preference and Notes. Locate: This function displays the inset chosen in the Panels combo box. Warnings There could be warnings not included in Notices to Mariners. British Admiralty may release textual warnings for any chart and they are available here.
- Page 164 9. Raster Chart Material Viewing notes of ARCS chart The operator can choose a desired item from the combo box in the ARCS Details dialog box in order to view notes for that item. After choosing the item from the Notes combo box, click the Notes… button, and a text window appears.
-
Page 165: Datum And Arcs Charts
9. Raster Chart Material Datum and ARCS Charts 9.2.1 Difference between ARCS chart local datum and positions in WGS-84 datum The difference between ARCS chart local datum and WGS-84 datum is known as WGS-84 Shift. For most of the ARCS charts this is known and the system can do the conversion automatically. For some ARCS chart, however, this is unknown and the operator must define the shift. - Page 166 9. Raster Chart Material WGS shift is defined for this chart. All latitude and longitude positions of the cursor, routes, user charts, pilot data, etc. are correctly displayed on this ARCS chart. WGS shift is not defined for this chart. Latitude and longitude positions of the cursor, routes, user charts, pilot data, etc.
- Page 167 9. Raster Chart Material Viewing cursor position in local datum of an ARCS chart On demand you can view the cursor position in local datum of an ARCS chart. This is useful when you need to refer to the corresponding paper chart. You can access ARCS details with the Details button in the chart legend of ARCS. In this example WGS-84 shift is defined for the current ARCS chart.
- Page 168 9. Raster Chart Material In this example WGS-84 shift is not defined for the current ARCS chart. The Cursor Position panel shows cursor position in local ARCS chart datum (indicated as Local Datum) and in WGS-84 datum as defined by the operator WGS shift (indicated as WGS-84 User).
- Page 169 9. Raster Chart Material In this example WGS-84 shift is not defined in the current ARCS chart Undefined Undefined Chart Shift: Undefined indicates that current ARCS chart does not have defined WGS-84 shift. 00.176'N 01.290'E Accuracy: This field contains accuracy as defined by the chart producer.
-
Page 170: Permanent Messages Of Arcs
9. Raster Chart Material 9.2.2 Permanent messages of ARCS The system can help you to keep your ARCS charts up-to-date for the charts that you have received from ARCS. Producers of ARCS charts store up-to-date status on an ARCS Weekly Update CD ROM (system Files). This information is loaded into the ECDIS when you update, either by permits or by active group. -
Page 171: Chart Menu
9. Raster Chart Material Chart Menu The Chart menu is used for managing chart database. Menu description Activate S57 chart: The function activates an S57 chart onto the display. You have two options to choose how to open a chart on the display. "Ignore scale" opens S57 chart cell with the scale that was used the last time you used an S57 chart. -
Page 172: Arcs Subscriptions
9. Raster Chart Material ARCS Subscriptions ARCS customers can subscribe to one of two service levels, ARCS Navigator or ARCS Skipper. 9.4.1 ARCS Navigator ARCS Navigator operators receive a comprehensive weekly updating service on CD ROM that mirrors the Admiralty Notices to Mariners (NMs) used to correct Admiralty paper charts. The update information is cumulative, ensuring that only the most recent Update CD ROM is necessary. -
Page 173: Getting Started With Arcs Charts
9. Raster Chart Material If ARCS format is active, you can choose ARCS License from the Chart menu, with "Licence". License information is shown in the window. This window contains information about owner of license, operator permit and type of license. -
Page 174: Loading Chart Permits For Arcs Navigator License
9. Raster Chart Material 9.4.5 Loading chart permits for ARCS Navigator license Permits are usually delivered in a floppy disk. You may load permits as follows: Select Next Chart Open the Chart menu then choose Chart Permits from the menu. Choose Navigator license as the type of license. -
Page 175: Loading Chart Permits For Arcs Skipper License
9. Raster Chart Material 9.4.6 Loading chart permits for ARCS Skipper license Permits are usually delivered in a floppy disk. To load chart permit into the system, do the following: Open the Chart menu, then choose Chart Permits from the menu. Choose Skipper license as the type of license. -
Page 176: Removing Chart Permits
9. Raster Chart Material 9.4.7 Removing chart permits Normally you do not need to remove permits during normal operation. However, it may be necessary to remove chart permits from the system. Permits may be removed individually or collectively. To remove chart permits, do the following: Open the Chart menu then choose Chart Permits from the menu. -
Page 177: Loading A New Arcs Chart Into The System
9. Raster Chart Material 9.4.8 Loading a new ARCS chart into the system You may load a new ARCS chart into the system for which you have a permit, by the following methods. • Load by permit. You can load all the charts that are covered in your license. The system will load them automatically. - Page 178 9. Raster Chart Material Loading ARCS charts by active group "Loading by active group" is used when you want to load only ARCS charts that are in a group that you have defined. This is very useful if your license includes many charts from around the world and you are going to use only a part of those charts for which you have a permit.
- Page 179 9. Raster Chart Material Loading ARCS charts manually You can also load ARCS charts manually into the system as follows. Insert desired ARCS CD ROM into the CD ROM drive. Choose Load Charts from the Chart menu and Manual from the sub menu. A Chart Operations window appears;...
-
Page 180: Updating Arcs Charts
9. Raster Chart Material 9.4.9 Updating ARCS charts The updates are delivered separately in an Update CD ROM. To update ARCS format raster chart into the system, you can use one of following procedures: • Update by permit. You can update all the charts that are applicable to your license. The system will update them automatically. - Page 181 9. Raster Chart Material Loading updates by active group Loading updates by active group is used when you want to update only ARCS charts that you have designed to include in a defined group. This is very useful if your license includes a lot of charts from around the world and you are going to use only a part of charts for which you have a permit.
- Page 182 9. Raster Chart Material Loading updates manually You can also load updates for ARCS charts manually as follows: Insert Update ARCS CD ROM into CD ROM drive. Open the Chart menu, choose Update Charts from the menu and Manual from the sub menu. The Chart Operations window appears;...
-
Page 183: Viewing Chart Load And Update History Of Arcs
9. Raster Chart Material 9.4.10 Viewing chart load and update history of ARCS You may view a history of all chart load and updates (Notices to Mariners) of ARCS. This information is stored in the ECDIS. Open the Chart menu and choose Load and Update History. Log file of loaded ARCS Update appears. -
Page 184: Viewing Update Status Of Your Arcs Charts
9. Raster Chart Material 9.4.11 Viewing update status of your ARCS charts You can easily check which is the latest Update CD ROM introduced to your system. To view update status of ARCS charts, do the following: Open the Chart menu, choose System from the menu, then choose ARCS Update Status from the submenu. -
Page 185: Arcs Catalogue
9. Raster Chart Material 9.4.12 ARCS catalogue The Chart Catalogue command in the Chart menu helps you manage ARCS charts. When you choose this command, the ARCS Catalogue window opens in the electronic chart area and the ARCS Catalogue dialog box appears in the information area. - Page 186 9. Raster Chart Material After you have clicked the limit of chart you get information of the chart in Selected Chart window as follows: • Number: Chart number as stated on the corresponding paper chart. • Orig. Scale: Scale of original paper chart. •...
-
Page 187: Grouping Arcs Charts
9. Raster Chart Material 9.4.13 Grouping ARCS charts Creating an ARCS chart group To create a ARCS chart group, do the following: Open the Chart menu. Choose Chart Catalogue from the menu to show the ARCS Catalogue dialog box. Click the Groups button to show the Group dialog box. See the figure below. - Page 188 9. Raster Chart Material Adding ARCS charts to a group After you have entered a name for the group, click the Add Frame button in the Group field. Choose the area to group by moving the cursor to the desired location and clicking the left mouse button. Below is a sample group. Charts that are inside the frame or intersect a frame limit are added to the group.
- Page 189 9. Raster Chart Material You can also save your chart cells as a text file, if you want to have a list of chart cells in text format. To do this, click the Save As Text... button. The Save As window appears as below. Choose directory and drive where you want save your text file.
-
Page 190: Removing Arcs Charts From The System
9. Raster Chart Material Choosing active group You can make a group an active group as follows: 1. Open the Chart menu. Choose Chart Catalogue from the menu. 2. Click Groups in the View Filters window. 3. Choose desired group from the Edit Group list box. Removing a group You can remove a group from the hard disk as follows: 1. - Page 191 9. Raster Chart Material Removing ARCS chart group by "group" Open the Chart menu. Choose Remove Charts from the menu and By Group from the sub menu to show the ARCS Remove window. [Remove Charts] Go Back By Group Manual Choose group from Group List then choose the chart you want to remove.
-
Page 192: Arcs Chart Display
9. Raster Chart Material ARCS Chart Display 9.5.1 Displaying ARCS chart material To display ARCS format raster chart material on the display, do the following: Place the cursor just above the area where the ECDIS shows chart scale. Spin the scrollwheel to show "Activate ARCS Chart" in the mouse functions area, then push the left mouse button to show ARCS charts on the display. -
Page 193: Viewing Different Arcs Charts
9. Raster Chart Material 9.5.3 Viewing different ARCS charts Choosing a chart from ARCS catalogue You may use the ARCS Catalogue to display an ARCS format chart. Open the Chart menu. Choose Chart Catalogue from the menu. From the ARCS Catalogue dialog box, activate desired chart. For more information, see section 9.4.12 ARCS Catalogue. - Page 194 9. Raster Chart Material Range - and Range+ change the chart scale. If true motion reset is active, ZOOM IN and ZOOM OUT keep the relative position of your ship with respect to the display. If true motion reset is on, ZOOM IN and ZOOM OUT keep the relative position pointed by the cursor with respect to the display.
-
Page 195: Choosing An Arcs Chart By Its Number On Display
9. Raster Chart Material 9.5.4 Choosing an ARCS chart by its number on display Opening an ARCS chart manually To choose a specific ARCS format raster chart onto the display use Open menu command. Do the following: Open the Chart menu. Check if the text Activate S57 chart appears on the first line of the menu. - Page 196 9. Raster Chart Material Opening an ARCS chart by position To open an ARCS chart by position of your ship or by chart center, if your display is in TM RESET OFF status, use the item "Open by position". Then you get a list of charts that cover current position. To open chart by position, do the following: Open the Chart menu.
-
Page 197: Controlling Visible Arcs Chart Features
9. Raster Chart Material 9.5.5 Controlling visible ARCS chart features The Display dialog box contains several pages to control visible chart features. Chart page Black and grey color symbol: This symbol is used to verify that you can distinguish black (frame of symbol) and grey (inner part of symbol) colors with current contrast and brilliance settings. - Page 198 9. Raster Chart Material Symbols: Choose how to display chart symbols. The options are: SIMPLIFIED: The shape of symbols is of modern design and the sea mark symbols are filled in a color PAPER CHART: The shape of symbols imitates traditional symbols used in paper charts. Depth: Set how to display different depth zones on the chart display.
-
Page 199: Display Base
9. Raster Chart Material "Standard, Other 1 and Other 2" pages The Standard page contains chart features defined by IMO that comprise a standard display. You can recall the standard display at any time using a single action, by pressing the STD DSP key on the Control Unit RCU-018 or displaying Chart Display/Info/Standard Display in the mouse function area and pushing the right mouse button. - Page 200 9. Raster Chart Material ARCS details page *ALL-ON The ARCS details page provides details about current ARCS chart. To open this box, spin the scrollwheel to show Chart Display/Info/Standard Display in the mouse functions area then push the left mouse button. You can change pages by clicking the right mouse button (Choose Next), clicking the arrow tabs in the dialog box.
- Page 201 9. Raster Chart Material The ARCS chart that *ALL-ON is displayed as original edition and places that show updates are marked with a red rectangle. 9-41...
-
Page 202: Controlling Visible Navigation Features
9. Raster Chart Material 9.5.7 Controlling visible navigation features Visibility control of the navigation features is divided into four pages in the Chart Display dialog box. The "Route" page controls planned and monitored route. The "Tracking" page controls past tracks and some other features. The "Mariner"... -
Page 203: Tracking Page
9. Raster Chart Material Tracking page Past tracks • Ship system: Choose Std or Other to plot your ship’s tracks using system-fed position. • Ship Primary: Choose Std or Other to plot your ship’s past track with position fed from the primary sensor. •... - Page 204 9. Raster Chart Material Targets page ARPA Targets: • Symbol: Choose Std or Other to show ARPA target labels. AIS Targets • Symbol: Choose Std or Other to display AIS target symbols. • Max (count): Set the maximum number of AIS targets to display. •...
- Page 205 9. Raster Chart Material Mariner page *ALL-ON Pilot data: • Position: Choose Std or Other to show positions of pilot data records with symbols on the chart. • Range: Choose Std or Other to circumscribe pilot data records with circles on the display. The size of a circle depends on the value set in pilot data.
-
Page 206: Storing And Recalling Chart Display Settings For Visible Chart And Navigational Features
9. Raster Chart Material 9.5.8 Storing and recalling chart display settings for visible chart and navigational features You can define chart display settings for chart details that are displayed over S57 charts cells. You can save these chart display settings into your hard disk and later recall them on demand. Creating new chart display settings To create new settings for chart displays, do the following: 1. -
Page 207: 10. Manual Updates
10. Manual Updates 10.1 Introduction SOLAS requires that mariners keep their charts up-to-date for an intended voyage. Mariners receive chart corrections and other essential information for the area of their intended voyage as • Notices to Mariners (by post, by email, by fax, etc.) •... -
Page 208: Symbols To Use With Manual Updates
10. Manual Updates 10.2 Symbols to Use with Manual Updates Manual updates can be used for the following purposes: • Keep charts up-to-date using similar symbols as the real chart uses. We refer to these symbols as "True symbols". • Keep charts up-to-date using conspicuous orange symbols reserved for this purpose. We refer to these symbols as "Orange symbols". -
Page 209: Controlling Visibility Of True Symbols From Manual Updates
10. Manual Updates 10.3.2 Controlling visibility of true symbols from manual updates Chart features added by manual updates behave exactly as any other chart feature. Their visibility follows common rules. For more information, see the section "8.10.4 Controlling visible chart features. 10.4 Controlling Chart Viewing Dates of Manual Updates... -
Page 210: Using Manual Update Editor W/Orange Symbols
10. Manual Updates 10.5 Using Manual Update Editor w/Orange Symbols The manual update editor has the choices shown below and you can choose one Go Back by choosing Manual Updates from the Chart menu. • Planning: Operate with new manual updates. •... -
Page 211: Inserting New Orange Symbols
10. Manual Updates 10.5.2 Inserting new orange symbols The mariner can insert a new object either using New or Copy in the Manual Update Planning dialog box. With New he creates a new feature from scratch. With Copy he uses an already existing object as an example for the newly inserted feature. - Page 212 10. Manual Updates 1. Spin the scrollwheel to display Menu/Info/Chart Menu in the mouse functions area. 2. Push the right mouse button. 3. Choose Manual Updates, push the scrollwheel, choose Planning then push the scrollwheel. 4. Click the New button in a Manual Update Planning dialog box. 5.
- Page 213 10. Manual Updates Inserting new orange symbols using "copy" You can make new orange symbols by copying existing orange symbols. Then you pick up an orange symbol and make a copy of it. After copying you can modify position suitable for your purposes. 3.
-
Page 214: Deleting Orange Symbols
10. Manual Updates 10.5.3 Deleting orange symbols The mariner cannot permanently remove any of the official chart objects from the chart display. If the mariner needs to remove any of the official chart objects, he is allowed to mark them as deleted. In practice the deleted chart object is still visible, but it has a special presentation for a deleted object on top of it. -
Page 215: Editing Position Of Orange Symbols
10. Manual Updates 10.5.4 Editing position of orange symbols An object can be type of point, line or area. • Point has only one point in its presentation. • Line can consist of one or more chains. A chain consists of two or more points. •... - Page 216 10. Manual Updates The example below shows how to modify a line. 1) Activate Position Edit. 2) Place cursor on point to edit. 3) Keep left mouse button pushed down to modify a point. The example below shows how to set position for a point. This method is also applicable to insert or append new points for existing chart features.
- Page 217 10. Manual Updates The example below how to define an area for an existing chart feature. 1) Activate Position Edit. 3) Place cursor on requred point and push left mouse button. 2) Choose "Set Center". 10-11...
-
Page 218: Using Manual Update Editor With True Symbols
10. Manual Updates 10.6 Using Manual Update Editor with True Symbols The manual update editor has the following features: Go Back • Planning: Operate with new manual updates. • Undo Last: Remove last accepted manual update planning session. By repeating Undo Last you can remove any amount of old manual update planning session. -
Page 219: Deleting Chart Objects
10. Manual Updates 10.6.2 Deleting chart objects The mariner cannot permanently remove any of the official chart objects from the chart display. If mariner needs to remove any of the official chart objects he is allowed to mark them as deleted. In practice the deleted chart object is still visible, but it has a special presentation for a deleted object on top of it. -
Page 220: Modifying Chart Objects
10. Manual Updates 10.6.3 Modifying chart objects The mariner cannot permanently remove from the chart display any of the official chart objects, but he can modify position and/or properties of chart objects. When the mariner modifies a chart object, the ECDIS will mark original chart object as deleted and a copy of original chart object as inserted. -
Page 221: Inserting New Chart Objects
10. Manual Updates 8. Set positions with cursor and push left mouse button. Click Accept button. 10.6.4 Inserting new chart objects The mariner can insert a new object either using New or Copy. With New he creates a new feature from scratch. With Copy he uses an already existing object as an example for the new inserted feature. - Page 222 10. Manual Updates Example of how to insert a "restricted area" 1. Follow steps 1-3 on page 10-6 to display the Manual Update Planning dialog box. 2. Click the New button in the Manual Update Planning dialog box. 3. Choose Area from the Drawing Type list box then choose Single from the Category list box. 4.
- Page 223 10. Manual Updates Example of how to insert easy lateral sea mark The method is similar also for easy cardinal sea marks, easy other sea marks, Easy lights and easy obstructions. 1. Follow steps 1-3 on page 10-6 to display the Manual Update Planning dialog box. 2.
- Page 224 10. Manual Updates Example of how to insert a nav aid A light is only a light - it also requires a support that could be a pile or buoy, etc. Body and top mark of a buoy are separated to enable a vast number of possible combinations. 1.
- Page 225 10. Manual Updates 10. Set postion with cursor and push left mouse button. Press Accept button. 11a. 11b. Set position and then click the Accept Manual Updates as Permanent button. 10-19...
- Page 226 10. Manual Updates Inserting new chart objects using "copy" You can make a new object by copying an existing one. Then you pick up an object and make a copy of it with all related properties. After copying, you can modify position and properties of copied object suitable for your purposes.
-
Page 227: Editing Properties Of Manually Updated Chart Objects
10. Manual Updates 10.6.5 Editing properties of manually updated chart objects Editing properties of chart objects 1. Follow steps 1-3 on page 10-6 to display the Manual Update Planning dialog box. 2. In Manual Update Planning dialog box, click the Edit Properties button. An Object window appears. 3. - Page 228 10. Manual Updates Editing position of chart objects An object can be type of point, line or area. • A Point has only one point in its presentation. • A Line can consist of one or more chains. A chain consists of two or more points. •...
- Page 229 10. Manual Updates Example of how to set new position for a point The method is also applicable to insert or append new points for existing chart features. 1) Activate Position Edit. 2) Insert point with left mouse button. 3) If necessary change lat and lon position.
-
Page 230: Checking Creation And Usage History Of Manual Updates
10. Manual Updates 10.7 Checking Creation and Usage History of Manual Updates You may need to check when a manual update has been added into your ECDIS. Also you may need to check what was shown in your chart display three weeks ago. There are also many other cases when you need to know what was known by your ECDIS. -
Page 231: 11. Chart Alarms
11. Chart Alarms 11.1 General The ECDIS can detect areas where the depth is less than the safety contour or detect an area where a specified condition exists. If you plan a route or if prediction of your ship movement goes across a safety contour or an area where a specified condition exists, the system will display a visual alarm or sound an audible alarm to alert you to impending danger. -
Page 232: Chart Alarms
11. Chart Alarms 11.2 Chart Alarms Official S57 chart material contains depth contours that can be used for calculation of chart alarms. A chart database also includes different types of objects that the operator can use for chart alarms. The procedure for setting chart alarms is outlined below. -
Page 233: Choosing Objects Used In Chart Alarms
11. Chart Alarms 11.2.2 Choosing objects used in chart alarms You can also include calculation areas that have to be noted when sailing (for example, restricted areas). To include these areas in chart alarms, do the following: 1. Spin the scrollwheel to show Menu/Info/Chart Menu in the mouse functions area then push the left mouse button. - Page 234 11. Chart Alarms List of areas There are the areas that the ECDIS detects and provides the audible alarm or visual indication if estimated your ship's position or planned or monitored route cross the area defined on the Chart Alarms page. You can choose from the following areas: Fairway Cargo Transhipment Area...
-
Page 235: Highlighting Chart Alarms
11. Chart Alarms 11.2.3 Highlighting chart alarms The operator can choose the level of transparency of the chart alarm highlight. Follow the procedure below to choose the level of transparency. 1. Spin the scrollwheel to show *ALL-ON Chart Display/Info/Standard Display then push the left mouse button. -
Page 236: Inserting User Chart Symbols, Lines And Areas In Chart Alarm
11. Chart Alarms 11.3 Inserting User Chart Symbols, Lines and Areas in Chart Alarm Symbols For user chart symbols, use the option Danger Symbol in the Symbol page of the Plan User Chart dialog box. To display this box, do the following: 1. - Page 237 11. Chart Alarms Areas To include areas in the chart alarm, check the Danger Area box in the Area page of the Plan User Chart dialog box. Danger Area must checked, otherwise danger areas of a user chart cannot be used in the chart alarm. The dangerous area is drawn in red instead of dark yellow (color may be different depending on Palette in use).
-
Page 238: Activating Own Ship Check
11. Chart Alarms 11.4 Activating Own Ship Check Calculation of your ship predicted movement area is done using watch sector from your ship's position. Sector size is defined by time and angle. To set them, do the following: Spin the scrollwheel to show Menu/Info/Chart menu in the mouse functions area then push the left mouse button. - Page 239 11. Chart Alarms North Up TM ECDIS only 070.0° (CALC) (POSN) (POSN) 045.1° (POSN) CPA 10 nm 10 min Chart alarm always uses the largest scale chart available no matter which chart is chosen for display. 11-9...
-
Page 240: Route Planning
11. Chart Alarms 11.5 Route Planning The system will calculate chart alarms using operator-defined channel limit for routes. Danger areas are shown highlighted if safety contour or operator-chosen chart alarm areas are crossed by the planned route. For more information on route planning, see Chapter 13 Route Planning. Note: If your voyage is going to take a long time or you are planning it much earlier than it is to take place, use display and approve dates corresponding to the dates you are going to sail. -
Page 241: Finding Chart Alarms Leg By Leg
11. Chart Alarms 11.5.1 Finding chart alarms leg by leg After you have done chart alarm calculation, the system is able to show you legs on the route where danger areas are located. All the alarms for each leg where alarms occur are shown in the Alarms list. The list of alarms is based on selections made in the Chart alarm parameters sub menu. -
Page 242: Finding Chart Alarms By Category
11. Chart Alarms 11.5.2 Finding chart alarms by category After you have done chart alarm calculation, the system is able to show you legs on the route where the chart alarms are located. The system can show alarms by their category. To find chart alarms for a route by alarm category, do the following: In the Check page of the Plan Route dialog box, the Legs by alarm field has a selection box where you may choose desired leg number. -
Page 243: Route Monitoring
11. Chart Alarms 11.6 Route Monitoring Route monitoring can be divided into two categories: your ship estimated position and monitored route. North Up TM ECDIS only 070.0° (MAN) (CALC) (POS) (POSN) (POS) (POSN) 045.1° (POS) (POSN) CPA 10 nm 10 min The figure above shows how the system highlights chart alarms inside channel limits of a monitored route and inside predicted movement area of your ship. -
Page 244: Chart Alarm Using Arcs Charts
11. Chart Alarms 11.7 Chart Alarm Using ARCS Charts In case of ARCS charts, the operator can define danger areas by using a user chart. The system can use user chart symbols, lines and areas and calculate chart alarm from this material. For further details, see Chapter 15 User Chart Control. -
Page 245: 12. Navigation Tools
12. Navigation Tools 12.1 Display Mode and Chart Orientation There are two display modes to present your ship’s movement on the electronic chart. They are true motion, TM, and relative motion, RM. In the true motion mode, the ECDIS shows your ship's position and other movable data such as radar targets moving on the earth-fixed chart background. -
Page 246: Navigation Marks
12. Navigation Tools 12.2 Navigation Marks Navigation marks consist of Reference Point, EBL, VRM, Parallel Index and Range Rings. Two sets of these marks are provided on the Nav. Marks dialog box, so that you can arrange each set according to a particular navigation operation. -
Page 247: Shifting The Ebl
12.Navigation Tools 12.2.1 Shifting the EBL With control unit RCU-018 There are two EBLs, No. 1 and No. 2. Each EBL is a straight dashed line extending out from your ship's position up to the edge of the screen. The long dashed line is the No. 1 EBL and the short dashed one is the No. 2 EBL. Press the EBL ON key to display either of the EBLs. -
Page 248: Shifting The Reference Point
12. Navigation Tools 12.2.4 Shifting the reference point The reference point, shown on the display with a cross mark (if turned on in the Nav Marks dialog box), is a specified location to which measurements of range and bearing are referred. To choose the location for the reference point, open the Nav. - Page 249 12.Navigation Tools North Up TM ECDIS only 070.0° (CALC) (POSN) (POSN) 045.1° (POSN) Past Posn true CPA 10 nm 10 min Centered reference point with range ring 12-5...
- Page 250 12. Navigation Tools This page intentionally left blank. 12-6...
-
Page 251: 13. Route Planning
13. Route Planning 13.1 Introduction A route plan defines the navigation plan from starting point to the final destination. The plan includes: • Route name • Name, latitude and longitude of each waypoint • Radius of turn circle at each waypoint •... -
Page 252: Main Menu For Route Planning
13. Route Planning 13.2 Main Menu for Route Planning The main parameters for the route planning are: • Latitude and longitude of the waypoint • Channel limits to the waypoint • Turning radius of the waypoint • Maximum and minimum speed limits for a leg There are two phases for a route: Route Plan and Route Monitor. -
Page 253: Choosing Datum
13. Route Planning Copy from Monitored: Copy monitored route to plan route. Backup and Restore: You can make a backup of a route to a floppy disk or restore a route from a floppy disk. See Chapter 17 Backup Operations. Report: Generate report of planned route. -
Page 254: Creating A New Route
13. Route Planning 13.4 Creating a New Route Write name of the new Route Plan To make a complete route for a voyage, do the following: 1. Place the cursor on Route in the status bar, then click the Plan button to open the Plan Route dialog box with Route Plan menu. -
Page 255: Processing Waypoints
13. Route Planning 13.4.1 Processing waypoints Following fields and buttons can be found in the WP page. Enable changes: Check to edit waypoints. Note: Routes can only be modified in the North-up or Course-up mode. Each waypoint has a number. NAME: You can name each waypoint. -
Page 256: Alarms Page
13. Route Planning 13.4.2 Alarms page The Alarms page lets you define conditions along a route for which you want to be alerted, by visual or audible indication. (You cannot get both visual and audible indications for a condition.) You can choose safety contour and chart alarms used to check the safety of the route. -
Page 257: Using The Check Page
13. Route Planning 13.4.3 Using the check page The Check page allows you to make safe water calculation for your route. You also store the names of the user chart and pilot data to use during route monitoring together with planned route on this page. This storage happens when you activate the safe water calculation by pushing the Start button. -
Page 258: Using The Parameters Page
13. Route Planning 13.4.4 Using the parameters page The Parameters page allows you to set departure time and arrival time for your route. Also optimisation type is chosen in this page. Enable changes: Check in order to enable editing. Note: A route may only be modified when using the north-up or course-up mode. -
Page 259: Using The Prepare Page
13. Route Planning 13.4.5 Using the prepare page The Prepare page allows you to prepare for exchange of planned route with monitored route. Use this page if you are going to use the exchange function to choose planned route as monitored route. If you do not use this page to define To WP and Final WP for steering in the planning mode, ECDIS will choose the most suitable To WP based on your ship's position and Final WP based on waypoint selected on the Parameters page. -
Page 260: Modifying An Existing Route
13. Route Planning 13.5 Modifying an Existing Route North Up TM ECDIS only 070.0° (CALC) (POSN) 045.1° (POSN) (POSN) Posn true Modifying an existing route 13.5.1 Parameters Main parameters for the route planning are: • Latitude and longitude of the waypoint •... - Page 261 13. Route Planning Entering latitude and longitude in position field Place the cursor on Route in the status bar, click the Plan button to open the Plan Route dialog box then click the WP tab. Check Enable changes, then choose desired WP. Place the cursor in the Lat or Lon field as appropriate, spin the scrollwheel to set co-ordinates then push the scrollwheel to confirm.
-
Page 262: Changing Other Waypoint Data
13. Route Planning Dragging and dropping waypoint to new position 1. Place the cursor on Route in the status bar, click Plan to open the Plan Route dialog box then click the WP tab. 2. Check Enable changes, then put the cursor on the waypoint you want to process. 3. -
Page 263: Adding A New Waypoint At The End Of A Route
13. Route Planning 13.5.4 Adding a new waypoint at the end of a route There are two ways that you can add a new waypoint at the end of a route: • Use the cursor and left mouse button to define position of a waypoint. •... -
Page 264: Deleting A Waypoint
13. Route Planning 13.5.6 Deleting a waypoint To delete a waypoint, do the following: 1. Place the cursor on Route in the status bar then click the Plan button to open the Plan Route dialog box. Click the WP tab to open the WP page. Check Enable changes. 2. -
Page 265: Importing Waypoint From External Device (Gp-80 Or Gp-90)
13.5.8 Importing waypoint from external device (GP-80 or GP-90) You are able to import waypoints from other External Device, like FURUNO GP-80 or GP-90 GPS Navigator to current route. To import waypoints do the following: 1. Place the cursor on Route in the status bar then click Plan to open the Plan Route dialog box. Click the WP tab to open the WP page. -
Page 266: Reversing Sailing Order Of A Route
13. Route Planning 13.5.9 Reversing sailing order of a route You may reverse the order of waypoints in a plan route. Place the cursor on Route in the status bar then click the Plan button to open the Plan Route dialog box. Click the WP tab to open the WP page. Check Enable changes. Click the Reverse button. -
Page 267: Optimizing A Route
13. Route Planning 13.6.2 Optimizing a route You can define Estimated Time of Departure (ETD), desired number of waypoints and Estimated Time of Arrival (ETA) on the Parameters page in the Plan Route dialog box to optimize your route. 1. Place the cursor on Route in the status bar then click the Plan button to open the Plan Route dialog box. Click the Parameters tab to open the Parameters page. -
Page 268: Wp Table Report
13. Route Planning An Example of speed profile max speed max_speed timetable profit cost min speed 1 2 3 4 5 6 7 8 9 10 11 Waypoint 13.7 WP Table Report This report is generated when you choose Report from the Plan Route menu. To display the report viewer, choose Route-Plan from the status bar, put the cursor on the triangle in the Plan Route dialog box, choose Report then push the scrollwheel. -
Page 269: Full Wp Report
13. Route Planning 13.8 Full WP Report The Full WP Report provides detailed information on each waypoint in a plan route. To display the report viewer, Place the cursor on the triangle in the Plan Route dialog box, choose Full WP Report from the menu then push the scrollwheel. -
Page 270: Passage Plan Report
13. Route Planning 13.9 Passage Plan Report Passage Plan report generates WP report together with pilot data report. The system automatically attaches pilot data from the planning mode on the route plan when you choose the Passage Plan report. To display the report viewer, choose Route-Plan from the status bar, put the cursor on the triangle in the Plan Route dialog box, choose Passage Plan Report from the menu then push the scrollwheel. -
Page 271: 14. Route Monitoring
14. Route Monitoring 14.1 Introduction Route monitor is a means for permanent monitoring of the ship’s behavior relative to the monitored route. The information area displays the data on the ship’s position relative to the monitored route. The monitored route consists of the following information, displayed in the electronic chart area: •... -
Page 272: Choosing To Waypoint
Choose the Plan Route dialog box and make necessary modifications. 14.3 Choosing TO Waypoint When the connected ARPA radar is FURUNO or ARPA radar that communicates using IEC 61162-1 standard the monitor dialog box looks like the figure at right. Note... -
Page 273: Choosing Final Waypoint
14. Route Monitoring 14.4 Choosing Final Waypoint Normally you use the last waypoint in a monitored route as the final waypoint, and the ECDIS automatically does this when you choose the route to monitor. However, sometimes you may prefer to use some other waypoint as the final waypoint of a monitored route. -
Page 274: Displaying A Route On The Electronic Chart Screen
14. Route Monitoring 14.6 Displaying a Route on the Electronic Chart Screen To display a monitored route, make sure that desired options of the monitored route (center line, channel borders, WP marks, leg marks and wheel over line) are chosen on the Route page of the Chart Display dialog box. To show this display, spin the scrollwheel to show Chart Display/Info/Standard *ALL-ON Display in the mouse functions area, push the left mouse button then click an... -
Page 275: Route Assistant
14. Route Monitoring 14.7 Route Assistant The system has a built-in route assistant that facilitates safe use of routes. During route planning, you can check your route plan for safe water and you can attach a user chart and pilot data that you intend to use together with a route plan. - Page 276 14. Route Monitoring The Alarms page may show the following message: "* = Current selection differ" indicates which conditions are currently set differently as planned. Remedy: Open Chart Alarm parameters to set them as they were at the time the route was planned. The Selection page may show the following messages:...
-
Page 277: Monitoring A Route
14. Route Monitoring 14.8 Monitoring a Route You can monitor the route from the two Plan Speed windows in the information area. Upper window: • Plan Speed: Planned speed to approach "To WP". • Plan: Planned course between previous WP and "To WP". Note that if the gyro value is compensated and Gyro error correction and Gyro error compensation have been enabled in Ship and Route parameters in the Initial Settings menu, then the text "(corr)"... -
Page 278: Information About Steering Mode On Permanent Route Monitor Windows
• Go Track mode: "Goto Track", "Track Great circle" and "Track Appr. Enabled", Track Turn enabled", "Track Turn" For further information about steering with the FAP-2000, see Chapter 28 Steering with FURUNO Autopilot FAP-2000. YOKOGAWA Autopilot PT-500A Following information can be seen with steering mode: •... -
Page 279: Eta (Estimated Time Of Arrival)
14. Route Monitoring 14.9 ETA (Estimated Time Of Arrival) Estimated time of arrival to a waypoint is calculated by the ECDIS. The operator can choose waypoint number and speed profile for calculation in the Monitoring page of the Monitor Route dialog box. To WP: Indicates approaching "TO WP". - Page 280 14. Route Monitoring Trial speed: Choose Trial from the Speed profile box to enter desired speed for calculation of ETA to waypoint. Speed profile is changed to Trial speed. You can enter Trial speed and system will calculate ETAs. Spd profile 14-10...
- Page 281 14. Route Monitoring Time table optimization displayed in route monitoring. profile Plan: This displays ETA at final WP. This value also appears in the Parameters page of the Plan Route dialog box. Off Plan: Indicates time difference between planned ETA and calculated ETA to final WP. Suggested speed: The system calculates suggested speed so that ETA to the final WP would be same as planned ETA if type of optimization was "Time table".
-
Page 282: 14.10 Route Monitoring Alarms
14. Route Monitoring 14.10 Route Monitoring Alarms The following alarms are related to route monitoring. 2052 Route: Illegal ETA WP: Appears when the system cannot use the chosen ETA waypoint. The reason might be corrupted or missing route file. 2053 Route: Illegal To WP: Appears when the system cannot use the chosen "To WP". The reason might be corrupted or missing route file. -
Page 283: 15. User Chart Control
15. User Chart Control 15.1 Introduction User charts are simple overlay charts that the operator makes for his own purposes. They can be displayed on both the radar display and the electronic chart. These charts are intended for highlighting safety-related items like position of important navigation marks, safe area for the ship, etc. -
Page 284: Modes Of User Charts
15. User Chart Control 15.1.2 Modes of user charts A user chart can be chosen for the monitoring mode, which means that it is displayed on connected ARPA radar display and it can be used in chart alarm calculation. Another user chart mode modifies the user chart planning mode. - Page 285 15. User Chart Control Opening the user chart dialog box and menu 1. Place the cursor on UserChart on the status bar. Click either Plan or Monitor button to open corresponding dialog box. If no User Chart has been chosen, one of the menus shown below appears, along with appropriate dialog box.
-
Page 286: What Is A User Chart Point And How Is It Used
15. User Chart Control 15.2 What is a User Chart Point and How is it Used? A point is a center point for a sub chart inside a user chart. Sub charts are small enough (max 80 elements) to be sent for display on the radar. - Page 287 15. User Chart Control Below are some examples of sub-charts. Note the position used for points to collect the sub charts. 15-5...
-
Page 288: Choosing Datum
15. User Chart Control 15.3 Choosing Datum Selection of datum is very important, especially if you manually enter latitude-longitude positions from the control panel or keyboard or if you use digitizer. If you only use the cursor to add and to modify waypoint locations, then you could use any datum, although it is recommended to use native datum of the chart. -
Page 289: Choosing User Chart To Use In Planning Mode
15. User Chart Control 15.5 Choosing User Chart to use in Planning Mode If "User Chart" on the status bar is white (or black depending on color scheme in use) it means that the workstation is in the monitoring mode user chart. To activate the planning mode and choose a user chart for the planning mode, do the following: ECDIS only North Up TM... -
Page 290: Creating A User Chart
15. User Chart Control 15.6 Creating a User Chart You can create and modify a user chart when you have chosen the planning mode of user chart. Write name of the new Route Plan [User Chart] Go Monitor mode Select Unselect Create Backup and Restore... -
Page 291: Point Page
15. User Chart Control 15.6.1 Point page The Point page lets you define points on a user chart. To choose this page, push the right mouse button (Next Card) then click the tab with the left mouse button. Enable changes: Check in order to modify user chart. -
Page 292: Symbol Page
15. User Chart Control 15.6.2 Symbol page The Symbol page lets you draw symbols on a user chart. To choose this page, push the right mouse button (Next Card), click the tab with the left mouse button or hit the NEXT key on the keyboard- equipped control unit. -
Page 293: Line Page
15. User Chart Control 15.6.3 Line page The Line page lets you inscribe lines on a user chart. To choose this page, push the right mouse button (Next Card), click the tab with the left mouse button or hit the NEXT key on the keyboard- equipped control unit Enable changes:... -
Page 294: Tidal Page
15. User Chart Control 15.6.4 Tidal page The Tidal page lets you inscribe tidal data on a user chart. To choose this page, push the right mouse button (Next Card) then click the tab with the left mouse button. Check in order to modify user chart. Enable changes: Note: The user chart may only be modified in the Course-up or North-up mode. -
Page 295: Area Page
15. User Chart Control 15.6.5 Area page The Area page lets you inscribe areas on a user chart. To choose this page, push the right mouse button (Next Card) then click the tab with the left mouse button. Enable changes: Check in order to modify user chart. - Page 296 15. User Chart Control Corner points of area window After you have defined an area, you can define corner points for it, by inserting a new point or appending a point, as shown in the figure below. For example, put the cursor on position A, click the left mouse button, and the area changes as in the right-side figure below.
- Page 297 15. User Chart Control Choosing an area of a user chart to modify In the Area field, Current indicates which area of a user chart is chosen for modification. To modify another area, two methods are available: • Enter desired area number of user chart object in the Rec box. To modify number, put the cursor in the Current box and use scrollwheel to change desired number.
-
Page 298: Adding A New Point, Symbol, Line Or Tidal To A User Chart
15. User Chart Control Importing an area to a user chart You can copy Areas of User Chart from another User Chart file to active User Chart file. Click the Import button in the Area field, and the User Chart Import dialog box appears. -
Page 299: Changing Other Data Of Point, Symbol, Line Or Tidal
15. User Chart Control Choosing a point, symbol, line or tidal to modify In this manual the term "user chart object" refers to any of point, symbol, line or tidal. The procedure for modifying a user chart object is common to all user chart objects. To choose the user chart object to modify, open the appropriate user chart object page. -
Page 300: Importing Points, Symbols, Lines Or Tidals From Other User Chart
15. User Chart Control 15.6.9 Importing points, symbols, lines or tidals from other user chart User is able to choose User chart objects from other user chart to import them to current User chart. To import User chart object do the following: 1. -
Page 301: Displaying User Charts On Ecdis Display
15. User Chart Control 15.8 Displaying User Charts on ECDIS display User charts can be displayed on the ECDIS display, and you can choose which chart objects to display from the Mariner page in the Chart Display dialog box. Below are some examples from the same user chart with different selections. - Page 302 15. User Chart Control An example with only symbols and points displayed. Note that this is also a very good example how many and where the points should be defined. No symbols displayed 15-20...
-
Page 303: Backing Up User Charts To A Floppy Disk
15. User Chart Control 15.9 Backing up User Charts to a Floppy Disk You may make backups of user charts. This feature is also useful for carrying user charts to other planning or navigation station. For further details, see section 17.5 Backing up a File to a Floppy Disk. 15.10 Restoring User Charts from a Floppy Disk This procedure can be used to read backup copies of any User Chart file if some data is lost during Pilot data modifying. - Page 304 15. User Chart Control Changing font size in report If you want to change the size of the font in a report hard copy, do the following: 1. Move the cursor onto the triangle in the report window. [Text View] Print Font Size: 8 Print Font Size: 9 Print Font Size: 10...
- Page 305 15. User Chart Control Sample reports Points report Lines report Areas report Symbols report Full report Report for radar 15-23...
- Page 306 15. User Chart Control This page intentionally left blank. 15-24...
-
Page 307: 16. Pilot Data
16. Pilot Data 16.1 Introduction A navigation-related notebook is called "pilot data". Pilot data is a "notebook data" file that provides messages for the operator relative to a specific ship position in the monitoring mode. The operator specifies range for each pilot data record. -
Page 308: Pilot Data Modes
16. Pilot Data 16.1.1 Pilot data modes Pilot data can be chosen for the monitoring mode, which means that pilot data gives predefined messages for the operator relative to a specific ship position. Another mode is for modifying pilot data in the planning mode. In the planning mode, pilot data is used to define predefined messages relative to your ship's position. -
Page 309: Using Pilot Data
16. Pilot Data 16.2 Using Pilot Data To prepare pilot data, do the following: 1. Place the cursor on PilotData in the status bar, then click the Plan or Monitor button as appropriate. If no pilot data is chosen, the Pilot Data menu (shown below) appears in addition to the Monitor Pilot Data dialog box or Plan Pilot Data dialog box. -
Page 310: Choosing Pilot Data To Use In Monitoring Mode
16. Pilot Data 16.3 Choosing Pilot Data to use in Monitoring Mode Pilot data that is for system use is displayed in the pilot data field on the status bar. If the text "PilotData" is red this means that the workstation is in the planning mode for pilot data. To activate the monitoring mode and choose pilot data for the monitoring mode, do the following: North Up TM ECDIS only... -
Page 311: Monitor Pilot Data Dialog Box Description
16. Pilot Data 16.3.1 Monitor pilot data dialog box description Current page If "View all records" is not chosen (checked): • Opens "Current Record" page. • When the ship is within the range set for a pilot data, the information of current record appears, something like the dialog box shown right. -
Page 312: Choosing Pilot Data To Use In Planning Mode
16. Pilot Data 16.4 Choosing Pilot Data to use in Planning Mode If the PilotData in the status bar is black (or white depending on color scheme) this means that the workstation is in the monitoring mode for pilot data. To activate the planning mode and choose pilot data for the planning mode, do the following: North Up TM ECDIS only... -
Page 313: Plan Pilot Data Dialog Box Description
16. Pilot Data 16.4.1 Plan pilot data dialog box description Edit record page Edit Record box: This indicates current number of active records. Enable changes: Check to enable changes. Note: Pilot data may only be modified in the North-up or Course-up mode. Position: Indicates the latitude and longitude position of current record. -
Page 314: Creating New Pilot Data
16. Pilot Data 16.5 Creating New Pilot Data You can create and modify pilot data, and this can be done in the planning mode. It is recommended to use the true motion display mode while editing. [Pilot Data] Go Monitor mode Select Unselect Create... -
Page 315: Choosing Pilot Data Record To Modify
16. Pilot Data To add a new pilot data record by Add button: 1. Open the Edit page of the Plan Pilot Data dialog box then check Enable changes. 2. Click the Add button. This adds a new pilot data record to the end of record, and it is a copy of current pilot data record. -
Page 316: Changing Other Data Of Pilot Data Record
16. Pilot Data 16.5.4 Changing other data of pilot data record To change function range or character data of pilot data, such as range and text, do the following: 1. Choose desired pilot data record, following section 16.5.2 Choosing pilot data record to modify. 2. -
Page 317: 17. Backup Operations
17. Backup Operations 17.1 Introduction There are several menus from which the operator may initiate backup and restore functions. From those menus the operator may execute hard disk operations such as backup, copy, rename and delete. The operator may make backup copies to backup devices or restore from backup device to hard disk. -
Page 318: Choosing Appropriate File Category
17. Backup Operations 17.2 Choosing Appropriate File Category The system automatically chooses corresponding file depending on your selection. The categories consist of the following files: • Route plans • User charts • Pilot data • Installation parameters • Chart display settings •... -
Page 319: Backing Up A File To A Floppy Disk
17. Backup Operations 17.5 Backing up a File to a Floppy Disk You can make a backup from an original file to a floppy disk. To make a backup of a file to a floppy disk, insert a floppy disk in the disk drive, then do the following: 1. -
Page 320: Moving A File To Planning Or Navigation Station
17. Backup Operations 17.8 Moving a File to Planning or Navigation Station If there are two ECDIS workstations connected via a LAN, files can be moved from one workstation to another and vice versa. Note: The intention of the Backup function is to make a backup copy of a route, user chart, etc. to a backup medium. -
Page 321: Reading A File From Planning Or Navigation Station
17. Backup Operations 17.9 Reading a File from Planning or Navigation Station If there are two ECDIS workstations connected via a LAN, it is possible to read files from planning station to navigation station and vice versa. 1. Select desired menu. 2. -
Page 322: 17.12 Saving A Route As An Ascii Text File
17. Backup Operations 17.12 Saving a Route as an ASCII Text File Sometimes it is useful to save route information as an ASCII text file for use with some other application, or to restore some ASCII text produced by some other application to the ECDIS. For further details see Appendix 5. The following formats are available for route backup and restore: •... -
Page 323: 17.14 Backing Up Chart Material
17. Backup Operations 17.14 Backing up Chart Material The ECDIS lets you keep a chart database identical both in the hard disk of the ECDIS and the hard disk of the backup ECDIS. If you want to make a backup of chart material to backup ECDIS, open the Backup & Restore dialog box and do the following: 1. -
Page 324: 17.15 Restoring Chart Material
17. Backup Operations 17.15 Restoring Chart Material The ECDIS lets you keep a chart database identical both in the hard disk of the ECDIS and the hard disk of backup the ECDIS. If you want restore a backup of some chart material from the backup ECDIS, open the Backup and Restore dialog box and do the following: 1. -
Page 325: Common Reference System (Multi-Workstation Mode)
18. Common Reference System (Multi-workstation mode) 18.1 Introduction A system is comprised of one or more Workstation(s) and it is configured as follows: • Single workstation • Multiple workstation (for example, navigation workstation and planning station) • Multiple workstation (for example, navigation workstations) An access server takes care of information shared inside the system to keep workstations consistent within the common reference system concept. -
Page 326: Controlling Common Reference System
18. Common Reference System 18.2 Controlling Common Reference System If the system has a dual workstation, the following dialog box appears when choosing the Initial Settings menu. Open the box by moving the cursor onto the workstation mode indication and pushing the right mouse button. 1. -
Page 327: Shared Alarm Management
18. Common Reference System 18.2.1 Shared alarm management The common reference system concept provides that all alarms are indicated in all workstations and a single acknowledge of alarm from any workstation is enough to acknowledge the alarm from all workstations. 18.2.2 Harmonized databases on workstations When the multi-workstation mode is used, information between workstations is shared via the access server. - Page 328 18. Common Reference System You can set access server display options ON if you want to monitor access server windows to know harmonization status, whenever harmonization is completed by the system. To set access server display ON/OFF, do the following: 1.
-
Page 329: Shared Operator Selections
18. Common Reference System 18.2.3 Shared operator selections The common reference system concept allows that some selections and settings made by a operator in one workstation are transferred to the other workstation. These are as follows: • Route, user chart and pilot data in monitoring mode •... -
Page 330: Setting Usage Rights As "Multi" Or "Slave
18. Common Reference System 18.3.2 Setting usage rights as "multi" or "slave" Multiple workstations can be chosen to control monitoring modes and navigation sensors. This means that these particular workstations are used to choose route, user chart and pilot data for monitoring modes. However, the multiple control requires that none of the other workstations is set for Master usage rights. -
Page 331: Setting Usage Rights As "Plan
18. Common Reference System 18.3.3 Setting usage rights as "plan" Workstation can be chosen to control only the planning mode. This means that particular workstation is used to edit route, user chart and pilot data in the planning mode. Selection of Plan usage rights is done in the Installation Parameters of the ECDIS by service personnel. -
Page 332: Sensor Source For The System
18. Common Reference System 18.4 Sensor Source for the System Normally the sensor source of a system is a single workstation to which all the sensors are connected. All workstations share the navigation sensors. The workstation chosen as a sensor source is connected to all sensors. The workstations that can be used as sensor source are shown in the Sensor source list box in the Sensors dialog box. -
Page 333: Mode Of Workstations
18. Common Reference System 18.5 Mode of Workstations The system is designed so that information and operations can be shared among workstations. Sharing requires that the access server be running in the specified workstation. (This is an installation parameter. See the Installation Manual.) The access server requires that the workstation be designated as multi workstation. -
Page 334: Troubleshooting
18. Common Reference System 18.6 Troubleshooting If something fails while the access server is harmonizing workstations, the following window appears to indicate that harmonising has failed. 18.6.1 What to do if pending access server window remains on screen The window below indicates that operation of the access server is pending. There are two alternatives for pending state: 1. -
Page 335: Access Server Log
18. Common Reference System 18.6.2 Access server log The access server log is used to analyze and diagnose access server operation. Service personnel can use this log to check the access server for proper operation. To access the access server log, do the following: 1. -
Page 336: Human Interface Log
18. Common Reference System 18.6.3 Human interface log The human interface log is used to analyse and diagnose system operation. Service personnel can use this log to check the system for proper operation. To activate the human interface log, do the following: 1. -
Page 337: 19. Navigation Sensors
19. Navigation Sensors 19.1 Choosing Navigation Sensors The operator can choose navigation sensors to use for navigation and view their current values on the Sensors dialog box. To access this dialog box, put the cursor on the Position field in the information area then push the right mouse button. - Page 338 19. Navigation Sensors ARPA: If checked, ARPA is used as speed and course source. The following indications appear to denote source: (bottom): Log operating in bottom tracking mode. (water): Log operating in water tracking mode. (posit.): Position receiver such as GPS. (manual): Manual speed.
- Page 339 19. Navigation Sensors Position page The field of a position sensor contains a label (here FURUNO and MX 200) which indicates the name of the sensor; a status (primary/secondary/off) which indicates if the sensor is used or not; position at conning position and local datum;...
- Page 340 19. Navigation Sensors Enable: Check to align chart, using the "drag and drop" feature. Chart alignment: Alignment is automatically chosen if the operator has defined position offset by using the chart align feature. The offset values are given in nautical miles and degrees. If position alignment is used, the operator is reminded of it every 30 minutes by the alarm "2011 ChartAlign: over 30 min".
- Page 341 19. Navigation Sensors Other page Set and Drift: See description below. Wind: Wind (True or North) speed (Kt or m/s) and direction are displayed. Note that true wind is wind relative to your ship heading. For further details, see section 19.10 Wind Sensor.
-
Page 342: Source Of Position
19. Navigation Sensors 19.2 Source of Position The figure below shows how source for position is chosen. The Kalman filter uses all position sensors which have either primary or secondary as input for its calculation. DGPS and SYLEDIS position sensors are considered more accurate than other position sensors. -
Page 343: Primary And Secondary Positions Of Own Ship
19. Navigation Sensors 19.3 Primary and Secondary Positions of Own Ship The system has three different positions for your ship: System position, primary position and secondary position: • System position: Used for navigation and steering. See "Source of Position" on page 19-6. •... -
Page 344: Source Of Sog, Cog, Speed, Heading, Rot, Drift And Docking Speed Components
19. Navigation Sensors 19.5 Source of SOG, COG, Speed, Heading, ROT, Drift and Docking Speed Components The figure below shows how various sources of navigation data are chosen. "SOG, COG" is speed over ground and course over ground, respectively. "Speed" is speed over water, "Drift" is the difference between speed over water and speed over ground. - Page 345 19. Navigation Sensors SOG/COG used by the system is shown at the upper right corner of the ECDIS display. In the example below, COG and SOG are from chosen position sensors and this is indicated with the text "(pos)". Other text which denote SOG/COG source are (BOT): Bottom tracking dual-axis log...
- Page 346 19. Navigation Sensors The figure below shows the source of water speed is used for drift calculation. Selected Manual SPEED Not selected (Water track of Selected and value exists dual-axis doppler Speed log OR pi lot log) used by the system Not selected (water RADAR...
- Page 347 19. Navigation Sensors Alarm related to SOG, COG, speed, heading, ROT, drift and docking speed components It is possible that the operator has not chosen any speed or heading sensors, or that the chosen sensors do not have any valid values. This kind of a situation is critical for the system, because it cannot even perform dead reckoning. When no speed source is available, the system generates the alarm "2001 No speed available".
-
Page 348: Dual Gyro Interface For Dnv Naut-Aw
19. Navigation Sensors 19.6 Dual Gyro Interface for DNV NAUT-AW DNV NAUT-AW requires dual gyro interface for a track control system, which consists of the ECDIS and a Autopilot FAP-2000. The benefit of this arrangement is that loss of a single gyro does not interrupt track control. The track control system can continue smoothly with a backup gyro. -
Page 349: Indication Of Gyro Source
19. Navigation Sensors 19.6.1 Indication of gyro source Information area Possible gyro source indications, which appear at the upper right corner, are as follows: • (1): Heading used by the ECDIS is from Gyro 1. • (2): Heading used by the ECDIS is from Gyro 2. •... -
Page 350: Gyro-Associated Alarms
19. Navigation Sensors Sensors dialog box The Speed/Course page of the Sensors dialog box shows gyro indication as follows: • (active): The system uses value from this gyro which is chosen by "First priority Gyro Choose selector". • (backup): The system uses value from this gyro which is NOT chosen by "First priority Gyro Choose selector" In the example screen at left in the figure below, heading information from Gyro 2 is used by a Autopilot FAP-2000 and the ECDIS. -
Page 351: Filter Operation
19. Navigation Sensors 19.7 Filter Operation The ECDIS has an automatic multi-sensor Kalman filter for position. The filter can calculate estimated position using all operative position sensors. To view position sensor status, put the cursor on the Position indication, confirm that Sensors appears in the mouse functions area then push the right mouse button. -
Page 352: Filter And Automatic Route Steering
19. Navigation Sensors 19.7.1 Filter and automatic route steering The filter can operate based on only one position sensor and one gyro. However, this minimum selection is not suitable for automatic route steering or program track, which both require an independent speed source. With automatic route steering the minimum selection is for GOTO Waypoint: •... -
Page 353: Position Alignment
19. Navigation Sensors About alarm "2000 Filter: Pos unreliable" If the filter is used with automatic route steering then, in case of alarm "2000 Filter: Pos unreliable", all position sensors and the filter itself are switched OFF and the system continues with backup dead reckoning, based on chosen speed/course sensors. - Page 354 19. Navigation Sensors 4. Use the trackball and the left mouse button to drag and drop a symbol or suitable chart detail on a radar target. See figures below. Before position alignment After position alignment 5. If the position source is dead reckoning, the position set with chart alignment is the new start position for dead reckoning.
-
Page 355: Resetting Position Alignment
19. Navigation Sensors 19.8.2 Resetting position alignment To reset position alignment, proceed as follows: 1. Open the Sensors dialog box then open the Position page. 2. Uncheck "Chart Align". Spd/Cse Posn 3. Check that the indication OFFSET is not shown in the upper part of the information area, to the right of the position source indication. -
Page 356: Gyro Error Correction
19. Navigation Sensors 19.9 Gyro Error Correction Typical gyro error sources are installation error, speed/latitude error and dynamic settling error. Typically you detect gyro error on a user chart superimposed on the ARPA picture, on ARPA targets drawn on the ECDIS display or on radar overlay drawn on the ECDIS display. -
Page 357: Enabling Gyro Error Correction
19. Navigation Sensors 19.9.1 Enabling gyro error correction To enable gyro error correction, which is effective for radar, ECDIS and route steering, do the following: 1. Spin the scrollwheel to display Menu/Info/Chart Menu in the mouse functions area, push the left mouse button, choose Initial Settings from the menu then push the scrollwheel. -
Page 358: 19.10 Wind Sensor
19. Navigation Sensors 19.10 Wind Sensor ECDIS can display and output wind data in the following three formats: Apparent: Wind meter-measured wind speed and direction. Wind angle reference: Heading North: True wind angle, true wind speed Wind angle reference: True North Theoretical: True wind angle, true wind speed Wind angle reference: Heading The illustration below shows wind speed and direction with given ship data. -
Page 359: 19.10.1 Installation Parameter For Wind Sensor
19. Navigation Sensors True wind or Relative wind may be selected from the Other dialog box in the Sensors menu. Relative wind/true wind selection box 19.10.1 Installation parameter for wind sensor There are installation parameters for a wind sensor: • Source of True wind (Setting for inputted serial data) •... - Page 360 19. Navigation Sensors Output to ARPA Option Description Output T(=True/North) only The reference field of the MWV sentence is T(True) and North data is output. Output T(=True/Theoretical) only The reference field of the MWV sentence is T(True) and Theoretical data is output.
-
Page 361: 19.11 Depth Sensor
19. Navigation Sensors 19.11 Depth Sensor The depth output from a depth sensor (for example, echo sounder) is shown on the Other page in the Sensors dialog box. The content of the Other page in the Sensor menu depends on sensors connected. -
Page 362: 19.12 Sensor-Related Alarms
19. Navigation Sensors 19.12 Sensor-related Alarms The following alarms, which are not described elsewhere, are related to sensors. "2055 ARPA Radar Comm. Error": Lost connection to ARPA radar 1. As a consequence the system loses tracked ARPA targets and speed/course available from ARPA. "2056 ARPA Radar Comm. -
Page 363: 20. Arpa Target Functions
20. ARPA Target Functions 20.1 ARPA Radar Targets ARPA-tracked targets may also be displayed on the ECDIS display. To do this, do the following: 1. Spin the scrollwheel to display Chart Display/Info/Standard Display in the mouse functions area. 2. Push the left mouse button. 3. -
Page 364: Displaying True Or Relative Speed Vectors
20. ARPA Target Functions 20.1.3 Displaying true or relative speed vectors Targets vector can be displayed relative to your ship's heading (relative vector) or with reference to the North (true vector). Both presentation modes can be used with relative motion or true motion. Ground stabilised True Vect (G)) Sea stabilised True Vect (S) Relative vector presentation... -
Page 365: Displaying Arpa Target Data
20. ARPA Target Functions 20.2 Displaying ARPA Target Data 20.2.1 Viewing ARPA data of normal targets On the ECDIS display, put the cursor on a desired ARPA radar target then push the scrollwheel. Tracking Dangerous 59 ° 53.499’N 024 ° 47.099’E Tracking ARPA Radar target on ECDIS screen ARPA target display window ARPA target display with detail... -
Page 366: Source Of Arpa Radar Targets
20. ARPA Target Functions 20.3 Source of ARPA Radar Targets To find the source of ARPA radar targets, put the cursor on Radar in the status bar. To change the source of ARPA radar targets, put the cursor on Radar in the status bar, spin the scrollwheel to choose desired item then push the scrollwheel. -
Page 367: Displaying Arpa Target Past Positions
20. ARPA Target Functions 20.4 Displaying ARPA Target Past Positions To display ARPA target past tracks, do the following: 1. Spin the scrollwheel to display Chart Display/Info/Standard Display in the mouse functions area, then push the left mouse button. 2. Click an arrow tab in the dialog box until the Targets page appears if it is not already open. Click the Oth or Std radio button of the item Targets to display ARPA target past positions on the ECDIS. -
Page 368: Arpa Target Recording Functions
20. ARPA Target Functions 20.5 ARPA Target Recording Functions Target recording is used to record ARPA targets information to danger targets log. For more information about recording a dangerous target, see section 23.3.3 Danger target log. 20.6 Using ARPA Targets for Chart Align Targets can be used for chart alignment. -
Page 369: 21. Ais Target Functions
21. AIS Target Functions 21.1 Introduction An AIS transponder can be connected to the ECDIS to display AIS targets received from the AIS transponder. The ECDIS can store up to 1,500 AIS targets in its storage buffer. When this buffer becomes full of AIS targets, the Alarm 3501 is generated to alert you to full storage buffer. -
Page 370: Displaying Ais Targets
21. AIS Target Functions 21.2 Displaying AIS Targets Targets which are being tracked by an AIS transponder can also be displayed on the ECDIS display. To do this; 1. Display Chart Display/Info/Standard Display in the mouse functions area then push the left mouse button. 2. -
Page 371: Dangerous Ais Targets
21. AIS Target Functions 21.2.1 Dangerous AIS targets A dangerous AIS target is displayed as a blinking target symbol, in green and red alternately. You can set CPA and TCPA limits used by the ECDIS in the Danger Targets page of the Voyage Recording dialog box. For further details, see "Setting conditions of viewing and logging danger targets"... -
Page 372: Maximum Number And Range For Displaying Ais Targets On Ecdis
21. AIS Target Functions 21.2.4 Maximum number and range for displaying AIS targets on ECDIS You can choose the maximum number of AIS targets to display on the ECDIS. Further, you can also define the range within which to show AIS targets and how to sort them. -
Page 373: Displaying Ais Target Data
21. AIS Target Functions 21.3 Displaying AIS Target Data Place the cursor on a desired AIS target then push the scrollwheel. The AIS Target Dialog window appears, similar to the one shown below. AIS target dialog window AIS target on ECDIS display The Target Dialog window displays the following information for an AIS target: AIS Target Name or Call Sign SPD: SOG for True Vect(G);... - Page 374 21. AIS Target Functions The operator can set Closest Point of Approach (CPA), and Time to CPA (TCPA) to define dangerous AIS targets. CPA and TCPA limits are common for ECDIS display and danger target log function of ARPA and AIS targets. The ECDIS display shows a dangerous AIS target with its symbol blinking, in green and red alternately.
-
Page 375: Displaying Ais Target Past Positions
21. AIS Target Functions 21.4 Displaying AIS Target Past Positions To display AIS target past tracks, do the following: 1. Spin the scrollwheel to display Chart Display/Info/Standard Display in the mouse functions area, then push the left mouse button. 2. Click an arrow tab in the dialog box until the Tracking page appears if it is not already open. Click the Oth or Std radio button of the item Targets to display AIS target past positions on the ECDIS. -
Page 376: Displaying Name Or Call Sign Of Ais Target
21. AIS Target Functions 21.4.1 Displaying name or call sign of AIS target You can display either the name or call sign of AIS targets on the ECDIS display. Place the cursor in the Target Dialog window then push the right mouse button to display name and call sing alternately. See the figure below for display appearance when changing from call signs to names and vice versa. -
Page 377: Displaying Ais Interface Status
21. AIS Target Functions 21.5 Displaying AIS Interface Status You can verify the status of the AIS interface on the Other page in the Sensors dialog box. The lower part of this page is reserved for AIS interface monitoring. • Received Data: Whether data from AIS transponder is correctly received or not... -
Page 378: Ais Safety Message
21. AIS Target Functions 21.6 AIS Safety Message 21.6.1 Introduction You may send and receive messages via the VHF link, to a specified destination (MMSI) or all AIS-equipped ships in the area. Messages can be sent to warn of safety of navigation, for example, an iceberg sighted. Routine messages are also permitted. -
Page 379: Creating A New Safety Message
21. AIS Target Functions 21.6.2 Creating a new safety message You can create a safety message on the ECDIS for transmission by the AIS transponder. This can be done as follows: 1. Display Menu/Info/Chart Menu in the mouse functions area then push the left mouse button to open the Main menu. -
Page 380: Reading A Received Safety Message
21. AIS Target Functions How to get vessel information for an addressed safety message You can find vessel information for an addressed safety message. This is useful when you want to send a Safety message to a specific vessel. To get vessel information, proceed as follows: 1. -
Page 381: Replying To A Safety Message
21. AIS Target Functions 21.6.4 Replying to a safety message To reply to a safety message, proceed as follows: 1. Display the Safety Message dialog box. Check Enable changes. Set Std Display 3. In the Filter field, choose Received from the upper box and the message to reply to from the lower box. - Page 382 21. AIS Target Functions This page intentionally left blank. 21-14...
-
Page 383: 22. Radar Overlay
22. Radar Overlay 22.1 Introduction The radar overlay is optionally available. This means that the radar echo image can be output from the radar unit and shown on the ECDIS chart display. Radar overlay video can be received by two methods by ECDIS: 1. -
Page 384: Activating Radar Overlay On The Ecdis
22. Radar Overlay 22.2 Activating Radar Overlay on the ECDIS Radar overlay can be output to the ECDIS and shown on its display. Like details on Vector charts (S57), the radar overlay can be displayed or removed from the chart display. The Mariner page in the Chart Display dialog box enables or disables the radar overlay. -
Page 385: Choosing Source Of Radar Overlay
22. Radar Overlay 22.3 Choosing Source of Radar Overlay 22.3.1 Radar overlay through LAN from FAR-2x07 radars Place the cursor on Radar in the status bar, and the Radar Selection window appears. Radar overlay source indicates source radar overlay. In the example display below the source is MAST X. If there are more than one radar video source available, you can change the radar overlay source by clicking Radar Overlay source then spin the scrollwheel to choose a source. -
Page 386: Radar Overlay Through Radar Overlay Card Inside Ecdis
22. Radar Overlay 22.3.2 Radar overlay through radar overlay card inside ECDIS If there is more than one Radar video source available and connected to ECDIS, you can use external switch to select desired source of Radar video overlay. Selected source is displayed on Radar Overlay dialog box and on upper status bar: MAST X MAST X... -
Page 387: Radar Overlay Display Modes
22. Radar Overlay 22.3.3 Radar overlay display modes You can choose from the following presentation modes with the radar overlay: ECDIS only: Only chart is displayed on the ECDIS. ECDIS and radar: With S57 chart material, the radar echo image is mixed into the chart so that some chart features lie above or beneath the radar image. -
Page 388: Adjusting Radar Overlay (Radar Overlay Dialog Box)
22. Radar Overlay 22.4 Adjusting Radar Overlay (Radar Overlay dialog box) The Radar Overlay dialog box has controls for adjustment of the radar image - gain, sea clutter, rain clutter, interference rejector, echo stretch, and echo average. Note 1: Sea clutter and rain clutter controls are not available in Radar Overlay dialog box if radar video is received through LAN from FAR-2x07 radars. -
Page 389: Rain Clutter
22. Radar Overlay 22.4.4 Rain clutter The rain clutter control removes rain clutter from the radar echo image. When you adjust the rain clutter, "Noise" is automatically switched ON in order to display low-level radar images. If you have radar overlay video through LAN from FAR-2x07 radar, use control of rain clutter on radar. 22.4.5 Controlling video processing Interference rejector:... -
Page 390: Echo Overload Condition
22. Radar Overlay 22.4.6 Echo overload condition When the number of targets on the screen exceeds the capacity of the CPU, the warning "Overload" appears in red on the status bar. The gain is temporarily lowered automatically then gradually raised. If the overload condition continues, the above-mentioned process is repeated. -
Page 391: Transparency
22. Radar Overlay When the overload condition occurs, do the following: 1. Adjust controls (gain, sea clutter, rain clutter, interference rejector, etc) on the radar to obtain proper radar image. 2. On the radar overlay dialog box, do the following: a) Set IR to IR1. -
Page 392: Adjusting Radar Overlay To Match Positions Of Chart Features
22. Radar Overlay 22.5 Adjusting Radar Overlay to Match Positions of Chart Features 22.5.1 Error sources of radar echo image and chart display mismatch There are several reasons why the radar echo image and chart display do not match exactly. The mismatch is a combination of several reasons and removing one reason doesn't solve the mismatch perfectly. -
Page 393: Compensating For Bearing Error
22. Radar Overlay 22.5.3 Compensating for bearing error There are two ways to compensate for gyro-induced bearing error: 1) Manual • Adjust value of manual gyro correction. 2) Table-based gyro speed/latitude correction (Note that the ECDIS's built-in correction facility doesn't correct dynamic error, settling time after course change, etc.) •... -
Page 394: Radar Overlay Related Alarms
22. Radar Overlay 22.6 Radar Overlay Related Alarms Alarms generated by Radar Overlay are related to ECDIS workstation where Radar overlay card is located. This means that Radar overlay related alarms on first ECDIS workstation starts with alarm number 6100 and Radar overlay related alarms on second ECDIS starts with alarm number 6200. - Page 395 22. Radar Overlay Alarm number 6105: RADOV HW FAILURE 6/13 ------------------------------------ RADAR OVERLAY HARDWARE FAILURE. SWITCH POWER ON/OFF. REINSTALL ECDIS SW. Alarm number 6106: LAN RADAR CONNECT STATE 5/12 ------------------------------------ INDICATION WHILE LAN CONNECTION FOR ARPA FEATURES IS ESTABLISHED BETWEEN ECDIS PROCESSOR AND ARPA PROCESSOR Alarm number 6107: LAN RADAR CONNECT FAILURE 5/12...
- Page 396 22. Radar Overlay This page intentionally left blank. 22-14...
-
Page 397: 23. Recording Functions
23. Recording Functions 23.1 Introduction The ECDIS records various voyage-related items like movement and position of your ship and dangerous radar targets (from ARPA radar). These items are recorded in the following logs: Voyage log: Records entire voyage, i.e., a sailing of a route from first point to the last. Details log: Records position, speed and course once every minute. -
Page 398: Voyage Records
23. Recording Functions 23.3 Voyage Records 23.3.1 Details log The details log contains voyage information of the last 12 hours. Various information is recorded in the details log once per minute. • Date and time • Position of your ship as output by chosen navigator. •... -
Page 399: Voyage Log
23. Recording Functions 23.3.2 Voyage log The voyage log holds data for the entire voyage, recording the following data: • Changes of course and speed. User can define limits for course change and speed change of your ship to be recorded. - Page 400 23. Recording Functions Setting conditions of logging The operator can define limits for course change and speed change of your ship to be recorded and also time period for automatic logging. To set them, do the following: Spin the scrollwheel to show Menu/Info/Chart Menu in the mouse functions area then push the left mouse button Choose Record from the menu then push the scrollwheel.
-
Page 401: Recording Positions
User observations. (Visual, astronomical and MFDF. MFDF is Medium Frequency Direction Finder.) An example of saving direct position or position calculated by the system FURUNO An example of saving position based on operator observation First you should locate the position of your observation on the ECDIS chart. Use, for example, the two separate EBL and VRM available in the Nav Marks dialog box. -
Page 402: Danger Target Log
23. Recording Functions 23.3.3 Danger target log The danger target log stores information about targets which are received from an ARPA radar (ARPA targets) and/or targets which are received from an AIS transponder (AIS targets). If an ARPA target or AIS target is within the set CPA and TCPA, information of all tracked targets (including non- dangerous targets) are recorded into the danger targets log. - Page 403 23. Recording Functions Setting conditions for viewing and logging of danger targets The operator may set Closest Point of Approach (CPA), Time to CPA (TCPA) and Log interval for viewing dangerous ARPA and AIS targets on the ECDIS display. A dangerous ARPA or AIS target is blinking and its color is green and red alternately.
-
Page 404: Chart Usage Log
23. Recording Functions 23.3.4 Chart usage log The chart usage log stores which charts were displayed on the ECDIS chart display area or which were used for chart alarms. The following information is recorded in the chart usage log: • Chart ID •... - Page 405 23. Recording Functions Printing specific portion of a log 1. Open desired log. 2. Click left mouse button to choose portion of log to print. First 1000 Prev 1000 Last 449 3. Place the cursor on the triangle and left-click Print Log. 4.
-
Page 406: Making Backup Copy From Details, Voyage Or Danger Targets Log
23. Recording Functions 23.3.6 Making backup copy from details, voyage or danger targets If necessary you can make a backup copy of ECDIS logs onto a floppy disk as follows: Spin the scrollwheel to show Menu/Info/Chart Menu in the mouse functions area then push the left mouse button. -
Page 407: Resetting (Emptying) Voyage And Danger Targets Logs
23. Recording Functions 23.3.7 Resetting (emptying) voyage and danger targets logs It may be useful to reset (empty) the voyage and danger targets logs when you are starting a new voyage. If necessary, make a backup copy before resetting. To reset a log, do the following: Spin the scrollwheel to show Menu/Info/Chart Menu in the mouse functions area then push the left mouse button. -
Page 408: Alarms Log
23. Recording Functions The User Chart Conversion dialog box appears. This dialog box contains the following fields: User chart name: Enter name for the user chart. Select points with distance > 0.3 NM: Check to have the system filter the chosen log so that the minimum distance between points in the user chart is 0.3 nm. - Page 409 23. Recording Functions To open the log, proceed as follows: Spin the scrollwheel to show Menu/Info/Chart Menu in the mouse functions area then push the left mouse button. Choose Record from the menu then push the scrollwheel. Choose Alarms Log from the menu then push the scrollwheel. The Alarms Log appears on the display.
-
Page 410: Distance And Trip Counters
23. Recording Functions 23.4 Distance and Trip Counters Distance and trip counters have separate fields for both through water and over ground distances. This information is available on the Record page of the Sensors dialog box, shown right. To reset the distance and/or trip counter, see the section which follows. -
Page 411: 24. Datum
24. Datum 24.1 General Datum is a mathematical model of the earth based on which a sea chart is produced. If the datum of a position sensor and that of a sea chart are different, a transformation has to be made somewhere in the system. Not doing so can result in errors of several sea miles. -
Page 412: Ecdis And Datum
24. Datum 24.5 ECDIS and Datum The real ECDIS uses ENC material, produced to standards using WGS-84 datum. Positioning devices connected to the ECDIS must work in the WGS-84 datum. IMO requires that the ECDIS must give an alarm if the datum of a positioning device is not the WGS-84. -
Page 413: 25. Parameters Setup
25. Parameters Setup 25.1 Parameters The Initial Settings menu in the Initial Settings dialog box contains the installation parameters, navigation parameters and optimization parameters which define the configuration of the ECDIS and operative parameters which are either used to control steering and navigation calculation or used during route planning. To open the Initial Settings menu, do the following: 1. -
Page 414: Parameter-Related Menus
25. Parameters Setup 25.1.1 Parameter-related menus Set time Place the cursor on the date and time presentation on right-hand side of ECDIS display. • Use the left mouse button to display UTC time and local time alternately. • Use the right mouse button to change time zone and/or time. In order to set the time, the following conditions must be met: •... -
Page 415: Accessing Installation Parameters
25. Parameters Setup 25.1.2 Accessing installation parameters The installation parameters command is used to set installation parameters for the system. These parameters are concerned with hardware configurations and set up. They need only be set during installation and if sensor configuration changes. -
Page 416: Navigation Parameters Setting
WP approach: Set the alarm time before approaching the wheel over point. WP prewarn: Set the alarm time before approaching the wheel over point. It should be well in advance of the WP When using FURUNO When using TOKYO approach alarm time. FAP-2000 or YOKO-... - Page 417 (Most important radius values are between 0.3 to 1.0 nm). You can define set of Forwarding Distances both for "Go To Track" and "Go To WP" steering modes. How to set Forwarding distances for FURUNO FAP 2000 You can define set of Forwarding Distances both for "Go To Track" and "Go To WP" steering modes.
- Page 418 25. Parameters Setup How to set forwarding distances for TOKYO KEIKI PR-6000 In order to edit forwarding distances parameters, do the following: 1. Place the cursor on the text SINGLE, PLAN, SLAVE, MULTI or MASTER (whichever is shown) on the lower right corner, then push the right mouse button to open the Initial Settings dialog box.
-
Page 419: Optimization Parameters Setting
25. Parameters Setup 25.1.5 Optimization parameters setting The optimization parameters are used in optimization calculation. Therefore these parameters must be defined before calculation. In order to modify optimization parameters, do the following: 1. Spin the scrollwheel to show Menu/Info/Chart Menu in the mouse functions area then push the left mouse button. - Page 420 25. Parameters Setup This page intentionally left blank. 25-8...
-
Page 421: 26. Color Calibration
26. Color Calibration 26.1 Color Calibration Settings Note: Use of the brilliance control (with FURUNO-supplied monitor) may adversely affect the visibility of information on the night display. 26.1.1 Color test for ARCS charts You may want to adjust brilliance. You have a tool to check that you can clearly see all details of the charts. For ARCS chart this tool is Colors. -
Page 422: Color Differentiation Test For S57 Charts
26. Color Calibration 26.1.2 Color differentiation test for S57 charts You may want to adjust brilliance. You have a tool to check that you can clearly see all details of the charts. For ARCS chart this tool is Colors. For S57 charts this tool is the color differentiation test diagram. The color differentiation test diagram is a part of ECDIS chart 1 and you can use it as follows: 1. -
Page 423: Gray Scale Test
26. Color Calibration 26.1.3 Gray scale test Set brilliance and contrast to calibrated positions. Use the gray scale test to visually inspect neutral shades of grey. Note: During any self-test, the ECDIS becomes inoperative and this is indicated by sounding the buzzer and flashing the lamp in the SYSTEM FAILURE key on the keyboard-equipped control unit. - Page 424 26. Color Calibration 6. Click the Gray Scale button at the upper left-hand corner of display with the left mouse button, and the following display appears: Grey scale test pattern 7. Check for proper display of gray shades. If the menu at the left side has disappeared, roll the trackball rightward to display it.
-
Page 425: 27. Conning Display
27. Conning Display 27.1 System Configuration The ECDIS can receive data from various sensors. It can adopt information output by the sensors in either analog or digital format, make navigation calculations from the data display and show the results on the conning display (option). -
Page 426: Display Interpretation
27. Conning Display 27.2 Display Interpretation The conning display shows collected data from different sensors, and the data below is available for display. However, this depends on which sensors are installed and connected on board the ship. Typically information which is displayed on the conning display are received from following sensors: •... -
Page 427: Rot Window
27. Conning Display 27.2.1 ROT window The ROT window monitors actual ROT, which is displayed in digital format in the upper center box and analog format in the center of the window. The text CALC" appears when ROT is calculated by the system. The scale is available from 35 to 90 degrees, and is set at installation, with installation parameters. -
Page 428: Rudder Window
27. Conning Display 27.2.4 Rudder window The rudder window shows the following information: First rudder and source of the first rudder. In this example the source is actual rudder (ACT). Second rudder and source of the second rudder. In this example the source is ordered rudder (ORD). -
Page 429: Autopilot Fap-2000 Window
27. Conning Display 27.2.7 Autopilot FAP-2000 window The trackpilot window displays the following information: • SET R.O.T.: Current set rate of turn based on current speed and set turning radius. • SET COURSE: Current set course. • MODE: Indicates chosen steering mode. •... -
Page 430: Route Window
27. Conning Display 27.2.8 Route window When you have chosen a route to monitor, the route window shows the following information: To WP: The waypoint your ship is approaching. Route: Calculated set course to follow the monitored route including off track, drift and gyro error compensation. -
Page 431: Weather And Wind Window
27. Conning Display 27.2.9 Weather and wind window The weather and wind window shows WIND - Wind direction, true or relative 1020 - Wind speed 1008 - Air pressure (optional) Weather conditions of last 12 hours are shown. 1020 1008 27.2.10 Depth window The depth window shows, in digital and analog formats, the latest 30 minutes of... -
Page 432: 27.2.12 Fuel Consumption Window
27. Conning Display 27.2.12 Fuel consumption window The fuel consumption window displays three sets of indications that show ship’s speed, fuel consumption per hour and fuel consumption per nautical mile. Each indication has two vertical bars. The bar on the left shows planned speed or fuel consumption and the bar at right shows actual situation. - Page 433 27. Conning Display Propulsion with actual and ordered information You can select during installation actual and ordered information of propeller using Engine Control Device Type "IEC 61162-1 (MAN B+W, $xxXDR, $xxRPM)". Propulsion with main engine (for DNV specification) Four different types of propellers windows are available and one is selected during the installation. The content of this window is defined with Propellers 1-4 in the Installation parameters.
-
Page 434: 27.2.15 Azimuth Propulsion Window
27. Conning Display Thruster and propulsion information with control position & source of ordered r.p.m. and pitch You can select during installation ordered RPM and Pitch and Control Position using Engine Control Device type "IEC 61162-1 (MAN B+W, $xxXDR, $xxRPM)" Select "Bow thruster and Engine"... -
Page 435: 27.2.16 Speedpilot Window
27. Conning Display 27.2.16 Speedpilot window The speedpilot window displays the following data: • ROUTE: Optimization type for monitored route. • PLAN LEG: Planned speed for current leg (based on plan). • SUGGESTED: If optimization type is "timetable", then this indicates suggested speed to keep the timetable. -
Page 436: 27.2.18 Main Engine Start Air Pressure Window
27. Conning Display 27.2.18 Main engine start air pressure window This window shows engine starting air pressure. 27.2.19 Alarm messages window This window shows all active or pending alarms in priority order. For more information, see section 31.8 List of Alarms. 27.2.20 Propulsion and thruster window (for DNV specification) PORT PROPULSION XXX RPM... -
Page 437: Modes For Conning Display
27. Conning Display 27.3 Modes for Conning Display The conning display shows data collected from different sensors and also data from ECDIS and trackpilot processors. There are four different conning display modes; Harbour 1 mode, Harbour 2 mode, Navigate 1 mode and Navigate 2 mode, and one of these modes may be selected from a dialog box. - Page 438 27. Conning Display This page intentionally left blank. 27-14...
-
Page 439: Steering With Furuno Autopilot Fap-2000
28.1 Introduction This chapter describes the steering functions (trackpilot) available with connection of the optional FURUNO Autopilot FAP-2000. This Autopilot FAP-2000 receives position, heading and speed data, compares this with the track section to be steered, and applies the ship model to calculate and command the necessary rudder angle. -
Page 440: Hand Steering
28. Steering with FURUNO Autopilot FAP-2000 28.2.1 Hand steering The manual steering modes are: • Steering wheel • Wing steering control • Override tiller While in a manual steering mode, the ECDIS provides indication of the rudder angle and the hand steering mode. -
Page 441: Autopilot Fap-2000 Control Panel
28. Steering with FURUNO Autopilot FAP-2000 28.3 Autopilot FAP-2000 Control Panel This section describes the Autopilot FAP-2000 control panel. FAP2000 FURUNO 1-6: Steering mode selection • PROGRAM TRACK: Programmed track-controlled heading change using set radius. Also for steering with chosen ARPA models. - Page 442 28. Steering with FURUNO Autopilot FAP-2000 9: Autopilot FAP-2000 status indicator: Shows chosen mode and state of readiness. • Autopilot FAP-2000 in operation: READY • Autopilot FAP-2000 control mode: HEADING/TRACK • Autopilot FAP-2000 automatic route steering: ROUTE • Autopilot FAP-2000 track controlled turn: TURN 10: Autopilot FAP-2000 alarm indicator and buzzer cancel •...
-
Page 443: Manual Steering
28. Steering with FURUNO Autopilot FAP-2000 28.4 Manual Steering 28.4.1 Heading control The heading control steering mode can be used always; it doesn't require position data. • Mode selection: HEADING CONTROL • The HEADING CONTROL and HEADING lamps are lit. -
Page 444: Program Track
28. Steering with FURUNO Autopilot FAP-2000 28.4.4 Program track The Program track steering mode can be used with the Kalman filter and a high-precision sensor such as DGPS: • Mode selection: PROGRAM TRACK • PROGRAM TRACK, TRACK and TURN lamps are lit. -
Page 445: Summary Of Manual Steering Modes
28. Steering with FURUNO Autopilot FAP-2000 28.4.5 Summary of manual steering modes HEADING RADIUS PROGRAM PROGRAM CONTROL CONTROL HEADING TRACK CHANGE Set heading Set radius Radius control Design before execution Full curved EBL on radar screen Wind, current, etc. compensation... -
Page 446: Automatic Route Steering
28. Steering with FURUNO Autopilot FAP-2000 28.5 Automatic Route Steering In automatic route steering, you can use either the Go to Waypoint mode or the Go to Track mode. Automatic route steering can be used with a predefined monitored route. -
Page 447: Goto Waypoint" Mode
28. Steering with FURUNO Autopilot FAP-2000 See the figure below to find how location of dynamic WP is defined when the "Go to Waypoint" mode is used. Originally planned turn Originally planned DYNAMIC WP Wheel over line Wheel over line... -
Page 448: Goto Track" Mode
28. Steering with FURUNO Autopilot FAP-2000 28.5.2 "Goto track" mode • Mode selection GO TO TRACK • GO TO TRACK button and ROUTE and TRACK lamps are lit. • The tiller can be used to set radius, but not heading, which is set automatically. -
Page 449: Preconditions For Automatic Route Steering
28. Steering with FURUNO Autopilot FAP-2000 28.5.4 Preconditions for automatic route steering General preconditions The Goto WP and Goto Track modes can be activated when your ship is located inside a channel of a monitored route. The difference between actual heading and planned course to approach "To WP" must be less than the limit set in the route steering parameters in order to initiate automatic route steering. -
Page 450: How To Activate Automatic Route Steering
28. Steering with FURUNO Autopilot FAP-2000 28.5.5 How to activate automatic route steering Route steering can be activated by pushing the GOTO WAYPOINT or GOTO TRACK button on the Autopilot FAP-2000 panel. The lamp of the pushed button will start to flash and if the ECDIS accepts the requested route steering mode, the lamp will then light to indicate the used route steering mode. - Page 451 28. Steering with FURUNO Autopilot FAP-2000 Alarms when automatic route steering cannot be accepted There are several reasons why the requested route steering mode could not be accepted: Alarm "2467 Disabled: Steering off" informs you that the ECDIS didn't have steering controlling permission at the time of the request.
-
Page 452: Arriving To A Waypoint
28. Steering with FURUNO Autopilot FAP-2000 28.5.6 Arriving to a waypoint Automatic route steering navigation tries to keep the ship always inside the channel limits and go to a next waypoint. At the "pre-warning point", the visual indication "2485 Route: WP prewarning" appears on the ECDIS display and the ACKN. - Page 453 28. Steering with FURUNO Autopilot FAP-2000 If acknowledgeable visual indication 2485 is not acknowledged, the text in the route monitor window will remain the same as it was before the prewarning point (Goto Track or Goto WP). Go to WP When the "approach point"...
-
Page 454: Automatic Route Steering Alarms
28. Steering with FURUNO Autopilot FAP-2000 28.5.7 Automatic route steering alarms There are two types of alarms relevant to route steering, permanent and intermittent. Permanent alarms are available regardless of the steering mode used: • Outside channel is indicated by displaying the text "Off track"... - Page 455 28. Steering with FURUNO Autopilot FAP-2000 Typical intermittent alarms not described in other sections are: Alarm "2010 Filter: Pos source change" appears when differential GPS used in filter positioning has changed its operation mode either from differential mode to normal mode or normal mode to differential mode. If the steering mode is "Goto Track"...
-
Page 456: Collision Avoidance Maneuver During Automatic Route Steering
28. Steering with FURUNO Autopilot FAP-2000 Alarm "2501 Route: Needs higher Speed" appears for any use of Goto Track with the Kalman filter but speed below limit set for track steering in the Installation Parameters. This alarm is repeated every four minutes for the next 10 minutes and if condition still exists, alarm "2497 Route: Stop - Sensor Fail"... -
Page 457: 28.5.10 Accuracy Of Automatic Route Steering
28. Steering with FURUNO Autopilot FAP-2000 Interrupted turn • If the turn has already started, the set course display on the Autopilot FAP-2000 shows the new course value. • Push the RADIUS CONTROL button on the Autopilot FAP-2000 control panel. -
Page 458: Additional Information About Steering Modes
28. Steering with FURUNO Autopilot FAP-2000 28.6 Additional Information About Steering Modes Use of multiple Autopilot FAP-2000 control panels The Autopilot FAP-2000 system may incorporate several control panels. In this case: • The active panel is indicated by a light in one of the steering mode buttons (RADIUS CONTROL, COURSE CONTROL, GOTO WAYPOINT, GOTO TRACK and PROGRAM TRACK). - Page 459 28. Steering with FURUNO Autopilot FAP-2000 Details of programmed turns The Autopilot FAP-2000 allows the operator to design a turn beforehand and to begin execution of the turn when the START COURSE CHANGE button is pushed. The table below summaries properties of each applicable steering mode.
-
Page 460: Important Information About Steering Mode Changes
28. Steering with FURUNO Autopilot FAP-2000 28.7 Important Information About Steering Mode Changes When the Autopilot FAP-2000 is not used for steering In addition to the Autopilot FAP-2000, a ship may have a steering selection unit of some kind that minimally incorporates "HAND"... - Page 461 28. Steering with FURUNO Autopilot FAP-2000 Program Course Change & Press Radius Goto WP Program Control course change Press Press Start Radius course change control Radius Goto Track Control Press Heading control Heading Control Program Track Press Program Press course change...
-
Page 462: Expected Steering Performance Under Various Conditions
28. Steering with FURUNO Autopilot FAP-2000 28.8 Expected Steering Performance Under Various Conditions The system has many available steering modes. Below is a summary of effect of various environmental conditions. 28.8.1 Expected steering performance for going ahead Environment Heading control... - Page 463 28. Steering with FURUNO Autopilot FAP-2000 Environment Heading control Program track Goto Waypoint Goto Track conditions Radius control Program heading change Slow change There is no Drift compensation Drift compensation Drift compensation of wind compensation for and/or current change - COG is equal to course...
- Page 464 28. Steering with FURUNO Autopilot FAP-2000 Environment Heading control Program track Goto Waypoint Goto Track conditions Radius control Program heading change Slow change There is no Drift compensation ON Drift compensation Drift compensation ON of speed compensation for or OFF:...
-
Page 465: Expected Steering Performance For Turns
28. Steering with FURUNO Autopilot FAP-2000 28.8.2 Expected steering performance for turns Environment Heading control Program track Goto Waypoint Goto Track conditions Radius control (assisted turn) Program heading change Calm sea, no Ship follows Drift compensation ON Drift compensation Drift compensation ON or wind, no curved EBL. - Page 466 28. Steering with FURUNO Autopilot FAP-2000 Environment Heading control Program track Goto Waypoint Goto Track conditions Radius control (assisted turn) Program heading change Sudden Ship goes fast Drift compensation Drift compensation Drift compensation change of inside or outside ON or OFF: wind and/or of turn.
-
Page 467: Expected Steering Performance Under Critical Failure
28. Steering with FURUNO Autopilot FAP-2000 28.9 Expected Steering Performance Under Critical Failure Below is a summary of system behavior in various failures when Program Track, Goto Waypoint or Goto track steering mode is in use. Note: Backup navigator alarm is activated if alarm is not acknowledged within 30 seconds. For more information about this alarm, see section 31.7 "Description of Backup Navigator Alarm". -
Page 468: Lost Speed
28. Steering with FURUNO Autopilot FAP-2000 28.9.3 Lost speed Associated alarms (generated Expected system performance What end operator at ECDIS) should do • • Acknowledge alarms. Sensor alarm, for example Alarm "4008: Log error", • Study situation. "4012…4016: Position equipment error", etc. -
Page 469: Low Speed
28. Steering with FURUNO Autopilot FAP-2000 28.9.4 Low speed Associated alarms (generated Expected system performance What end operator at ECDIS) should do • • Alarm "2008 Filter: Speed Acknowledge alarms. below xx." • Study situation. • • Within 90 Alarm "2010 Filter: Pos Acknowledge alarms. -
Page 470: Lost Sog/Cog Reference
28. Steering with FURUNO Autopilot FAP-2000 28.9.5 Lost SOG/COG reference Goto track steering mode Associated alarms (generated Expected system performance What end operator at ECDIS) should do • • • Alarm "2507 Route: Need Acknowledge alarms. sog/cog ref." • Study situation. -
Page 471: Total Lost Position
28. Steering with FURUNO Autopilot FAP-2000 28.9.6 Total lost position Associated alarms (generated Expected system performance What end operator at ECDIS) should do • • Alarm "4012…4016: Acknowledge alarms. Position equipment error" • Study situation. • Kalman filter detects jump, etc. -
Page 472: Lost Differential Position
28. Steering with FURUNO Autopilot FAP-2000 28.9.7 Lost differential position Goto track steering mode Associated alarms (generated Expected system performance What end operator at ECDIS) should do • • Alarm "4027…4031: Lost Acknowledge alarms. DGPS" or "4012…4016: • Study situation. -
Page 473: Lost Differential Position And Position Discrepancy
28. Steering with FURUNO Autopilot FAP-2000 28.9.8 Lost differential position and position discrepancy Associated alarms (generated Expected system performance What end operator at ECDIS) should do • Precondition If sensors in Filter calculation Acknowledge alarms. are NOT inside operator chosen •... -
Page 474: 28.9.10 Lost Communication Between Autopilot Fap-2000 And Ecdis
28. Steering with FURUNO Autopilot FAP-2000 28.9.10 Lost communication between Autopilot FAP-2000 and ECDIS Associated alarms Expected system performance What end operator should do • • • Within 15 Alarm "2488 Steering: Automatic change of steering Acknowledge alarms. seconds Stop-system fail" and "2480 mode to Radius Control mode. -
Page 475: Description Of Alarms Generated By Autopilot Fap-2000
28. Steering with FURUNO Autopilot FAP-2000 28.11 Description of Alarms Generated by Autopilot FAP-2000 28.11.1 Alarms Autopilot FAP-2000 operation related alarms • ALARM lamp on the Autopilot FAP-2000 control panel goes on. • Alarm is displayed on the Autopilot FAP-2000 control panel as OFF COURSE/SPEED WARNING or as an alarm number "AL: NN", where NN is the number of an alarm. - Page 476 28. Steering with FURUNO Autopilot FAP-2000 Integrated operation related alarms • ACKN. WARNING lamp of the Autopilot FAP-2000 control panel flashes. • Type of alarm is displayed on the ECDIS display as number and text. • Alarm is acknowledged by pushing the ACKN. WARNING button on the Autopilot FAP-2000 control panel.
-
Page 477: 28.11.2 Errors
28. Steering with FURUNO Autopilot FAP-2000 28.11.2 Errors Errors should not happen during normal operation. They are related to internal problems. Autopilot FAP-2000 operation related errors • ALARM lamp on the Autopilot FAP-2000 control panel lights. • Error is displayed on the Autopilot FAP-2000 control panel as error number type ERR NN, where NN is the number of an error. -
Page 478: 28.12 Using The Curved Ebl
28. Steering with FURUNO Autopilot FAP-2000 28.12 Using the Curved EBL The curved EBL is a design and control tool which functions to start a turn at the correct position and to monitor behavior of your ship during the turn. The curved EBL is available on the ECDIS display and on some ARPA radar displays. - Page 479 28. Steering with FURUNO Autopilot FAP-2000 Curved EBL at the wheel over point Curved EBL locked during turn 28-41...
-
Page 480: 28.12.1 Structure Of The Curved Ebl
28. Steering with FURUNO Autopilot FAP-2000 28.12.1 Structure of the curved EBL The curved EBL consists of a straight part at its beginning called "forwarding distance". Then an arc with chosen radius and finally an EBL in the direction of the newly requested set course. See the figure below. -
Page 481: 28.13 Using The Predictor
28. Steering with FURUNO Autopilot FAP-2000 28.13 Using the Predictor The Predictor is a tool for estimating your ship’s future positions and behavior, and it is available on the status bar. Place the cursor on the text "Predictor" then use left mouse button to toggle the predictor ON/OFF. The current setting is shown in the mouse functions area. - Page 482 28. Steering with FURUNO Autopilot FAP-2000 This page intentionally left blank. 28-44...
-
Page 483: Steering With Yokogawa Autopilot Pt-500A
29. Steering with YOKOGAWA Autopilot PT-500A 29.1 Introduction This chapter describes steering functions available with the YOKOGAWA Autopilot PT-500A. 29.2 Steering Control Unit Below is layout of Autopilot PT-500AA autopilot steering control unit. 29-1... -
Page 484: Steering Modes Of The System
29. Steering With YOKOGAWA Autopilot PT-500A 29.3 Steering Modes of the System Note that all steering related functions are available only if the ECDIS system is also connected to an optional Autopilot PT-500AA autopilot processor. With Autopilot PT-500AA autopilot following steering modes are available: •... -
Page 485: Automatic Route Steering
29. Steering With YOKOGAWA Autopilot PT-500A 29.4 Automatic Route Steering Automatic route steering can be used with predefined monitored route. It can be activated when vessel is located inside a channel of monitored route. The figure above demonstrates performance of the automatic route steering. ORIGINAL PLANNED TURN ORIGINAL... -
Page 486: Characteristics Of Automatic Route Steering
29. Steering With YOKOGAWA Autopilot PT-500A 29.4.1 Characteristics of automatic route steering Steering is course controlled with set radius between waypoints, if wind, current etc. effects the ship, the system tries to prevent the ship from drifting away from planned route. The system has three means to prevent drifting away from the planned route. -
Page 487: Activating Route Steering
29. Steering With YOKOGAWA Autopilot PT-500A 29.4.4 Activating route steering Activate route steering by selecting mode "NAVI" in the YOKOGAWA autopilot panel. Track If "NAVI" is selected, indication "Track" appears in Route Monitor window of ECDIS display. If the ECDIS did not accept the requested route steering mode, then there is an "Autopilot Conflict"... -
Page 488: Arrival To A Waypoint
29. Steering With YOKOGAWA Autopilot PT-500A 29.4.5 Arrival to a waypoint Automatic route steering navigation tries to keep the ship always inside the channel limits and going to next waypoint. Well before the next waypoint, there will be an alarm 2485 ROUTE WP PREWARING. As soon as the alarm appears verify that the maneuver is safe and there are no dangerous targets. -
Page 489: Route Steering Alarms
29. Steering With YOKOGAWA Autopilot PT-500A 29.4.6 Route steering alarms The alarms relevant to the Steering are of two types (permanent and intermittent). Permanent alarms below are available regardless of the steering mode used: Outside Channel red color of the "Off track" value orange color text "Outside Channel"... -
Page 490: Collision Avoidance Maneuver During Automatic Route Steering
29. Steering With YOKOGAWA Autopilot PT-500A Alarm "2469 Autopilot: off course" appears when the autopilot needs more than a set limit (the limit is available in Installation parameters for Track mode). This alarm is repeated every 5 minutes, if the condition continues. Alarm "2471 AP mode Conflict - Use AUTO"... -
Page 491: How To Stop Or Modify Already Enabled Route Turn
29. Steering With YOKOGAWA Autopilot PT-500A 29.4.8 How to stop or modify already enabled route turn There are two cases that the automatic route turn must be stopped or modified. • The turn cannot be performed up to the final value. •... -
Page 492: Other Operations With Autopilot Pt-500A
29. Steering With YOKOGAWA Autopilot PT-500A 29.5 Other Operations with Autopilot PT-500A 29.5.1 Speed used by autopilot The Autopilot uses the speed from its own log input interface during AUTO mode. The operator may choose its own log input or manual speed with the SPEED button. When NAVI mode is selected, Autopilot switches automatically to the speed from the serial line coming from an integrated computer. -
Page 493: Description Of Alarms With Autopilot Pt-500A
29. Steering With YOKOGAWA Autopilot PT-500A 29.6 Description of Alarms with Autopilot PT-500A 29.6.1 Alarms • The ECDIS control unit ALARM ACK lamp goes on. • Type of alarm is displayed on the display ECDIS display as number and text. •... -
Page 494: Expected Steering Performance Under Various Conditions
29. Steering With YOKOGAWA Autopilot PT-500A 29.7 Expected Steering Performance Under Various Conditions The system has many available steering modes. Below is a summary of effect of various environmental conditions 29.7.1 Expected steering performance for going ahead Environment conditions Heading control = "AUTO" Track = "NAVI"... -
Page 495: Expected Steering Performance For Turns
29. Steering With YOKOGAWA Autopilot PT-500A 29.7.2 Expected steering performance for turns Environment conditions Heading control Track Calm sea, no wind, no current There is no position control of Drift compensation set as ON or OFF: turn. Turn is controlled by vessel follows monitored route rudder angle limit. -
Page 496: Expected Steering Performance Under Critical Failure
29. Steering With YOKOGAWA Autopilot PT-500A 29.8 Expected Steering Performance Under Critical Failure Below is a summary of system behaviour in various failures when the "NAVI" steering mode is used. 29.8.1 Lost heading from autopilot (ECDIS may also have lost heading) Associated alarms Expected system performance... -
Page 497: Lost Heading From Ecdis (Autopilot Still Has Heading)
29. Steering With YOKOGAWA Autopilot PT-500A 29.8.2 Lost heading from ECDIS (Autopilot still has heading) Associated alarms Expected system performance What end operator should do Sensor alarm, for example Acknowledge alarms. Alarm "4005: Gyro error" or Study situation. "4006: Gyro error." Within few Alarm "2002 No heading Acknowledge alarms. -
Page 498: Lost Speed
29. Steering With YOKOGAWA Autopilot PT-500A 29.8.3 Lost speed Associated alarms Expected system performance What end operator should Sensor alarm, for example Alarm Acknowledge alarms. "4008: Log error", "4012…4016: Study situation. Position equipment error", etc. Within 30 Alarm "2476 Route Needs log Acknowledge alarms. -
Page 499: Low Speed
29. Steering With YOKOGAWA Autopilot PT-500A 29.8.4 Low speed Associated alarms Expected system What end operator should do performance Alarm "2008 Filter: Speed below Acknowledge alarms. xx." Study situation. Within 90 Alarm "2010 Filter: Pos source Acknowledge alarms. seconds change." Study situation. -
Page 500: Total Lost Position
29. Steering With YOKOGAWA Autopilot PT-500A 29.8.5 Total lost position Associated alarms Expected system performance What end operator should do Alarm "4012…4016: Acknowledge alarms. Position equipment error" Study situation. Kalman filter detects jump, etc. Alarms "2000 Filter: Position Within 30 Kalman Filter is switched Off and Acknowledge alarms. - Page 501 29. Steering With YOKOGAWA Autopilot PT-500A <Continued from previous page> Acknowledge alarms After Alarm If vessel is in linear part of route If ship is in linear part, "2497 Route alarm "2471 AP mode conflict - Use actual heading is used as set Study situation.
-
Page 502: Lost Differential Position And Position Discrepancy
29. Steering With YOKOGAWA Autopilot PT-500A 29.8.6 Lost differential position and position discrepancy Associated alarms Expected system performance What end operator should do Precondition If sensors in Filter Acknowledge alarms. calculation are NOT inside Study situation. operator chosen position discrepancy limit. Alarm "2007 Position discrepancy"... -
Page 503: Ecdis Lost Messages From Autopilot
29. Steering With YOKOGAWA Autopilot PT-500A <Continued from previous page> Associated alarms Expected system What end operator should performance After Alarm If vessel is in linear part of route If ship is in linear part, actual Acknowledge alarms "2497 Route alarm "2471 AP mode conflict - Use heading is used as set Study situation. -
Page 504: Autopilot Lost Messages Form Ecdis
29. Steering With YOKOGAWA Autopilot PT-500A 29.8.8 Autopilot lost messages form ECDIS Associated alarms Expected system performance What end operator should Within 15 Alarm "2488 Steering: Stop- Acknowledge alarms. seconds system fail" and "2480 Study situation. Autopilot FAP-2000 Receive error" is generated at the ECDIS. -
Page 505: How To Use The Curved Ebl With Yokogawa Pt-500A Autopilot
29. Steering With YOKOGAWA Autopilot PT-500A 29.9 How to Use the Curved EBL with YOKOGAWA PT-500A Autopilot The curved EBL is a control tool to monitor automatic operation of Goto Waypoint (="NAVI") steering mode. This EBL is available on the ECDIS display and selected ARPA radar displays. After the WP Approach but before start of turn, the curved EBL displays the next intended turn. -
Page 506: 29.10 Using The Predictor
29. Steering With YOKOGAWA Autopilot PT-500A 29.10 Using the Predictor The Predictor is a tool for estimating your ship’s future positions and behaviour, and it is available on the status bar. Place the cursor on the text "Predictor" then use left mouse button to toggle the predictor ON/OFF. The current setting is shown in the mouse functions area. -
Page 507: Steering With Tokyo Keiki Autopilot Pr-6000
30. Steering with TOKYO KEIKI Autopilot PR-6000 30.1 Introduction This chapter describes the steering functions available with the optional Autopilot PR-6000. 30.2 Steering Control Unit Below is the control layout of the autopilot steering control unit. Autopilot PR-6000 control panel Mode selection unit Mode selection switch Non-Follow up unit... -
Page 508: Steering Modes Of The System
32. Steering With TOKYO KEIKI Autopilot PR-6000 Non-Follow up steering lever Auto steering control knobs Auto unit Course setting knob Remote control steering selection unit Repeater unit 10. Repeater synchronising knob 11. Repeater switch 12. Helm unit 13. Steering wheel 14. -
Page 509: Autopilot Steering (Mode Selector: Auto)
30. Steering With TOKYO KEIKI Autopilot PR-6000 30.3.2 Autopilot steering (Mode selector: AUTO) The operator sets the required heading of the vessel by operating the Course Setting knob. Turns are controlled by the rudder limit or Rate of Turn and initiated by the operator. Turn the Mode selection switch to the AUTO position, and the set course is shown in the SET. -
Page 510: Track Mode Automatic Route Steering, Rc/Nav (Mode Selector: Rc)
30. Steering With TOKYO KEIKI Autopilot PR-6000 30.3.4 Track mode automatic route steering, RC/NAV (Mode selector: RC) Open Sea mode (Goto OS) In the Open Sea mode, the planned track is followed at moderate and economical accuracy between waypoints and also during turns (position-controlled turn). -
Page 511: Override Steering Method (Option)
30. Steering With TOKYO KEIKI Autopilot PR-6000 30.3.6 Override steering method (option) FU override unit Starting override steering: Confirm that the Ready lamp in the FU unit is ON. Override steering knob Press the ON/OFF override steering switch to enable control of the steering from this unit, by the Override steering Ready lamp knob. - Page 512 30. Steering With TOKYO KEIKI Autopilot PR-6000 NFU override controller Starting override steering: Override steering level Confirm that the Ready lamp in the NFU controller is ON. Pull out the pin stopper inserted in the Pin stopper override NFU controller and turn the lever to the desired direction.
-
Page 513: Automatic Route Steering, Rc/Nav (Mode: Rc)
30. Steering With TOKYO KEIKI Autopilot PR-6000 30.4 Automatic Route Steering, RC/Nav (Mode: RC) There are two types of automatic route steering: open sea (=Goto OS) mode or all waters (=Goto AW) mode. Automatic route steering can be used with a predefined monitored route. The Goto OS and Goto AW steering modes can be activated when your ship is located inside a channel of a monitored route and in the linear part of a monitored route. -
Page 514: Activation Of Route Steering
30. Steering With TOKYO KEIKI Autopilot PR-6000 30.4.4 Activation of route steering Do the following to activate route steering. First select a route in the monitor mode on the ECDIS. Then open the route monitor window. Select either Goto OS or Goto AW from the list box, which is located in the To WPT field. After you have selected a route in the monitor mode and desired steering mode (Goto OS or Goto AW), the NAV-Ready lamp comes on. - Page 515 30. Steering With TOKYO KEIKI Autopilot PR-6000 Goto OS When Go to OS is activated, the indication Goto OS appears in the route monitor window. If the planned course to approach a To WPT is defined using Great Circle, the indication "Goto OS Great circle" appears in the route monitor window.
-
Page 516: Missing Preconditions For Route Steering
30. Steering With TOKYO KEIKI Autopilot PR-6000 30.4.5 Missing preconditions for route steering When route steering is not used or the ECDIS did not accept the requested route steering mode, there is no indication of route steering mode in the route monitor window, as shown right. There are several requirements to start route steering. - Page 517 30. Steering With TOKYO KEIKI Autopilot PR-6000 Reason: You tried to activate a route steering mode Reason: You tried to activate a route steering mode without SOG/COG reference. when your ship's speed is less than defined for route Remedy: Check your selection of the sensors. steering.
- Page 518 30. Steering With TOKYO KEIKI Autopilot PR-6000 Alarm "2464 Route: No selected route" informs you that the there is no route selected for route monitoring. Alarm "2465 Route: Illegal WPT" informs you that the there is a route selected for route monitoring, but the selection of the next or final waypoint is missing or illegal.
-
Page 519: Arrival To A Waypoint
30. Steering With TOKYO KEIKI Autopilot PR-6000 30.4.6 Arrival to a waypoint Automatic route steering navigation tries to keep your ship inside the channel limits and going to the next waypoint. Well before arriving at a next waypoint, the alarm "2485 ROUTE:WPT PREWARING" is given. As soon as the alarm appears, verify that the maneuver is safe and there are no dangerous targets. -
Page 520: Route Steering Alarms
30. Steering With TOKYO KEIKI Autopilot PR-6000 30.4.7 Route steering alarms There are two types of route steering alarms: permanent and intermittent. Permanent route steering alarms Permanent alarms are available regardless of the steering mode: • "Off track" value is shown in red. •... - Page 521 30. Steering With TOKYO KEIKI Autopilot PR-6000 Alarm "2461 Route: ROT will be exceed" appears when the planned radius for a next waypoint together with the current speed of the rate of turn is over the limit set with Max. rate of turn in the Route Parameters dialog box. This alarm is activated if your ship is within the value set for WPT approach alarm time in the Route Parameters dialog box.
-
Page 522: Collision Avoidance Maneuver During Automatic Route Steering
30. Steering With TOKYO KEIKI Autopilot PR-6000 Alarm "2518 Disabled: Not accepted" informs you that the 30-second timeout period has passed after you pressed the NAV and Enable switch buttons on the TOKYO KEIKI control panel. After you select "GotoOS" or "GotoAW" at the ECDIS, you have 30 seconds to press the NAV and Enable switch buttons on the TOKYO KEIKI control panel, otherwise alarm 2518 is given. -
Page 523: How To Stop Or Modify Already Enabled Route Turn
30. Steering With TOKYO KEIKI Autopilot PR-6000 30.4.9 How to stop or modify already enabled route turn There are two reasons that an automatic route turn must be stopped or modified. • The turn cannot be performed up to the final value. •... -
Page 524: 30.4.10 How To Change Mode Of Route Steering
30. Steering With TOKYO KEIKI Autopilot PR-6000 30.4.10 How to change mode of route steering The mode of automatic route steering can be changed as follows: Open the route monitor window. Select either "Goto OS" or "Goto AW" in the list box which is located in the "To WPT" field. If you try to change the route steering mode without fulfilling preconditions, one of following User guidance dialog box appears: Reason: Change of route steering modes without the... -
Page 525: 30.4.11 Notes On Steering
30. Steering With TOKYO KEIKI Autopilot PR-6000 30.4.11 Notes on steering Accuracy of route steering Accurate route steering is defined as small cross track error when automatically following the route. One of the Route Parameters - Drift compensation - has a significant effect for accuracy of route steering. -
Page 526: Other Operations With Tokyo Keiki Pr-6000
30. Steering With TOKYO KEIKI Autopilot PR-6000 30.5 Other Operations with TOKYO KEIKI PR-6000 30.5.1 Adjusting method for Auto steering (Auto mode) For the PID, the auto steering adjusting control knobs are weather control (AUTO/0-10), rudder ratio (1-9), rate of turn (1-9), pilot watch (5-15) and rudder angle limit (5-35). -
Page 527: Description Of Alarms With Tokyo Keiki Pr-6000
30. Steering With TOKYO KEIKI Autopilot PR-6000 30.6 Description of Alarms with TOKYO KEIKI PR-6000 30.6.1 Alarms • The ECDIS control unit's ALARM ACK lamp goes on. • The type of alarm is displayed on the ECDIS screen as number and text. •... -
Page 528: Errors
30. Steering With TOKYO KEIKI Autopilot PR-6000 30.6.2 Errors Errors should not happen during normal operation. They are related to internal problems. Integrated operation related alarms • The ECDIS control unit's ALARM ACK lamp goes on. • The type of alarm is displayed on the ECDIS screen as number and text. •... - Page 529 30. Steering With TOKYO KEIKI Autopilot PR-6000 RC/NAV-GOTO AW: Track steering in All Waters mode RC/NAV-TC STO : Track steering stopped. Change steering mode from "RC" to some other steering mode. Failure texts available on Autopilot dialog box are: Missing gyro: Gyro data is missing or not received correctly at autopilot. Rudder servo: Rudder feedback signal is missing or rudder servo not working correctly.
-
Page 530: Expected Steering Performance Under Various Conditions
30. Steering With TOKYO KEIKI Autopilot PR-6000 30.8 Expected Steering Performance Under Various Conditions The system has many available steering modes. Below is a summary of effect of various environmental conditions. Note 1: Track Control System use a combination of drift compensation and off track compensation to keep your ship inside the channel limit. - Page 531 30. Steering With TOKYO KEIKI Autopilot PR-6000 Environmental Heading control = Goto OS + "RC" Goto AW+ "RC" conditions "AUTO" Sudden change of There is no - Ship may go outside channel - Ship may go outside channel wind and/or current compensation for limit and return back inside limit and return back inside...
-
Page 532: Expected Steering Performance For Turns
30. Steering With TOKYO KEIKI Autopilot PR-6000 30.8.2 Expected steering performance for turns Environmental Heading control = Goto OS + "RC" Goto AW + "RC" conditions "AUTO" Calm sea, no wind, Ship performs normal - Ship follows monitored route. - Ship follows monitored no current autopilot turn under route. - Page 533 30. Steering With TOKYO KEIKI Autopilot PR-6000 Environmental Heading control = Goto OS + "RC" Goto AW + "RC" conditions "AUTO" Slow change of speed Ship performs normal - Ship follows monitored - Ship follows monitored autopilot turn under route, but may need full route.
-
Page 534: Expected Steering Performance Under Critical Failure
30. Steering With TOKYO KEIKI Autopilot PR-6000 30.9 Expected Steering Performance Under Critical Failure Below is a summary of the system behaviour in various failures when the Goto OS or Goto AW steering mode is in use. Note: The backup navigator alarm is activated if the alarm is not acknowledged within 30 seconds. For more information about this alarm, see section 31.7 Description of Backup Navigator Alarm. -
Page 535: Lost Speed
30. Steering With TOKYO KEIKI Autopilot PR-6000 30.9.3 Lost speed Associated alarms (generated Expected system performance What end operator at ECDIS) should do • Sensor alarm, for example • Acknowledge alarms. Alarm "4008: Log error", • Study situation. "4012…4016: Position equipment error", etc. -
Page 536: Low Speed
30. Steering With TOKYO KEIKI Autopilot PR-6000 30.9.4 Low speed Associated alarms (generated Expected system performance What end operator at ECDIS) should do • Alarm "2008 Filter: Speed • Acknowledge alarms. below xx." • Study situation. • Alarm "2010 Filter: Pos •... -
Page 537: Total Lost Position
30. Steering With TOKYO KEIKI Autopilot PR-6000 30.9.6 Total lost position Associated alarms (generated Expected system performance What end operator at ECDIS) should do • Alarm "4012…4016: • Acknowledge alarms. Position equipment error" • Study situation. • OR • Kalman filter detects jump, etc. -
Page 538: Lost Differential Position
30. Steering With TOKYO KEIKI Autopilot PR-6000 30.9.7 Lost differential position Goto AW steering mode Associated alarms (generated Expected system performance What end operator at ECDIS) should do • Alarm "4027…4031: Lost • Acknowledge alarms. DGPS" or "4012…4016: • Study situation. Position equipment error."... -
Page 539: Lost Differential Position And Position Discrepancy
30. Steering With TOKYO KEIKI Autopilot PR-6000 30.9.8 Lost differential position and position discrepancy Associated alarms (generated Expected system performance What end operator at ECDIS) should do • If sensors in Filter calculation • Acknowledge alarms. Precondition are NOT inside operator •... -
Page 540: Lost Communication Between Ecdis And Autopilot
30. Steering With TOKYO KEIKI Autopilot PR-6000 30.9.9 Lost communication between ECDIS and Autopilot Associated alarms Expected system performance What end operator should do • Alarm "2488 Steering: Stop- • Acknowledge alarms. Within 15 system fail" generated at • Study situation. seconds ECDIS. -
Page 541: How To Use The Curved Ebl With Tokyo Keiki Autopilot
30. Steering With TOKYO KEIKI Autopilot PR-6000 30.10 How to use the Curved EBL with TOKYO KEIKI Autopilot The curved EBL is a control tool to monitor automatic operation of GotoOS and Goto AW (="RC/Nav") steering modes. The curved EBL is available on ECDIS screen and on some selected radar displays. After the WPT Approach but before start of turn, the curved EBL displays next intended turn. -
Page 542: 30.11 Using The Predictor
30. Steering With TOKYO KEIKI Autopilot PR-6000 30.11 Using the Predictor The Predictor is a tool for estimating your ship’s future positions and behaviour, and it is in the information area. Place the cursor on the text "Predictor" then use left mouse button to toggle the predictor ON/OFF. The current setting is shown in the mouse functions area. -
Page 543: 31. Alarms
31. Alarms 31.1 Overview Alarms are displayed on the ENC screen at the lower right corner, indicated with "1" in the figure below. "2" in the figure below is the alarm area, where you acknowledge alarms and display the Alarm Queue window which shows alarms generated. -
Page 544: Alarms Generated By Navigation Calculation
31. Alarms 31.2 Alarms Generated by Navigation Calculation Navigation calculation generates the following alarms: • Error detected in any sensor • Radar communication error • Software alarms, etc. 31.3 Alarms Generated by Chart Calculation Chart calculation generates the following alarms: •... -
Page 545: Description Of The Alarm Priority System
31. Alarms 31.6 Description of the Alarm Priority System The permanently visible alarm is the top most urgent alarm at any moment. Alarms have priority from 1 to 10 to control urgency. Priority 1 is the highest. The list of alarms in this chapter shows these priorities for each alarm with following syntax: "/1"... -
Page 546: Description Of Backup Navigator Alarm
31. Alarms 31.7 Description of Backup Navigator Alarm Track Control System (=TCS) standard IEC 62065 requires a "backup navigator alarm". This alarm is connected to the Central Alarm System. The idea behind the IEC 62065 requirement for "Backup Navigator Alarm" is that if the navigator on duty cannot handle the situation (i.e. -
Page 547: List Of Alarms
31. Alarms 31.8 List of Alarms 31.8.1 List of navigation alarms Alarm number 1101: REFTGT: NO FILE CHOSEN ------------------------------------ USE 'REFERENCE TARGET' BUTTON TO CHOOSE VALID REFERENCE TARGET FILE Alarm number 1102: REFTGT: NEED 8 TARGETS ------------------------------------ FILE MUST CONTAIN AT LEAST 8 TARGETS IN ORDER TO UTILIZE REFERENCE TARGETS USE 'REFERENCE TARGET' BUTTON TO CHOOSE ANOTHER REF. - Page 548 31. Alarms Alarm number 2004: GYRO DATA UNRELIABLE /1/8 ------------------------------------ IF YOU HAVE BOTH GYRO1 AND GYRO2 CHOSEN AND IF THEY VALUE DIFFERS MORE THAN 5 DEGREES ALARM IS GENERATED. VERIFY AND CHOOSE HEADING SENSORS IN 'SENSORS’ FUNCTION. Alarm number 2005: LOG DATA UNRELIABLE /1/8 ------------------------------------...
- Page 549 31. Alarms Alarm number 2008: FILTER: SPEED BELOW /1/8 ------------------------------------ KALMAN FILTER REQUIRED THAT THE SPEED OF THE OWN SHIP IS MORE THAN SPEED LIMIT SET IN ECDIS INSTALLATION PARAMETERS. IF ROUTE STEERING WAS NOT USED, THEN KALMAN FILTER HAS BEEN SET AUTOMATICALLY OFF BY THE SYSTEM.
- Page 550 31. Alarms Alarm number 2052: ROUTE:ILLEGAL ETA WAYPOINT ------------------------------------ ETA WAYPOINT DOESN'T EXIST IN ROUTE FILE OR ETA WAYPOINT IS NOT BETWEEN NEXT AND FINAL WAYPOINT. VERIFY IN 'ROUTE MONITOR' THAT A VALID ROUTE IS CHOSEN. Alarm number 2053: ROUTE:ILLEGAL NEXT WAYPOINT ------------------------------------ NEXT WAYPOINT DOESN'T EXIST IN ROUTE FILE.
- Page 551 31. Alarms Alarm number 2058: ARPA RADAR COMMUNICATION ERROR /3/10 ------------------------------------ ECDIS CANNOT COMMUNICATE WITH ARPA 4 VERIFY THAT 'AUTOTRACKING ON' AND 'INS ON' ARE DECLICKED ON THE ARPA RADARS. Alarm number 2060: ROUTE: WP CHANGE DISABLED ------------------------------------ NEXT WAYPOINT CANNOT BE CHANGED DURING ROUTE STEERING.
- Page 552 31. Alarms Alarm number 2067: MANUAL DRIFT DISABLED ------------------------------------ MANUAL DRIFT VALUE CAN ONLY BE INSERTED WHEN NO SENSORS PROVIDE SPEED OVER GROUND DATA. USE 'SENSORS' BUTTON TO VERIFY AND CHOOSE SENSORS TO BE USED. Alarm number 2071: SOURCE ARPA RADAR CHANGED ------------------------------------ MASTER RADAR FOR ECDIS HAS BEEN CHANGED.
- Page 553 31. Alarms Alarm number 2102: USERCHART: FILE NOT FOUND /7 ------------------------------------ CANNOT READ USER CHART IN MONITOR MODE. MOVE USER CHART TO PLAN MODE TO MAKE POSTPROCESSING AGAIN FOR USER CHART. Alarm number 2150: ROUTE: FILE READ ERROR ------------------------------------ CANNOT OPEN ROUTE IN MONITOR MODE. OPEN ROUTE IN PLAN MODE TO MAKE SOME MODIFICATION OF WP DATA IN WP PAGE.
- Page 554 31. Alarms Alarm number 2459: STEERING PARAMETER ERROR ------------------------------------ TRACKPILOT PARAMETER HAS AN ERROR IN ITS CONTENTS. CHECK AGAIN INSTALLATION PARAMETERS OF ECDIS. Alarm number 2480: TRACKPILOT RECEIVE ERROR /2/9 ------------------------------------ ECDIS CANNOT RECEIVE ANY DATA FROM TRACKPILOT. CHANGE "MAIN STEERING" -CHOOSEOR TO ANY OTHER POSITION THAN AUTOP.
- Page 555 31. Alarms Alarm number 3500: AIS TARGET OVERFLOW /2/9 ------------------------------------ MAXIMUM COUNT OF AIS TARGETS SET TO BE DISPLAYED ON ECDIS HAS BEEN EXCEEDED WITHIN DEFINED MAXIMUM RANGE. IT IS POSSIBLE THAT SOME OF AIS TARGETS ARE NOT DISPLAYED ON ECDIS.
- Page 556 31. Alarms Alarm number 4001: B-ADAPTER ERROR /4/11 ------------------------------------ B-ADAPTER DOES NOT OPERATE DUE TO A SYSTEM FAULT. SWITCH OFF MAIN CIRCUIT BREAKER AND THEN ON AGAIN. CALL SERVICE IF FAILURE STILL EXISTS Alarm number 4002: ENGINE CONTROL COMM ERROR /6/13 ------------------------------------ CONNECTION TO ENGINE CONTROL HAS...
- Page 557 31. Alarms Alarm number 4009: DUAL AXIS LOG (BT) ERROR /3/10 ------------------------------------ DUAL AXIS LOG DATA IS NOT RECEIVED CORRECTLY. USE SPEED/COURSE PAGE TO CHOOSE VALID SPEED SENSORS. Alarm number 4010: ECHO SOUNDER ERROR /3/10 ------------------------------------ ECHO SOUNDER DATA IS NOT RECEIVED CORRECTLY.
- Page 558 31. Alarms Alarm number 4015: POSITION EQUIPMENT ERROR /3/10 ------------------------------------ POSITION EQUIPMENT 4 DATA IS NOT RECEIVED CORRECTLY. USE 'SENSORS' POSITION TO CHOOSE VALID POS SENSOR. Alarm number 4016: POSITION EQUIPMENT ERROR /3/10 ------------------------------------ POSITION EQUIPMENT 5 DATA IS NOT RECEIVED CORRECTLY.
- Page 559 31. Alarms Alarm number 4023: ARPA RADAR SYSTEM ERROR /6/13 ------------------------------------ RADAR FROM CHANNEL 3 REPORT RADAR SYSTEM FAILURE OR ECDIS CANNOT COMMUNICATE WITH THE RADAR. VERIFY THAT 'AUTOTRACKING ON' AND 'INC ON' ARE DECLICKED ON THE RADAR. Alarm number 4024: ARPA RADAR SYSTEM ERROR /6/13 ------------------------------------...
- Page 560 31. Alarms Alarm number 4029: DGPS POS. SOURCE CHANGE /3/10 ------------------------------------ DGPS POSITION SENSOR IN CHANNEL NUMBER 3 HAS CHANGED ITS OPERATION MODE FROM NORMAL TO DIFFERENTIAL OR FROM DIFFERENTIAL TO NORMAL. CHECK SENSORS AND IF REQUIRED CHOOSE MORE SUITABLE POSITION SENSOR. Alarm number 4030: DGPS POS.
- Page 561 31. Alarms Alarm number 4035: B-ADAPTER INTERFACE ERROR /1/8 ------------------------------------ B-ADAPTER DATA IS NOT RECEIVED CORRECTLY DUE TO INTERNAL SOFTWARE ERROR IN COMMUNICATION PROGRAM. TO RESTART COMMUNICATION PROGRAM, OPEN INSTALLATION PARAMETERS OF ECDIS AND CLICK OK WITHOUT CHANGING ANY PARAMETERS. OR RESTART ECDIS. Alarm number 4036: AMWSS COMM ERROR /6/13...
- Page 562 31. Alarms Alarm number 4040: DATUM MISMATCH /3/10 ------------------------------------ POSITION SENSOR IN CHANNEL NUMBER 3 OUTPUTS POSITION ANOTHER DATUM AS SET IN ECDIS INSTALLATION PARAMETERS CHECK, THAT SENSOR OUTPUTS POSITION IN WGS 84 DATUM. Alarm number 4041: DATUM MISMATCH /3/10 ------------------------------------ POSITION SENSOR IN CHANNEL NUMBER 4 OUTPUTS POSITION ANOTHER DATUM AS...
- Page 563 31. Alarms Alarm number 4046: DATUM CHANGE ------------------------------------ POSITION SENSOR IN CHANNEL NUMBER 3 HAS CHANGED OUTPUT POSITION FROM ANOTHER DATUM TO WGS 84 DATUM. Alarm number 4047: DATUM CHANGE ------------------------------------ POSITION SENSOR IN CHANNEL NUMBER 4 HAS CHANGED OUTPUT POSITION FROM ANOTHER DATUM TO WGS 84 DATUM.
- Page 564 31. Alarms Alarm number 4055: GYRO ERROR(TRACKPILOT) /3/10 ------------------------------------ GYRO DATA ON TRACKPILOT IS MISSING. AL 10 IS ALSO ACTIVE ON TRACKPILOT'S CONTROL PANEL. STUDY SITUATION ON TRACKPILOT. Alarm number 4063: ECDIS IP ERROR FOR LANADA /3/10 ------------------------------------ IF ECDIS IP-ADDRESS FOR LAN ADAPTERS IS DIFFERENT BETWEEN WINDOWSXP CONTROL PANEL AND ECDIS Alarm number 4064:...
- Page 565 31. Alarms Alarm number 4068: LAN ADAPTER 3 PARAM ERROR /3/10 ------------------------------------ INSTALLATION MISTAKE. INSTALL ECDIS SW AGAIN. Alarm number 4069: LAN ADAPTER 4 PARAM ERROR /3/10 ------------------------------------ INSTALLATION MISTAKE. INSTALL ECDIS SW AGAIN. Alarm number 4070: ECDIS IP ERROR FOR ARPA /3/10 ------------------------------------ IF ECDIS IP-ADDRESS FOR LAN RADAR IS...
- Page 566 31. Alarms Alarm number 4075: LAN ARPA 4 CONN ERROR /3/10 ------------------------------------ ECDIS FAILED TO COMMUNICATE WITH LAN RADAR 4. CHECK IP ADDRESSES BOTH FOR LAN RADAR ON ECDIS AND ON RADAR. Alarm number 4083: LAN ADAPTER PARAM CONFLICT /3/10 ------------------------------------ ID OF LAN ADAPTER ON ECDIS IS INCORRECT OR PARAMETER "F"...
-
Page 567: List Of Chart Alarms
31. Alarms Alarm number 4206: EXT. NAVIGATION EQ. ERROR ------------------------------------ NAVIGATION EQUIPMENT CONNECTED IN ALARM INPUT 6 HAS INTERNAL FAILURE Alarm number 4207: EXT. NAVIGATION EQ. ERROR ------------------------------------ NAVIGATION EQUIPMENT CONNECTED IN ALARM INPUT 7 HAS INTERNAL FAILURE Alarm number 4208: EXT. - Page 568 31. Alarms Alarm number 5111: FAIRWAY /2/10 Alarm number 5112: RESTRICTED AREA /2/10 Alarm number 5113: CAUTION AREA /2/10 Alarm number 5114: OFFSHORE PRODUCTION AREA /2/10 Alarm number 5115: MILITARY PRACTICE AREA /2/10 Alarm number 5116: SEAPLANE LANDING AREA /2/10 Alarm number 5117: SUBMARINE TRANSIT LANE /2/10...
-
Page 569: List Of Steering Alarms With Autopilot Fap-2000
31. Alarms 31.8.3 List of steering alarms with Autopilot FAP-2000 Alarm number 2451: ROUTE: WP APPROACH ALARM /1/8 ------------------------------------ WAYPOINT IS NOW BEING APPROACHED. CLICK 'ACKN. WARNING' TO ACCEPT THE TURN. Alarm number 2452: ROUTE: TURNING DISABLED ------------------------------------ WHEELOVER POINT HAS BEEN PASSED WITHOUT 'ACKN. - Page 570 31. Alarms Alarm number 2460: PILOT: ROT WILL BE EXCEEDED /4/11 ------------------------------------ THE RADIUS SENT TO Autopilot IS EXCEEDING THE MAXIMUM LIMIT FOR TURNRATE. INCREASE THE RADIUS, OR REDUCE SPEED. Alarm number 2461: ROUTE:ROT WILL BE EXCEEDED /4/11 ------------------------------------ WAYPOINT IS BEING APPROACHED WITH TOO HIGH SPEED FOR THE PLANNED RADIUS, CAUSING MAX.
- Page 571 31. Alarms Alarm number 2468: DISABLED: OUT OF COURSE ------------------------------------ ROUTE STEERING CAN ONLY BE INITIATED WHEN SHIPS COURSE IS WITHIN THE 'GOTO WP LIMIT' FOR 'GOTO WP' OR WITHIN THE 'GOTO TRACK LIMIT' FOR 'GOTO TRACK'. USE 'RADIUS CONTROL' MODE TO STEER WITHIN THE LIMITS.
- Page 572 31. Alarms Alarm number 2477: DISABLED: OUT OF CHANNEL ------------------------------------ 'GOTO WP' OR 'GOTO TRACK' CAN ONLY BE INITIATED WHEN SHIP IS WITHIN CHANNEL LIMIT OF MONITORED ROUTE. Alarm number 2478: ROUTE: NEEDS GOOD POSIT. /2/9 ------------------------------------ THIS IS WARNING THAT YOU ARE USING GOTO WP STEERING MODE WITHOUT DIFF.
- Page 573 31. Alarms Alarm number 2492: ROUTE: NEEDS DIFF POS. ------------------------------------ 'GOTO TRACK' MODE CANNOT CONTINUE WITHOUT A HIGH-PRECISION POSITION SENSOR. STEERING MODE IS AUTOMATICALLY CHANGED "GOTO WP" WITH ALARM 2489:ROUTE: CHANGED TO GOTO WP Alarm number 2493: PROGTRACK: NEEDS FILTER ON /2/9 ------------------------------------ A WARNING THAT YOU ARE USING PROGRAM...
- Page 574 31. Alarms Alarm number 2498: USE MANUAL RUDDER CONTROL ------------------------------------ CHANGE IMIDIATELY TO DIRECT CONTROL OF RUDDER. THIS ALARM IS REMINDER THAT TRACKPILOT HAS LOST GYRO HEADING. IT IS REPEATED EVERY TWO MINUTES. Alarm number 2499: DISABLED: NEEDS GOOD POS ------------------------------------ 'ROUTE STEERING' MODE CANNOT BE ACTIVATED WITHOUT DIFF.
- Page 575 31. Alarms Alarm number 2504: PROGTRACK: USE RADIUS CTRL. /2/9 ------------------------------------ THIS IS INSTRUCTION TO CHANGE STEERING MODE. THIS ALARM IS GENERATED IF THERE ARE NOT SUFFICIENT SENSORS AVAILABLE TO CONTINUE PROGRAM TRACK Alarm number 2505: ROUTE: USE GOTO WP /2/9 ------------------------------------ THIS IS INSTRUCTION TO CHANGE...
- Page 576 31. Alarms Alarm number 2509: PROG TRACK: NEED SOG/COG REF. /2/9 ------------------------------------ 'PROGRAM TRACK' MODE CANNOT CONTINUE WITHOUT SOG/COG REFERENCE AVAILABLE FROM POSITION SENSOR OR BOTTOM TRACK OF DUAL AXIS LOG. Alarm number 2510: DISABLED: OUT OF TURN ------------------------------------ GOTO TRACK OR GOTO WP STEERING MODE CANNOT BE ACTIVATED IF THE ROUTE MONITORING OF THE SYSTEM DETECTS THAT ROUTE MONITOR IS in TURN, BUT...
-
Page 577: List Of Steering Alarms Only With Yokogawa Autopilot
31. Alarms 31.8.4 List of steering alarms only with YOKOGAWA Autopilot Alarm number 2471: 2471 AP MODE CONFLICT - USE AUTO/2/9 ------------------------------------ YOU HAVE TRIED TO ACTIVATE TRACK STEERING OR YOU HAVE REACHED THE END OF THE ROUTE, BUT YOU HAVE NOT LEFT 'TRACK' MODE CHANGE IMMEDIATELY TO 'AUTO' MODE Alarm number... - Page 578 31. Alarms Alarm number 2514: ROUTE: NAVI COMPLETE TURN /2/9 ------------------------------------ THIS IS INSTRUCTION TO CHANGE STEERING MODE. THIS ALARM IS GENERATED IF THERE ARE NOT SUFFICIENT SENSORS AVAILABLE TO CONTINUE TRACK MODE AFTER TURN. Alarm number 2515: CONFLICT-NAVI COMPL. TURN /2/9 ------------------------------------ THIS IS INSTRUCTION TO CHANGE...
-
Page 579: List Of Radar Overlay Related Alarms
31. Alarms 31.8.5 List of radar overlay related alarms Alarm number 6100: RADOV NO HEADLINE 6/13 ------------------------------------ NO HEADLINE AVAILABLE FOR RADAR OVERLAY. CHECK CONNECTORS AND CABLING FOR RADAR OVERLAY Alarm number 6101: RADOV NO AZIMUTH 6/13 ------------------------------------ NO AZIMUTH AVAILABLE FOR RADAR OVERLAY. - Page 580 31. Alarms Alarm number 6106: LAN RADAR CONNECT STATE 5/12 ------------------------------------ INDICATION WHILE LAN CONNECTION FOR ARPA FEATURES IS ESTABLISHED BETWEEN ECDIS PROCESSOR AND ARPA PROCESSOR Alarm number 6107: LAN RADAR CONNECT FAILURE 5/12 ------------------------------------ FAILURE TO ESTABLISH LAN CONNECTION FOR ARPA FEATURES BETWEEN ECDIS PROCESSOR AND ARPA PROCESSOR.
- Page 581 31. Alarms Alarm number 6200: RADOV NO HEADLINE 6/13 ------------------------------------ NO HEADLINE AVAILABLE FOR RADAR OVERLAY. CHECK CONNECTORS AND CABLING FOR RADAR OVERLAY Alarm number 6201: RADOV NO AZIMUTH 6/13 ------------------------------------ NO AZIMUTH AVAILABLE FOR RADAR OVERLAY. CHECK CONNECTORS AND CABLING FOR RADAR OVERLAY Alarm number 6202: RADOV NO TRIGGER...
- Page 582 31. Alarms Alarm number 6206: LAN RADAR CONNECT STATE 5/12 ------------------------------------ INDICATION WHILE LAN CONNECTION FOR ARPA FEATURES IS ESTABLISHED BETWEEN ECDIS PROCESSOR AND ARPA PROCESSOR Alarm number 6207: LAN RADAR CONNECT FAILURE 5/12 ------------------------------------ FAILURE TO ESTABLISH LAN CONNECTION FOR ARPA FEATURES BETWEEN ECDIS PROCESSOR AND ARPA PROCESSOR.
- Page 583 31. Alarms Alarm number 6301: RADOV NO AZIMUTH 6/13 ------------------------------------ NO AZIMUTH AVAILABLE FOR RADAR OVERLAY. CHECK CONNECTORS AND CABLING FOR RADAR OVERLAY Alarm number 6302: RADOV NO TRIGGER 6/13 ------------------------------------ NO TRIGGER AVAILABLE FOR RADAR OVERLAY. CHECK CONNECTORS AND CABLING FOR RADAR OVERLAY Alarm number 6303: RADOV NO VIDEO...
- Page 584 31. Alarms Alarm number 6307: LAN RADAR CONNECT FAILURE 5/12 ------------------------------------ FAILURE TO ESTABLISH LAN CONNECTION FOR ARPA FEATURES BETWEEN ECDIS PROCESSOR AND ARPA PROCESSOR. CHECK LAN CONNECTORS AND CABLES POWER ON/OFF AND REINSTALL ECDIS SW. Alarm number 6308: LAN RADAR DLL FAILURE 5/12 ------------------------------------ FAILURE INSIDE ECDIS PROCESSOR...
- Page 585 31. Alarms Alarm number 6402: RADOV NO TRIGGER 6/13 ------------------------------------ NO TRIGGER AVAILABLE FOR RADAR OVERLAY. CHECK CONNECTORS AND CABLING FOR RADAR OVERLAY Alarm number 6403: RADOV NO VIDEO ------------------------------------ NO VIDEO AVAILABLE FOR RADAR OVERLAY. CHECK ADJUSTMENT OF GAIN ON ON RADAR OVERLAY.
- Page 586 31. Alarms Alarm number 6408: LAN RADAR DLL FAILURE 5/12 ------------------------------------ FAILURE INSIDE ECDIS PROCESSOR BETWEEN DLL INTERFACE SW AND ECDIS SOFTWARE. SWITCH POWER ON/OFF AND REINSTALL ECDIS SW. Alarm number 6410: RADOV CONNECT STATE 6/13 ------------------------------------ INDICATION WHILE LAN CONNECTION FOR RADAR ECHO DATA IS ESTABLISHED BETWEEN ECDIS PROCESSOR AND ARPA PROCESSOR...
-
Page 587: Maintenance And Troubleshooting
Interval Check point Check and measures Remarks When needed FURUNO- Dust or dirt may be removed from the cabinet Do not use chemical- supplied LCD with soft cloth. Water-diluted mild detergent based cleaners to monitor and may be used if desired. -
Page 588: Replacing The Fuse
32. Maintenance and Troubleshooting 32.2 Replacing the Fuse The 5A fuse located at the back of the processor unit protects the system from overcurrent and internal fault. If the power cannot be turned on, check if the fuse has blown. If it has blown, find out the cause before replacing the fuse. If it blows again after replacement, contact your dealer for advice. -
Page 589: Troubleshooting
32. Maintenance and Troubleshooting 32.4 Troubleshooting The troubleshooting table below provides common faults and the remedy with which to restore normal operation. If you cannot restore normal operation do not check inside the equipment - there are no operator-serviceable parts inside. - Page 590 32. Maintenance and Troubleshooting Troubleshooting (continued from previous page) If… Then… Remedy • ARCS display mode is not • Activate ARCS charts display ARCS chart cannot be displayed activated. mode: Open Chart menu and select Activate ARCS Charts from the menu. •...
-
Page 591: Keyboard Test
32. Maintenance and Troubleshooting 32.5 Keyboard Test In addition to the color calibration tests mentioned in Chapter 26, the ECDIS provides a keyboard test that the operator may use to check keyboard of the RCU-018. (Other diagnostic tests are also provided, on the self-test menu, however these are intended for service technicians. -
Page 592: Consumable Parts
32. Maintenance and Troubleshooting 6. Click the Control Head button to show the control head-checking screen. 7. Push each key, mouse button and scrollwheel. The perimeter of the on-screen key, button or scrollwheel blackens if the pushed item is functioning normally. (For the Control Unit RCU-015, push the hot keys. Their on-screen location is in the Control Head window.) 8. - Page 593 FURUNO FEA-2107 SPECIFICATIONS OF Electronic Chart Display and Information System (ECDIS) FEA-2107 This system is designed with up-to-date computer technology to comply with the IMO/IHO performance standards for Electronic Chart Display and Information System (ECDIS). It displays selected information from SENC (System Electronic Navigational Chart) with positional information from navigation sensors to assist the operator in route planning and monitoring.
- Page 594 FURUNO FEA-2107 USER INTERFACE Position calculation Navigation by result of positioning found with external sensor Dead reckoning with gyro and log Highly accurate position with combination of gyro, log, external sensor and Kalman filter Navigation planning Planning by rhumb line, great circle...
- Page 595 FURUNO FEA-2107 Bearing vibration IEC 60945 COATING COLOR Monitor unit N3.0 (not changed) Processor unit N3.0 (not changed) B/LAN-Adapter N3.0 (not changed) Console 2.5GY5/1.5 (standard) SP - 3 E4122S01F 070601...
- Page 596 This page is intentionally left blank.
-
Page 597: Appendix 1: Glossary Of Terms
Appendix 1: Glossary of Terms APPROACHING POINT (AP) An operator-chosen point where a turning alarm is initiated. AUTOMATIC RADAR PLOTTING AID (ARPA) A system wherein radar targets are automatically acquired, tracked and collision situations computer assessed and warning given. CHANNEL LIMIT (CHL) During route planning a channel limit is defined for each leg. - Page 598 Appendix 1: Glossary of Terms ELECTRONIC NAVIGATIONAL CHART (ENC) The database held on the ship for use with ECDIS. The ENC is equivalent to new editions of paper charts, and may contain additional supplementary nautical information in addition to that contained in the paper chart. FORWARDING DISTANCE (F) The distance which the ship moves straight after a rudder command.
- Page 599 Appendix 1: Glossary of Terms POSITION The display indicates which position-fixing instruments are giving information for the position calculation. RENC Regional Electronic Nautical Chart center. RENC is defined by IMO and IHO as the source of SOLAS compliant Electronic Nautical Charts (ENC), which use S57ed3 coding. An example of such an RENC is the PRIMAR in Stavanger, Norway.
- Page 600 Appendix 1: Glossary of Terms WORLD GEODETIC SYSTEM (WGS) A consistent set of parameters describing the size and shape of the earth, the positions of a network of points with respect to the center of mass of the Earth, transformations from major geodetic datums, and the potential of the Earth.
-
Page 601: Appendix 2: Iho Ecdis Chart 1
Appendix 2: IHO ECDIS Chart 1 A.2.1 IHO ECDIS Chart 1 International Hydrographic Organization (IHO) has published a set of charts where you can find examples of symbology used in S57 charts. You can study them by using the "Info/Help" feature and by switching different layers ON and OFF in the Chart Display dialog box. - Page 602 Appendix 2: IHO ECDIS Chart 1 Information about the chart features Shore features, Ports AP-6...
- Page 603 Appendix 2: IHO ECDIS Chart 1 Depths, currents Seabed, obstructions, pipelines AP-7...
- Page 604 Appendix 2: IHO ECDIS Chart 1 Routes Special areas AP-8...
- Page 605 Appendix 2: IHO ECDIS Chart 1 Lights, radars, services, small crafts Buoys, beacons AP-9...
- Page 606 Appendix 2: IHO ECDIS Chart 1 Mariners symbols Color differentiation diagram AP-10...
-
Page 607: Appendix 3: Interpreting S57 Charts
Appendix 3: Interpreting S57 Charts A3.1 Interpreting S57 Charts The following examples gives you a short introduction to the features of S57 charts. Paper chart or simplified symbols Two color or multi-color depth AP-11... - Page 608 Appendix 3: Interpreting S57 Charts Plain or symbolized boundaries Limited or full light sectors AP-12...
- Page 609 Appendix 3: Interpreting S57 Charts Shallow, safety and deep contours Shallow = 2m, Safety = 5m and Deep = 10m Shallow = 5m, Safety = 10m and Deep = 20m Safety depth = 6m Safety depth = 10m AP-13...
- Page 610 Appendix 3: Interpreting S57 Charts Shallow pattern Items on Standard page of Chart Display dialog box Unknown object or presentation Chart data coverage AP-14...
- Page 611 Appendix 3: Interpreting S57 Charts Land features Water and seabed features Traffic routes AP-15...
- Page 612 Appendix 3: Interpreting S57 Charts Cautionary areas Information areas Buoys and beacons Lights AP-16...
- Page 613 Appendix 3: Interpreting S57 Charts Fog signals Radars Services AP-17...
- Page 614 Appendix 3: Interpreting S57 Charts Items on Other page in Chart Display dialog box Information about chart data Land features Soundings AP-18...
- Page 615 Appendix 3: Interpreting S57 Charts Depth contours, current magnetic Seabed and obstructions Services and small craft facilities AP-19...
- Page 616 Appendix 3: Interpreting S57 Charts Special areas Additional information available Important text AP-20...
- Page 617 Appendix 3: Interpreting S57 Charts Text on Other page in Chart Display dialog box Names for position reporting Light descriptions Nature of seabed AP-21...
- Page 618 Appendix 3: Interpreting S57 Charts Geographic names, etc. Swept depths, magnetics Berth and anchorage numbers AP-22...
-
Page 619: Appendix 4: C-Map Cm-93/3 Charts
Appendix 4: C-MAP CM-93/3 Charts A4.1 C-MAP Cartographic Service Your ECDIS system has the capability of using and displaying the latest CMAP CM-93/3 worldwide vector chart database. These charts are fully compliant with the latest IHO S-57 3.1 specifications. In order to prepare the system for use with the C-MAP CM-93/3 database, there are a number of things that must be done. -
Page 620: A4.2 Chart Subscription Service
A4.2.1 C-MAP service There are three different services available through C-MAP Cartographic service that can be used in FURUNO ECDIS FEA-2x07. Two of them are using CM-93/3 format. These data sets contain two databases: Global Chart Database, which is available on CM93/3 professional CD-ROM. This database contains chart data originally produced both by C-MAP and Hydrographic Office. -
Page 621: A4.2.2 Renc Service
Appendix 4: C-MAP CM-93/3 Charts A4.2.2 RENC service RENC service produced by Primer or IC-ENC is considered to legally fulfil SOLAS requirements as primary aid of navigation. National Hydrographic Organization (NHO) may have arranged similar subscription service as RENC on its own waters. Chart data distributed through the service is S57 ed.3.0 or ed. -
Page 622: A4.3 Cm93/3 Chart Display
Appendix 4: C-MAP CM-93/3 Charts A4.3 CM93/3 Chart Display A4.3.1 Introduction CM93/3 charts are vector charts displayed together with ENC (S57) and CM93/2 charts. These charts have the priority order shown below. 1. ENC 2. CM93/3 3. CM93/2 If identical navigational purpose charts exist for a given area, priority is as shown above. Areas where ENC is not available and CM93/3 and CM93/2 are available, CM 93/3 is displayed. -
Page 623: A4.3.2 Choosing Cm93/3 Chart Material To Use
Appendix 4: C-MAP CM-93/3 Charts Horizontal datum: Horizontal datum of the chart data as published by the chart producer. By definition this must be WGS 84. Vertical datum: Vertical datum of the chart. Sounding datum: Datum used for soundings. Quality of data: Quantitative estimate of the accuracy of chart features, given by the chart producer. - Page 624 Appendix 4: C-MAP CM-93/3 Charts Browsing your charts You may view S57 charts using different positions and different scales. The basic tools for browsing charts are Range -, Range+, Set Chart Center, ShipOffcenter and TM Reset. Set Chart Center allows you to look ahead from a place other than your ship’s current position. Choose Set Chart Center from the Main menu to display the dialog box shown below.
-
Page 625: A4.3.4 Chart Catalogue Of C-Map Charts
Appendix 4: C-MAP CM-93/3 Charts A4.3.4 Chart catalogue of C-MAP charts You can use the chart catalogue to graphically view content of loaded C-MAP database(s) into ECDIS. 1. Open the Chart menu and select Catalogue. 2. Select "Source of Chart Catalogue" as C-MAP. Use Navigation purpose selection to view desired charts. 070.0°... -
Page 626: A4.4 S57 Managing C-Map Charts
Appendix 4: C-MAP CM-93/3 Charts A4.4 S57 Managing C-MAP charts A4.4.1 Licensing system used by the C-MAP The licensing system used with CM-93/3 professional charts is based on the serial number of eToken. The eToken is connected to USB port on the ECDIS and it identifies ECDIS for CM-93/3 professional charts. It must be connected to ECDIS always when using CM-93/3 professional charts. -
Page 627: A4.5 Cm93/3 Database
Appendix 4: C-MAP CM-93/3 Charts A4.5 CM93/3 Database There are three different CM93/3 Databases that can be loaded into ECDIS: • CM93/3 Professional, available on CD-ROM • CM93/3 Professional +, available on DVD • CM-ENC, available on DVD Note: CM-ENC is not yet available. A4.5.1 Load of CM93/3 database to ECDIS Charts are available on CM93/3 professional CD ROM. -
Page 628: A4.5.2 Use Of Multiple Databases
Appendix 4: C-MAP CM-93/3 Charts 4. Click the Yes button. ECDIS will copy database. 5. After successful loading the following dialog box appears 6. Click the OK button. Close this window by clicking X in upper right corner. A4.5.2 Use of multiple databases It is possible to use CM93/3 Professional, CM93/3 Professional + and CM-ENC databases at the same time at the same workstation. -
Page 629: A4.6 License Of Cm93/3
Appendix 4: C-MAP CM-93/3 Charts A4.6 License of CM93/3 To view charts of C-MAP database(s), you need to load the license for the database. For each database (CM93/3 Professional, CM93/3 Professional + and CM-ENC) C-MAP generates own license. Note: CM-ENC is not yet available. A4.6.1 Add license from file To get access to CM93/3 professional chart database, you have to enter a code, which is received from C-MAP... - Page 630 Appendix 4: C-MAP CM-93/3 Charts 4. Click the OK button. Then, you have to confirm loading of new code. 5. Click the YES button. Code will be read. 6. Successful loading is indicated with following dialog box. 7. Click the Close button. If you will have dialog box shown above, it indicates that there is mismatch between chart database and password.usr.
-
Page 631: A4.6.2 Add License Manually
Appendix 4: C-MAP CM-93/3 Charts A4.6.2 Add license manually If you receive license as a "License string," you can enter this string manually into ECDIS, using the service keyboard. To connect the keyboard, turn off the power, open the lid on the processor unit, connect the keyboard to the location shown below then turn the power on again. -
Page 632: A4.6.3 Renewal Of License
Appendix 4: C-MAP CM-93/3 Charts A4.6.3 Renewal of license You will receive a notice 2 months prior to expiration of the licenses. This notice is repeated on a regular basis until the expiration date is reached. You need to renew license to view chart database after the expiration date. When warning of license(s) expiration appears, contact your chart agent to renew your C-MAP license(s). -
Page 633: A4.7 How To Keep Charts Up To Date
Appendix 4: C-MAP CM-93/3 Charts A4.7 How to Keep Charts up to Date During period of subscription, you will receive CM-93/3 Professional CD ROM three times. To keep up-to-date between CD issuing periods, you can use Real Time Updating service. ECDIS operators cannot connect to the internet directly from the ECDIS. - Page 634 Appendix 4: C-MAP CM-93/3 Charts Select Zones (or Areas) to be updated. Click the Create button then select the drive where to save the Chart Update Order file. When Chart Update Order file is generated and saved to destination, the following dialog box appears: Click the OK button.
-
Page 635: A4.7.2 Loading Chart Updates From The File
Appendix 4: C-MAP CM-93/3 Charts A4.7.2 Loading chart updates from the file When you have received an update file via e-mail, then you can load it to ECDIS. Open the Chart menu and select C-MAP Ed 3 in the menu. Select Update Charts in C-MAP Ed 3 menu and Apply Updates from e-mail in Update charts menu. - Page 636 Appendix 4: C-MAP CM-93/3 Charts In C-MAP Chart Update dialog box, select drive where updates are saved and click the Apply Updates button. When completed, the following dialog box appears. Click the OK button. AP-40...
-
Page 637: A4.7.3 Review Of Chart Updates
Appendix 4: C-MAP CM-93/3 Charts A4.7.3 Review of chart updates You can see a list of changes for every updated chart as follows: Open the Chart menu and select C-MAP Ed 3 in the menu. Select Update Charts in C-MAP Ed 3 menu and Apply Updates from e-mail in Update charts menu. - Page 638 Appendix 4: C-MAP CM-93/3 Charts Select from the list shown below. Select a chart from the list. Click the X button. In RTU dialog box, click the X button. AP-42...
-
Page 639: A4.8 Removing Cm93/3 Charts
Appendix 4: C-MAP CM-93/3 Charts A4.8 Removing CM93/3 Charts You can remove CM93/3 charts from ECDIS using Unregister. This will remove license and entire database from ECDIS. Open the Chart menu and select C-MAP Ed 3 from the menu. Select Load and register for use from the C-MAP Ed 3 menu. - Page 640 Appendix 4: C-MAP CM-93/3 Charts This page intentionally left blank. AP-44...
-
Page 641: Appendix 5: C-Map Cm-93/2 Charts
Appendix 5: C-MAP CM-93/2 Charts A5.1 C-MAP Charts A5.1.1 Introduction This electronic chart system is also compatible with C-MAP vector chart format CM-93 charts, available from C- MAP Norway A/S. This material is used like Hydrographic Offices S57ed3 charts, but it doesn't have ENC status as defined by IMO, IHO and IEC and thus it cannot be used to replace paper charts. -
Page 642: A5.2 Managing C-Map Charts
Appendix 5: C-MAP CM-93/2 Charts A5.2 Managing C-MAP charts A5.2.1 Licensing system used by the C-MAP The licensing system used with C-MAP is based on serial numbered CD ROMs and authorisation codes received from C-MAP Norway A/S. You choose either required C-MAP areas or zones and your electronic chart system generates an operator code based on your selection, the serial number of the serial numbered C-MAP CD ROM and the hardware identifier of your electronic chart system. -
Page 643: A5.2.4 Defining Subscription Of C-Map Charts
Appendix 5: C-MAP CM-93/2 Charts A5.2.4 Defining subscription of C-MAP charts Before you can be an authorized operator of C-MAP charts you must do the following: Purchase CD ROM(s) of C-MAP from your chart agent. Load serial number of C-MAP into the ECDIS. Choose charts that you want to use in the ECDIS, by zones or areas. - Page 644 Appendix 5: C-MAP CM-93/2 Charts Loading serial number of CD ROM Each CD ROM has an individual serial number that is used to identify the operator of C-MAP charts. In order to load the serial number into the ECDIS, do the following: 1.
- Page 645 Appendix 5: C-MAP CM-93/2 Charts Defining subscription by zones The contents of the CD ROM are divided into nine zones (1/0 - 9/0) and each zone has been divided in various numbers of areas (1/1 - 1/16…9/1 - 9/2). A various number of charts are included into each area. You can specify the charts you want to have in your chart folio either by zones or by areas.
- Page 646 Appendix 5: C-MAP CM-93/2 Charts Defining subscription by areas The contents of a CD ROM are divided into nine zones (1/0 - 9/0) and each zones has divided various number of areas (1/1 - 1/16 … 9/1 - 9/2). The various number of charts are included by Area. You can define a chart you would like to have in your chart folio either by zones or by areas.
- Page 647 Appendix 5: C-MAP CM-93/2 Charts Entering authorisation code An authorisation code allows you to define your subscription to C-MAP. Based on your operator code you receive an authorisation code from C-MAP. You have to enter this string into the ECDIS, following the procedure below. 1.
-
Page 648: A5.2.5 Loading C-Map Charts From A Cd Rom Into The System
Appendix 5: C-MAP CM-93/2 Charts A5.2.5 Loading C-MAP charts from a CD ROM into the system When you load C-MAP charts by CD ROM catalogue, the system first loads a CD ROM catalogue, which stores certain information into your hard disk such as cells ID, their position and edition number, from your LAN (Local Area Network) connection, floppy disk or CD ROM. - Page 649 Appendix 5: C-MAP CM-93/2 Charts If an error is detected during conversion from ENC to SENC, the following window appears. To find the reason click the Details button. When conversion is completed, the following window appears. AP-53...
- Page 650 Appendix 5: C-MAP CM-93/2 Charts Interpretation of Load or Update Charts from loaded CD ROM window ECDIS only 070.0° (CALC) (POSN) (POSN) 045.1° (POSN) 1. The source and edition date of the CD is displayed here. 2. A list of charts stored in the CD ROM, edition number of the chart and the number of updates included in the chart.
- Page 651 Appendix 5: C-MAP CM-93/2 Charts Viewing CD ROM contents summary You can view the Summary of the contents of the CD ROM. It contains information about charts you are going to load. 1. Spin the scrollwheel to show Menu/Info/Chart Menu in the mouse functions area then push the right mouse button.
-
Page 652: A5.2.6 Catalogue Of S57 Cells With C-Map Charts
Appendix 5: C-MAP CM-93/2 Charts A5.2.6 Catalogue of S57 cells with C-MAP charts A S57 catalogue is used to view your cells stored into your hard disk or named "CD ROM catalogues". You view limits of cells in the S57 catalogue window. It is possible to pick any cell to see information for it (cell, update’s number) by going over its limit with the cursor. -
Page 653: A5.2.7 Grouping S57 Chart Cells
Appendix 5: C-MAP CM-93/2 Charts A5.2.7 Grouping S57 chart cells You can define groups of S57 charts. This means you can collect related charts, for example, all cells that cover a route from Liverpool to New York or all cells available from a National Hydrographic Office. You can make a group and define charts included to group using either "Chart Catalogue"... - Page 654 Appendix 5: C-MAP CM-93/2 Charts 5. Press the Add Frame button. ECDIS only 070.0° (CALC) (POSN) (POSN) 045.1° (POSN) 6. Use the trackball to define frame then push the left mouse button. ECDIS only 070.0° (CALC) (POSN) 045.1° (POSN) (POSN) 7.
- Page 655 Appendix 5: C-MAP CM-93/2 Charts 8. Press the Close Edit button to finish. ECDIS only 070.0° (CALC) (POSN) (POSN) 045.1° (POSN) 9. Choose the group to load. ECDIS only 070.0° (CALC) (POSN) 045.1° (POSN) (POSN) 10. Press the Load button to load chart. AP-59...
- Page 656 Appendix 5: C-MAP CM-93/2 Charts Using Chart catalogue window Chart Catalogue can be used to define a group as follows: 1. Select "Chart Catalogue" from Chart menu window ECDIS only 070.0° (CALC) (POSN) 045.1° (POSN) (POSN) 2. Press the Edit Group button then click the New button. 3.
- Page 657 Appendix 5: C-MAP CM-93/2 Charts 4. Press the Add Frame button. ECDIS only 070.0° (CALC) (POSN) (POSN) 045.1° (POSN) 5. Define frame using left mouse button in "Select" mode then click the Done button. 6. Select Group to view content of group in Chart Catalogue window. ECDIS only 070.0°...
- Page 658 Appendix 5: C-MAP CM-93/2 Charts Removing S57 chart cells from a group You can remove chart cells from a defined group as follows: ECDIS only 070.0° (CALC) (POSN) 045.1° (POSN) (POSN) Select “Group” to activate a Group selecion. Select desired group Press “Edit Group”...
- Page 659 Appendix 5: C-MAP CM-93/2 Charts Deleting a group You can delete a defined group as follows: ECDIS only 070.0° (CALC) (POSN) (POSN) 045.1° (POSN) Use "Remove" button to delete a group. Viewing active group with catalogue To view active group do the following: ECDIS only 070.0°...
-
Page 660: A5.2.8 Automatic Display Until Setting
Appendix 5: C-MAP CM-93/2 Charts A5.2.8 Automatic display until setting Display data may be set to system data automatically. 1. Open the Chart menu and choose SENC Convert Settings to show the following window. 2. Check Automatic Display Until. A5.2.9 Removing C-MAP charts from the system To remove C-MAP charts from the system, do the following: Open the Chart menu. -
Page 661: A5.2.10 Viewing Status And Date Dependency Of S57 Chart Cells And Their Updates
Appendix 5: C-MAP CM-93/2 Charts A5.2.10 Viewing status and date dependency of S57 chart cells and their updates When you load S57 chart cell(s) and/or their updates, the system sets Display Until of S57 chart cell(s) as current date of the system. To set Approve Until as current date of the system, you must open the Set Chart viewing dates window and set it there. - Page 662 Appendix 5: C-MAP CM-93/2 Charts This page intentionally left blank. AP-66...
-
Page 663: Appendix 6: Route Backup
Appendix 6: Route Backup A6.1 Route Backup & Restore in ASCII Format Sometimes it is useful to save some information about a route as an ASCII text file for use with some other application, or use some ASCII format-generated route in the ECDIS. ECDIS can generate an ASCII text file from a route. -
Page 664: A6.1.1 Exporting Ecdis Route Data Into An Excel File
Appendix 6: Route Backup A6.1.1 Exporting ECDIS route data into an Excel file Below is an example of how to export waypoints' name and latitude/longitude values to a Microsoft Excel table. 1. Place the cursor on Route in the status bar then click the Plan button to open the Plan Route dialog box. Place the cursor on the triangle in the dialog box, choose Backup and Restore from the menu then push the scrollwheel. -
Page 665: A6.1.2 Importing Route Data From Excel File Into Ecdis
Appendix 6: Route Backup A6.1.2 Importing route data from Excel file into ECDIS Below is an example of how to import waypoints' name and latitude/longitude values from a Microsoft Excel table into ECDIS. Limit the length of waypoint names to eight alphanumeric characters and route names to 30 alphanumeric characters. - Page 666 Appendix 6: Route Backup 6. ECDIS generates new route, which has same name as text file. Steering mode: default = Rhumb line From text file Channel limit: default = 185 m Speed Min: default = 0 Kt Above is an example where you can see which fields are from text file and which fields are using default values generated by the ECDIS.
-
Page 667: A6.2 Route Backup & Restore In Orion Pro Weather Routing Format
Appendix 6: Route Backup A6.2 Route Backup & Restore in Orion Pro Weather Routing Format A6.2.1 Exporting Route from ECDIS to Orion Pro To make backup from a route in format, which can then be imported to Orion Pro weather routing program, do the following: 1. -
Page 668: A6.2.2 Importing Route From Orion Pro
Appendix 6: Route Backup A6.2.2 Importing Route from Orion Pro To restore a route in format of Orion Pro weather routing program to ECDIS, do the following: 1. Place the cursor on Route in the status bar then click the Plan button to open the Plan Route dialog box. Place the cursor on the triangle in the dialog box, choose Backup and Restore from the menu then push the scrollwheel. -
Page 669: Appendix 7: Menu Overview
Appendix 7: Menu Overview A7.1 Hierarchic Menu Tree This appendix introduces menus available with the ECDIS. A7.1.1 Menu The Main menu contains various functions and menus which control the ECDIS. To show the Main menu, press the MENU key on the keyboard-equipped control unit or spin the scrollwheel to show Menu in the mouse functions area (see figure below) then push the left mouse button. - Page 670 Appendix 7: Menu Overview Help window Use Help to call the Help window on the ECDIS display. Set Std Display Set Std (Standard) Display Use Set Std Display to call IMO-defined Standard display on the ECDIS and restore monitor brilliance to calibrated state.
- Page 671 Appendix 7: Menu Overview Man Over Board (MOB) Use MOB to inscribe Man Over Board mark on the ECDIS and log that position to the Voyage log. Set Std Display For detailed information, see section 23.2 Events and Man Over Board Functions. Event Use Event to record a textual description to the Voyage log.
- Page 672 Appendix 7: Menu Overview Record Record provides access to the ECDIS’s various logs. Set Std Display For detailed information, see Chapter 23 Recording Functions. Safety Message Safety Message handles AIS transponder related messages. Set Std Display For detailed information, see Chapter 21 AIS Target Functions. AP-76...
- Page 673 Appendix 7: Menu Overview Chart Menu Chart Menu maintains chart database for both vector (S57) and Raster charts (ARCS). Set Std Display This is the menu for vector (S57) charts. For detailed information, see Chapter 8 Vector Chart Material. Set Std Display This is the menu for ARCS charts.
-
Page 674: Chart Display
Appendix 7: Menu Overview Chart Display Chart Display mainly controls visibility of chart related objects. *ALL-ON *ALL-ON *ALL-ON Set Std Display *ALL-ON *ALL-ON *ALL-ON *ALL-ON Filter RANGE For detailed information, see section 8.10 Vector Chart Display and section 9.5 ARCS Chart Display. AP-78... - Page 675 Appendix 7: Menu Overview Set Chart Center Chart Center lets you specify the center of the chart display, with manually entered latitude and longitude values. Set Std Display Initial Settings Initial Settings mainly provides for set up of equipment parameters. Set Std Display For detailed information, see Chapter 24 Datum and Chapter 25 Parameters Setup.
- Page 676 Appendix 7: Menu Overview Sensors Sensors sets up the various sensor connected to the ECDIS. Gyro 1 Gyro 2 Rate gyro Set Std Display Safety Msg Alarm Received data Ok Display Ok Storage Ok For detailed information, see Chapter 19 Navigation Sensors. AP-80...
- Page 677 Appendix 7: Menu Overview Conning Display Conning Display sets up the conning display, which may be shown in the sidebar. Set Std Display For detailed information, see Chapter 27 Conning Display. Route Route lets you select the planned and monitored routes to use. Set Std Display For detailed information, see Chapter 13 Route Planning and Chapter 14 Route Monitoring.
- Page 678 Appendix 7: Menu Overview User Chart User Chart lets you select the planned and monitored routes to use for the user chart. Set Std Display For detailed information, see Chapter 15 User Chart Control. Pilot Data Pilot Data processes pilot data, information for use in navigation. Set Std Display For further details, see Chapter 16 Pilot Data.
- Page 679 Appendix 7: Menu Overview Radar Radar provides radar functions. MAST X MAST X Set Std Display LAN Radar Overlay Radar Overlay Card For further details, see Chapter 22 Radar Overlay. AP-83...
- Page 680 Appendix 7: Menu Overview This page intentionally left blank. AP-84...
-
Page 681: Appendix 8: Digital Interface
Appendix 8: Digital Interface A8.1 Data Sentences A8.1.1 Input sentences DBT, DPT, DTM, GGA, GLL, HDT, MTW, MWV, OSD, ROT, RSA, TTM, VBW, VDM, VTG, ZDA A8.1.2 Output sentences DTM, GLL, MWV, RTE, WPT A8.1.3 Data reception Data is received in serial asynchronous form in accordance with the standard referenced in IEC 61162-2. -
Page 682: A8.1.4 Sentence Structure
Appendix 8: Digital Interface A8.1.4 Sentence structure Input sentences DBT – Depth below transducer $--DBT,x.x,f,x.x,M,x.x,F*hh<CR><LF> | | | | | | | | | | | +--------- 4 | | | | +--+----------- 3 | | +--+----------------- 2 +--+----------------------- 1 1. - Page 683 Appendix 8: Digital Interface DTM - Datum reference $--DTM,ccc,a,x.x,a,x.x,a,x.x,ccc*hh<CR><LF> | | | | | | | +--- 7 | | | +------ 6 | | | | +---------- 5 | | | | +--+------------- 4 | | +---+------------------- 3 | +------------------------- 2 +---------------------------- 1 1.
- Page 684 Appendix 8: Digital Interface GGA - Global positioning system (GPS) fix data $--GGA,hhmmss.ss,llll.lll,a,yyyyy.yyy,a,x,xx,x.x,x.x,M,x.x,M,x.x,xxxx*hh<CR><LF> | | | | | | +-- 11 | | | +---- 10 | | | | +--------- 9 | | | | +---+------------ 8 | | | +---+------------------ 7 | | | +------------------------- 6...
- Page 685 Appendix 8: Digital Interface GLL - Geographic position - latitude/longitude $--GLL,llll.lll,a,yyyyy.yyy,a,hhmmss.ss,A,a*hh<CR><LF> | | | | | +------- 6 | +--------- 5 +----------- 4 +---------------- 3 +------+----------------------- 2 +---+----------------------------------- 1 1. Latitude, N/S 2. Longitude, E/W 3. UTC of position 4. Status: A=data valid, V=data invalid 5.
- Page 686 Appendix 8: Digital Interface OSD - Own ship data $--OSD,x.x,A,x.x,a,x.x,a,x.x,x.x,a*hh<CR><LF> | | | | | | +--------- 10 | | | +----------- 9 | | | +-------------- 8 | | | +------------------ 7 | | +--------------------- 6 | +------------------------ 5 +--------------------------- 4 | | +------------------------------ 3 | +--------------------------------- 2...
- Page 687 Appendix 8: Digital Interface TTM - Tracked target message $--TTM,xx,x.x,x.x,a,x.x,x.x,a,x.x,x.x,a,c--c,a,a,hhmmss.ss,a*hh<CR><LF> | | | | | | | +----- 14 | | | +------- 13 | | | +-------------- 12 | | +------------------- 11 | +--------------------- 10 +------------------------ 9 | +---------------------------- 8 +------------------------------- 7 | +----------------------------------- 6 | +--+-------------------------------------- 5...
- Page 688 Appendix 8: Digital Interface VTG - Course over ground and ground speed $--VTG,x.x,T,x.x,M,x.x,N,x.x,K,a*hh<CR><LF> | | | | | | | +------- 6 | | +--------- 5 +--+----------- 4 | | +--+----------------- 3 | | +--+----------------------- 2 +--+----------------------------- 1 1. Course over ground, degrees true 2.
- Page 689 Appendix 8: Digital Interface Output sentences DPT, DTM, GLL, MWV, OSD – See input sentences. RTE – Routes $--RTE,x.x,x.x,a,c--c,c--c,..,c--c*hh<CR><LF> +--------- 7 +------------ 6 +----------------------- 5 | +---------------------------- 4 | +-------------------------------- 3 +----------------------------------- 2 +--------------------------------------- 1 1. Total number of messages being transmitted 2.
-
Page 690: A8.1.5 Serial Interface: Input Ports
Appendix 8: Digital Interface A8.1.5 Serial interface: input ports Heading, log, wind, depth and navigation sensors Photo Coupler 330k RD-A HCPL061N RD-B AIS transponder Photo Coupler RD-A HCPL061N RD-B Absolute maximum rating Input Forward current: 50mA Reverse voltage: 3V Output Supply voltage: 7V High level output voltage: 7V Low level output current: 50mA... -
Page 691: A8.1.6 Serial Interface: Input/Output Ports
Appendix 8: Digital Interface A8.1.6 Serial interface: input/output ports Input port (RD-A, RD-B) Isolated RS485 Transceiver RD-A SP487 RD-B Logical High: A-B> +0.2V Logical Low: A-B< -0.2V Output port (TD-A, TD-B) Isolated RS485 Transceiver TD-A SP487 TD-B Logical High: A-B> +4.0V Logical Low: A-B>... - Page 692 Appendix 8: Digital Interface This page intentionally left blank. AP-96...
-
Page 693: Appendix 9: Parts List And Parts Location
Appendix 9: Parts List and Parts Location A9.1 Parts List FURUNO Model FEA-2807/FEA-2107/FEA-2107-BB Unit Processor Unit EC-1000C Control Unit RCU-018 Control Unit RCU-015 ELECTRICAL PARTS LIST Ref.Dwg. Blk.No. 2008/09 SYMBOL PRINTED CIRCUIT BOARD/ CODE NO. REMARKS ASSY. TYPE PROCESSOR UNIT EC-1000C... -
Page 694: A9.2 Parts Location
Appendix 9: Parts List and Parts Location A9.2 Parts Location A9.2.1 Processor unit EC-1000C Power Supply (UPF250-AA-BG) Hard Disk (MHW2040 AC) DVD-ROM Drive (GDR-H30N), and EMC Filter (FN 2080-6/06) Floppy Disc Drive (FD-235HF) PWR ON Board (24P0092) BACKPLANE Board (PCI-5S-RS-R40) SDRAM DIMM Board (77.G1136.44G) CPU Board Assy. -
Page 695: A9.2.2 Control Unit Rcu-018
Appendix 9: Parts List and Parts Location A9.2.2 Control unit RCU-018 Trackball BUZ Board Assy. (03P9362) (TA4726N) PNL Board (03P9343) A9.2.3 Control unit RCU-015 Trackball Assy. (TA4726N) PNL Board (03P9344) AP-99... - Page 696 Appendix 9: Parts List and Parts Location This page intentionally left blank. AP-100...
-
Page 697: Index
Index trackpilot..........28-37 Access server Alarms log human interface log ......18-12 printing ..........23-13 viewing ..........23-12 log............18-11 monitoring ..........18-4 Approve until date ........8-77 troubleshooting........18-10 ARCS details page........9-40 ARCS navigator alarms ............ 21-4 chart permit loading......9-14 description..........9-12 CPA and TCPA........21-6 CPA and TCPA for AIS targets .... - Page 698 Index program heading change....... 28-5 details log backup ....... 23-10 program track........28-6 file backup..........17-3 programmed turns ......28-21 file copy ..........17-2 radius control ........28-5 file deletion ........... 17-3 route steering alarms......28-16 file reading ..........17-5 speed used by........28-36 file renaming.........
- Page 699 Index status and date dependency of S57 thruster window ........27-8 chart cells ........AP-65 trackpilot order window ......27-12 trackpilot window ........27-5 viewing active group ......AP-63 C-MAP CM-93/3 weather and wind window ....27-7 catalog of charts ......... AP-29 Control unit RCU-015 control description ........4-3 chart ordering........
- Page 700 Index operator interface ........3-4 overview ...........3-1 Line page ..........15-11 palette ............3-4 Load and Conv. history button ....8-19 sidebar .............3-6 Loading Event recording.........23-1 chart permits for ARCS navigator license ..........9-14 chart permits for ARCS skipper Files license ..........9-15 backing up ..........17-3 messages for vector charts ....
- Page 701 Index Printing Optimization parameters ......25-7 CD ROM contents (A57)......8-11 font size for logs, choosing.....23-9 Orientation..........12-1 Other page..........19-5 logs ............23-8 raster charts .......... 9-39 navigation parameters ......25-2 Processor unit..........1-4 vector charts .......... 8-68 Palette ............3-4 Radar overlay Paper charts, replacing with ECDIS activating ..........22-2 charts ............
- Page 702 Index cursor position in local datum ....9-7 details ............9-2 alarm ........... 19-11 source ............ 19-8 displaying ..........9-32 group removal........9-30 Route monitoring loading update loading, manual ... 9-22 alarms ..........14-12 description..........14-7 manual loading........9-19 manual updates, displaying....10-2 final waypoint ........
- Page 703 Index cell status window initiation ....8-96 User chart dialog box ........15-3 failed conversion window in area page..........15-13 vector chart ........8-20 line page ..........15-11 history log ..........8-21 point page..........15-9 history log for vector chart....8-21 symbol page .........15-10 progress in vector charts.......
- Page 704 Index conversion to SENC, speeding up..8-17 vector chart updates ......8-76 Convert button ........8-23 viewing dates ....... 8-37, 8-76 coverage area of base or update viewing properties of chart object ..8-87 CD ROM from RENC ......8-57 visible navigation features ....