
Related Manuals for Sam4s ER-650


Summary of Contents for Sam4s ER-650
- Page 1 ER-650/650R Operation and Program Manual ©2005, CRS, Inc. All specifications are subject to change without notice. M-ER650 Version 2.1...
- Page 3 CRS, Inc. Limited Warranty and Disclaimers of Warranty This manual has been developed by CRS, Inc. It is intended for the use of its customers and service personnel and should be read in its entirety before attempting to install, use or program the product(s). Nothing contained in this manual shall be deemed to be, and this manual does not constitute, a warranty of, or representation with respect to, the product or any of the products to which this manual applies.
-
Page 4: Safety Precautions
Precaution Statements Follow these safety, servicing and ESD precautions to prevent damage and to protect against potential hazards such as electrical shock. Safety Precautions 1. Be sure that all built-in protective devices are 6. Observe the original lead dress, especially near the replaced. - Page 5 Servicing Precautions WARNING: First read the-Safety Precautions-section of this manual. If some unforeseen circumstance creates a conflict between the servicing and safety precautions, always follow the safety precautions. WARNING: An electrolytic capacitor installed with the wrong polarity might explode. 5. Check the insulation between the blades of the AC 1.
-
Page 7: Table Of Contents
Contents Getting Started About the ER-650/650R......................1 Using this Manual........................2 Unpacking..........................2 Installing the Paper ........................3 Basic Features and Functions ....................5 Standard Hardware ...................... 5 Optional Hardware ...................... 5 Software Features ......................5 ER-650 Keyboards ...................... 7 ER-650R Keyboards .................... - Page 8 Direct Scale Entry......................77 Automatic Scale Entry....................78 Tare Weight Entry .....................78 Manual Tare Weight Entry ..................79 Manual Weight Entry ....................80 Integrated Payment Operations....................80 X Mode Manager Mode.........................81 Manager Operation ........................82 X Reports ..........................83 Declaration..........................85 Register Print Format.......................86 ii • Contents ER-650/650R...
- Page 9 Programming a Canadian GST................141 System Option Programming....................142 System Options - Reference Information ..............146 Print Option Programming ....................150 Clerk Programming ....................... 158 Clerk Programming - Reference Information............159 Function Key Programming ....................160 #/NS......................... 161 Contents • iii ER-650/650R...
- Page 10 PLU Stock..........................222 Drawer Limit..........................223 Check Change Limit ......................224 Time & Date ..........................225 Tare Weight ...........................226 Macro.............................227 Programming a New Macro ..................228 Editing an Existing Macro..................229 Machine No...........................230 PC Schedule Time .........................231 Training Mode Password .......................232 iv • Contents ER-650/650R...
- Page 11 Change Batch Number .................... 260 Issue Local Total ..................... 260 Issue Transaction..................... 260 Issue Batch Status....................261 Dial In Load/Dial Out Load ..................261 Tip Operation ......................261 Local Transaction Report Key....................262 Glossary of Terms Index Contents • v ER-650/650R...
-
Page 13: Getting Started
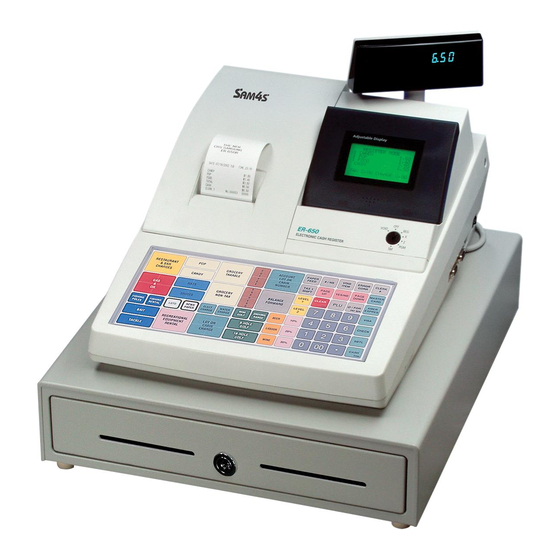
About the ER-650/650R Congratulations! You have selected a very flexible electronic cash register designed for years of reliable service. The ER-650/650R will fit many shops and restaurants, providing fast transaction processing, security, and detailed sales information. The ER-650/650R features a unique operator screen that allows you to view itemized transaction information, as well as providing on screen programming that is simple and easy to use. -
Page 14: Using This Manual
"Getting Started" - Before you begin, please review the information in this chapter carefully, including: ⇒ Unpacking and initial setup, ⇒ The basic features and capabilities of your ER-650/650R. • "Operating Instructions" - Step by step operating sequences for your ER-650/650R. -
Page 15: Installing The Paper
Installing the Paper 1. Remove the printer cover. 2. Push the blue cap lever and then lift up to open the paper cover. 3. Ensure that the paper is being fed from the bottom of the roll. Getting Started • 3 ER-650/650R... - Page 16 4. Put the leading edge of the paper over the printer. 5. Close the paper cover slowly until it locks firmly 6. Passing the leading edge of the paper through the cutter slot. Tear off the excess paper. Replace the printer cover. 4 • Getting Started ER-650/650R...
-
Page 17: Basic Features And Functions
Standard Hardware • Adjustable 8-line, 20-character liquid crystal display. • Keyboard ER-650: Flat spill resistant 98 position. ER-650R: Raised 64 position.. • Thermal 32-column printer with drop-and-print mechanism. • Sturdy Metal Cash Drawer with removable 5 Bill/5 Coin drawer insert. - Page 18 Up to 8 PLU look-up keys, each key can display up to eight PLUs for quick registration. • Age verification feature that requires the operator to enter the customer’s date of birth before selected items can be registered. 6 • Getting Started ER-650/650R...
-
Page 19: Er-650 Keyboards
ER-650 Keyboards Default Keyboard PAPER VOID ERROR CLERK #/NS FEED ITEM CORR TAX 1 PAGE PAGE YES/NO SHIFT CHECK DOWN LEVEL @/FOR FUNCTION CLEAR PRT SCR LOOK-# 1 LEVEL FUNCTION LOOK-# 2 CHECK SBTL CASH ENTER FUNCTION LOOK-UP 1 MENU... -
Page 20: Er-650R Keyboards
Refer to”Descriptor Programming” on page 119 to use either the Program Overlay Method or the Descriptor Code Method of programming descriptors. PAPER PAGE PAGE BACK FEED DOWN SPACE CLEAR YES/NO DOUBLE </, >/. SPACE “/’ SPACE SPACE &/* ENTER CAPS 8 • Getting Started ER-650/650R... -
Page 21: Programmable Function Keys
Change issued will be subtracted from the cash- in-drawer total. Use to exchange a check for cash. Cash-in-drawer and check-in-drawer totals CHECK CASHING are adjusted. Getting Started • 9 ER-650/650R... - Page 22 UP (1-2) screen. Use to enter the count of guests served as part of a guest check. The entry of GUEST a guest count can be enforced when opening a guest check, or for all transactions. 10 • Getting Started ER-650/650R...
- Page 23 RECD ON ACCT loaned to the cash drawer, or payments received outside of a sale. The cash drawer will open. The amount received adds to the cash-in-drawer total. Press once to display the sale subtotal. SBTL Getting Started • 11 ER-650/650R...
- Page 24 Press to toggle from Y (yes) to N (no) when selecting program options. YES/NO Press to initiate a single line validation. Note that an optional printer with VALIDATION validation capability must be attached to the ER-650/650R and identified. 12 • Getting Started ER-650/650R...
-
Page 25: Control Lock
Use to program the register. Service Mode used for tests and special settings. The ER-650/650R includes two sets of keys that can be used to access the following key lock positions. Positions Accessible VOID, OFF, REG, X OFF, REG... -
Page 26: Front Display
When the control lock is in the X, Z, PGM or SM positions, the appropriate menu is displayed. OFF MODE REGISTER MODE ██████████ █ CLOSED █ ██████████ VOID VOID MODE ██████████ █ CLOSED █ ██████████ 14 • Getting Started ER-650/650R... -
Page 27: System Option
3.CHECK CHANGE LIMIT 4.TIME & DATE 5.TARE WEIGHT 6.MACRO ♦ Press PAGE DOWN to view the remainder of the PROGRAM MODE page 2 menu: PROGRAM MODE page2 7.MACHINE NO. 8.PC SCHEDULE TIME 9.TRAINING MODE P/W 00.SCAN Getting Started • 15 ER-650/650R... -
Page 28: Irc Options
4. EPROM INFO. 5. MEMORY ALLOCATION 6. KEY ASSIGNMENT ♦ Press PAGE DOWN to view the remainder of the SERVICE MODE menu: SERVICE MODE 7. IRC OPTIONS 8. RS232C PORT 1 9. RS232C PORT 2 16 • Getting Started ER-650/650R... -
Page 29: Rear Display
Item Count The amount of the item, subtotal or total, is displayed in the Amount rightmost portion of the display. Rear Display Messages Change Due Negative entry Subtotal of the sale Total of the sale Getting Started • 17 ER-650/650R... -
Page 30: Initial Clear
650/650R register or system. Perform this procedure only as necessary. Contact your dealer first if you have questions about operating or programming your ER-650/650R. To Perform an Initial Clear: 1. Turn the power switch located on the right side of the register to the OFF position. -
Page 31: Operating Instructions
Operating Instructions Operator Display Screen The ER-650/650R Electronic Cash Register has a liquid crystal display screen, providing up to 8 lines of information with up to 20 characters per line. The display is backlit to provide excellent visibility, regardless of lighting conditions. Display screen contrast may be adjusted with the contrast adjustment, located on the right front corner of the register. -
Page 32: Operator Display Example
1 PLU5 15.00 registered, the 1 PLU6 6.00 display lists the Tax and sale last six items subtotals are 1 PLU7 7.00 sold. updated with 1 PLU8 8.00 each new TAX 0.06 SBTL 46.06 item entered. 20 • Operating Instructions ER-650/650R... -
Page 33: Clerk Operations
A pop-up clerk system might be used in a department store, where several clerks might use the register during the same shift and clerk sales information is required. See "System Options" in the "Program Mode Programming" chapter to set clerk options. Operating Instructions • 21 ER-650/650R... -
Page 34: Clerk Sign On Instructions
When a clerk is not signed on, the message "CLOSED" is shown on the display. The current clerk must be signed off before a new clerk can be signed on. Push Button CLERK # Code Entry CLERK # Secret clerk # Clerk Sign Off Instructions CLERK # 22 • Operating Instructions ER-650/650R... -
Page 35: Clerk Time Keeping
Clerk Time Keeping Clerk time keeping is a standard feature of the ER-650/650R. Clerks can clock in and clock out at any time, regardless of whether they are signed on to operate the register. (Clocking in and clocking out are separate functions from signing on or signing off to operate the register.) You must assign secret clerk codes to clock in or clock out. - Page 36 CLERK TIME IN ================================ CLERK 1 IN : 11/09/1999 08:33 CLERK 1 No.000011 00001 THANK-YOU CALL AGAIN DATE 08/15/1999 SUN TIME 08:33 ================================ CLERK TIME OUT ================================ CLERK 1 OUT : 11/09/1999 08:33 CLERK 1 No.000011 00001 24 • Operating Instructions ER-650/650R...
-
Page 37: Item Registrations
Remember that the sale and tax totals are updated automatically with each entry. Using Function Look-Up Keys Because the ER-650/650R keyboard is programmable, both the selection and location of function keys may vary from one register to another. You must pay particular attention to the two function look-up keys, FUNCTION LOOK-UP #1 and FUNCTION LOOK-UP #2. -
Page 38: Open Keyboard Plu Entry
Programming" in the "Program Mode Programming" chapter to program preset prices. THANK-YOU 1. Press a preset PLU key. For example, CALL AGAIN press PLU 5: DATE 08/15/1999 SUN TIME 08:33 PLU5 $1.29 TOTAL $1.29 CASH $1.29 CLERK 1 No.000011 00001 26 • Operating Instructions ER-650/650R... -
Page 39: Keyboard Plu Repeat Entry
2. Press a PLU key. For example, press TOTAL $6.34 PLU 1: CASH $6.34 CLERK 1 No.000011 00001 3. To register a second item exactly as the first, press the PLU key a second time. For example, press PLU 1: Operating Instructions • 27 ER-650/650R... -
Page 40: Keyboard Plu Multiplication
2. Enter an amount on the ten key pad. Do CASH $8.44 CLERK 1 No.000011 00001 not use the decimal key. For example, for $1.99, enter: 3. Press a PLU key. For example, press PLU 1: 28 • Operating Instructions ER-650/650R... -
Page 41: Keyboard Plu Multiplication With Decimal Point
2. Enter an amount on the ten key pad. Do TOTAL $3.93 not use the decimal key. For example, CASH $3.93 CLERK 1 No.000011 00001 if the price is $.99 per pound, enter: 3. Press a PLU key. For example, press PLU 1: Operating Instructions • 29 ER-650/650R... -
Page 42: Split Pricing (Keyboard Plu)
$0.71 CLERK 1 No.000011 00001 3. Enter an amount on the ten key pad. For example, if the items are priced 3 for $1.00, enter: 4. Press a PLU key. For example, press PLU 1: 30 • Operating Instructions ER-650/650R... -
Page 43: Single Item Keyboard Plu
1. Press a single item preset PLU key. (or CALL AGAIN enter a price and press a single item open PLU key.) For example, press PLU 6: DATE 08/15/1999 SUN TIME 08:33 PLU6 $1.29 TOTAL $1.29 CASH $1.29 CLERK 1 No.000011 00001 Operating Instructions • 31 ER-650/650R... -
Page 44: Open Code Entry Plu
Preset Price Code Entry PLU THANK-YOU 1. Enter the PLU number; press the PLU CALL AGAIN key. For example, enter: DATE 08/15/1999 SUN TIME 08:33 PLU1 $1.29 TOTAL $1.29 CASH $1.29 CLERK 1 No.000011 00001 32 • Operating Instructions ER-650/650R... -
Page 45: Code Entry Plu Multiplication
DATE 08/15/1999 SUN TIME 08:33 and press the @/FOR key: @1.99 PLU1 T1 $7.96 TAX1 $0.48 TOTAL $8.44 2. Enter the PLU number; press the PLU CASH $8.44 CLERK 1 No.000011 00001 key. For example, enter: Operating Instructions • 33 ER-650/650R... -
Page 46: Code Entry Plu Multiplication With Decimal Point
@/FOR key. For example, if TOTAL $2.11 the items are priced 3 for $1.00, enter: CASH $2.11 CLERK 1 No.000011 00001 3. Enter the PLU number; press the PLU key. For example, enter: 34 • Operating Instructions ER-650/650R... -
Page 47: Plu Price Inquiry
If the PLU has prices at more than one price level, all prices will be shown. 4. Press CLEAR to remove the price information from the screen, or enter the PLU again to register the item. Operating Instructions • 35 ER-650/650R... -
Page 48: Modifier Key
1 will add the digit 1 to the fourth PLU # position, resulting in the registration of PLU #1001. 4. Press another PLU key. In this example press PLU 2 with a price of $1.50. 36 • Operating Instructions ER-650/650R... -
Page 49: Price Level Key
$2.00 for price level 2. 4. Press another PLU key. In this example press PLU 2 programmed to register PLU #2 with price level 1. Note that the level 1 price is registered. Operating Instructions • 37 ER-650/650R... -
Page 50: Promo
2. Press the PROMO key. The message TOTAL $0.00 "PROMO" displays. CASH $0.00 CLERK 1 No.000011 00001 PROMO 3. Enter the item to be promo'd. You can not enter an item that has not been already registered in this transaction. 38 • Operating Instructions ER-650/650R... -
Page 51: Waste
TIME 08:33 ***WASTE*** WASTE PLU1 $1.25 PLU2 $1.50 2. Enter the item or items that are wasted. ***WASTE*** TOTAL $2.75 3. Press the WASTE key again to total the CLERK 1 No.000011 00001 wasted items: WASTE Operating Instructions • 39 ER-650/650R... -
Page 52: Shifting Or Exempting Tax
For example, for $2.99, enter: 3. Press a PLU key. For example, press PLU 1. If PLU 1 is normally taxable by tax 1, the registration will be non- taxable. 40 • Operating Instructions ER-650/650R... -
Page 53: Exempting Tax
TAX SHIFT 1, then press SBTL: TAX 1 SBTL SHIFT 5. The display reflects the transaction without added taxes. Total the sale with CASH, CHECK , or a CHARGE function. The sale will not include tax Operating Instructions • 41 ER-650/650R... - Page 54 TAX EXMT function from a function look up menu key): EXMT 5. The display reflects the transaction without added taxes. Total the sale with CASH, CHECK, or a CHARGE function. The sale will not include tax 1. 42 • Operating Instructions ER-650/650R...
-
Page 55: Percent Key Operations
1. Register the item. CALL AGAIN 2. Press the %1 key: DATE 08/15/1999 SUN TIME 08:33 PLU2 $10.00 -10.000% 3. The discount is automatically subtracted. AMOUNT -1.00 TOTAL $9.00 CASH $9.00 CLERK 1 No.000011 00001 Operating Instructions • 43 ER-650/650R... -
Page 56: Enter A Percent Discount On An Item
TIME 08:33 SBTL PLU2 $10.00 15.000% 3. Enter the percentage, press the AMOUNT $1.50 TOTAL $11.50 appropriate discount key. For example, CASH $11.50 for 15% enter: CLERK 1 No.000011 00001 4. The surcharge is automatically added. 44 • Operating Instructions ER-650/650R... -
Page 57: Coupon On Sale (Vendor Coupon)
DATE 08/15/1999 SUN TIME 08:33 SBTL PLU2 $10.00 -2.00 3. Enter the amount of the coupon, press the TOTAL $8.00 CASH $8.00 appropriate % key. For example: CLERK 1 No.000011 00001 4. The coupon is subtracted. Operating Instructions • 45 ER-650/650R... -
Page 58: Coupon On Item (Store Coupon)
3. Press the PLU key you wish to subtract CLERK 1 No.000011 00001 the coupon from (or enter the PLU number of the PLU you wish to subtract the coupon from and press PLU.) 4. The coupon is automatically subtracted. 46 • Operating Instructions ER-650/650R... -
Page 59: Return Merchandise Registrations
PLU2 T1 -2.99 return, then press the PLU key where it TAX1 AMT -0.18 was registered originally. TOTAL -3.17 CASH -3.17 CLERK 1 No.000011 00001 3. Total the sale with CASH, CHECK, or a CHARGE function. Operating Instructions • 47 ER-650/650R... -
Page 60: Voids And Corrections
VOID VOID --------------------------- ITEM PLU2 -1.29 TAX1 AMT $0.14 3. Enter the price of the first item, then TOTAL $2.43 press the PLU key where it was CASH $2.43 registered originally. CLERK 1 No.000011 00001 48 • Operating Instructions ER-650/650R... -
Page 61: Cancel
PLU2 -1.00 exemptions or any other function. TAX1 AMT -0.14 TOTAL -3.43 3. All totals and counters are corrected as if CASH -3.43 the original transaction did not take CLERK 1 No.000011 00001 place. Operating Instructions • 49 ER-650/650R... -
Page 62: No Sale Operations
2. Enter the number you wish to record, for DATE 08/15/1999 SUN TIME 08:33 example enter: PLU1 T1 $2.99 NON-ADD# 1234 TAX1 AMT $0.18 TOTAL $3.17 3. Press #/NS: CHECK $3.17 CLERK 1 No.000011 00001 #/NS 4. Press CHECK: CHECK 50 • Operating Instructions ER-650/650R... -
Page 63: Received On Account Operations
CHARGE1, (or press the FUNCTION LOOKUP key and press the numeric key representing the appropriate charge function.) CHARGE 5. You can continue to itemize receipts, or you can finalize by pressing or selecting the same received on account key. Operating Instructions • 51 ER-650/650R... -
Page 64: Paid Out Operations
CHARGE1, (or press the FUNCTION LOOKUP key and press the numeric key representing the appropriate charge function.) CHARGE 5. You can continue to itemize paid outs, or you can finalize by pressing or selecting the same paid out key. 52 • Operating Instructions ER-650/650R... -
Page 65: Subtotaling A Sale
You can force the operator to press one of the keys before tendering. See "System Option Programming" in the "Program Mode Programming" chapter. Separate totals will be maintained on the financial report to detail sales counts and amounts for each key. Operating Instructions • 53 ER-650/650R... -
Page 66: Totaling And Tendering
2. To total a cash sale, press CHECK: DATE 08/15/1999 SUN TIME 08:33 CHECK PLU2 $7.96 TOTAL $7.96 3. The display will indicate the total amount CHECK $7.96 CLERK 1 No.000011 00001 of the cash sale. 54 • Operating Instructions ER-650/650R... -
Page 67: Tendering A Cash Sale
$7.96 TAX1 $0.36 3. Press CHECK: TOTAL $14.30 CHECK $20.00 CHANGE $5.70 CHECK CLERK 1 No.000011 00001 4. The display will indicate the total amount of the check tendered and the change due, if any. Operating Instructions • 55 ER-650/650R... -
Page 68: Totaling A Charge Sale
TAX1 $0.36 TOTAL $14.30 function look up key press CHARGE1 $14.30 FUNCTION LOOK2, then press the CLERK 1 No.000011 00001 digit representing the charge function you are using: FUNCTION LOOK#2 56 • Operating Instructions ER-650/650R... -
Page 69: Tendering A Charge Sale
$14.30 CHARGE1 $20.00 function look up key, enter the amount of CHANGE $5.70 the charge: CLERK 1 No.000011 00001 Press FUNCTION LOOK2, then press the digit representing the charge function you are using: FUNCTION LOOK#2 Operating Instructions • 57 ER-650/650R... -
Page 70: Check Cashing
For example, for $20.00 enter: DATE 08/15/1999 SUN TIME 08:33 ***CHKCASH*** CHECK $20.00 2. Press CHKCASH: CASH -20.00 CLERK 1 No.000011 00001 CASH 3. The display will indicate the amount of the check and the cash change. 58 • Operating Instructions ER-650/650R... -
Page 71: Split Tender
4. Enter the amount of check tendered by the customer. For example, enter $10.00 and press CHECK: CHECK 5. When the total tendered equals or exceeds the total due, the receipt will print and the transaction is complete. Operating Instructions • 59 ER-650/650R... -
Page 72: Post Tender
3. The display will indicate the total of the CASH $2.12 CLERK 1 No.000011 00001 cash sale. 4. Enter the amount of the new tender, Press CASH: CASH ENTER 5. The display will indicate the change due. 60 • Operating Instructions ER-650/650R... -
Page 73: Food Stamp Sales
Food Stamp Sales The ER-650/650R is capable of sorting food stamp and non-food stamp eligible items. Then if a customer chooses to pay by food stamps, the eligible total can be recalled and food stamp payments accepted. If you choose to use this feature, you must: •... -
Page 74: Currency Conversion
4. Enter the amount of the foreign currency tender, Press CASH: CASH ENTER 5. The display will indicate the amount of foreign currency tendered and display $5.17 change due. The change due is computed in home currency! 62 • Operating Instructions ER-650/650R... -
Page 75: Receipt On/Off And Receipt On Request
If the receipt is off, you can still issue a receipt after the sale has been completed. Printing a Receipt after the Sale ♦ After the sale has been totaled, but before the next transaction is started, press CASH: CASH ENTER Operating Instructions • 63 ER-650/650R... -
Page 76: Check Tracking Operations
You must open, add to, and/or pay the check at the same register. Overview The ER-650/650R can employ a manual previous balance, hard check, or soft check system. (You must select hard or soft check posting in memory allocation programming - the default selection is soft.) -
Page 77: Function Keys
See "Function Key Assignment" in the "Service Mode Programming" chapter to place the functions necessary for your application. See "Function Key Programming" in the "Program Mode Programming" chapter to set the options for each function. Operating Instructions • 65 ER-650/650R... -
Page 78: Posting Balances Manually
2. Register the next items you wish to sell. SERVICE $2.00 BFWD $3.00 3. To total the posting, press SERVICE: CLERK 1 No.000012 00001 SERVICE 4. Place a slip in an optional slip printer, press the PRINT CHECK key. 66 • Operating Instructions ER-650/650R... - Page 79 CHECK, or one of the CHARGE functions. If the tender is greater than the balance due, change is displayed: CASH ENTER 4. Place a slip in an optional slip printer, press the PRINT CHECK key. Operating Instructions • 67 ER-650/650R...
-
Page 80: Soft Check
5. To total the posting, press SERVICE: SERVICE Note: If a table number entry is required for all guest checks, and checks are assigned by register, the check will be assigned by the register when the table # is entered. 68 • Operating Instructions ER-650/650R... - Page 81 PRINT CHECK key will CHK # : 1 automatically service the check: CLERK 1 No.000012 00001 PRINT CHECK The number of times each check has been printed is counted and printed on the check Operating Instructions • 69 ER-650/650R...
- Page 82 SBTL 3. Pay the balance as you would normally tender a transaction, with CASH, CHECK, or one of the CHARGE functions. If the tender is greater than the balance due, change is displayed. CASH ENTER 70 • Operating Instructions ER-650/650R...
-
Page 83: Hard Check
3. If required, enter the number of guests and press the GUEST key: GUEST 4. Register the items you wish to sell. 5. Place a slip in an optional slip printer, the check will print automatically when you press SERVICE: SERVICE Operating Instructions • 71 ER-650/650R... - Page 84 TABLE TABLE GARLIC BREAD $2.00 key: SERVICE $2.00 $19.00 BFWD TABLE CLERK 1 No.000012 00001 2. Register the next items you wish to sell. 3. To total the posting, press SERVICE: SERVICE 72 • Operating Instructions ER-650/650R...
- Page 85 $54.50 CASH $54.50 tender a transaction, with CASH, CHECK, or one of the CHARGE No.000021 REG 01 ETHAN TIME 10:16 functions. If the tender is greater than the balance due, change is displayed. CASH ENTER Operating Instructions • 73 ER-650/650R...
-
Page 86: Fast Food Drive Thru
Fast Food Drive Thru For fast food drive thru windows, the ER-650/650R has the capability of storing orders when they are taken, and then recalling the next order automatically at the payment window. • The PBAL function becomes a recall function when the drive thru feature is enabled in the CHECK # function key program. - Page 87 $3.00 tender a transaction, with CASH, CASH $5.00 CHECK, or one of the CHARGE CHANGE $2.00 functions. If the tender is greater than CLERK 1 No.000012 00001 the balance due, change is displayed. CASH ENTER Operating Instructions • 75 ER-650/650R...
-
Page 88: Scale Operations
Scale Operations The ER-650/650R can be interfaced to an optional load-cell scale. The scale interface allows direct entry of an item's weight using the SCALE function. You can also choose "manual entry" scale operation if you are working with a standalone scale that is not interfaced to the cash register. -
Page 89: Direct Scale Entry
Enter the price per pound on CASH $4.77 the ten key pad. Do not use the decimal CLERK 1 No.000011 00001 key. For example, for $3.00, enter: 4. Press a PLU key. For example, press PLU 1: Operating Instructions • 77 ER-650/650R... -
Page 90: Automatic Scale Entry
Enter the price per pound on the ten key pad. Do not use the decimal key. For example, for $3.00, enter: 5. Press a PLU key. For example, press PLU 1: 78 • Operating Instructions ER-650/650R... -
Page 91: Manual Tare Weight Entry
Enter the price per pound on the ten key pad. Do not use the decimal key. For example, for $3.00, enter: 6. Press a PLU key. For example, press PLU 1: Operating Instructions • 79 ER-650/650R... -
Page 92: Manual Weight Entry
Do not use the decimal key. For example, for $3.00, enter: 4. Press a PLU key. For example, press PLU 1: Integrated Payment Operations See “Integrated Payment Appendix” on page 249 for electronic payment operation information. 80 • Operating Instructions ER-650/650R... -
Page 93: Mode
X Mode Manager Mode ♦ Turn the control lock to the X position to display the MANAGER MODE menu: MANAGER MODE 0.MANAGER OPERATION 1.X REPORTS 2.DECLARATION 3.REG. PRINT FORMAT 4.STOP REG PRINTING 5.TRAINING MODE 6.E.J. OPERATION X Mode • 81 ER-650/650R... -
Page 94: Manager Operation
Choose Manager Operation to access the Manager Mode screen, where operations allowed only with manager control can be performed. 1. From the MANAGER MODE menu press 0 to enter manager mode: MANAGER MODE 2. The MANAGER MODE screen displays. 3. Complete the operation requiring manager control. 82 • X Mode ER-650/650R... -
Page 95: Reports
X REPORT LIST PG 1 0.FINANCIAL 1.TIME 2.PLU 3.CLERK 4.GROUPS 5.DAY 6.STOCK Press PAGE DOWN to view the second page of reports: X REPORT LIST PG 2 7.CLERK TIME 8.OPEN CHECK 9.DRAWER TOTALS 00.PLU ZERO SALE X Mode • 83 ER-650/650R... -
Page 96: Report Options
- the screen will initially show the registers available from the from/to IRC register programming, for example if the IRC range is from 1 to 3, then the selection will default to: Select PRINT or DISPLAY output. OUTPUT 84 • X Mode ER-650/650R... -
Page 97: Declaration
3. When you have completed declaration entries, press the CASH key again to finalize and total your declaration. The screen will display the total declared input, the drawer total and the difference (over/short). DELCARATION SCREEN INPUT AMT 31.00 DRAWER TOTAL 17.00 DIFFERENCE -14.00 X Mode • 85 ER-650/650R... -
Page 98: Register Print Format
Register Print Format You can designate the ER-650/650R printer to print either a receipt, or a sales journal. If you select journal format, the preamble/postamble will not print. If you select receipt format, the preamble/postamble will print and the receipt will feed sufficiently for paper tear- off. -
Page 99: Stop Register Printing
The screen will display the current status. Press ENTER to set the new format. Note: When the receipt is off, a receipt may be printed after the sale by pressing ENTER after the transaction is complete. X Mode • 87 ER-650/650R... -
Page 100: Training Mode
2. The ENTER/EXIT TRAINING screen displays. The screen will display the current status. To enter training mode, type your four digit password (you must enter preceding zeros) and press ENTER. To exit training mode, type 0000 and press ENTER. 88 • X Mode ER-650/650R... -
Page 101: E.j. 0Peration
E.J. 0peration An electronic journal feature is available on the ER-650/650R. The electronic journal captures the sales journal in the register memory. If you intend to use the electronic journal, you must allocate sufficient memory (see "Memory Allocation " in the "Service Mode Programming"... - Page 102 90 • X Mode ER-650/650R...
-
Page 103: Z Mode
♦ Turn the control lock to the Clear Totals position to display the RESET REPORT MODE menu: RESET REPORT MODE 0.Z REPORTS 1.RESET E.J. 2.PC COMMUNICATION 3.PLU LOOKUP PGM 4.AGE VERIFICATION 5.KP STARTING NO. 00.DATATRAN Z Mode • 91 ER-650/650R... -
Page 104: Z Reports
Report List, then press the number of the report you wish to generate. Z REPORT LIST PG 1 0.FINANCIAL 1.TIME 2.PLU 3.CLERK 4.GROUPS 5.DAY 6.STOCK Press PAGE DOWN to view the second page of reports: Z REPORT LIST PG 2 7.CLERK TIME 8.OPEN CHECK 92 • Z Mode ER-650/650R... - Page 105 - the screen will initially show the registers available from the from/to IRC register programming, for example if the IRC range is from 1 to 3, then the selection will default to: Z Mode • 93 ER-650/650R...
-
Page 106: Reset Electronic Journal
Reset Electronic Journal An electronic journal feature is available on the ER-650/650R. The electronic journal captures the sales journal in the register memory. If you intend to use the electronic journal, you must allocate sufficient memory (see "Memory Allocation" in the "Service Mode Programming"... -
Page 107: Plu Lookup Program
PGM. The PLU LOOKUP PGM screen displays: PLU LOOKUP PGM PUSH LOOKUP NUMBER TO BE PROGRAMMED AND PRESS ENTER (1-8) 2. Enter the number of the PLU LOOKUP key you wish to program, press ENTER. Z Mode • 95 ER-650/650R... - Page 108 5. If you wish to remove an item from the PLU LOOKUP key, place the cursor on the line to be removed, press the VOID key. 6. Press ESC to return to the RESET REPORT MODE menu and save changes. 96 • Z Mode ER-650/650R...
-
Page 109: Age Verification
In most areas, the sale of tobacco and/or alcoholic beverages to minors is prohibited. The ER-650/650R offers an age verification feature that helps control the sale of restricted items by forcing the operator to enter a birth date before a controlled item can be registered. If the date entered shows that the customer has not yet reached the appropriate age, the item cannot be registered. -
Page 110: Kp Starting No
ORDER No. The KP STARTING ORDER No. screen displays: KP STARTING ORDER NUMBER (0-9999) 2. Enter the order number that KP orders will start with and press ENTER. 3. Set this number at each register. 98 • Z Mode ER-650/650R... -
Page 111: Datatran Operation Menu
2. If necessary, press PAGE DOWN to display the second page of the DataTran Operation menu: DATATRAN OPERATION 7.ISSUE BATCH STATUS 8.DIAL IN LOAD 9.DIAL OUT LOAD 3. See “Integrated Payment Appendix” on page 249 for detail DataTran operation instructions. Z Mode • 99 ER-650/650R... - Page 112 100 • Z Mode ER-650/650R...
-
Page 113: Service Mode Programming
Clear all totals • Clear grand total • Clear PLU file • EPROM Information • Memory Allocation • Assignment of functions to keyboard locations • IRC Options • RS232C Port 1 & 2 Options Service Mode Programming • 101 ER-650/650R... - Page 114 4. EPROM INFO. 5. MEMORY ALLOCATION 6. KEY ASSIGNMENT ♦ Press PAGE DOWN to view the remainder of the SERVICE MODE menu: SERVICE MODE 7. IRC OPTIONS 8. RS232C PORT 1 9. RS232C PORT 2 102 • Service Mode Programming ER-650/650R...
-
Page 115: Clearing Memory
Clearing Memory Before you use your ER-650/650R for the first time, you must perform a memory clear to insure that all totals and counters are cleared and that the default program is installed. CAUTION: The procedures described in this area are security sensitive. Clearing the ER- 650/650R memory after the register is put into service will erase all programming as well as totals and counters. - Page 116 When complete, the printer will print the message: "RAM ALL CLEAR OK !" The SERVICE MODE menu will display. TO MEMORY ALL CLEAR: CHECK CHECK Press and hold the CHECK key position during power-up in SBTL SERVICE mode. CASH/ENTER 104 • Service Mode Programming ER-650/650R...
-
Page 117: Hardware Test
Hardware Test Various components of the ER-650/650R are tested by using this program. 1. From SERVICE MODE menu press 0 to display the H/W TEST menu: H/W TEST 0. TEST PRINTER 1. TEST DISPLAY 2. TEST KEYBOARD 3. TEST MODE & CLERK 4. -
Page 118: Clear All Totals
2. Press the YES/NO key to display Y at the "ARE YOU SURE ?" question. Press ENTER. 3. The message "GRAND TOTAL CLEAR" is printed and the screen returns to the SERVICE MODE menu. 106 • Service Mode Programming ER-650/650R... -
Page 119: Clear Plu File
EPROM version if you contact your dealer for assistance. You should also verify that all registers in an IRC configuration have the same version EPROM. 1. From SERVICE MODE menu press 4 . The "PLEASE WAIT" message displays momentarily until the ER-650/650R EPROM INFO screen displays: ER-650R EPROM INFO. VERSION 1.0 USA... -
Page 120: Memory Allocation
ENTER after each entry, and the cursor will move to the next field. Page 2 of Memory Allocation will display after the # OF GROUP TOTALS field is set: MEMORY ALLOCATION TTL AVAIL: 187136 TTL USED: 186980 # EJ LINES 1500 # CHECKS Y=HARD/N=SOFT CHK N # LINES/SFT CH 108 • Service Mode Programming ER-650/650R... - Page 121 "MEMORY ALLOCATION OK !" or "MEMORY ALLOCATION SIZE OVER" if you attempt to allocate features requiring more memory than is available. 5. The SERVICE MODE menu screen displays when memory allocation programming is completed. Service Mode Programming • 109 ER-650/650R...
-
Page 122: Function Key Assignment
3. Enter a new key code from the list of "Function Key Codes" on page 110 and press ENTER, or press PAGE DOWN to display a list of key codes on the screen. FUNCTION KEYCODE -------------------- NLU#1 - NLU#80(1-80) THREE FOUR FIVE 110 • Service Mode Programming ER-650/650R... - Page 123 2. If you wish to program the CASH/ENTER key, select it immediately after selecting KEY ASSIGNMENT from the SERVICE MODE menu. After the initial key is programmed, the CASH/ENTER key is used to finalize the program. Service Mode Programming • 111 ER-650/650R...
-
Page 124: Function Key Codes
CHARGE 8 MODIFIER 3 PLU LOOKUP7 CHECK CASHING MODIFIER 4 PLU LOOKUP8 ENDORSE MODIFIER 5 FINALIZE CHECK TEND P/BAL INACTIVE CHECK TRACK # PAGE DOWN CLEAR (ESC) PAGE UP CLERK # PAID OUT 1 112 • Service Mode Programming ER-650/650R... -
Page 125: Irc Options
Enter the first register number in the IRC system. 1 digit TO REG# Numeric Enter the last register number in the IRC system. 1 digit IRC RETRIES Numeric Each retry equals approximately 0.5 seconds. 2 digits Service Mode Programming • 113 ER-650/650R... -
Page 126: Rs232C Port 1/Rs232C Port 2 Options
9:POLE 10:EFT 11:PDC 4. Press PAGE DOWN to view page 3 of the RS232C port program: PORT 1 PROGRAM pg3 INITIAL FEEDING LINE ON KP(0-20) ENDING FEEDING LINE ON KP(0-20) INITIAL FEEDING LINE ON SLIP(0-20) 114 • Service Mode Programming ER-650/650R... - Page 127 6:CITIZEN 810 7:CITIZEN 230 7. Press PAGE DOWN to view page 6 of the RS232C port program: PORT 1 PROGRAM pg6 PRINTER TYPE 8:EPSON TM-T88-2 9:EPSON U200 10:EPSON U295 11:EPSON U300 12:EPSON U325 13:EPSON U375 Service Mode Programming • 115 ER-650/650R...
- Page 128 TIMES(0-99) 10. Refer to "RS232C Settings Screen Program Notes" on the next page to fill the fields for each port. 11. Press the CLEAR key to finalize and return to the SERVICE MODE screen. 116 • Service Mode Programming ER-650/650R...
-
Page 129: Rs232C Settings Screen Program Notes
PRINTER TYPE this port. Select the digit that represents the pole display type POLE DISPLAY TYPE connected to this port. Set the number of retries for RS232C communication (about RS232C RETRY TIMES 0.5 seconds each.) Service Mode Programming • 117 ER-650/650R... -
Page 131: Program Mode Programming
Press enter to finalize your descriptor. PAGE PAGE BACK DOWN SPACE CLEAR YES/NO DOUBLE </, >/. SPACE “/’ SPACE SPACE &/* ENTER CAPS The program overlay method is the default method for programming descriptors. Program Mode Programming • 119 ER-650/650R... -
Page 132: Descriptor Code Method
A = [6599] [ . ] [ENTER] Descriptor Code Table Char. Space " & Code Char. Code Char. < Code Char. > Code Char. Code Char. Code Char. Back- CAPS Double 1line Delete space Code 120 • Program Mode Programming ER-650/650R... -
Page 133: Program Mode Menu
0.PLU 1.GROUP 2.SALES TAX 3.SYSTEM OPTION 4.PRINT OPTION 5.FUNCTION KEYS 6.CLERK ♦ Press PAGE DOWN to view the remainder of the PROGRAM MODE menu: PROGRAM MODE 7.LOGO DESC. 8.NLU CODE# PGM. 9.DOWNLOAD PROGRAMS 00.MORE Program Mode Programming • 121 ER-650/650R... - Page 134 3.CHECK CHANGE LIMIT 4.TIME & DATE 5.TARE WEIGHT 6.MACRO ♦ Press PAGE DOWN to view the remainder of the PROGRAM MODE page 2 menu: PROGRAM MODE page2 7.MACHINE NO. 8.PC SCHEDULE TIME 9.TRAINING MODE P/W 00.SCAN 122 • Program Mode Programming ER-650/650R...
-
Page 135: Plu Programming
PLU key on the keyboard, or scan the barcode on an item. 3. Refer to "PLU Options - Reference Information" on page 126 to make program entries or changes, press the CLEAR key to finalize and return to the PROGRAM MODE screen. Program Mode Programming • 123 ER-650/650R... -
Page 136: Single Item
GALLONAGE ITEM INVENTORY ITEM DISABLE PLU# 1 P4 Press SCALABLE PAGE DOWN to view the AUTO SCALE fourth PLU AUTO TARE (1-5) Programming CONDIMENT screen. COMP. CONDIMENT PRINT ON RECEIPT PRINT ON DISPLAY 124 • Program Mode Programming ER-650/650R... - Page 137 LINK PLU: cause the to view the 6 registration of and last PLU another PLU, Programming Enter the PLU # screen. you wish to link with the 10-key pad. Enter '0' for no link. Program Mode Programming • 125 ER-650/650R...
-
Page 138: Plu Options - Reference Information
PLU entry. Single item PLUs are used to speed up one item sales. NON-ADD # COMP Y or N Select Y to enforce the entry of a non-add number before a registration can be made. 126 • Program Mode Programming ER-650/650R... - Page 139 If you wish the registration of this PLU to automatically cause the maximum registration of another PLU, enter the PLU # you wish to link with the 10-key pad. Enter 0 for no link. Program Mode Programming • 127 ER-650/650R...
-
Page 140: Delete Plu
The CONFIRM DELETE screen displays: CONFIRM DELETE ARE YOU SURE YOU WISH TO DELETE PLU# ?????????????? ENTER=DELETE ESC=ABORT 4. Press ENTER to delete the PLU; press ESC to return to the PLU DELETE screen without deleting the PLU. 128 • Program Mode Programming ER-650/650R... - Page 141 3. Enter the number of the first PLU in the range you wish to delete and press PLU. The screen prompts for the last PLU in the range: PLU NUMBER ∗ ENTER NUMBER OF THE LAST PLU IN THE RANGE AND PUSH Program Mode Programming • 129 ER-650/650R...
- Page 142 Note: Before a PLU can be deleted, all report information must be cleared. I may be necessary to run a Z1 and Z2 PLU Report, and if the PLU is an inventory item, you must change the stock to zero. 130 • Program Mode Programming ER-650/650R...
-
Page 143: Group Programming
2. Enter the number of the group to be programmed, press ENTER. The GROUP# PROG. screen displays: GROUP #1 PROG. DESC : GROUP 1 ADD TO GROUP TTL SEND TO KP KP PORT# : 1 2 R N N Y PRINT RED ON KP Program Mode Programming • 131 ER-650/650R... - Page 144 4. Refer to the table below to fill the fields of the GROUP PROGRAMMING screens. 5. Press ENTER to return to the GROUP PROGRAMMING screen. Continue to program groups as necessary. Press ESC to return to the PROGRAM MODE screen. 132 • Program Mode Programming ER-650/650R...
- Page 145 Set “0”for no age requirement. Set “1” to “5” to check the date of birth against the age requirement group set in Z Mode. Program Mode Programming • 133 ER-650/650R...
-
Page 146: Sales Tax Programming
Sales Tax Programming The ER-650/650R allows three calculation options for each of the four possible taxes. • Add-On - most sales taxes can be programmed by entering an add-on tax percentage rate. • Tax Table - if a tax entered as an add-on tax percentage does not follow exactly the tax chart follow that apply in your area, tax table programming will match tax collection exactly to the break points of your tax table. -
Page 147: Programming An Add-On Tax Rate Percentage
10.000 or 10.0. Press ENTER (CASH) to set the rate. 6. The TAX PROG. screen will return prompting you to enter the next tax, if necessary. Continue to program additional taxes or press CLEAR to return to the PROGRAM MODE screen. Program Mode Programming • 135 ER-650/650R... -
Page 148: Programming A Tax Table
The arrow will move to the TAX TYPE field. 4. Enter 1 for an TAX TABLE programming. The appropriate TAX # PROGRAMMING screen displays: TAX #1 PROGRAMMING FIRST TAX AMOUNT 0.01 NON-TAXable AMOUNT 0.10 # OF NON-REPEAT BREAK # OF REPEAT BRK 136 • Program Mode Programming ER-650/650R... - Page 149 Note that this screen should look exactly like the corresponding part of the printed tax table. TAX TABLE PROG. SALE AMT RANGE 0.00 0.00 0.10 0.01 0.11 0.21 0.02 0.22 0.38 0.03 0.39 0.56 0.04 0.57 0.73 0.05 0.74 0.91 Program Mode Programming • 137 ER-650/650R...
- Page 150 Continue to program additional taxes or press CLEAR to return to the PROGRAM MODE screen. Note: Some tax tables are very complex. Contact your Dealer for assistance should you have difficulty entering your Tax Table. 138 • Program Mode Programming ER-650/650R...
- Page 151 $0.92 - $1.08 $0.07 $1.09 - $1.24 Repeat $0.08 $1.25 - $1.41 $0.09 $1.42 - $1.58 $0.10 $1.59 - $1.74 $0.11 $1.75 - $1.91 $0.12 $1.92 - $2.08 $0.13 $2.09 - $2.24 $0.14 $2.25 - $2.41 Program Mode Programming • 139 ER-650/650R...
-
Page 152: Programming A Vat (Value Added Tax)
10. Press ENTER (CASH) to set the rate. 6. The TAX PROG. screen will return, prompting you to enter the next tax, if necessary. Continue to program additional taxes or press CLEAR to return to the PROGRAM MODE screen. 140 • Program Mode Programming ER-650/650R... -
Page 153: Programming A Canadian Gst
6. At the RATE 1 field, indicate if the GST is taxable by rate 1 (tax on tax) by pressing the YES/NO key, then pressing the ENTER (CASH) key. The arrow advances to the RATE 2 field. Enter taxable status for RATE 2 and RATE 3. The PROGRAM MODE screen returns. Program Mode Programming • 141 ER-650/650R... -
Page 154: System Option Programming
4 BEFORE REPORTS System Option MGR CONTROL TO TEND. Press YES/NO screen. NEGATIVE BALANCE N to toggle from 'Y' to 'N' for yes ZERO BALANCE or no decisions. RESET TRANSACTION NO. ON Z REPORT 142 • Program Mode Programming ER-650/650R... -
Page 155: Train Mode
ON @/FOR KEY SYSTEM OPTION pg 9 Press RESET Z COUNTER PAGE DOWN to view the 9 AFTER Z1 REPORT System Option FINANCIAL REPORT N screen. TIME REPORT PLU REPORT CLERK REPORT GROUP REPORT Program Mode Programming • 143 ER-650/650R... - Page 156 SYSTEM OPTION pg 14 Press PROMPT OPERATOR WHEN PAGE DOWN EJ BUFF. IS FULL to view the 14 STOP OPERATIONS WHEN System Option EJ BUFF. IS FULL screen. SEND ONLY NEGATIVE ENTRIES TO EJ 144 • Program Mode Programming ER-650/650R...
- Page 157 ON CASH ALLOW Z STOCK RPT Y PRG DESC BY CODE SYSTEM OPTION pg 18 Press EFT DRAFT IS PAGE DOWN Y:DATATRAN to view the 18 N:FINE DINING Print Option screen. MSR CONNECTED 0:DATATRAN 1:PDC Program Mode Programming • 145 ER-650/650R...
-
Page 158: System Options - Reference Information
Select Y if you wish to reset the grand total to zero after the AFTER Z REPORT financial report is reset. OPEN DRAWER WHEN Y or N Select N to stop the drawer from opening when reports are REPORTS ARE RUN run. 146 • Program Mode Programming ER-650/650R... - Page 159 A built in paper sensor determines whether paper is currently SENSOR ACTIVE loaded in the printer. If Y, operations are not allowed without paper loaded. If N, operations are allowed when paper is out. Program Mode Programming • 147 ER-650/650R...
- Page 160 RS-232C port. Here you can choose the N:AMT OF SALE content of single line validation ALLOW PRICE LEVEL Y or N Choose Y to require the X Mode key to operate the Price ONLY MGR MODE Level keys. 148 • Program Mode Programming ER-650/650R...
- Page 161 Set EFT DRAFT to N (FINE DINING) for a draft with a tip entry line. MSR CONNECTED 0 or 1 Set MSR CONNECTED to 0 if the MSR is connected to the DATATRAN. SET to 1 if the MSR is connected to the PDC. Program Mode Programming • 149 ER-650/650R...
-
Page 162: Print Option Programming
4 PRINT TIME Print Option PRINT MACHINE NO. Y Press YES/NO screen. PRINT CLERK NAME to toggle from 'Y' to 'N' for yes HOME CURRENCY or no decisions. SYMBOL IS PRINT Z COUNTER 150 • Program Mode Programming ER-650/650R... - Page 163 IN TRAINING MODE Press YES/NO to toggle from PRINT OPTION pg 8 'Y' to 'N' for yes Press or no decisions. PAGE DOWN CURRENCY SYMBOL to view the 8 CONV#1 Print Option CONV#2 screen. CONV#3 CONV#4 Program Mode Programming • 151 ER-650/650R...
- Page 164 PRIORITY PRINT BY GROUP ON KP/KV PRINT OPTION pg 13 Press PRINT PLU# PAGE DOWN to view the 13 ON RECEIPT Print Option E.J PORT (0/1/2) screen. REPORT PORT(0/1/2)0 PRINT E.J FROM Y:OLDEST N:NEWEST 152 • Program Mode Programming ER-650/650R...
- Page 165 PRINT DATE ON screen. SERV ON HARD CHECK COPY OF DATATRAN RECEIPT (0-99) PRT WHOLE CARD NO.N PRINT OPTION pg 16 Press PAGE DOWN PRT EXP. DATE to view the 16 Print Option screen. Program Mode Programming • 153 ER-650/650R...
- Page 166 00 to display a list of optional symbols. PRINT Z COUNTER Y or N Select N if you wish to delete the printing of the reset counter on Z reports. 154 • Program Mode Programming ER-650/650R...
- Page 167 You can choose whether to print or not print registrations in VOID MODE void mode on kitchen requisitions. SEND TO KP IN Y or N You can choose whether to print or not print registrations in TRAIN MODE training mode on kitchen requisitions. Program Mode Programming • 155 ER-650/650R...
- Page 168 GRAND TOTAL IS Y or N Choose Y if you wish the grand total to accumulate daily net Y:NET N:GROSS sales totals. Choose N if you wish the grand total to accumulate daily gross sales totals. 156 • Program Mode Programming ER-650/650R...
- Page 169 If N, only the last four digits of the credit/debit card will print. PRT EXP. DATE Y or N If N, the credit card expiration date will not print on the DataTran (integrated credit) receipt. Program Mode Programming • 157 ER-650/650R...
-
Page 170: Clerk Programming
3. Refer to "Clerk Programming - Reference Information" to make choices or changes on the screens provided. 4. After making new entries or changes for a function key, press the CLEAR key to finalize and return to the PROGRAM MODE screen. 158 • Program Mode Programming ER-650/650R... -
Page 171: Clerk Programming - Reference Information
DRAWER Enter 0 to allow check track operations only. (No cash sales.) Enter 1 or 2 (with the multiple drawer option) to select which drawer the clerk will open. Program Mode Programming • 159 ER-650/650R... -
Page 172: Function Key Programming
1 to select STATUS PROGRAM (meaning you wish to program the status of the function not the menu assignment of the function look-up key) then press the digit corresponding to the function you wish to program 160 • Program Mode Programming ER-650/650R... - Page 173 MAX DIGIT(0-8) 3. Press ENTER from the last field to return to the FUNCTION KEY PROGRAM screen, or press ESC at any time to return to the FUNCTION KEY PROGRAM screen without saving changes. Program Mode Programming • 161 ER-650/650R...
- Page 174 Select Y if you wish all non-add number entries to have the exact MUST MATCH number of digits selected in the MAX DIGIT flag below. MAX DIGIT MAX DIGIT (0-8) Enter the maximum number of digits for non-add number entry. Zero (0) means no limit. 162 • Program Mode Programming ER-650/650R...
- Page 175 3. Press ENTER from the last field or press PAGE DOWN to view the next page of % function key options: %1 PROGRAMMING ALLOW ONLY ONE TIME SUBTOTAL ENTRY ALLOW MULTIPLE AMT DISCOUNT(COUPON) WITHOUT SUBTOTAL N PRESET OVERIDE IN MGR ONLY Program Mode Programming • 163 ER-650/650R...
- Page 176 COMPULSORY VALID 5. Press ENTER from the last field to return to the FUNCTION KEY PROGRAM screen, or press ESC at any time to return to the FUNCTION KEY PROGRAM screen without saving changes. 164 • Program Mode Programming ER-650/650R...
- Page 177 Select Y to allow preset override only in manager operation IN MGR ONLY mode. COMPULSORY Y or N Choose Y to enforce validation if an optional printer with VALIDATION validation capability is connected to an RS-232C port. Program Mode Programming • 165 ER-650/650R...
-
Page 178: Add Check
COMPULSORY VALID 3. Press ENTER from the last field to return to the FUNCTION KEY PROGRAM screen, or press ESC at any time to return to the FUNCTION KEY PROGRAM screen without saving changes. 166 • Program Mode Programming ER-650/650R... - Page 179 EXEMPT TAX 2 EXEMPT TAX 3 EXEMPT TAX 4 COMPULSORY Y or N Choose Y to enforce validation if an optional printer with validation VALIDATION capability is connected to an RS-232C port. Program Mode Programming • 167 ER-650/650R...
-
Page 180: Cancel
UNDER MGR Y or N Select Y if you do not want the operator use this function in CONTROL REGISTER mode. When selected, the function is allowed only in the X control lock position. 168 • Program Mode Programming ER-650/650R... -
Page 181: Cash
COMPULSORY VALID 3. Press ENTER from the last field to return to the FUNCTION KEY PROGRAM screen, or press ESC at any time to return to the FUNCTION KEY PROGRAM screen without saving changes. Program Mode Programming • 169 ER-650/650R... - Page 182 EXEMPT TAX 2 EXEMPT TAX 3 EXEMPT TAX 4 COMPULSORY Y or N Choose Y to enforce validation if an optional printer with VALIDATION validation capability is connected to an RS-232C port. 170 • Program Mode Programming ER-650/650R...
-
Page 183: Charge 1-8
SELECT (1:CREDIT 2:DEBIT,3;GIFT) 4. Press ENTER from the last field to return to the FUNCTION KEY PROGRAM screen, or press ESC at any time to return to the FUNCTION KEY PROGRAM screen without saving changes. Program Mode Programming • 171 ER-650/650R... - Page 184 Select Y if the DataTran is connected. SELECT (1:CREDIT 1, 2, or 3 At the SELECT field, select 1 (credit). Debit and Gift options are 2:DEBIT, 3:GIFT) not currently available. (Applies to DataTran operations only.) 172 • Program Mode Programming ER-650/650R...
-
Page 185: Check Cashing
REGISTER mode. When selected, the function is allowed only in the X control lock position. COMPULSORY Y or N Choose Y to enforce validation if an optional printer with validation VALIDATION capability is connected to an RS-232C port. Program Mode Programming • 173 ER-650/650R... -
Page 186: Check Endorsement
CONSECUTIVE No. 3. Press ENTER from the last field to return to the FUNCTION KEY PROGRAM screen, or press ESC at any time to return to the FUNCTION KEY PROGRAM screen without saving changes. 174 • Program Mode Programming ER-650/650R... - Page 187 See "Endorsement Message" on page 213 for more information. PRINT OPTION Y or N Choose Y or N to determine whether each option prints on the PRINT DATE check endorsement. PRINT TIME PRINT CLERK CONSECUTIVE Program Mode Programming • 175 ER-650/650R...
-
Page 188: Check
COMPULSORY VALID 4. Press ENTER from the last field to return to the FUNCTION KEY PROGRAM screen, or press ESC at any time to return to the FUNCTION KEY PROGRAM screen without saving changes. 176 • Program Mode Programming ER-650/650R... - Page 189 Choose Y to enforce check endorsement if an optional printer with CHECK endorsement capability is connected to an RS-232C port. ENDORSEMENT COMPULSORY Y or N Choose Y to enforce validation if an optional printer with VALIDATION validation capability is connected to an RS-232C port. Program Mode Programming • 177 ER-650/650R...
-
Page 190: Check
SCAN CHECK # 4. Press ENTER from the last field to return to the FUNCTION KEY PROGRAM screen, or press ESC at any time to return to the FUNCTION KEY PROGRAM screen without saving changes. 178 • Program Mode Programming ER-650/650R... - Page 191 SCAN CHECK # Y or N Choose Y to allow the check number to be input by a scanner (must be nine digits or less). Program Mode Programming • 179 ER-650/650R...
-
Page 192: Currency Conversion 1-4
The US dollar (home currency) is worth 1.3720 Canadian dollars (foreign currency). RATE: 13720 NUMBER OF DEC.: 5 The US dollar (home currency) is worth 110.24 Japanese Yen (foreign currency). RATE: 11024 NUMBER OF DEC.: 2 180 • Program Mode Programming ER-650/650R... -
Page 193: Eat-In Take Out Drive Thru
EXEMPT TAX 4 exempt tax on take out sales. COMPULSORY Choose Y to enforce validation if an optional printer with validation VALIDATION capability is connected to an RS-232C port. Program Mode Programming • 181 ER-650/650R... -
Page 194: Error Correct
UNDER MGR Y or N Select Y if you do not want the operator use this function in CONTROL REGISTER mode. When selected, the function is allowed only in the X control lock position. 182 • Program Mode Programming ER-650/650R... -
Page 195: F/S Tend
COMPULSORY VALID 3. Press ENTER from the last field to return to the FUNCTION KEY PROGRAM screen, or press ESC at any time to return to the FUNCTION KEY PROGRAM screen without saving changes. Program Mode Programming • 183 ER-650/650R... - Page 196 Select N if you do not want the drawer to opened with this key. OPEN COMPULSORY Y or N Choose Y to enforce validation if an optional printer with validation VALIDATION capability is connected to an RS-232C port. 184 • Program Mode Programming ER-650/650R...
-
Page 197: Function Look Up (1-2)
If you chose 0 to program menu assignment, the FUNC. # MENU ASSIGN screen displays: FUNC #1 MENU ASSIGN. PUSH MENU NUMBER TO BE PROGRAMMED (1-8) Program Mode Programming • 185 ER-650/650R... - Page 198 Programming" chapter, or press PAGE DOWN to view a list of functions and codes. 5. Go to step 2 above and continue to program menu numbers for the function look up key, or press ESC to return to the PROGRAM MODE menu. 186 • Program Mode Programming ER-650/650R...
-
Page 199: Guest
PRINT AT REMOTE Y or N Select N if you do not want GUEST # entry to print at the kitchen PRINTER printer if items from the same transaction are sent to the KP. Program Mode Programming • 187 ER-650/650R... -
Page 200: Level 1-5
Alpha You can program a descriptor. The default descriptors are numeric LEVEL1, LEVEL2, etc. . 12 character SEND Y or N Determines whether the level decriptor prints with the item at the DESCRIPTION TO 188 • Program Mode Programming ER-650/650R... -
Page 201: Mdse Return
UNDER MGR Y or N Select Y if you do not want the operator use this function in CONTROL REGISTER mode. When selected, the function is allowed only in the X control lock position. Program Mode Programming • 189 ER-650/650R... -
Page 202: Modifier 1-5
TO KP 3. Press ENTER from the last field to return to the FUNCTION KEY PROGRAM screen, or press ESC at any time to return to the FUNCTION KEY PROGRAM screen without saving changes. 190 • Program Mode Programming ER-650/650R... - Page 203 PLU #1017. SEND Y or N Determines whether the modifier descriptor prints with the item at DESCRIPTION TO the KP. (The modifier descriptor will print immediately above the item.) Program Mode Programming • 191 ER-650/650R...
-
Page 204: Pbal
Select Y to allow the PBAL entry at any time. Select N to allow a PBAL entry only at the start of a sale. REQUIRE AT Y or N Select Y to require an entry into the PBAL key at the start of every START OF SALE transaction. 192 • Program Mode Programming ER-650/650R... -
Page 205: Paid Out 1-3
REGISTER mode. When selected, the function is allowed only in the X control lock position. COMPULSORY Y or N Choose Y to enforce validation if an optional printer with validation VALIDATION capability is connected to an RS-232C port. Program Mode Programming • 193 ER-650/650R... -
Page 206: Print Check
Select Y if you want the Check Print function to print on the receipt RECP printer. SKIP PRT OF Y or N Select Y if you wish to delete the printing of the consecutive # on CONSEC# ON the guest check. CHECK 194 • Program Mode Programming ER-650/650R... -
Page 207: Promo
If an item is taxable, and you wish to remove taxes and an item's TAX1 cost when using the PROMO key, set the taxable status for the TAXABLE BY appropriate tax to Y. TAX2 TAXABLE BY TAX3 TAXABLE BY TAX4 Program Mode Programming • 195 ER-650/650R... -
Page 208: Recd On Acct 1-3
REGISTER mode. When selected, the function is allowed only in the X control lock position. COMPULSORY Y or N Choose Y to enforce validation if an optional printer with validation VALIDATION capability is connected to an RS-232C port. 196 • Program Mode Programming ER-650/650R... -
Page 209: Scale
SCALEABLE ITEM 3. Press ENTER from the last field to return to the FUNCTION KEY PROGRAM screen, or press ESC at any time to return to the FUNCTION KEY PROGRAM screen without saving changes. Program Mode Programming • 197 ER-650/650R... - Page 210 Y or N If N, you must use the scale to register scaleable PLU items. If Y, ENTRY W/O SCALE you can either register scaleable items by weight extension, or by ON SCALEABLE price entry. ITEM 198 • Program Mode Programming ER-650/650R...
-
Page 211: Service
HARD CHECK PRINTER PORT(0-2) 3. Press ENTER from the last field to return to the FUNCTION KEY PROGRAM screen, or press ESC at any time to return to the FUNCTION KEY PROGRAM screen without saving changes. Program Mode Programming • 199 ER-650/650R... - Page 212 RS-232C port. HARD CHECK If you are using a hard check system, enter the RS232C port PRINTER PORT number (1 or 2) where the optional guest check printer is attached. (0-2) 200 • Program Mode Programming ER-650/650R...
-
Page 213: Table
Y or N If Y, you must enter the table number before beginning any SALES transaction. PRINT AT REMOTE Y or N Choose Y to print the table number at the remote printer. PRINTER Program Mode Programming • 201 ER-650/650R... -
Page 214: Tare
REGISTER mode. When selected, the function is allowed only in the X control lock position. #5 IS MANUAL Y or N Choose Y to use tare number five to manually enter a tare weight. TARE 202 • Program Mode Programming ER-650/650R... -
Page 215: Tax Exempt
Select Y if you wish to force the entry of a non-add number (i.e. a tax exempt #) before the key is used. COMPULSORY Y or N Choose Y to enforce validation if an optional printer with validation VALIDATION capability is connected to an RS-232C port. Program Mode Programming • 203 ER-650/650R... -
Page 216: Time In/Out
REGISTER mode. When selected, the function is allowed only in the X control lock position. COMPULSORY Y or N Choose Y to enforce validation if an optional printer with validation VALIDATION capability is connected to an RS-232C port. 204 • Program Mode Programming ER-650/650R... -
Page 217: Tip
NET & GROSS TOT 3. Press ENTER from the last field to return to the FUNCTION KEY PROGRAM screen, or press ESC at any time to return to the FUNCTION KEY PROGRAM screen without saving changes. Program Mode Programming • 205 ER-650/650R... - Page 218 ADD TAX RATE 4 AMT ADDED TO Y or N Choose Y if you wish to add the TIP total to the NET and GROSS NET AND GROSS sales totals on the financial report. 206 • Program Mode Programming ER-650/650R...
-
Page 219: Validate
Enter 0 if validation is not used. KEY DISABLE Y or N Select Y to disable this function. ALLOW MULTIPLE Y or N Select Y to allow multiple validations of the same transaction. VALID? Program Mode Programming • 207 ER-650/650R... -
Page 220: Void Item
UNDER MGR Y or N Select Y if you do not want the operator use this function in CONTROL REGISTER mode. When selected, the function is allowed only in the X control lock position. 208 • Program Mode Programming ER-650/650R... -
Page 221: Waste
REGISTER mode. When selected, the function is allowed only in the X control lock position. COMPULSORY Y or N Choose Y to enforce validation if an optional printer with validation VALIDATION capability is connected to an RS-232C port. Program Mode Programming • 209 ER-650/650R... -
Page 222: Logo Descriptor
♦ From the PGM control lock position menu, press 7 for LOGO DESC. The LOGO DESC. PROGRAM screen displays: LOGO DESC. PROGRAM 0. PREAMBLE 1. POSTAMBLE 2. ENDORSEMENT MESG. 3. FINANCIAL REPORT 4. CLERK REPORT 5. MACRO NAME 6. DATATRAN 210 • Program Mode Programming ER-650/650R... -
Page 223: Preamble
↑ PREAMBLE LINE 4 : LINE 5 : LINE 6 : 4. When the last line has been entered, press ENTER to accept the line and return to the LOGO DESC. PROGRAM screen. Program Mode Programming • 211 ER-650/650R... -
Page 224: Postamble
↑ POSTAMBLE LINE 4 : LINE 5 : LINE 6 : 4. When the last line has been entered, press ENTER to accept the line and return to the LOGO DESC. PROGRAM screen. 212 • Program Mode Programming ER-650/650R... -
Page 225: Endorsement Message
LINE 5 : LINE 6 : 4. Continue programming all ten lines if necessary. When the last line has been entered, press ENTER to accept the message and return to the LOGO DESC. PROGRAM screen. Program Mode Programming • 213 ER-650/650R... -
Page 226: Financial Report
3 descriptors. (There are 73 Financial Report descriptors that you may program.) Using the same procedure, continue programming each line as necessary. Press ESC at any time to exit and return to the LOGO DESC. PROGRAM screen. 214 • Program Mode Programming ER-650/650R... -
Page 227: Clerk Report
3 descriptors. (There are 52 Clerk Report descriptors that you can program.) Using the same procedure, continue programming each line as necessary. Press ESC at any time to exit and return to the LOGO DESC. PROGRAM screen. Program Mode Programming • 215 ER-650/650R... -
Page 228: Macro Name
3 macro descriptors. Using the same procedure, continue programming each line as necessary. Press ESC at any time to exit and return to the LOGO DESC. PROGRAM screen. 216 • Program Mode Programming ER-650/650R... -
Page 229: Datatran
3. Press ENTER repeatedly, or press PAGE UP and/or PAGE DOWN to locate the next DataTran message line you wish to program. Press ESC at any time to exit and return to the LOGO DESC. PROGRAM screen. Program Mode Programming • 217 ER-650/650R... -
Page 230: Nlu Code Number
3. The current PLU code number displays. Type the new PLU code number you wish to use for this NLU key, press ENTER. 4. The NLU CODE PROGRAM screen returns. Continue from step 2 to program additional NLU keys, or press ESC to exit. 218 • Program Mode Programming ER-650/650R... -
Page 231: Download Programs
ENTER. The cursor arrow moves to #2. Select Y or N for second register. In this manner you can determine which registers you wish to download programs to. When you have selected Y or N for the last register, the PROGRAM DOWN screen appears. Program Mode Programming • 219 ER-650/650R... - Page 232 Note: If there is a failure in IRC communication, the register that programs are being sent from will display "TIME OVER" indicating that the IRC retries have been completed and no communication was possible. 220 • Program Mode Programming ER-650/650R...
-
Page 233: Clerk In/Out
7:00 PM as 1900. 5. Note that when you edit time information, the TIME WORKED field is updated with a new total. When you have completed editing, press ESC to return to the CLERK NUMBER selection screen. Program Mode Programming • 221 ER-650/650R... -
Page 234: Plu Stock
THE KEYBOARD 3. Enter the PLU number and press the PLU key, or press an PLU key on the keyboard. The stock quantity for the selected PLU displays: PLU# 1 P1 STOCK QUANTITY 0.00 222 • Program Mode Programming ER-650/650R... -
Page 235: Drawer Limit
2. From the PROGRAM MODE page 2 screen, press 2 for DRAWER LIMIT. The LIMIT PROGRAM screen displays: LIMIT PROGRAM DRAWER LIMIT 0.00 3. Type the amount you wish to use for a limit (or type 0 for no limit.) Press ENTER. Program Mode Programming • 223 ER-650/650R... -
Page 236: Check Change Limit
2. From the PROGRAM MODE page 2 screen, press 3 for CHECK CHANGE LIMIT. The CHECK LIMIT PGM. screen displays: CHECK LIMIT PGM. CHECK CHANGE LIMIT 0.00 3. Type the amount for the check change limit. Press ENTER. 224 • Program Mode Programming ER-650/650R... -
Page 237: Time & Date
Time & Date Use this program to set the clock and calendar on your ER-650/650R. The date changes automatically. After initial setting, time changing will probably be required only for beginning and ending daylight savings time. 1. From the PGM control lock position menu, press 00 for MORE. The PROGRAM MODE page 2 screen displays. -
Page 238: Tare Weight
3. Type the weight for the first tare, press ENTER. The cursor advances to TARE 2. Type the weight for the second tare and press ENTER. Continue until all 5 tares are programmed, or press ESC to exit. 226 • Program Mode Programming ER-650/650R... -
Page 239: Macro
3. Press the digit that represents the macro you wish to program. Press PAGE DOWN to view the remainder of the list: ↑ MACRO PROGRAM 7. MACRO #8 8. MACRO #9 9. MACRO #10 Program Mode Programming • 227 ER-650/650R... -
Page 240: Programming A New Macro
2. Press the first key of the macro sequence, for example, press 1 (numeric one): 1. ONE 3. The keystroke is recorded on the screen and the cursor moves to the next keystroke. 228 • Program Mode Programming ER-650/650R... -
Page 241: Editing An Existing Macro
4. If you wish to remove a key stroke from a macro, replace the current function with the INACTIVE function by pressing the PAGE DOWN to display a keycode list, then enter 1 9 1. Program Mode Programming • 229 ER-650/650R... -
Page 242: Machine No
2. From the PROGRAM MODE page 2 screen, press 7 for MACHINE NO. The MACHINE # PROG. screen displays: MACHINE # PROG. MACHINE # 3. Type the machine number, up to 5 digits, press ENTER. 230 • Program Mode Programming ER-650/650R... -
Page 243: Pc Schedule Time
You can place the PC in ONLINE MODE manually by selecting the PC COMMUNCATION function from the RESET REPORT MODE menu. If you wish to do unattended polling, you can program the ER-650/650R to automatically enter the PC ONLINE MODE at a scheduled time. -
Page 244: Training Mode Password
2. From the PROGRAM MODE page 2 screen, press 9 for TRAINING MODE P/W. The TRAINING MODE P/W screen displays: TRAINING MODE P/W PASSWORD : 3. Type the password, up to 4 digits, press ENTER. 232 • Program Mode Programming ER-650/650R... -
Page 245: Program Scans
Program Scans You can make a printed record of your ER-650/650R program. 1. From the PGM control lock position menu, press 00 for MORE. The PROGRAM MODE page 2 screen displays. Press PAGE DOWN to view the remainder of the page 2 program options. - Page 246 6. Press PAGE DOWN to view the remainder of the program scan selections. When you see the program you wish to print, press the digit representing that program. PROGRAM MODE page2 7.MACHINE NO. 8.PC SCHEDULE 9.TRAINING MODE P/W 234 • Program Mode Programming ER-650/650R...
-
Page 247: Sample Reports
EATIN TTL $10.12 Total sales for each TAKEOUT TTL type of destination $40.77 DRTHRU TTL $3.04 Total and count for ITEM DISC. each % function key -0.48 (i.e. discounts & continued . . . coupons) Sample Reports • 235 ER-650/650R... - Page 248 $145.00 R/A 2 $0.00 R/A 3 $0.00 Total and count for P/O 1 each type R/A -140.00 (received on P/O 2 account) and P/O $0.00 (paid out) key. P/O 3 $0.00 continued . . . 236 • Sample Reports ER-650/650R...
- Page 249 CHG5 SALES $2.67 CHG6 SALES $13.09 CHG7 SALES $0.00 Total for each CHG8 SALES Foreign currency in $3.04 drawer. FOREIGN 1 0.00 FOREIGN 2 0.00 FOREIGN 3 0.00 FOREIGN 4 0.00 continued . . . Sample Reports • 237 ER-650/650R...
- Page 250 Total and count of AVG ITEM/CUST 7.29 balances paid AVG $/CUST $10.81 ******************************** Total and count of GRAND $375.63 items serviced ETHAN No.000209 00000 Average number if items per customer, and average dollar sales per customer Grand total 238 • Sample Reports ER-650/650R...
-
Page 251: Time
Net sales in this SALES RATE 65.39% period. 14:00-14:59 Percentage of total SALES AMT $97.33 sales SALES RATE 34.61% ******************************** Number of TOTAL CNT Transactions all TOTAL AMT $281.18 periods ETHAN No.000236 00000 Net sales in all periods. Sample Reports • 239 ER-650/650R... -
Page 252: Plu
RETURNS CNT 10 -20.00 SALES RATE -7.44% PLU#33 NAILS CNT 15.55 $24.72 SALES RATE 9.20% Total activity for all ******************************** PLUs TOTAL CNT 189.56 TOTAL AMT $268.60 ETHAN No.000213 00000 Total sales for all PLUs. 240 • Sample Reports ER-650/650R... -
Page 253: Clerk
$45.14 DRWR TTL $43.22 -------------------------------- ANNA NET SALE $78.75 DRWR TTL $67.03 -------------------------------- LAURA NET SALE $0.00 DRWR TTL $18.64 -------------------------------- PEGGY -------------------------------- MOLLY NET SALE $2.06 DRWR TTL -22.01 -------------------------------- ETHAN No.000218 00000 Sample Reports • 241 ER-650/650R... -
Page 254: Individual Clerk
DATE 11/10/1999 WED TIME 15:36 REPORT 00001 -------------------------------- Clerk Name INDIVIDUAL CLERK ETHAN Number of NET SALE Transactions $155.23 DRWR TTL $109.81 Net sales for this -------------------------------- clerk ETHAN No.000218 00000 Drawer total for this clerk 242 • Sample Reports ER-650/650R... -
Page 255: Groups
58.40 SALES AMT $44.11 GROUP : 9 STORE MDSE 77.56 SALES AMT $74.58 ******************************** Number of items TOTAL CNT 189.56 sold in all groups. TOTAL AMT $268.60 ETHAN No.000237 00000 Net sales for all groups. Sample Reports • 243 ER-650/650R... -
Page 256: Stock
REPORT 00001 -------------------------------- PLU number ALL PLU STOCK PLU Descriptor PLU#1 HAMBURGER Current inventory count PLU#2 DBL BURGER PLU#7 ROAST 25.96 PLU#28 UNLEADED 1488.47 PLU#33 NAILS 161.25 ETHAN No.000228 00000 DATE 11/10/1999 WED TIME 15:47 244 • Sample Reports ER-650/650R... -
Page 257: Clerk Time Report
TIME WORKED : 0000:00 MOLLY TIME IN : 11/09/1999 01:05 TIME OUT: 11/09/1999 09:55 TIME IN : 11/10/1999 07:44 TIME WORKED : 0008:50 -------------------------------- TOTAL WORKED : 0059:28 Total time for all ETHAN No.000217 00000 clerks Sample Reports • 245 ER-650/650R... -
Page 258: Check File
Open check number OPEN CHECK and balance. CHECK : 3 $24.07 MOLLY CHECK : 4 $45.42 ETHAN Clerk responsible CHECK : 5 $24.50 for the check. ETHAN CHECK : 6 $28.33 ETHAN ETHAN No.000243 00000 246 • Sample Reports ER-650/650R... -
Page 259: Plu Zero Sale
PLU Zero Sale DATE 11/10/1999 WED TIME 15:59 REPORT 00001 -------------------------------- PLU ZERO SALE ITEM PLU# PLU Descriptor PLU Numberr -------------------------------- PLU11 PLU14 PLU15 PLU16 PLU19 PLU20 CLERK 1 No.000243 00000 Sample Reports • 247 ER-650/650R... -
Page 260: Balancing Formulas
Net Sales Negative PLU Total Item Coupon Total Item Percent Discount Sale Coupon Amounts Sale Percent Discounts Credit Tax 1 Credit Tax 2 Credit Tax 3 Credit Tax 4 Merchandise Return Void Positon Total Gross Sales 248 • Sample Reports ER-650/650R... -
Page 261: Integrated Payment Appendix
4.AGE VERIFICATION 5.KP STARTING No. 00.DATATRAN 2. Press 00 to display the DataTran Operation menu: DATATRAN OPERATION 0.INITIALIZE EFT 1.OPEN BATCH 2.CLOSE CURR. BATCH 3.CLEAR CURR. BATCH 4.CHG. BATCH NUMBER 5.ISSUE LOCAL TOTAL 6.ISSUE TRANSACTION Integrated Payment Appendix • 249 ER-650/650R... -
Page 262: Datatran Operation
3. If necessary, press PAGE DOWN to display the second page of the DataTran Operation menu: DATATRAN OPERATION 7.ISSUE BATCH STATUS 8.DIAL IN LOAD 9.DIAL OUT LOAD 4. Press 1 to open the batch. The message “WAITING RESP” displays. No printing takes place. 250 • Integrated Payment Appendix ER-650/650R... -
Page 263: Sample Transaction
CONTINUE” displays. Tear off the printer paper, and press CASH to resume printing. Sample Draft 5/26/04 10:10 00001 SALE $2.00 ************6301 APP: VITAL8 REF: 41415013334 REC NO : 1 X___________________________ I AGREE TO PAY ABOVE TOTAL AMOUNT ACCORDING TO CARD ISSUER AGREEMENT Integrated Payment Appendix • 251 ER-650/650R... - Page 264 DRAFT IS” to “N” (no). 5/26/04 10:10 00001 SALE $2.00 ************6301 APP: VITAL8 REF: 41415013334 REC NO : 1 TIP_____________________________ TOTAL___________________________ X___________________________ I AGREE TO PAY ABOVE TOTAL AMOUNT ACCORDING TO CARD ISSUER AGREEMENT 252 • Integrated Payment Appendix ER-650/650R...
-
Page 265: Manual Card Entry
4. When verification is complete, the draft is printed. Note: If multiple documents are to be printed, the message “PRESS CASH TO CONTINUE” displays. Tear off the printer paper, and press CASH to resume printing. Integrated Payment Appendix • 253 ER-650/650R... -
Page 266: Merchandise Return
CONTINUE” displays. Tear off the printer paper, and press CASH to resume printing. Sample Draft 5/26/04 10:42 SALE -2.00 ************6301 APP: *7 REF: 00003 REC NO : 3 X___________________________ I AGREE TO PAY ABOVE TOTAL AMOUNT ACCORDING TO CARD ISSUER AGREEMENT 254 • Integrated Payment Appendix ER-650/650R... -
Page 267: Void Transaction
█ ENTER REF NO █ ████████████████ TAX 0.00 SUBT 12.00 6. Enter the Reference number from the transaction to be voided; press CASH. The message “WAITING RESP.” displays until the transaction is found and the original record removed. Integrated Payment Appendix • 255 ER-650/650R... -
Page 268: Local Total Report
Sample Tip Chit DATE 09/27/2004 MON TIME 10:41 SALE AMOUNT: $426 TIP AMOUNT: $1.50 REF: * REC: 2 EMPLOYEE1 NO.000023 REG 01 256 • Integrated Payment Appendix ER-650/650R... -
Page 269: Close Batch
4.CHG. BATCH NUMBER 5.ISSUE LOCAL TOTAL 6.ISSUE TRANSACTION 3. Press 2 to close the current batch. The message “WAITING RESP” displays. When communication is complete, the Local Batch Status prints and the batch is closed. Integrated Payment Appendix • 257 ER-650/650R... -
Page 270: Integrated Payment Program Requirements
From the appropriate charge program screen, select Y (yes) at the CONNECT EFT field. Select CREDIT, DEBIT or GIFT at the SELECT field. Check with your CRS representative to verify availability of different payment methods. 258 • Integrated Payment Appendix ER-650/650R... -
Page 271: Datatran Operation Menu
Select Initialize EFT to verify communications, software versions and installed networks. DATE 5/24/2004 THU TIME 16:15 ** LIST INSTALLED NETWORRKS ** List of Installed Networks CHK DEN --- --- VER:3.89 Software Version OFF ON OFF OFF EMPLOYEE1 NO.000019 REG 01 Status of Installed Integrated Payment Appendix • 259 ER-650/650R... -
Page 272: Clear Current Batch
This report is added for ease of customer balancing actual totals in the Datatran to the system wide reports. A summary of each kind of credit card and a batch total should match the totals within the ER-650/ER-600 system-wide report before the Settle Batch is attempted. DATE 5/24/2004 WED TIME 10:55... -
Page 273: Issue Batch Status
Follow the prompts to enter the record number, original transaction amount and tip amount. If the record number and transaction number are valid, the tip amount is entered in the batch and a tip entry chit prints. Integrated Payment Appendix • 261 ER-650/650R... -
Page 274: Local Transaction Report Key
B. Transaction Status: The DataTran will use this field to return the current status of each accessed transaction. Allowed values: “A” = Authorized but not captured, “C” = Captured, “F” = Forced Entry, or “V” = Void. 262 • Integrated Payment Appendix ER-650/650R... - Page 275 U. Payment Service Indicator: When available, the DataTran will use this field to return the Payment Service Indicator (also referred to as the ACI field) of each accessed transaction. Integrated Payment Appendix • 263 ER-650/650R...
- Page 276 Entry Mode: When available, the DataTran will use this field to return the entry mode of each accessed transaction. BB. Original Authorization Amount: When available, the DataTran will use this field to return the original authorization amount of each accessed transaction. Format: -9999999.99 (decimal point required). 264 • Integrated Payment Appendix ER-650/650R...
-
Page 277: Glossary Of Terms
Cancel Press the CANCEL function to abort a transaction in progress. All current items are removed (voided). Check Cash Use the CHECK CASH function to exchange a check for cash outside of a sale. Glossary of Terms • 265 ER-650/650R... -
Page 278: Default Program
Change is calculated and issued in home currency. Default Program The original program installed in the ER-650/650R. The register has a default program which makes it operational after a RAM clear. Nearly all option, rate, and status programs are set to zero as the default condition. -
Page 279: Electronic Journal
In the United States, Food Stamps may be used to purchase eligible food items at food stores that participate in the program. The ER-650/650R can assist a retailer in handling food stamp transactions by sorting food stamp and non-food stamp eligible items within each sale and tracking food stamp payments for eligible items. - Page 280 Price look-ups (PLUs) are accessed by indexing a code number and pressing the PLU key, or by pressing a PLU key. PLUs can be programmed with a preset or open price. PLUs record their own activity count and dollar total on the PLU report. 268 • Glossary of Terms ER-650/650R...
-
Page 281: Post Tendering
Stock is maintained increments to the second decimal position, i.e. "X.XX".) Surcharge (Item) An item percent surcharge adds a percentage to the price of an item. This addition nets the PLU total. Glossary of Terms • 269 ER-650/650R... -
Page 282: Tax Shift
A void operation will erase a previous item entry. It must be used inside of a sale only. Waste The Waste function is used to start and end entries of items that are wasted. Inventory is adjusted. 270 • Glossary of Terms ER-650/650R... -
Page 283: Index
21 pop-up 21 Cancel printing names 154 Operation 49 programming 158 Cancel key 112 programming entry method 146 CANCEL key 9 programming staydown/pop up 146 programming 168 push button 21 Cash sign off instructions 22 Index • 271 ER-650/650R... - Page 284 GUEST key 10 operation 53 DRIVE THRU operations 74 DRIVE THRU key 10 Hard Check operations 71 Hardware Test 105 Home Currency Symbol Eat In setting 154 operation 53 EAT-IN key 10 electronic journal 156 Electronic Journal 272 • Index ER-650/650R...
- Page 285 PLU Options - Reference Information 126 operation 36 PLU Price Inquiry 35 Modifier/Size 191 PLU Repeat Entry Multiplication Operation 27 operation 28 PLU Report 240 Multiplication With Decimal Point 29 PLU Stock 222 Post Tender 60 Programming 146 Index • 273 ER-650/650R...
- Page 286 Stock Report 244 Rear Display 17 Stop Register Printing 87 Messages 17 Subtotal RECD ON ACCT 1-3 key print when pressed 154 programming 196 Subtotaling a Sale 53 RECD ON ACCT keys 11 System Option Programming 142 Receipt 274 • Index ER-650/650R...
- Page 287 204 Time Report 239 TIP key 12 programming 205 Training Mode 88 printing "TRAIN MODE" 155 Training Mode Password 232 Transaction # resetting on reports 146 Unpacking 2 UPC number 25 VALIDATE key programming 207 Index • 275 ER-650/650R...