Sam4s ER-230 Series Operation And Program Manual
Hide thumbs
Also See for ER-230 Series:
- Operation and program manual (262 pages) ,
- Operation and programming manual (174 pages) ,
- Operation and program manual (2 pages)

Related Manuals for Sam4s ER-230 Series


Summary of Contents for Sam4s ER-230 Series
- Page 1 ER-230 Series Operation and Program Manual All specifications are subject to change without notice...
-
Page 2: Precaution Statements
Precaution Statements Follow these safety, servicing and ESD precautions to prevent damage and to protect against potential hazards such as electrical shock. 1-1 Safety Precautions 6. Observe the original lead dress, especially near the following areas: 1. Be sure that all built-in protective sharp edges, and especially the AC and devices are replaced. - Page 3 1-2 Servicing Precautions WARNING: First read the-Safety Precautions-section of this manual. If some unforeseen circumstance creates a conflict between the servicing and safety precautions, always follow the safety precautions. WARNING: An electrolytic capacitor installed with the wrong polarity might explode. 5.
-
Page 5: Table Of Contents
Contents Getting Started About the ER-230 Series ..............1 Standard Hardware ..............1 Optional Hardware ..............1 Software Features ..............1 Mode Change..................2 Installing the Paper ................2 Display ..................3 Keyboards ................5 Operating Instructions Function Key Descriptions ..............7 Clerk Sign-On/Sign-Off ..............10 Direct Sign-On ..............10 Coded Sign-On .............. - Page 6 Open Drawer ................ 33 Non Add Number..............33 Received On Account Operations ............34 Paid Out Operations................. 35 Subtotalling a Sale ................36 Totalling and Tendering ..............37 Totalling a Cash Sale ............. 37 Totalling a Cheque Sale ............37 Tendering a Cash Sale ............
- Page 7 Print Option Table ..............75 Function Key Programming............... 78 Program 70 - Function Key Options ......... 79 Program 80 - Function Key Descriptor........80 Program 90 - Function Key HALO ..........81 ADD CHECK (tray total) ............82 CANCEL ................83 CASH...................
-
Page 9: Getting Started
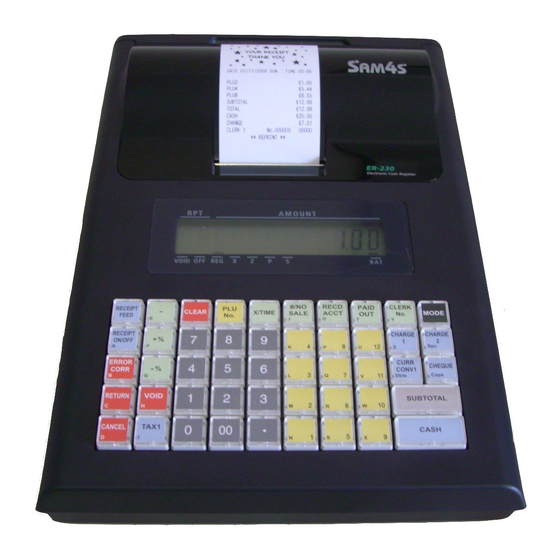
Getting Started About the ER-230 Series Standard Hardware 12-position front display standard. • Rear Display. • 48 position raised keyboard. • Communications ports: RS232C. • Optional Hardware Kitchen printer. • Bar code scanner. • PC Link. • Software Features Up to 2 price levels for each PLU. -
Page 10: Mode Change
Mode Change Mode Select Method The Mode key can be changed by either pressing the key until the indicator is shown under the correct mode on the display i.e. VOID, OFF, REG, X, Z, P, S 1. To select register press the MODE key until the display shows an indicator under REG MODE Fast Track Method... -
Page 11: Display
Display The rear display is a 12 digit display that allows your customer to monitor the transaction and view the sale total. Rear Display Information Item Count The number of times an item has been repeated is displayed Amount The amount of the item, subtotal or total, is displayed in the rightmost portion of the display Rear Display Message Change Due... -
Page 12: Error Code Table
Error Code Table SEQUENCE ERROR PLU NO DATA CLERK ERROR AMOUNT COUNT OVER LAN TRAN COMMUNICATION ERROR TIME AND DATE LIMIT OVER INACTIVE X MODE ONLY NONADD ADDCHECK ERROR CONDIMENT ERROR REQ. STOCK REQ. DRAWER CLERK NOT MATCH REQ. DECLARATION OFF LINE REQ. -
Page 13: Keyboards
Keyboards The ER-230 keyboard is shown below with the default key assignments. This configuration has 12 keyboard locations, and Programmable key locations. RECEIPT CLEAR X/TIME #/NO RECD PAI D CLERK MODE FEED SALE ACCT RECEIPT CHARGE CHARGE ON / OFF ERROR CONV1 CHEQUE... -
Page 15: Operating Instructions
Operating Instructions Function Key Descriptions Keys are listed in alphabetical order. Some of the keys described below are not included on the default keyboard, and can be allocated if required. Keyboard Legend Description #/NO SALE Use as a non-add key to print up to an 8-digit numeric entry on the receipt and journal. - Page 16 CHEQUE Use to finalise CHEQUE sales. Calculates the sale total including tax, finalises the sale, and opens the cash drawer. Change computation is allowed by entering an amount before pressing the CHEQUE key. The cash drawer will open only if the amount tendered is equal to or greater than the total amount of the sale.
- Page 17 Up to five % keys may be placed on the keyboard. % Keys (1- 5) Each % key is set with a specific function, such as item discount or surcharge, or sale discount or surcharge. The percent rate may be entered or preprogrammed, or the percent keys can be programmed with a negative, open or preset price, thus acting as coupon keys.
-
Page 18: Clerk Sign-On/Sign-Off
Clerk Sign-On/Sign-Off See "System Option Programming”, to review your clerk options: System option #2 and #3 allows you to select direct or code • entry sign on and/or stay-down or pop-up operation. Depending on how your machine has been programmed, sign-on will take place only at the beginning of a shift (stay-down), or may have to be repeated for each transaction (pop-up). -
Page 19: Receipt On And Off Function Key
Receipt On and Off Function Key 1. Move to the REG position. 2. Press the function labeled RECEIPT ON/OFF to toggle the receipt On / Off RECPT OFF Receipt On and Off Access Code 1. Move to the X position. 2. -
Page 20: Item Registrations
Item Registrations All registrations on ER-230 Series are made to open or preset PLUs. In place of traditional PLU keys, some PLUs are located directly • on the keyboard. When more items or categories are needed than the number of •... -
Page 21: Open Keyboard Plu Entry
Open Keyboard PLU Entry THANK-YOU 1. Enter an amount on the numeric CALL AGAIN keypad. DATE 06/09/2009 WED TIME 8:33 Do not use the decimal key. For example, for £2.99, enter: PLU1 T1 £2.99 TAX1 £0.18 TOTAL £3.17 CASH £3.17 2. -
Page 22: Keyboard Plu Repeat Entry
Keyboard PLU Repeat Entry Open or preset price PLUs can be repeated as many times as necessary by pressing the same PLU again. The number of times the item is repeated is shown on the display. THANK-YOU 1. Enter an amount on the numeric CALL AGAIN keypad. -
Page 23: Keyboard Plu Multiplication
Keyboard PLU Multiplication When several of the same items are to be sold of the same PLU, you can use multiplication. You can enter a quantity (1 to 999.999) using the X/TIME key. You can also multiply open or preset PLUs. THANK-YOU 1. -
Page 24: Keyboard Plu Multiplication With Decimal Point
Keyboard PLU Multiplication with Decimal Point If you are selling items by weight, or decimal quantities such as half-pints, you can multiply a fraction of a unit. THANK-YOU 1. Enter the amount with the CALL AGAIN decimal point, press the X/TIME key. -
Page 25: Split Pricing (Keyboard Plu)
Split Pricing (Keyboard PLU) When items are priced in groups, i.e. 3 for £1.00, you can enter the quantity purchased and let the register calculate the correct price. THANK-YOU 1. Enter the quantity purchased, CALL AGAIN press the X/TIME key. DATE 06/09/2009 WED TIME 8:33 For example, enter:... -
Page 26: Single Item Keyboard Plu
Single Item Keyboard PLU Single item PLUs automatically total as a cash sale immediately after registration. Use single item PLUs for speedy one-item sales. For example if you are selling admission tickets, and all ticket sales are one item sales, you can use an open or preset PLU. After each registration, the drawer will immediately open, and a separate transaction receipt is printed. -
Page 27: Open Code Entry Plu
Open Code Entry PLU If the PRESET status of a PLU is set to N (no), the PLU will operate as an open PLU. See "PLU Programming" in the "Program Mode Programming" chapter to program PLU descriptors and options. THANK-YOU 1. -
Page 28: Code Entry Plu Multiplication
Code Entry PLU Multiplication When several of the same items are to be entered into the same PLU, you can use multiplication. You can enter a quantity (1 to 999.999) using the X/TIME key. You can multiply open or preset PLUs. THANK-YOU 1. -
Page 29: Code Entry Plu Multiplication With Decimal Point
Code Entry PLU Multiplication with Decimal Point If you are selling items by weight, or decimal quantities such as half-pints, you can multiply a fraction of a unit. THANK-YOU 1. Enter the quantity with the CALL AGAIN decimal point, press the X/TIME key. -
Page 30: Modifier Key
Modifier Key Pressing a modifier key alters the next PLU registered, either by changing the code number of the PLU so that a different item is registered, or by just adding the modifier descriptor and registering the same PLU. See "Modifier 1-5" in the "Program Mode Programming" chapter in order to determine how the modifier key will affect the PLU entry. -
Page 31: Price Level Key
Price Level Key If you choose to use the price level feature, you must allocate memory for each level. See "Memory Allocation" in the "Service Mode Programming" chapter. Note that the default program selects two price levels. You must also place price level keys on the keyboard. See "Function Key Assignment"... -
Page 32: Promo (Promotion)
PROMO (promotion) The PROMO key allows you to account for promotional items. Pressing this key will remove an item's cost from the sale, and the PROMO item will not be added to the PLU sales total, but it is added to the item sales counter. -
Page 33: Waste
Waste The WASTE key allows control of inventory by accounting for items that must be removed from stock due to spoilage, breakage or mistakes. Press the WASTE key before entering wasted items, and then press the WASTE key again to finalise. THANK-YOU 1. -
Page 34: Percent Key Operations
Percent Key Operations A total of five % functions are available to be allocated to the keyboard. Each function is individually programmable to add or subtract, from an individual item or from a sale total, amounts (coupons) or percentages. You can also program the percentage key taxable or non-taxable, so that sales taxes are calculated on the net, or the gross amount of the item or sale. -
Page 35: Enter A Percent Discount On An Item
Enter a Percent Discount on an Item You can also operate the percentage functions by entering the percentage of the discount or surcharge. If necessary, you can enter a fractional percentage up to 3 digits beyond the decimal (i.e. 99.999%). THANK-YOU 1. -
Page 36: Coupon On Sale (Vendor Coupon)
Coupon on Sale (Vendor Coupon) When programmed as "amount", "sale", "open" and "negative", a % key will perform a coupon against a sale (or vendor coupon.) Also, depending upon programming: You may be allowed to enter only one coupon in a sale, after the •... -
Page 37: Coupon On Item (Store Coupon)
Coupon on Item (Store Coupon) When programmed as "amount", "item", "open" and "negative", a % key will perform a coupon against an item (or store coupon.) In this case, you must press the PLU (or enter the PLU number) of the PLU you wish the coupon to be subtracted from. -
Page 38: Return Merchandise Registrations
Return Merchandise Registrations If you wish to return or refund an item, press RETURN, then re-enter any item. You can return merchandise as part of a sale, or you can return merchandise as a separate transaction and return cash to the customer. THANK-YOU 1. -
Page 39: Voids And Corrections
Voids and Corrections Error Correction (Void Last Item) This function corrects the last item entered. THANK-YOU 1. Register the item you wish to CALL AGAIN sell. DATE 06/09/2009 WED TIME 8:33 2. Press the ERROR CORR key: PLU1 T1 £2 29 PLU2 £1.29 ERR CORR ----------------------------... -
Page 40: Cancel
Cancel The CANCEL key allows you to cancel any transaction. Anything registered within the transaction before the CANCEL key is pressed is automatically cancelled. The CANCEL key can be inactivated through programming, see "Function Key Programming" in the "Program Mode Programming" chapter. -
Page 41: No Sale Operations
No Sale Operations Open Drawer The #/NO SALE key will open the cash drawer when you have not already started a transaction. The no sale function can be disabled through programming, see "Function Key Programming" in the "Program Mode Programming" chapter. THANK-YOU 1. -
Page 42: Received On Account Operations
Received On Account Operations You can use one of the received on account functions (RA1-RA3) to accept Cash, Cheques or Charge sales into the cash drawer when you are not actually selling merchandise. For example, use received on account to accept payments for previously sold merchandise, or record loans to the cash drawer. -
Page 43: Paid Out Operations
Paid Out Operations You can use the paid out function (PO1-PO3) to track Cash, Cheques or Charge sales paid out or to record loans from the cash drawer. THANK-YOU 1. Press one of the paid out CALL AGAIN keys(PO1-PO3) DATE 06/09/2009 WED TIME 8:33 CASH £10.00... -
Page 44: Subtotalling A Sale
Subtotalling a Sale 1. Register the items you wish to sell. 2. Press SBTL. The subtotal will display with the message "Sub" indicated on the rear display. SBTL 3. The subtotal can be printed if the system option is set. 4. -
Page 45: Totalling And Tendering
Totalling and Tendering There are ten tender functions available to categorise sales. CASH and CHEQUE are individual keys on the keyboard Totalling a Cash Sale THANK-YOU 1. Register the items you wish to CALL AGAIN sell. DATE 06/09/2009 WED TIME 8:33 2. -
Page 46: Tendering A Cash Sale
Tendering a Cash Sale THANK-YOU 1. Register the items you wish to CALL AGAIN sell. DATE 06/09/2009 WED TIME 8:33 2. Enter the amount tendered by the customer. For example, for PLU1 T1 £2.99 £20.00 enter: PLU1 T1 £2.99 £1.99 PLU2 £7.96 TAX1... -
Page 47: Totalling A Charge Sale
Totalling a Charge Sale Use the charge keys to track charge or credit card sales. See "Function Key Programming" in the "Program Mode Programming" chapter to change the descriptors for the charge tender functions. For example, you can use CHARGE 1 to track Visa card sales. The descriptor "VISA"... -
Page 48: Tendering A Charge Sale
Tendering a Charge Sale Tendering a charge sale may or may not be allowed. See "Function Key Programming" in the "Program Mode Programming" chapter to set tendering options for the charge keys, i.e. whether to allow over tendering or to enforce tendering. THANK-YOU 1. -
Page 49: Cheque Cashing
Cheque Cashing The Cheque Cashing function exchanges Cash for a Cheque. If you wish to cash cheques, you must place a CHKCASH key on the keyboard. See "Function Key Assignment" in the "Program Mode Programming" chapter. THANK-YOU 1. Enter the amount of the CALL AGAIN CHEQUE tendered by the customer. -
Page 50: Split Tender
Split Tender Split tendering is paying for one transaction by more than one payment method. For example, a £20.00 sale could be split so £10.00 is paid in cash, and the remaining £10.00 is paid by a Cheque. If necessary, you can make several different payments. -
Page 51: Post Tender
Post Tender Post tendering allows the register to compute change after the sale has been totalled and the drawer is open. This feature is useful when a customer changes the amount of the tender. Normally, this function is not allowed. If you wish to allow post tendering, you must set the appropriate system option. -
Page 52: Currency Conversion
Currency Conversion If you normally accept currency from neighbouring nations, you can program to convert the subtotal of a sale to the equivalent cost in the foreign currency. You can set up four separate conversion functions for different foreign currencies. To do this, you need to program the conversion factor. -
Page 53: Not Found Plu Function
Not Found PLU function This option can be used to create codes quickly in Register for new items. 1. Move to the REG position. 2. Sell the item, which does not exist in the register For Example… enter 1000 and press the PLU key, (or scan a barcode using the scanner) 3. -
Page 54: Z Mode Reporting
X / Z Mode Reporting System reports are divided into two basic categories: X reports, which read totals without resetting • Z reports, which read totals and reset them to zero • Most reports are available in both categories. Some reports, such as the Cash-in- Drawer report and the From-To PLU report are available only as X reports. -
Page 55: Report Table
Report Table Report Type Report Report Control Key Sequence Number Mode Lock Position Financial 1 – SBTL 1 – SBTL 201 – SBTL 201 – SBTL Time 2 – SBTL 2 – SBTL 202 – SBTL 202 – SBTL All PLU 3 –... -
Page 56: Report Table
Report Table 300 -SBTL PRINT ALL EJ 301 -SBTL PRINT EJ CASH 302 -SBTL PRINT EJ CHEQUE SALES 303 –SBTL PRINT EJ CHARGE SALES 304 -SBTL PRINT EJ % SALES 305 -SBTL PRINT EJ RA/PO SALES 306 -SBTL PRINT EJ RETURN SALES 307 -SBTL PRINT EJ... -
Page 57: Cash Declaration
Cash Declaration If compulsory cash declaration is required, you must declare the count of the cash drawer prior to taking X or Z financial and clerk reports. You can enter the cash drawer total in one step, or to facilitate the counting of the cash drawer, you can enter each type of bill/coin and CHEQUEs separately and let the register act as an adding machine. -
Page 58: Service Mode Programming
Service Mode Programming Overview The following procedures are done from the Service Mode menu: Clear all totals • Clear grand total • Clear PLU file • EPROM Information • Memory Allocation • Assignment of functions to keyboard locations • RS232C Port •... -
Page 59: Ram Clearing
Ram Clearing All Memory Clear - ** WARNING** RAM clearing the cash register erases all programming and totals. Use this program the first time the cash register is programmed. Follow this procedure to clear totals from memory. 1. Unplug ECR. 2. -
Page 60: Clear All Totals
Clear All Totals 1. Move to the S position. 2. To Reset Totals, enter 20, press the SBTL key. SBTL Clear Grand Totals only 1. Move to the S position. enter 30, press the SBTL key. 2. To Reset Z1 Totals (Not current sales), SBTL Clear PLU File... -
Page 61: Function Key Assignment Programming
Function Key Assignment Programming Function keys may be relocated, inactivated or changed with this program. For example, you may wish to place functions, such as TAX2 or %4 that are not placed on the default keyboard. Or perhaps, you may wish to remove a function, such as CANCEL, for security reasons. -
Page 62: Function Key Codes
Function Key Codes Code Function Code Function Code Function NLU 1 CHARGE 7 MOD 5 NLU 12 CHARGE 8 PAID OUT 1 Numeric 1 CHEQUE CASHING PAID OUT 2 Numeric 2 CHEQUE ENDORSE PAID OUT 3 Numeric 3 CHEQUE PAPER FEED (not allocatable) Numeric 4 CLEAR (ESC) -
Page 63: Rs232C Port
NONE RECEIPT PRINTER SCANNER Initial Feeding Line KP 0 - 20 End Feeding Line KP 0 - 20 Printer Type NONE EPSON U295 SAM4S ELLIX-10 EPSON U300 SAM4S ELLIX-20 EPSON U325 CITIZEN3550 EPSON U375 CITIZEN810 STAR SP-200 CITIZEN230 STAR SP-298... -
Page 64: Program Mode Programming
Program Mode Programming Default Programming All keyboard PLUs are non-taxable and open, without entry limits • by default status programming of "00000000". All system options are set to 0 in default programming, unless • otherwise noted. Change only the options, which will deviate, from default programming. -
Page 65: Descriptor Programming Methods
Descriptor Programming Methods Descriptors are programmable for PLUs, function keys, groups, clerks and the logo/messages. There is a method available to program descriptors by codes representing each letter this is refered to as the Descriptor Code Method. Note :- To program by three digit alpha character codes you must select ‘No’... -
Page 66: Descriptor Code
Descriptor Code Descriptor Code Chart CHAR Ç ü é â ä à å ç ê ë CODE CHAR è ï î ì Ä Å É æ Ǽ ô CODE CHAR ö ò û ù ÿ Ö Ü ■ £ ¥ CODE CHAR €... -
Page 67: Tax Programming
Tax Programming Each tax may be either an add-on tax (added to the cost of a taxable item), or a value added tax (VAT) that is included in the price of the item. Important Note: After you have entered your tax program(s), test for accuracy by entering several transactions of different amounts. -
Page 68: Plu Programming
PLU Programming All PLUs, whether they are registered by pressing a PLU key on the keyboard, or by entering the PLU number and pressing the PLU key, have the same programming options. These options are set through separate programs: Program 100 – PLU Status Programming •... -
Page 69: Program 100 - Plu Status Programming
Program 100 - PLU Status Programming 1. Move to the P position. 2. To begin the program, enter 1 0 0, press the SBTL key. SBTL 3. Select the PLU or PLUs you wish to program in one of the following ways: Press a PLU key on the keyboard, •... - Page 70 PLU Status Chart Value Address Program Option Yes = 0 PLU is preset? No = 1 Yes = 0 PLU is override preset ? No = 2 Yes = 4 PLU is taxable by rate 1? No = 0 Yes = 1 PLU is taxable by rate 2? No = 0 Yes = 2...
-
Page 71: Program 150 - Plu Group Assignment
Program 150 - PLU Group Assignment Each PLU may report to any three levels of groups. Group totals appear on reports, so that you can track sales of different types of items. A group can also be used to designate items that are to print on an optional kitchen printer. -
Page 72: Program 200 - Plu Price/Halo Programming
Program 200 - PLU Price/HALO Programming If a PLU is open, set the HALO (high amount lock out) here. If a PLU is preset set the preset price here. 1. Move to the P position. 2. To begin the program, enter 2 0 0, press the SBTL key. SBTL 3. -
Page 73: Program 250 - Plu Stock Amount Programming
Program 250 - PLU Stock Amount Programming With this program, you can add stock to the PLU sales counters for PLUs you have designated as stock keeping PLUs. 1. Move to the P position. 2. To begin the program, enter 2 5 0, press the SBTL key. SBTL 3. -
Page 74: Program 300 - Plu Description Programming
Program 300 - PLU Description Programming Program descriptors by typing descriptors on the alpha keyboard overlay or by entering three digit alpha character codes. To program by three digit alpha character codes you must select ‘No’ in system option #25(See “System Option Programming). 1. -
Page 75: Program 350 - Plu Link Programming
Program 350 - PLU Link Programming PLU link programming allows you to link a PLU to another PLU, so that registration of the first PLU will automatically trigger registration of the linked PLU. For example, you may wish to link a bottle deposit with the sale of beverages, or you may wish to register a group of items normally sold together. -
Page 76: Program 400 - Plu Delete Programming
Program 400 – PLU Delete Programming NOTE: To delete a PLU, all totals for the PLU must be cleared from Z reports(including Stock and PLU reports.) 1. Move to the P position. 2. To begin the program, enter 4 0 0, press the SBTL key. SBTL 3. -
Page 77: Program 450 - Plu Mix & Match Programming
Program 450 - PLU MIX & MATCH Programming Move to the P position. To begin the program, enter 4 5 0, press the SBTL key. SBTL 3. Select the PLU you wish to be linked to the mix & match table: Press a PLU key on the keyboard, •... -
Page 78: System Option Programming
System Option Programming Refer to the “System Option Table” to review the system options. Read each option carefully to determine if you wish to make any changes. NOTE: Because after clearing memory all options settings are automatically set, with your most likely option you do not need to program this section unless you wish to change the default status. -
Page 79: System Option Table
System Option Table Address SYSTEM OPTION VALUE Beeper is active? Yes = 0 No = 1 Clerk sign on is :- Sequential No. = code entry Clerks are: pop-up stay down Allow the post tender function? Yes = 1 No = 0 Cash Declaration Required before Z Yes = 1 Financial report? - Page 80 Reset the Financial report Z counter Yes = 1 after a Z1 Financial report? No = 0 Reset the Time report Z counter after Yes = 2 a Z1 Time report? No = 0 Reset the PLU report Z counter after a Yes = 4 Z1 PLU report? No = 0...
- Page 81 Disable level keys None Level1 Level2 Price level is: Pop-up after item Pop-up after sale = Stay-down Modifier is: Pop-up after item Pop-up after sale = Stay-down Electronic Journal Enabled Yes = 1 No = 0 Prompt Operator When EJ buffer is full Yes = 2 No = 0 Print Density(0-2)
-
Page 82: Print Option Programming
Print Option Programming Refer to the “Print Option Table” to review the print options. Read each option carefully to determine if you wish to make any changes. NOTE: Because after clearing memory all options settings are automatically set, with your most likely option you do not need to program this section unless you wish to change the default status. -
Page 83: Print Option Table
Print Option Table Address PRINT OPTION VALUE Yes = 1 Print tax symbol? No = 0 Void/Return totals will print Yes = 0 No = 1 Financial report? Audaction total will print on the Financial Yes = 2 No = 0 report? Yes = 0 Skip media totals with zero activity on... - Page 84 Address PRINT OPTION VALUE Print the tax amount on receipt? Yes = 0 No = 1 Print taxable totals? Yes = 2 No = 0 Print the tax rate? Yes = 4 No = 0 Print a Net Amount breakdown of the Yes = 1 VAT eligible sale? No = 0...
- Page 85 Print pre- logo Default User Number of Pre-feeding lines. Number of Post-feeding lines. NOTE 2: Print Option# 14,15,16,17 - If you are using the currency conversion feature, you can select the appropriate symbol for each foreign currency you are accepting. To select a different symbol, type descriptors on the alpha keyboard overlay or enter three digit alpha character codes.
-
Page 86: Function Key Programming
Function Key Programming Three programs are used to program function keys; Program 70 - is used to set each keys individual options • Program 80 - is used to program a 12 character alpha numeric • descriptor Program 90 - is used to set a high amount limit (HALO) •... -
Page 87: Program 70 - Function Key Options
Program 70 - Function Key Options Use Program 70 to set options for function keys. Because of the differences inherent in function keys, individual options will be different. See the specific instructions for each key in this chapter to find the options for each key. -
Page 88: Program 80 - Function Key Descriptor
Program 80 - Function Key Descriptor Program descriptors by typing descriptors on the alpha keyboard overlay or by entering three digit alpha character codes. To program by three digit alpha character codes you must select ‘No’ in system option #25(See “System Option Programming). 1. -
Page 89: Program 90 - Function Key Halo
Program 90 - Function Key HALO Use Program 90 to program a high amount lock out (HALO) for a function key. Only specific keys require this program. For example, you can set a HALO for the CASH, CHEQUE or CHARGE keys. -
Page 90: Add Check (Tray Total)
ADD CHECK (tray total) Options - Program 70 Repeat for another function key SBTL CASH CHECK Address OPTION VALUE Key is inactive? Yes = 1 No = 0 Compulsory before tendering? Yes = 2 No = 0 Advance the consecutive # when this Yes = 0 function is used? No = 4... -
Page 91: Cancel
CANCEL Options - Program 70 Repeat for another function key SBTL CANCEL CASH Address OPTION VALUE Key is inactive? Yes = 1 No = 0 Validation is compulsory? Yes = 4 No = 0 Descriptor - Refer to “Program 80 – Function Key Descriptor” HALO - Refer to “Program 90 –... -
Page 92: Cash
CASH Options - Program 70 Repeat for another function key SBTL CASH CASH Address OPTION VALUE Amount tender is compulsory? Yes = 1 No = 0 Disable under tendering? Yes = 4 No = 0 Open cash drawer? Yes = 0 No = 1 Exempt tax 1? Yes = 2... -
Page 93: Charge1-8
CHARGE1-8 Options - Program 70 Repeat for another function key SBTL CHARGE CASH Address OPTION VALUE Amount tender is compulsory? Yes = 1 No = 0 Disable under tendering? Yes = 4 No = 0 Open cash drawer? Yes = 0 No = 1 Allow over tendering ? Yes = 2... -
Page 94: Cheque
CHEQUE Options - Program 70 Repeat for another function key SBTL CHECK CASH Address OPTION VALUE Amount tender is compulsory? Yes = 1 No = 0 Disable under tendering? Yes = 4 No = 0 Open cash drawer? Yes = 0 No = 1 Exempt tax 1? Yes = 2... -
Page 95: Cheque Cashing
CHEQUE CASHING Options - Program 70 Repeat for another function key CHECK SBTL CASH CASH Address OPTION VALUE Key is inactive? Yes = 1 No = 0 Validation is compulsory? Yes = 4 No = 0 Descriptor - Refer to “Program 80 – Function Key Descriptor”HALO - Refer to “Program 90 –... -
Page 96: Currency Conversion
CURRENCY CONVERSION Currency Conversion Rate - Program 90 1. Move to the P position. 2. To begin the program, enter 9 0, press the SBTL key. SBTL 3. Enter the exchange rate of up to 7 digits (do not enter the decimal point), then enter a number from 0 to 7 to indicate the decimal position. -
Page 97: Error Correct
ERROR CORRECT Options - Program 70 Repeat for another function key ERROR SBTL CASH CORRECT Address OPTION VALUE Key is inactive? Yes = 1 No = 0 Validation is compulsory? Yes = 4 No = 0 Descriptor - Refer to “Program 80 – Function Key Descriptor” HALO - Refer to “Program 90 –... -
Page 98: Ns (No Sale)
#/NS (no sale) Options - Program 70 Repeat for another function key SBTL #/NS CASH Address OPTION VALUE No Sale is inactive? Yes = 1 No = 0 No Sale inactive after non-add # Yes = 4 entry? No = 0 Enforce non-add # entry at start of Yes = 1 sale? -
Page 99: Return
RETURN Options - Program 70 Repeat for another function key SBTL RETURN CASH Address OPTION VALUE Key is inactive? Yes = 1 No = 0 Validation is compulsory? Yes = 4 No = 0 Descriptor - Refer to “Program 80 – Function Key Descriptor” HALO - Refer to “Program 90 –... -
Page 100: Modifier 1-5
MODIFIER 1-5 Options - Program 70 Repeat for another function key SBTL CASH Address OPTION VALUE Modify PLU#? Yes = 2 No = 0 Print modifier descriptor on the Yes = 2 receipt? No = 0 Value of affected digit(0-9) * Affect Digit(1-14) of PLU# Repeat for another function key... -
Page 101: Promo
PROMO Options - Program 70 Repeat for another function key SBTL PROMO CASH Address OPTION VALUE Key is inactive? Yes = 1 No = 0 Fixed value of 0 Descriptor - Refer to “Program 80 – Function Key Descriptor” ER230 Series Program Mode Programming •... -
Page 102: Paid Out1-3
PAID OUT1-3 Options - Program 70 Repeat for another function key SBTL CASH Address OPTION VALUE Key is inactive? Yes = 1 No = 0 Validation is compulsory? Yes = 4 No = 0 Descriptor - Refer to “Program 80 – Function Key Descriptor” 94 •... -
Page 103: Recd On Acct1-3
RECD ON ACCT1-3 Options - Program 70 Repeat for another function key SBTL CASH Address OPTION VALUE Key is inactive? Yes = 1 No = 0 Validation is compulsory? Yes = 4 No = 0 Descriptor - Refer to “Program 80 – Function Key Descriptor” HALO - Refer to “Program 90 –... -
Page 104: Subtotal
SUBTOTAL Options - Program 70 Repeat for another function key SBTL SUBTOTAL CASH Address OPTION VALUE Key is inactive? Yes = 1 No = 0 Descriptor - Refer to “Program 80 – Function Key Descriptor” 96 • • • • Program Mode Programming ER230 Series... -
Page 105: Tax Exempt
TAX EXEMPT Options - Program 70 Repeat for another function key SBTL CASH EXEMP Address OPTION VALUE Exempt tax 1? Yes = 1 No = 0 Exempt tax 2? Yes = 2 No = 0 Exempt tax 3? Yes = 4 No = 0 Exempt tax 4? Yes = 1... -
Page 106: Validate
VALIDATE Options - Program 70 Repeat for another function key SBTL VALID CASH Address OPTION VALUE Enter Port Number Enter Zero if validation is not used. Key is inactive? Yes = 1 No = 0 Allow multiple validation? Yes = 2 No = 0 Descriptor - Refer to “Program 80 –... -
Page 107: Void
VOID Options - Program 70 Repeat for another function key SBTL VOID CASH Address OPTION VALUE Key is inactive? Yes = 1 No = 0 Validation is compulsory? Yes = 4 No = 0 Descriptor - Refer to “Program 80 – Function Key Descriptor” HALO - Refer to “Program 90 –... -
Page 108: Waste
WASTE Options - Program 70 Repeat for another function key SBTL WASTE CASH Address OPTION VALUE Key is inactive? Yes = 1 No = 0 Validation is compulsory? Yes = 4 No = 0 Descriptor - Refer to “Program 80 – Function Key Descriptor” HALO - Refer to “Program 90 –... - Page 109 %1- %5 Options - Program 70 Repeat for another function key SBTL CASH Address OPTION VALUE Apply an: Amount Percentage Key is inactive? Yes = 2 No = 0 % key is: Open Preset % key is: Sale Item Allow % key override preset? Yes = 4 No = 0 % key is:...
- Page 110 HALO - Program 90 Repeat for another function key Enter 5 digit rate or SBTL CASH amount (see note below) Note: If key is amount , enter 5 digit HALO, or 0 for no HALO. If key is percentage enter the percentage in a five digit format, without the decimal (XX.XXX).
-
Page 111: Clerk Programming
Clerk Programming Clerks have the following programming options. These options are set through separate programs: Program 800 - Secret Code programming • This determines the code that is used for clerk sign on if a code entry sign on method is selected in system option #2 (See "System Option Programming") Program 801 –... -
Page 112: Program 800 - Secret Code Programming
Program 800 - Secret Code Programming 1. Move to the P position. 2. To begin the program, enter 8 0 0, press the SBTL key. SBTL 3. Enter the number (1-5) of the clerk you wish to program; press the X/TIME key. X/TIME 4. -
Page 113: Program 801 - Clerk Status Programming
Program 801 - Clerk Status Programming 1. Move to the P position. 2. To begin the program, enter 8 0 1, press the SBTL key. SBTL 3. Enter the number (1-5) of the clerk you wish to program; press the X/TIME key. X/TIME 4. - Page 114 106 • • • • Program Mode Programming ER230 Series...
-
Page 115: Program 810 - Clerk Description Programming
Program 810 - Clerk Description Programming Program descriptors by typing descriptors on the alpha keyboard overlay or by entering three digit alpha character codes. To programby three digit alpha character codes you must select ‘No’ in system option #25(See “System Option Programming”). 1. -
Page 116: Mix & Match Programming
Mix & Match Programming Mix & Match Tables have the following programming options. These options are set through separate programs: • Program 600 - Trip Level Programming This allows you to define the quantity of items that must be sold before the discount is given. -
Page 117: Program 600 - Trip Level Programming
Program 600 - Trip Level Programming Move to the P position. To begin the program, enter 6 0 0, press the SBTL key. SBTL 3. Enter the number of the M&M table you wish to program; press the X/TIME key. X/TIME 4. -
Page 118: Program 610 - Mix & Match Description
Program 610 - Mix & Match Description Program descriptors by typing descriptors on the alpha keyboard overlay or by entering three digit alpha character codes. To program by three digit alpha character codes you must select ‘No’ in system option #25(See “System Option Programming”). Move to the P position. -
Page 119: Group Programming
Group Programming Group totals are available to accumulate totals of individual PLUs that are assigned to each group. Each PLU can be assigned to one, two or three different groups. Use program 900 to assign a group status • i.e. a group can be set to not add to the total of all groups, or a group can be used to designate like items for kitchen printer assignment. - Page 120 Programming Group Description 1. Move to the P position. 2. To begin the program, enter 9 1 0, press the SBTL key. SBTL 3. Enter the number (1-20) of the group you wish to program; press the X/TIME key. X/TIME 4.
-
Page 121: Miscellaneous Programming
Miscellaneous Programming Macro Key Sequence Programming Macros are special function keys that are used to execute a sequence of key depressions. For example, a macro might be used to execute a string of reports or to automatically tender a preset amount. Up to ten different macros may be placed on the keyboard. - Page 122 Programming the Macro Name Up to ten function locations may be designated as Macro keys. You may wish to program a name for a macro. For example if a macro executes a series of commands to produce daily reports, you can program the descriptor “DAILY”, so the macro can easily be identified. Macro names can also be helpful when looking at keyboard layout information with the PC communication utility.
-
Page 123: Logo Description Programming
Logo Description Programming A preamble message of up to six lines can be printed at the top of each receipt; a postamble message of up to six lines can be printed at the bottom of each 1. Move to the P position. 2. - Page 124 Programming the Financial Report Message The Financial Report selection allows you to reprogram the descriptors that appear with the Financial Report totals and counters. For example, the first total on the financial report "+PLU TTL" represents the total of all positive PLU entries. You might wish to re-label this total to say "FOOD SALES".
- Page 125 ER230 Series Program Mode Programming • • • • 117...
- Page 126 Financial Report Message Message Line Message Line Message Line +PLU TTL GROSS SALES FOREIGN 1 -PLU TTL CASH SALES FOREIGN 2 ADJST TTL CHEQUE SALES FOREIGN 3 NONTAX R/A 1 FOREIGN 4 TAX1 SALES R/A 2 DRWR TTL TAX2 SALES R/A 3 PROMO TAX3 SALES...
- Page 127 Programming the Clerk Report Message The Clerk Report selection allows you to reprogram the descriptors that appear with the Clerk Report totals and counters. For example, the first total on the clerk report "NET SALES" might be re-labeled to say "MONIES". You can reprogram any of the Financial Report totals listed here with any 12- character descriptor.
-
Page 128: Nlu Code Number Programming
NLU Code Number Programming NLU are fixed keys on the keyboard that access specific PLUs. On the default keyboard, there are 12 NLU keys and the PLU# assigned to the NLU key is the same, i.e. NLU key number one is PLU #1. However, with this program, you can assign any PLU number you wish to any one of the 12 possible NLU keys. -
Page 129: Cash-In-Drawer Limit Programming
Cash-In-Drawer Limit Programming A Cash-In-Drawer limit can be programmed so that a warning appears on screen when the limit is exceeded. Pressing the CLEAR key will remove the error. The operator should carry out a Paid Out operation to reduce the Cash-in-drawer amount. Programming the Drawer Limit 1. -
Page 130: Cheque Change Limit Programming
Cheque Change Limit Programming Use this program to set the maximum amount of cash that can be returned when a CHEQUE is tendered for an amount greater than the amount of the sale. For example, if the CHEQUE change limit is £10.00 the maximum amount that can be tendered into the CHEQUE key on a £5.00 sale is £15.00. -
Page 131: Date And Time Programming
Date and Time Programming Use this program to set the clock and calendar on your ER230 Series. The date changes automatically. After initial setting, time changing will probably be required only for beginning and ending daylight savings time. Programming the Date and Time 1. -
Page 132: Machine Number Programming
Machine Number Programming The machine number is printed on the register receipt. Program a machine number so that any receipt can be identified with the store or register where the transaction took place. Programming the Machine Number 1. Move to the P position. 2. -
Page 133: Program Scans
Since much time and energy has been invested in the planning and programming of your ER-230 Series , it is advisable to print a hard copy of the final program for future reference. This copy should be kept in a safe place. - Page 134 Refer to the chart below and enter a digit to represent the segment of the program you wish to print; press the X/TIME key. To program additional scan, repeat this operation. OTHERS PROGRAM SCAN X/TIME Program Program Group Financial Report message Macro Name System option Drawer Limit...