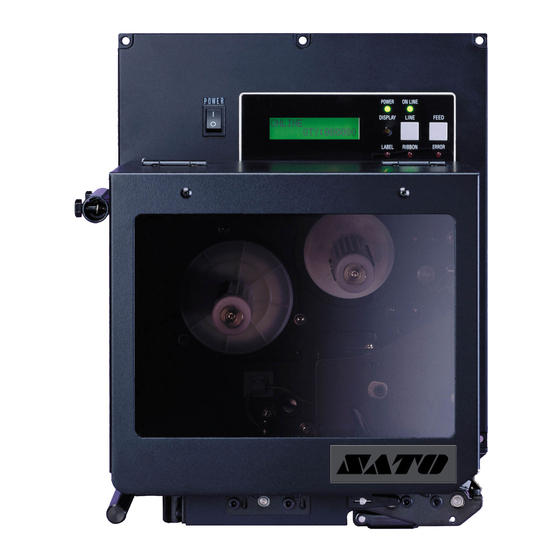
SATO M-8485Se Operator And Technical Reference Manual
“se” applicator print engines
Hide thumbs
Also See for M-8485Se:
- Programming reference manual (242 pages) ,
- Service manual (216 pages) ,
- Operator's manual (107 pages)

Related Manuals for SATO M-8485Se


Summary of Contents for SATO M-8485Se
- Page 1 ® “Se” Applicator Print Engines Operator and Technical Reference Manual M-8459Se, M-8460Se, M-8485Se M-8490Se PN 9001073 Rev C...
- Page 2 All rights reserved. No part of this document may be reproduced or issued to third parties in any form whatsoever without the express permission of SATO America, Inc. The materials in this document is provided for general information and is subject to change without notice. SATO America, Inc.
- Page 3 This section contains instructions on how to clean and maintain the printer. SECTION 5. PROGRAMMING This section introduces the SATO Programming Language. It contains the commands that are used with the printer to produce labels with bar codes, alphanumeric data and graphics.
- Page 4 APPENDICES APPENDIX A: Command Code Quick Reference APPENDIX B: Bar Code Specifications APPENDIX C: Custom Characters and Graphics APPENDIX D: Optional Features APPENDIX E: Custom Protocol Command Codes PN 9001073 Rev C...
-
Page 5: Table Of Contents
TABLE OF CONTENTS SECTION 1. PRINTER OVERVIEW Introduction ......1-1 General Printer Specifications ..... 1-2 SECTION 2. - Page 6 Introduction ......5-1 The SATO RISC Programming Language ....5-1 Selecting Protocol Control Codes.
- Page 7 Job Name Store......5-48 Journal Print ......5-49 Lines and Boxes .
- Page 8 Pitch Offset ......5-120 Print Mode ......5-121 Print Type .
- Page 9 APPENDICES APPENDIX A: Command Code Quick Reference APPENDIX B: Bar Code Specifications Bar Code Symbologies ..... . . B-1 Codabar ......B-2 Code 39.
- Page 10 This page left intentionally blank. PN 9001073 Rev C...
-
Page 11: Section 1. Printer Overview
SECTION 1. PRINTER OVERVIEW INTRODUCTION The SATO “Se” Print Engines are designed to be integrated into high-performance on-site labeling systems. All printer parameters are user programmable using the front panel controls and the DIP switches. All popular bar codes and 14 human-readable fonts, including a vector font, are resident in memory providing literally thousands of type styles and sizes. - Page 12 134 mm 165 mm 134 mm Minimum Width 1.55 in. 2.1 in. 1.55 in. 39.5 mm 53 mm 39.5 mm Length 1968 ft (600 M) Thickness 4.5 micron, Face-In Wind PN 9001073 Rev C Page 1-2 SATO "Se" Print Engines...
- Page 13 32 Bit RISC Flash ROM 2 MB SDRAM 16 MB Receive Buffer 2.95 MB Optional Flash ROM 4 MB Optional PCMCIA Memory 16 MB Flash ROM or 4 MB SRAM PN 9001073 Rev C SATO "Se" Print Engines Page 1-3...
- Page 14 TrueType Fonts with Utility Program CHARACTER CONTROL Expansion up to 12X in either the X or Y coordinates Character Pitch control Line Space control Journal Print facility 0°, 90°, 180° and 270° Rotation PN 9001073 Rev C Page 1-4 SATO "Se" Print Engines...
- Page 15 Sequential numbering of both numerics and bar codes Custom Characters RAM storage for special characters Graphics Full dot addressable graphics SATO Hex/Binary, .BMP or .PCX formats Form Overlay Form overlay for high-speed editing of complex formats. Real Time Clock Date/Time clock for stamping labels at print time PN 9001073 Rev C SATO "Se"...
- Page 16 Max 90% RH, non-condensing Electrostatic Discharge REGULATORY APPROVALS Safety UL, CSA, CE, TUV RFI/EMI FCC Class A CONFIGURATION Left to Right Hand Label Feed Right to Left Hand Label Feed PN 9001073 Rev C Page 1-6 SATO "Se" Print Engines...
- Page 17 PARALLEL INTERFACE IEEE1284 Bi-Directional Plug-In Interface Module. SERIAL INTERFACE High Speed RS232C Plug-In Interface Module. USB INTERFACE Universal Serial Bus Plug-In Interface Module. ETHERNET INTERFACE 10/100BaseT Plug-In Interface Module. PN 9001073 Rev C SATO "Se" Print Engines Page 1-7...
- Page 18 Section 1. Printer Overview This page left intentionally blank. PN 9001073 Rev C Page 1-8 SATO "Se" Print Engines...
-
Page 19: Section 2. Installation
INSTALLATION INTRODUCTION This section of the manual has been written to help you install the SATO “Se” print engine modules and to get started as quickly as possible. It is recommend to read each chapter in this manual before the installation or the use of the print modules. -
Page 20: Dimensions
300 mm 16.1" 408 mm M-8460S 17.9" 452 mm 4.6" 4.6" 117.5 mm 117.5 mm 11.8" 10.4" 300 mm 265 mm 10.4" 265 mm 9.25" 235 mm Right Hand Model Shown PN 9001073 Rev C Page 2-2 SATO “Se” Print Engines... -
Page 21: Component Names
Sensor Cover Open Switch Head Open Switch Ribbon Unwind Label Hold Down Platen Roller Print Head Nip Roller Head Pressure Label Edge Guide Head Latch Latch Adjust M-8460Se/M-8485Se/M-8490Se M-8459Se Only PN 9001073 Rev C SATO “Se” Print Engines Page 2-3... -
Page 22: Rear Panel
Slot for installation of Plug-In Interface Module. EXT Connector This is an external signal connector for interfacing with the label applicator system. Memory Card Connectors for Optional PCMCIA Memory Cards. PN 9001073 Rev C Page 2-4 SATO “Se” Print Engines... -
Page 23: Switches And Sensors
When the print head is opened, this switch is activated and the printer will stop printing. Label Sensor This sensor unit contains two sensors for both label gap and Eye-mark sensing. PN 9001073 Rev C SATO “Se” Print Engines Page 2-5... -
Page 24: Media Loading
Unwind Spindle and push it onto the spindle as far as it will go. Make sure the ribbon wil unwind from the top of the roll. Note that all SATO ribbons are wound face-in (the ink or dull side faces toward the inside of the roll). - Page 25 Make sure the Nip Roller Latch is securely engaged. Note: Always check that the backing paper is taut between Platen Roller and Nip Roller. Nip Roller Peel Nip Roller Label Hold Down Latch Liner PN 9001073 Rev C SATO “Se” Print Engines Page 2-7...
- Page 26 Section 2. Installation 12. Power the printer on and press the Feed key. It should feed labels until the first label is peeled and ready for application. PN 9001073 Rev C Page 2-8 SATO “Se” Print Engines...
-
Page 27: Adjusting The Label Sensor
14 mm to 82 mm 14 mm to 68 mm 14 mm to 68 mm) Non-Print Area 0.12" (3 mm) 0.12" or 0.25" 0.12" (3 mm) 0.12" (3 mm) 3 mm or 6.5 mm PN 9001073 Rev C SATO “Se” Print Engines Page 2-9... - Page 28 Adjustments to compensate for different liner opacity is done with the LCD panel. Print Head Sensor Adjust Sensor Position (shown open) Slot Screws PN 9001073 Rev C Page 2-10 SATO “Se” Print Engines...
-
Page 29: Operator Panel
Switches the printer On-Line or Off-Line. It can also be used as a Pause function key to stop label during the printing process. FEED Key To feed one blank label. DISPLAY Potentiometer for adjusting the contrast of the LCD PN 9001073 Rev C SATO “Se” Print Engines Page 2-11... -
Page 30: Dip Switch Panel
The DIP Switch panel is located inside the cover and contains three 8-position DIP switches and three adjustment potentiometers. Adjustment procedures for these are listed in Section 3: Configuration. DIP Switches Potentiomenters PN 9001073 Rev C Page 2-12 SATO “Se” Print Engines... -
Page 31: Section 3. Configuration
8 data bits 7 data bits Parity Selection (DSW1-2, DSW1-3). These switches select the type of parity used for error detection. DSW1 DSW1-2 DSW1-3 SETTING No Parity Even Not Used PN 9001073 Rev C SATO “Se” Print Engines Page 3-1... - Page 32 Sensor Type Selection (DSW2-2). Selects between the use of a label gap or a reflective Eye-Mark detector. See page 2-9 for the location of these sensors. DSW2 DSW2-2 SETTING Eye-Mark PN 9001073 Rev C Page 3-2 SATO “Se” Print Engines...
- Page 33 Should be used only if problems are encountered when using existing software. This switch will also affect the settings selected by DSW1-7 and DSW1-8. DSW2 DSW2-8 SETTING Disabled Enabled PN 9001073 Rev C SATO “Se” Print Engines Page 3-3...
- Page 34 Specifications for a description of the signal level and requirements When DSW3-5 is On, the unit is in the Continuous print mode, Backfeed is disabled and External Signals are ignored. DSW3 DSW3-5 SETTING Enabled Disabled PN 9001073 Rev C Page 3-4 SATO “Se” Print Engines...
- Page 35 Repeat Print via External Signal (DSW3-8). Allows the applicator to reprint the current label in the print buffer. See Section 6: Interface Specifications for a description of the signal requirements. DSW3 DSW3-8 SETTING Disabled Enabled Reserved for Future Use (DSW3-2) PN 9001073 Rev C SATO “Se” Print Engines Page 3-5...
-
Page 36: Default Settings
(or after the beep is heard. This saves the default settings in the non-volatile memory where they will be automatically loaded the next time the printer is powered on. DEFAULT COMPLETED PN 9001073 Rev C Page 3-6 SATO “Se” Print Engines... -
Page 37: Potentiometer Adjustments
Switch Panel inside the cover. When turned all the way counterclockwise, the amount of backfeed is +3.75 mm, and -3.75 mm when turned all the way counterclockwise. 1. Turn the printer on. PN 9001073 Rev C SATO “Se” Print Engines Page 3-7... - Page 38 NOTE: The PRINT potentiometer adjustment will affect the darkness in all of the command code speed and darkness ranges. PN 9001073 Rev C Page 3-8 SATO “Se” Print Engines...
-
Page 39: Lcd Panel Printer Configuration
Clear Non-Standard Protocol DSW2-7 ON + LINE + FEED ALT. PROTOCOL 3-25 + POWER Protocol Code Download DSW2-7 ON + POWER USER DOWNLOAD 3-26 Hex Dump DSW2-4 ON + POWER ONLINE 3-27 QTY:000000 9001073 Rev C SATO “Se” Print Engines Page 3-9... -
Page 40: Normal Mode
M-8459Se M-8485Se M-8460Se M-8490Se 2 ips 4 ips 4 ips 3 ips 6 ips 6 ips 4 ips 8 ips 8 ips 5 ips 10 ips 12 ips 9001073 Rev C Page 3-10 SATO “Se” Print Engines... - Page 41 ABCDEFG Leading edge of the label as detected by the sensor Original (0 offset) first line print position ABCDEFG Moved with positive (+) offset to print on trailing edge of label 9001073 Rev C SATO “Se” Print Engines Page 3-11...
-
Page 42: Advanced Mode
1. Use the LINE key to step the cursor to either the YES or NO selection. 2. Once the correct setting is selected, pressing the FEED key will accept the setting and advance the display to the Print Offset display. 9001073 Rev C Page 3-12 SATO “Se” Print Engines... - Page 43 YES. If the Calendar feature is to be disabled, press the LINE key until the cursor is underneath the NO. When the desired setting is selected, press the FEED key. 9001073 Rev C SATO “Se” Print Engines Page 3-13...
- Page 44 (CRLF ) from the data stream, including graphics and 2D bar codes. It is used primrily to maintain compatibility with earlier models of SATO printers. 1. Use the LINE key to step the underline cusor to either the YES or NO selection.
-
Page 45: Card Mode
Yes is selected, the printer will enter the Card Copy mode. If No is selected, the display will advance to the Card to Memory SATO Font Copy mode. 2. Confirm your selection by stepping the cursor to the Yes COPY START selection. - Page 46 Section 3. Configuration This selection allows you to copy SATO fonts from the CARD->MEMORYCOPY PCMCIA Memory card installed in the Memory Card slot on SATOFONT the rear of the printer to the optional Flash ROM. 1. Use the LINE key to step the cursor to desired setting. If Yes is selected, the printer will enter the Card Copy mode.
- Page 47 If you select No, the display will return to the previous selection. 3. Once the copy process is completed, press the FEED key MEMORY->CARDCOPY to step the display. COMPLETED 9001073 Rev C SATO “Se” Print Engines Page 3-17...
-
Page 48: Service Mode
LINE key once. The Service Mode display indicates that the printer is in the SERVICE MODE Card Mode. To advance to the first selection, press the FEED key. 9001073 Rev C Page 3-18 SATO “Se” Print Engines... - Page 49 5. Once the setting iscorrect, pressing the FEED key will accept the setting and advance the next display. 9001073 Rev C SATO “Se” Print Engines Page 3-19...
- Page 50 1. Use the LINE key to step the cursor to desired setting. If Yes is selected, the printer will feed a blank label anytime an error condition is cleared. If No is selected, the display will advance to the mode display. 9001073 Rev C Page 3-20 SATO “Se” Print Engines...
- Page 51 3. Press the LINE key to step to the desired setting. 4. When the setting is correct, press the FEED key to accept the setting and step to the next display. 9001073 Rev C SATO “Se” Print Engines Page 3-21...
-
Page 52: Counter Mode
The Service mode is exited by powering the printer off and SERVICE MODE then back on. COUNTERS MODE The Counters Mode is provided to allow the user to access the internal printer cousters. 9001073 Rev C Page 3-22 SATO “Se” Print Engines... - Page 53 YES. Once the desired setting is selected, pressing the FEED key will advance the return you to the Counters Mode display. 5. To exit the Counters Mode, turn power to the printer off and COUNTERS MODE then back on. 9001073 Rev C SATO “Se” Print Engines Page 3-23...
-
Page 54: Test Print Mode
3. Press the FEED key to start printing test labels continuously. 4. Press the FEED key to stop the printer. 5. To exit the Test Print Mode, power the printer off and then back on. 9001073 Rev C Page 3-24 SATO “Se” Print Engines... -
Page 55: Default Setting Mode
3. After the default setting is complete, the printer will emit two short beeps indicating the process is complete. 4. To exit the mode, power the printer off and then back on. 9001073 Rev C SATO “Se” Print Engines Page 3-25... -
Page 56: Download User Defined Protocol Codes
6. If the custom codes are correct, press the FEED key to accept them and terminate the download process. If they are incorrect, turn the printer off without pressing the FEED key and begin the process again. 9001073 Rev C Page 3-26 SATO “Se” Print Engines... -
Page 57: Hex Dump Mode
3. The received data will be printed in a hexadecimal format 4. To return the printer to normal operation, place DSW2-4 in the off position and power the printer off and then back on. 9001073 Rev C SATO “Se” Print Engines Page 3-27... - Page 58 Section 3. Configuration This page left intentionally blank. 9001073 Rev C Page 3-28 SATO “Se” Print Engines...
-
Page 59: Section 4. Cleaning And Maintenance
Replacing the Fuse ADJUSTING THE PRINT QUALITY One of the nice features of the SATO “Se” printers are their high print quality. They are equipped with two different methods of adjusting the quality of the print: print darkness and speed. When adjusting for optimum print quality, a bar code verifier system should be used. -
Page 60: Print Speed
3. Open the Print Head Assembly by pushing the Head Latch toward the rear of the printer. The Print Head Assembly is spring-loaded and will automatically open as soon as the Head Latch is disengaged. 4. Apply SATO Thermal Print Head Cleaner to a cotton swab. PN 9001073 Rev C Page 4-2... - Page 61 Print Head Assembly is spring-loaded and will automatically open as soon as the Head Latch is disengaged. 4. Apply SATO Thermal Print Head Cleaner to one of the cotton swabs. 5. The Platen is the rubber roller directly below the Print Head. It should be cleaned of any ribbon or label residue.
-
Page 62: Cleaning The Sensors And Paper End Switch
The Sensor Window is positioned directly below the Upper Sensor. 4. Apply SATO Thermal Print Head Cleaner to one of the cotton swabs. 5. Use the cotton swab to clean any foreign matter from the exposed surface of the sensors. -
Page 63: Replacing The Print Head
REPLACING THE PRINT HEAD The print head is a user-replaceable item. If it becomes damaged for any reason, it can be easily removed and replaced. Contact your local SATO representative for information on obtaining a new print head. Supplies needed: Flat Blade Screwdriver (Note: Some units may require a No. -
Page 64: Replacing The Fuse
3. Unscrew the cap and remove the defective fuse. 4. Replace with a new 250V 15A fuse. 5. Screw the fuse cap back onto the printer and replace the power cable. AC Fuse AC Input Connector PN 9001073 Rev C Page 4-6 SATO “Se” Print Engines... -
Page 65: Section 5. Programming
SECTION 5. PROGRAMMING REFERENCE INTRODUCTION This section presents the commands that are used with the SATO “Se” printers to produce labels with logos, bar codes and alphanumeric data. The following information is presented in this section: The SATO Programming Language... -
Page 66: Selecting Protocol Control Codes
2. If you are using the printer’s RS232C interface, it is necessary to set the COM port on the PC such that the CTS and DSR signals will be ignored. Send your OPEN “COM” statement in the following way: PN 9001073 Rev C Page 5-2 SATO “Se” Print Engines... -
Page 67: Printing With The Parallel Port
30 LPRINT E$;"A"; Sends an “<ESC>A” command code to the LPT1 parallel port 40 LPRINT E$;"H400",E$;"V100";E$;"WL1SATO"; Sends the data “SATO” to be to be placed 400 dots horizontally and 100 dots vertically on the label and printed in the “WL” font. -
Page 68: The Print Area
Section 5. Programming Reference 60 PRINT #1, E$;"H400",E$;"V100";E$;"WL1SATO"; S ends the data “SATO” to be to be placed 400 dots horizontally and 100 dots vertically on the label and printed in the “WL” autosmoothed font. 70 PRINT #1, E$;"Q1"; Instructs the printer to print a quantity of one label. - Page 69 Shift Distance = 3.0" x 25.4 mm/in x 8 dpmm = 610 dots Each <ESC>H command would have the value “610” added to it to correctly position each field. PN 9001073 Rev C SATO “Se” Print Engines Page 5-5...
- Page 70 If you are using a two inch wide label, the entire image may not appear on your label. By adding the following Base Reference Point command to the second line of the data H=50 V=100 SATO V=200 *SATO* *SATO* *SATO* 5" 2" Unshifted Print Area PN 9001073 Rev C Page 5-6 SATO “Se” Print Engines...
-
Page 71: Rotated Fields
<ESC>% - The field rotates, but the base reference point for the field remains the same. The following data stream will rotate the print field but will not change the base reference point of the field: PN 9001073 Rev C SATO “Se” Print Engines Page 5-7... -
Page 72: Command Default Settings
(1) The settings for these commands will revert to the default value when the printer receives an <ESC>Z or an <ESC>*. (2) These values transmitted with these commands will remain in effect until a new command is received. PN 9001073 Rev C Page 5-8 SATO “Se” Print Engines... -
Page 73: Opposite Hand Models
The same command stream sent to both printers should print an identical label except the image may be shifted because of the relative positioning of the label under the print head. PN 9001073 Rev C SATO “Se” Print Engines Page 5-9... -
Page 74: Command Code Page Reference
If the same command stream is sent to an M-8490Se, the image will be reduced by 33%. An alphabetical listing of the commands is contained in Appendix A: Command Code Quick Reference. PN 9001073 Rev C Page 5-10 SATO “Se” Print Engines... -
Page 75: Bar Codes
(see Two Dimensional bar code symbols). Each of the bar codes are unique, and it is important to know the differences. See Appendix B for specific information on using each individual bar code symbol. PN 9001073 Rev C SATO “Se” Print Engines Page 5-11... - Page 76 Section 5. Programming Reference Input to Printer PN 9001073 Rev C Page 5-12 SATO “Se” Print Engines...
- Page 77 Section 5. Programming Reference Printer Output PN 9001073 Rev C SATO “Se” Print Engines Page 5-13...
- Page 78 Section 5. Programming Reference UCC-128 Without Incrementing BI07150101234567000000001 With Incrementing >BI07150101234567000000001 PN 9001073 Rev C Page 5-14 SATO “Se” Print Engines...
- Page 79 For the MSI bar code, the check digit is not automatically calculated. 7. The <ESC>D and <ESC>BD commands are not valid for the MSI, Code 128, Code 93, UPC-E, Bookland, UCC128 and Postnet symbologies. PN 9001073 Rev C SATO “Se” Print Engines Page 5-15...
-
Page 80: Bar Codes, Expansion
1. This command must be preceded by the Variable Ratio Bar Codes <ESC>BT command. 2. The following bar codes will be affected by the Character Pitch command: Codabar, Code 39, Interleaved 2 of 5, Matrix 2 of 5. PN 9001073 Rev C Page 5-16 SATO “Se” Print Engines... -
Page 81: Bar Codes, Variable Ratio
(bars, spaces) as shown above. Remember that this command only applies to the five bar code types shown. Input to Printer BT101030103 Printer Output PN 9001073 Rev C SATO “Se” Print Engines Page 5-17... - Page 82 3. If the data specified in this command is incorrect, the command is ignored and the ratio used will be based on the previous setting. 4. See Appendix B for more specific instructions and details regarding individual bar code symbols. PN 9001073 Rev C Page 5-18 SATO “Se” Print Engines...
-
Page 83: Base Reference Point
It may also be used to move images past preprinted fields on a label. Input to Printer A3H0300V0075 Printer Output PN 9001073 Rev C SATO “Se” Print Engines Page 5-19... - Page 84 -1344 to 1344 Vertical Default bbbb 0001 to 1424 0001 to 1424 0001 to 1424 0001 to 2136 Expanded bbbb 0001 to 9999 0001 to 9999 0001 to 9999 0001 to 9999 PN 9001073 Rev C Page 5-20 SATO “Se” Print Engines...
-
Page 85: Characters, Custom Designed
Up to 50 individual characters may be stored in the custom character volatile memory. Printer Input See Appendix C for a detailed explanation. T1H3F K1H903F K1H903F PN 9001073 Rev C SATO “Se” Print Engines Page 5-21... - Page 86 3. Do not use ASCII <CR> or <LF> characters (carriage return or line feed) as line delimiters within the graphic data or the actual image will not be printed as specified. PN 9001073 Rev C Page 5-22 SATO “Se” Print Engines...
-
Page 87: Character Expansion
(except the vector font) up to 12 times in either direction. Expanded characters are typically used for added emphasis or for long distance readability. Input to Printer L0402 L0204 Printer Output PN 9001073 Rev C SATO “Se” Print Engines Page 5-23... - Page 88 1 x 1. Therefore, either send the Character Expansion command before all printed data, or send Line and Box commands last, preceding the <ESC>Q Quantity command. PN 9001073 Rev C Page 5-24 SATO “Se” Print Engines...
-
Page 89: Character, Fixed Spacing
To reset proportional spacing and place the printer back to fixed spacing. Printer Input Printer Output Special Notes 1. This command only works with the proportionally spaced fonts XU, XM, XS, XL and XB. PN 9001073 Rev C SATO “Se” Print Engines Page 5-25... -
Page 90: Character Pitch
To designate the amount of spacing (in dots) between characters. This command provides a means of altering character spacing for label constraints or to enhance readability. Input to Printer Printer Output PN 9001073 Rev C Page 5-26 SATO “Se” Print Engines... - Page 91 4. Character Pitch will always revert to the default value unless it is specified before each new font command in the data stream. 5. This command also affects Codabar, Code 39 and Industrial 2 of 5 bar codes. PN 9001073 Rev C SATO “Se” Print Engines Page 5-27...
-
Page 92: Character, Proportional Spacing
Printer Output Special Notes 1. Once this command is sent in the data stream, it is in effect until the end of the print job unless a reset command is sent. PN 9001073 Rev C Page 5-28 SATO “Se” Print Engines... -
Page 93: Clear Print Job(S) And Memory
4. When the “a” parameter is used, the section of memory specified will not be cleared until the label is printed. PN 9001073 Rev C SATO “Se” Print Engines Page 5-29... -
Page 94: Continuous Forms Printing
The length may be increased with printed spaces (20 hexadecimal) if necessary. There is no command code to control label length. PN 9001073 Rev C Page 5-30 SATO “Se” Print Engines... -
Page 95: Copy Image Area
To copy an image from one location to another on the same label. This may be useful for duplicating individual fields or entire sections of the label with only one command. Input to Printer >WDH0130V0050X0400Y0200 Printer Output PN 9001073 Rev C SATO “Se” Print Engines Page 5-31... - Page 96 0896 1216 1024 1344 Default Vertical 0001 0001 0001 0001 bbbb dddd 1424 1424 1424 2136 Expanded Vertical 0001 0001 0001 0001 bbbb dddd 9999 9999 9999 9999 PN 9001073 Rev C Page 5-32 SATO “Se” Print Engines...
-
Page 97: Fonts, U, S, M, Oa, Ob, Xu, Xs And Xm
To print text images on a label. These are eight of the built-in fonts available on the printer. All matrices include descenders. NON-PROPORTIONAL PROPORTIONAL Input to Printer XUSATO XSSATO XMSATO OASATO OBSATO USATO SSATO MSATO Printer Output PN 9001073 Rev C SATO “Se” Print Engines Page 5-33... - Page 98 5. Fonts U, S, M, OA and OB are identical to fonts U, S, M, OA and OB on the SATO M-8400S printer. (Note: These fonts, except the OA and OB fonts which are fixed in size, will be 33% smaller on an M-8490Se) 6.
-
Page 99: Fonts, Raster
If point size is used, the point size is preceded by a “P”. PN 9001073 Rev C SATO “Se” Print Engines Page 5-35... -
Page 100: Fonts, Vector
Default: None Command Function To specify printing of the unique SATO vector font. The vector font allows large characters to be printed with smooth, round edges. Each character is made of a number of vectors (or lines), and will require slightly more printer compiling time. - Page 101 4. The font width and height values include asenders, desenders and other space. 5. A font must be defined for each field to be printed. There is no default font. PN 9001073 Rev C SATO “Se” Print Engines Page 5-37...
-
Page 102: Fonts, Wb,Wl, Xb And Xl
To print text images on a label. These are the four auto-smoothing fonts available on the printer. NON-PROPORTIONAL PROPORTIONAL Input to Printer WB0SATO WB1SATO WL0SATO WL1SATO XB0SATO XB1SATO XL0SATO XL1SATO Printer Output PN 9001073 Rev C Page 5-38 SATO “Se” Print Engines... - Page 103 4. A font must be defined for each field to be printed. There is no default font. 5. The proportionally spaced fonts XU, XS, XM, XL and XB can be printed with fixed spacing using the <ESC>PS Proportional Space command. PN 9001073 Rev C SATO “Se” Print Engines Page 5-39...
-
Page 104: Form Feed
Separate data stream sent to printer Default: None Command Function To feed a blank tag or label, which is the equivalent of a “form feed” Input to Printer (space) Printer Output Blank label or tag PN 9001073 Rev C Page 5-40 SATO “Se” Print Engines... -
Page 105: Form Overlay Recall
1. The overlay is stored using the <ESC>& Form Overlay Store command. 2. If the this command is used with the <ESC>EX0 Expanded Print Length command the Form Overlay length cannot exceed 9999 dots. PN 9001073 Rev C SATO “Se” Print Engines Page 5-41... -
Page 106: Form Overlay Store
2. The overlay is recalled using the <ESC>/ Form Overlay Recall command. 3. Form overlays do not have to be recompiled each time they are called to be printed and therefore may result in much faster print output. PN 9001073 Rev C Page 5-42 SATO “Se” Print Engines... -
Page 107: Graphics, Custom
Using a dot-addressable matrix, design the graphic image in 8 dot by 8 dot blocks, then send it in a binary format to the printer. Printer Input GH006006 See Appendix C for a details on the data format. PN 9001073 Rev C SATO “Se” Print Engines Page 5-43... - Page 108 001 to 267 Expanded 001 to 999 001 to 999 001 to 999 001 to 999 8. Use the <ESC>E0 Expanded Print Length command to get the maximum label length. PN 9001073 Rev C Page 5-44 SATO “Se” Print Engines...
-
Page 109: Graphics, Bmp
64K, the graphic will not print. 2. Only black and white BMP files can be downloaded. 3. The file size specified by this command is the DOS file size in bytes. PN 9001073 Rev C SATO “Se” Print Engines Page 5-45... -
Page 110: Graphics, Pcx
64K, the graphic will not print. 2. Only black and white PCX files can be downloaded. 3. The file size specified by this command is the DOS file size in bytes. PN 9001073 Rev C Page 5-46 SATO “Se” Print Engines... -
Page 111: Job Id Store
2. If more than one ID number is sent in a single job, i.e. <ESC>A <ESC>ID01 ..<ESC>ID02 ..the last number transmitted will be used. PN 9001073 Rev C SATO “Se” Print Engines Page 5-47... -
Page 112: Job Name Store
<ESC>A <ESC>WKSATO ..<ESC>WKSATO AMERICA ..the last name transmitted will be used. PN 9001073 Rev C Page 5-48 SATO “Se” Print Engines... -
Page 113: Journal Print
1. Journal mode assumes a maximum label width . Otherwise, you may print where there is no label and damage your print head. 2. It is effective only for the current print job. PN 9001073 Rev C SATO “Se” Print Engines Page 5-49... -
Page 114: Lines And Boxes
<ESC>FW02H0200 Placement: Following the necessary positioning commands Default: None Command Function To print horizontal lines, vertical lines, and boxes as images on the label. Input to Printer FW20H0200 >FW20V0200 FW1010H0200V0200 PN 9001073 Rev C Page 5-50 SATO “Se” Print Engines... - Page 115 0001 to 1424 0001 to 2136 Expanded cccc 0001 to 9999 0001 to 9999 0001 to 9999 0001 to 9999 3. Use the <ESC>E0 Expanded Print Length command for maximum label length. PN 9001073 Rev C SATO “Se” Print Engines Page 5-51...
-
Page 116: Line Feed
H values after this command, the print position will be determined by the H value last specified. You must redefine the font to be used after each H command. PN 9001073 Rev C Page 5-52 SATO “Se” Print Engines... -
Page 117: Media Size
3. All eight variables (“aaaa” and “bbbb”) must be included in this command. Maximum M-8459Se M-8460Se M-8485eS M-8490Se Hmax aaaa 1216 1024 1344 Vmax Default bbbb 1424 1424 1424 2136 Expanded bbbb 9999 9999 9999 9999 PN 9001073 Rev C SATO “Se” Print Engines Page 5-53... -
Page 118: Mirror Image
3. This command should not be specified more than once in any single job. 4. This command cannot be used with commands requiring re-editing of the print area, such as Sequential Numbering, Real time clock or Copy Image Area. PN 9001073 Rev C Page 5-54 SATO “Se” Print Engines... - Page 119 Any print job containing the <ESC>RM comand and without any print data will be treated as a command error. PN 9001073 Rev C SATO “Se” Print Engines Page 5-55...
-
Page 120: Off-Line/Pause
On-Line status (see Section 2: Operator Panel of this manual). 2. Remember, when using this command, that the print job specifies <ESC>Q10, all ten labels will print before the printer goes off-line. PN 9001073 Rev C Page 5-56 SATO “Se” Print Engines... -
Page 121: Postnet
BP123456 BP123456789 BP12345678901 Printer Output Special Notes 1. If the number of data digits does not match those listed, the command is ignored. 2. Only numeric data will be accepted. PN 9001073 Rev C SATO “Se” Print Engines Page 5-57... -
Page 122: Print Darkness
2. The allowable ranges for heat settings are: Heat Range M-8459Se M-8460Se M-8485Se M-8490Se The lighest setting is the smallest value and the darkest setting is the largest value. PN 9001073 Rev C Page 5-58 SATO “Se” Print Engines... -
Page 123: Print Length, Expanded
Default: <ESC>AR (7") Command Function To increase the maximum print length (in feed direction) for a label. Input to Printer > Printer Output 49” PN 9001073 Rev C SATO “Se” Print Engines Page 5-59... - Page 124 7. If a job contains elements out of the memory range, it is ignored. 8. If the Forms Overlay command <ESC>& is used with Expanded Memory to expand the print area, the Form Overlay length is still limited to the maximum.. PN 9001073 Rev C Page 5-60 SATO “Se” Print Engines...
-
Page 125: Print Position
They also establish a reference point for subsequent fields until the next horizontal and/or vertical print position command is issued. Input to Printer >H0025<ESC>V0050 H0100<ESC>V0150 Printer Output PN 9001073 Rev C SATO “Se” Print Engines Page 5-61... - Page 126 4. If you attempt to print where there is no paper, you may damage the print head. 5. For these commands, the leading zeroes do not have to be entered. The command V1 is equivalent to V0001. PN 9001073 Rev C Page 5-62 SATO “Se” Print Engines...
-
Page 127: Print Quantity
4. If you do not specify a Print Quantity, the printer will not print a label. 5. For this command, leading zeroes do not have to be entered. The command Q1 is equivalent to Q000001. PN 9001073 Rev C SATO “Se” Print Engines Page 5-63... -
Page 128: Print Speed
150 mm/sec 150 mm/sec 150 mm/sec 8 ips 8 ips 8 ips 200 mm/sec 200 mm/sec 200 mm/sec 10 ips 10 ips 250 mm/sec 250 mm/sec 12 ips 300 mm/sec PN 9001073 Rev C Page 5-64 SATO “Se” Print Engines... -
Page 129: Repeat Label
A duplicate of the previous label will be printed. Special Notes 1. This command will have no effect if the power to the printer was cycled off and back on since printing the previous label. PN 9001073 Rev C SATO “Se” Print Engines Page 5-65... -
Page 130: Replace Data (Partial Edit)
To replace a specified area of the previous label with new data. This command will cause the previous label to print along with any changes specified within the current data stream. Input to Printer Printer Output PN 9001073 Rev C Page 5-66 SATO “Se” Print Engines... - Page 131 2. This command will not function if the power has been cycled off and back on since the last label was printed. 3. Proportional Pitch text cannot be used with this command. PN 9001073 Rev C SATO “Se” Print Engines Page 5-67...
-
Page 132: Reverse Image
To reverse an image area from black to white and vice versa. Use the Print Position commands (<ESC>H and <ESC>V) to locate the top left corner of the reverse image area. Input to Printer (370,100 (220,47 Printer Output PN 9001073 Rev C Page 5-68 SATO “Se” Print Engines... - Page 133 0001 to 1344 Vertical Default bbbb 0001 to 1424 0001 to 1424 0001 to 1424 0001 to 2136 Expanded bbbb 0001 to 9999 0001 to 9999 0001 to 9999 0001 to 9999 PN 9001073 Rev C SATO “Se” Print Engines Page 5-69...
-
Page 134: Rotate, Fixed Base Reference Point
<ESC>% Rotate command. Note that the entire print area is shown, but your label will probably not be as large as the entire area. Input to Printer Printer Output PN 9001073 Rev C Page 5-70 SATO “Se” Print Engines... - Page 135 Special Notes 1. The specified values are valid until another Rotate (<ESC>%) command is received. 2. Receipt of a Stop Print (<ESC>Z) command will reset the setting to the default value. PN 9001073 Rev C SATO “Se” Print Engines Page 5-71...
-
Page 136: Sequential Numbering
Up to eight different sequential fields can be specified per label. Sequencing is effective for up to 99-digit numeric data within each field. Input to Printer F001+005 PN 9001073 Rev C Page 5-72 SATO “Se” Print Engines... - Page 137 3. Up to eight different sequential fields can be specified per label. 4. This command ignores alpha characters in the sequential number field. 5. This command can not be used with the following commands: Copy Image Reverse Image Line Feed PN 9001073 Rev C SATO “Se” Print Engines Page 5-73...
-
Page 138: Start/Stop Label
There is no output for these commands they are not accompanied by other label printing commands. However, these commands must precede and follow each print job sent to the printer. PN 9001073 Rev C Page 5-74 SATO “Se” Print Engines... -
Page 139: Calendar Option Commands
Section 5. Programming Reference CALENDAR COMMANDS The following commands in this section are used to control the Calendar Functions. PN 9001073 Rev C SATO “Se” Print Engines Page 5-75... -
Page 140: Calendar Increment
1. Once the year increments past “99” it will wrap back to “00”. 2. This command can only be used once per data stream. 2. The printer’s internal clock may be set through the Calendar Set command. PN 9001073 Rev C Page 5-76 SATO “Se” Print Engines... - Page 141 If December 31st falls on a Wednesday, it belongs to the first week of the following year. If Calendar Increment calculation extends over the year, the result belongs to the week number of the following year. PN 9001073 Rev C SATO “Se” Print Engines Page 5-77...
-
Page 142: Calendar Print
1. The date and time elements may be placed in any order for printing. 2. Use a slash (/) to separate date elements and a colon (:) to separate time elements. PN 9001073 Rev C Page 5-78 SATO “Se” Print Engines... - Page 143 The first day of the year is January 1st (001) and the last day of the year is December 31st (365 or 366 for leap years). 10. The TT command should not be specified for printing in numeric only bar codes. PN 9001073 Rev C SATO “Se” Print Engines Page 5-79...
-
Page 144: Calendar Set
There is no printer output for this command. It sets the current date to December 25, 1993 and the current time to 1:00 PM in the printer. Special Notes None PN 9001073 Rev C Page 5-80 SATO “Se” Print Engines... -
Page 145: Expanded Memory Option Commands
Note: Before Expanded Memory can be used for the first time, it must be initialized using the <ESC>BJF command. If it is not initialized, the printer will not recognize the memory and respond as if no expanded memory was installed. PN 9001073 Rev C SATO “Se” Print Engines Page 5-81... -
Page 146: Clear Expanded Memory
Clear Expanded Memory Command Structure <ESC>*a,bbb Memory card section to be cleared To clear SATO graphic files from memory card P To clear PCX graphic files F To clear formats from the memory card O To clear TrueType fonts R To clear BMP graphic files... -
Page 147: Fonts, Truetype Recall
This command recalls previously stored bit mapped TrueType fonts from Expanded Memory. Printer Input BJT01,02,02,01,00,0004,SATO Printer Output Special Notes 1. TrueType fonts are stored in a fixed size bit mapped format by this command. PN 9001073 Rev C SATO “Se” Print Engines Page 5-83... -
Page 148: Fonts, Truetype Store
1. This command requires the Expanded Memory option. See your SATO representative for details. 2. The SATO TrueType Download utility program can be used to automate the download process from a computer running Windows 3.1 or above. A copy of this utility program is included as a part of the Expanded Memory Option. -
Page 149: Format/Field Recall
Printer Output Special Notes 1. This command requires the Expanded Memory option. See your SATO representative for details. 2. Only one format can be recalled at a time. However, multiple fields may be recalled from the same format. 3. The number of data characters contained in the “cc...c” field cannot exceed the value designated in the <ESC>/N Field Store... -
Page 150: Format/Field Store
Special Notes 1. This command requires the Expanded Memory option. See your SATO representative for details. 2. Each job should be sent individually. If more than one job is sent in a data stream, only the first one will be accepted and the remainder ignored. -
Page 151: Forms Overlay Recall
To be added Special Notes 1. The Expanded Memory option is required for this command. See your SATO representative for details. 2. The <ESC>CC Memory Area Select Command must be sent prior to this command. 3. Several label images stored under different Storage Numbers can be printed with this command. -
Page 152: Forms Overlay Store
4. A label image cannot be stored in a location that already contains data. 5. Graphics, PCX and BMP files can be stored with this command. PN 9001073 Rev C Page 5-88 SATO “Se” Print Engines... - Page 153 6. As many as 99 Form Overlays can be stored, however their combined storage area cannot exceed the available memory. 7. The forms stored by this command are cleared by the <ESC>*R command. PN 9001073 Rev C SATO “Se” Print Engines Page 5-89...
-
Page 154: Bmp Graphics Recall
To recall a previously stored BMP file stored in Expanded Memory Printer Input GC001 Printer Output Special Notes 1. The <ESC>CC Memory Area Select command must be sent before this command. 2. The printed image can be expanded or rotated. PN 9001073 Rev C Page 5-90 SATO “Se” Print Engines... - Page 155 There is no printer output as a result of this command. Special Notes 1. This command requires the Expanded Memory Option. See your SATO representative for details. 2. Data must be sent in binary format. 3. The Memory Area Select Command <ESC>CCa must be sent before this command.
-
Page 156: Graphics, Custom Recall
1. The graphic image to be stored cannot be rotated before it is stored. It can be rotated when it is recalled. 2. Graphic images cannot be stored as part of a label format. 3. See the <ESC>GI Custom Graphic Store command. PN 9001073 Rev C Page 5-92 SATO “Se” Print Engines... -
Page 157: Graphics, Custom Store
Recall Custom Graphics command. Special Notes 1. You must have the optional Expanded Memory to use this command. Call your SATO representative for details. 2. The maximum storage capacity is 999 graphics, up to the capacity of the memory card used. - Page 158 001 to 168 Vertical Blocks Default 001 to 178 001 to 178 001 to 178 001 to 267 Expanded 001 to 999 001 to 999 001 to 999 001 to 999 PN 9001073 Rev C Page 5-94 SATO “Se” Print Engines...
-
Page 159: Graphics, Pcx Recall
Printer Input PY001 PY001 PY001 PY001 Printer Output Special Notes: 1. This command requires Expanded Memory option. See your SATO representative for details. 2. See the <ESC>PI Store PCX Graphics command. PN 9001073 Rev C SATO “Se” Print Engines Page 5-95... -
Page 160: Graphics, Pcx Store
PCX Graphics Recall command. Special Notes: 1. This command requires Expanded Memory option. See your SATO representative for details. 2. Graphics cannot be stored as part of a format. 3. Only black and white PCX files can be stored. 4. The file size specified by this command is the DOS file size in bytes. -
Page 161: Initialize
There is no printer output as a result of this command. Special Notes 1. You must have the optional Expanded Memory to use this command. Call your local SATO representative for information. 2. All Expanded Memory must be initialized before it can be used for the first time. -
Page 162: Memory Area Select
There is no printer output as a result of this command. Special Notes 1. This command requires the Expanded Memory option. See your SATO representative for more information. 2. The Memory Areas specified by this command may be reversed using the LCD menu/configuration panel. -
Page 163: Status
[ 2 ] Special Notes 1. This command requires the Expanded Memory option. See your SATO representative for more information 2. The following information is provided on the status label: Line 1: Memory size in Kbytes Line 2: The ID number assigned with the <ESC>BJF command... -
Page 164: Two-Dimensional Symbols
Section 5. Programming Reference TWO-DIMENSIONAL SYMBOLS The following commands are used to create the two-dimensional symbologies supported by the printers. PN 9001073 Rev C Page 5-100 SATO “Se” Print Engines... -
Page 165: Data Matrix, Data Format
3. The Reference Point for the Data Matrix symbol is the upper-left corner. 4. The Format ID specified for “aa” is defined by the following table. The printer only supports the Format ID’s defined in the table. PN 9001073 Rev C SATO “Se” Print Engines Page 5-101... - Page 166 Upper Case Alpha, Space,Comma, Period, Base 41 Slash, Minus Upper Case Alphanumeric, Space Base 37 ASCII 7-bit, Full Keyboard (20 -7F ) ASCII ISO 8-bit, International (20 -FF ) 8-Bit PN 9001073 Rev C Page 5-102 SATO “Se” Print Engines...
-
Page 167: Data Matrix, Print Data
Printer Output Special Notes 1. If an <ESC>BX Data Format designation command contains any parameters out of the valid range, no symbol will be printed when this command is sent. PN 9001073 Rev C SATO “Se” Print Engines Page 5-103... -
Page 168: Data Matrix Sequential Numbering
Immediately following the <ESC>BX Data Format designation command and preceding the <ESC>DC Print Data Command. Default: None Command Function To print sequential numbered Data Matrix symbols. Printer Input FX002+001005003 Printer Output Label Set #1 PN 9001073 Rev C Page 5-104 SATO “Se” Print Engines... - Page 169 <ESC>Q command should be 2 sets x 2 labels/set = 4. If, in the above example, it was set to a value of “1”, only the first label would be printed. PN 9001073 Rev C SATO “Se” Print Engines Page 5-105...
-
Page 170: Maxicode
To print a Maxicode two-dimensional bar code image on a label. See Appendix B for specific information on using each individual bar code symbol. Command Function To print a UPS Maxicode symbol. BV1,1,2,123456789,840,001,[)<RS>01<GS>961Z01547089<GS>UPSN <GS>056872<GS>349<GS>99999999<GS>001/005<GS>029<GS>N<GS> <GS>LENEXA<GS>KS<RS><EOT> Printer Output PN 9001073 Rev C Page 5-106 SATO “Se” Print Engines... - Page 171 Section 5. Programming Reference Special Notes 1. <RS> represents Hex 1E, <GS> represents Hex 1D, <EOT> represents Hex 04, <ESC> represents Hex 1B and <SP> represents Hex 20. PN 9001073 Rev C SATO “Se” Print Engines Page 5-107...
-
Page 172: Pdf417
<ESC>BK0304400000021 Placement: Immediately preceding data to be encoded Default: None Command Function To print a PDF417 two-dimensional bar code image on a label. Printer Input BK0607400000021PDF417 PDF417 PDF417 Printer Output PN 9001073 Rev C Page 5-108 SATO “Se” Print Engines... - Page 173 10. The print height of the symbol will vary depending upon the data specified; numeric only, alpha only or alphanumeric. 11. For module dimensions less than “4”, symbol quality may be degraded. PN 9001073 Rev C SATO “Se” Print Engines Page 5-109...
-
Page 174: Qr Code
Data Size. Used in Automatic or Manual mode with binary data (0001 - 2953 bytes) Special Notes 1. Contact SATO Technical Support for specific usage information. 2. Parameters “c”, “d”, “ee”, “f f” and “gg” are not used for Micro QR Code. - Page 175 Also, the maximum data size should be less than 7000 bytes and the maximum block number for the data field is 200. 7. If the parameters are not correctly specified, the symbol will not be printed. PN 9001073 Rev C SATO “Se” Print Engines Page 5-111...
-
Page 176: Configuration Commands
Section 5. Programming Reference CONFIGURATION COMMANDS These commands are used to change to operating configuration of the printer. PN 9001073 Rev C Page 5-112 SATO “Se” Print Engines... -
Page 177: Custom Protocol Command Codes
Printer Input LD,{,},%,#,&,*,~,0,0,D5 Printer Output A Protocol Command code status label will be printed as a result of the a successful download of a custom set of Protocol Command codes. PN 9001073 Rev C SATO “Se” Print Engines Page 5-113... - Page 178 5. Downloading Auto Online and Zero Slash settings will overwrite the values selected using the LCD panel. If these settings are changed using the LCD panel, they will overwrite any previously downloaded settings. PN 9001073 Rev C Page 5-114 SATO “Se” Print Engines...
-
Page 179: Printer Setting
Print Darkness Range B Print Darkness Range C Print Darkness Range D Print Darkness Range E Print Darkness Range F Print Darkness Level 1 Print Darkness Level 2 Print Darkness Level 3 PN 9001073 Rev C SATO “Se” Print Engines Page 5-117... -
Page 180: Pitch Offset
-01 to -99 Dispense Offset (-1 to -99 dots) Reserved 0 to 64 Gap Size (0 to 64 dots) Buzzer Enabled Buzzer Disabled Placement: Separate data stream sent to printer Default: None PN 9001073 Rev C Page 5-118 SATO “Se” Print Engines... - Page 181 <ESC>PC, , , , , , , , ,0, , , , , , , , , , , , , , , , , . 4. If only one setting is to be changed, the “aa” parameter must be an “F”. PN 9001073 Rev C SATO “Se” Print Engines Page 5-119...
-
Page 182: Pitch Offset
2. To change the value stored in the EEPROM, use the <ESC>PC Printer Setting command or use the Printer Setting Utility program contained on the CDROM shipped with the printer. PN 9001073 Rev C Page 5-120 SATO “Se” Print Engines... -
Page 183: Print Mode
CDROM shipped with the printer. 3. The Print Mode can also be set using DSW3-1, 3-2 and 3-4. The setting priority is determined by the Priority Setting in the LCD Panel Service Mode. PN 9001073 Rev C SATO “Se” Print Engines Page 5-121... -
Page 184: Print Type
CDROM shipped with the printer. 3. The Print Type can also be set using DSW2-1. The setting priority is determined by the Priority Setting in the LCD Panel Service Mode. PN 9001073 Rev C Page 5-122 SATO “Se” Print Engines... -
Page 185: Sensor Type
CD-ROM shipped with the printer. 3. The Sensor Type can also be set using DSW3-2 and DSW3-3.. The setting priority is determined by the Priority Setting in the LCD Panel Service Mode. PN 9001073 Rev C SATO “Se” Print Engines Page 5-123... -
Page 186: Serial Interface Parameters
3. All command parameters must be present in the data stream sent to the printer. 4. Selecting X-On/X-Off, Bi-Com3 or Bi-Com4 will automatically place the printer in the Multi Buffer mode. PN 9001073 Rev C Page 5-124 SATO “Se” Print Engines... -
Page 187: Section 6. Interface Specifications
The other interfaces available are a high speed (to 57.6K bps) serial interface, an Ethernet interface or an optional Universal Serial Bus (USB) interface. PN 9001073 Rev C SATO “Se” Print Engines Page 6-1... -
Page 188: The Receive Buffer
(or an X-On status if using X-On/X-Off), meaning the printer is ready to receive data. When the receive buffer is holding 2.0 MB of data (1 MB from being full), DTR PN 9001073 Rev C Page 6-2 SATO “Se” Print Engines... -
Page 189: Ieee1284 Parallel Interface
ELECTRICAL SPECIFICATIONS Printer Connector AMP 57-40360 (DDK) or equivalent Cable Connector AMP 57-30360 (DDK) or equivalent PN 9001073 Rev C SATO “Se” Print Engines Page 6-3... -
Page 190: Data Streams
To Host FAULT To Host Not Used Not Used Logic Gnd Not Used Frame Ground Not Used +5V (Z=24K ohm) To Host SELECTIN From Host (1) Signals required for IEEE1284 mode. PN 9001073 Rev C Page 6-4 SATO “Se” Print Engines... -
Page 191: Rs232C Serial Interface
Cable Requirements appropriate to the RS232C protocol chosen. Signal Levels High = +5V to +12V Low = -5V to -12V Pin Assignments Pin 1 Pin 13 Pin 25 Pin 14 PN 9001073 Rev C SATO “Se” Print Engines Page 6-5... -
Page 192: Ready/Busy Flow Control
By raising/lowering the voltage level on Pin 20 of the RS232C port, the printer notifies the host when it is ready to receive data. Pin 4 (RTS) and pin 20 PN 9001073 Rev C Page 6-6 SATO “Se” Print Engines... -
Page 193: X-On/X-Off Flow Control
USB peripherals using Windows 98. Details for loading the USB driver are contained in the USB Interface Manual that is shipped with each printer with a USB Optional interface installed. Up to 127 devices may be connected to a USB port. PN 9001073 Rev C SATO “Se” Print Engines Page 6-7... -
Page 194: Local Area Network (Lan) Interface
If an ENQ is received after the print job specified in the ID bytes has been completed, or there is no data in the buffer, the printer will respond with two “space” characters PN 9001073 Rev C Page 6-8 SATO “Se” Print Engines... - Page 195 ACK (06 hexadecimal) is returned if there are no errors and a NAK (16 hexadecimal) if a printer error exists. (1) To provide compatibility with older SATO printers, the RS232C interface can be configured to use an earlier Bi-Com 3 ENQ/ACK/NAK protocol selected via DSW2-8 and DSW1-7/8 (on the RS232C Interface module).The earlier protocol did not have...
- Page 196 Ribbon Near End and Buffer Near Full Print Stop (without error) OFF-LINE, ERROR CONDITION Head Open Paper End Ribbon End Media Error Sensor Error Head Error Cutter Error Other Error Condition PN 9001073 Rev C Page 6-10 SATO “Se” Print Engines...
-
Page 197: Status Response
Not Supported Not Supported Label Dispense Print mode Reserved Not Supported Not Supported Not Supported Dispense at head position Dispense at dispense position Reserved Not Supported Not Supported Not Supported C PN 9001073 Rev C SATO “Se” Print Engines Page 6-11... - Page 198 Dispense Offset in dots (0 to 99) FF to 9D Dispense Offset in dots (-1 to -99) Compatibility Mode Enabled Compatibility Mode Disabled 08 to 40 Not Supported Buzzer Enabled Buzzer Disabled PN 9001073 Rev C Page 6-12 SATO “Se” Print Engines...
- Page 199 4 byte Sensor Status Word bounded by an STX-ETX pair that reports the values of the printer counters. BYTE VALUE DESCRIPTION NUMBER Reflective Sensor Level Transmissive Sensor Level Out of Paper Paper Present Head Open Head Closed PN 9001073 Rev C SATO “Se” Print Engines Page 6-13...
- Page 200 BYTE VALUE DESCRIPTION NUMBER Free Font Memory Total Font Memory 9-12 Free Form Overlay Memory 13-16 Total Form Overlay Memory 17-20 Free Graphic Memory 21-24 Total Graphic Memory PN 9001073 Rev C Page 6-14 SATO “Se” Print Engines...
- Page 201 18 byte Form Overlay Status Word bounded by an STX-ETX pair that reports the Forms downloaded into the printer. BYTE VALUE DESCRIPTION NUMBER 01 to 99 Form Registration Number (ASCII value) 3-18 ASCII Form Name PN 9001073 Rev C SATO “Se” Print Engines Page 6-15...
- Page 202 Italic Attribute 79-80 Weight Attribute 81-82 Spread 83-84 Assent in dots 85-86 Registration Start Code 86-87 Registration End Code 88-95 Reserved 96-98 Code 99-100 Horizontal Valid Size 101-102 Left Gap Size PN 9001073 Rev C Page 6-16 SATO “Se” Print Engines...
- Page 203 Even Parity 1 Stop Bit 2 Stop Bits Single Item Buffer with Ready/Busy Flow Control Multi-Item Buffer with Ready/Busy Flow Control X-ON/X-OFF Flow Control Status 4 Bi-Comm Status 3 Bi-Comm PN 9001073 Rev C SATO “Se” Print Engines Page 6-17...
-
Page 204: Pin Assignments
Note: This conditions that determine when this line goes true can be modified by the LCD Service Mode Panel setting Reserved To Host +24V +/- 10% @2A - Power for external devices. Frame Ground PN 9001073 Rev C Page 6-18 SATO “Se” Print Engines... -
Page 205: Standard Operation
Start of Print Cycle End of Print Cycle Print Start Input Print Repeat Input Print End Type 1 20 milliseconds Print End Type 2 Print End Type 3 Print End Type 4 PN 9001073 Rev C SATO “Se” Print Engines Page 6-19... -
Page 206: Repeat Print
Head Head Moving Open Closed Print Motion Stopped Paper End Ribbon End Machine Error Print End Type 1 Print End Type 2 Print End Type 3 Print End Type 4 PN 9001073 Rev C Page 6-20 SATO “Se” Print Engines... -
Page 207: Section 7. Troubleshooting
If so, make sure you are sending data out the correct port. 4. Is the IEEE1284 Interface Module installed in the printer? Older versions of the Parallel Interface module will not work correctly in the “Se” printers. PN 9001073 Rev C SATO “Se” Print Engines Page 7-1... - Page 208 BASIC, it may be adding these characters automatically as the line wraps. Adding a “width” statement to your program can help to suppress these extra 0D characters by expanding the line length up to 255 PN 9001073 Rev C Page 7-2 SATO “Se” Print Engines...
-
Page 209: Using The Rs232C Serial Interface
7. From the Hex Dump, if you are seeing extra 0D (CR and LF) characters, and are using BASIC, refer to the beginning of the Command Code section. It provides hints for writing a SATO program in BASIC. PN 9001073 Rev C SATO “Se” Print Engines... - Page 210 3. Click on the Device Manager tab. 4. Make sure that the View Device by type is checked. Scroll down until you get to SATO-USB device. 5. Verify that it does not have any errors next to it. If it shows an error, remove the device and then reinstall it.
-
Page 211: Checking The Network Connection And Cabling
Ethernet Interface Module for additional causes of intermittent printer problems. Intermittent Problems If the print server and the printer start up OK, but you intermittently have problems printing, check the following: PN 9001073 Rev C SATO “Se” Print Engines Page 7-5... - Page 212 NetWare entirely with the command SET NETWARE DISABLED. 2. Check the individual protocol troubleshooting sections provided with the Ethernet Plug-In Interface Module for additional causes of intermittent printer problems. PN 9001073 Rev C Page 7-6 SATO “Se” Print Engines...
-
Page 213: Error Signals
3 Short Media Error Open/close Head Lever Label Blinks Ribbon Blinks None Ribbon Near End Replace ribbon with full roll Line Blinks None Buffer Near Full Slow down transmission rate PN 9001073 Rev C SATO “Se” Print Engines Page 7-7... - Page 214 Section 7. Troubleshooting This page left intentionally blank. PN 9001073 Rev C Page 7-8 SATO “Se” Print Engines...
-
Page 215: Command Code Quick Reference
Number of dots (01-12) for narrow bar and narrow space Bar height in dots (001-600) UCC 128 only No human readable text Human readable at top Human readable at bottom PN 9001073 Rev C Page A-1 SATO “Se” Print Engines... - Page 216 Total number of symbols in the set Mode dd..d = 9 digit numeric Postal Code eee = 3 digit numeric Country Code f f f 3 digit numeric Service Class gg..g = Data, terminated by <ESC> PN 9001073 Rev C SATO “Se” Print Engines Page A-2...
- Page 217 Plus or minus symbol (+ for increments; - for decrements) cccc = Value of step for sequence (001-9999) No. of digits for sequential numbering (01-99, default = 8) No. of digits free from sequential numbering (01-99, default=0) PN 9001073 Rev C Page A-3 SATO “Se” Print Engines...
- Page 218 Number of duplicate labels (001-999) Increment or decrement Increment Decrement Increment/decrement steps (001-999) ddd = Sequential numbering start position (001-999). Referenced to left side. eee = Incremented data length (001-999). Measured from start position. PN 9001073 Rev C SATO “Se” Print Engines Page A-4...
- Page 219 Font type. Specifies the OCR-A font with dot matrix. 5-33 M-8459Se M-8460Se M-8485Se M-8490Se OA Font Matrix 15W x 22H 22W x 33H Font type. Specifies the OCR-B font dot matrix. 5-33 PN 9001073 Rev C Page A-5 SATO “Se” Print Engines...
- Page 220 0001 to 9999 0001 to 9999 Font type. Specifies the 18W x 30L dot matrix font (including 5-38 descenders). Disables auto-smoothing of font Enables auto-smoothing if expansion is greater than 3 PN 9001073 Rev C SATO “Se” Print Engines Page A-6...
- Page 221 Sets print to 90° CCW Sets print to 180° rotated (upside down) Sets print to 270° CCW (90° CW) $a,b,c,d Vector font. Specifies printing of the unique SATO vector font. 5-36 Helvetica Bold (proportional spacing) Helvetica Bold (fixed spacing) Font width (50-999 dots*)
- Page 222 Optional message to be displayed on the LCD panel. Maximum of 32 characters. 2D3m,a,bb,c QR Code. Prints QR Code symbols. See command description for 5-110 d,ee,ff,gg parameter definition and usage. PN 9001073 Rev C SATO “Se” Print Engines Page A-8...
-
Page 223: Calendar Commands
Initialize Expanded Memory. Initializes the Memory Area and formats 5-97 it for use. Should be preceded by the Memory Area Select command for the memory area to be initialized. aaaaaaaa 8 character alphanumeric password PN 9001073 Rev C Page A-9 SATO “Se” Print Engines... - Page 224 = Number of format to be recalled (001 to 999) Number of field to be recalled (01-99) cc...c = Data to be placed in field. PN 9001073 Rev C SATO “Se” Print Engines Page A-10...
- Page 225 Vertical size of window to be stored (50 to Vmax) *a,bbb Clear Expanded Memory. Clears individual memory and buffer areas. 5-82 Memory section to be cleared SATO graphic files (001-999) PCX graphic file (001-999) Stored formats (001-999) TrueType fonts, memory card (001-009) BMP graphic file (001-999)
- Page 226 Dispense, backfeed before print POabcc Pitch Offset. Sets the pitch type, direction and offset to be used 5-113 Cutter Dispense Tear-Off Continuous Positive offset Negative offset 00 to 99, offset value in dots. PN 9001073 Rev C SATO “Se” Print Engines Page A-12...
- Page 227 LEGACY COMMANDS These commands are provided for legacy applications that use command streams created for older SATO printers. It is not recommended that these commands be used for new applications. Expanded Print Length. This command sets the printer to the Expanded print length (14 inches).
- Page 228 Appendix A: Command Quick Reference This page left intentionally blank. PN 9001073 Rev C SATO “Se” Print Engines Page A-14...
- Page 229 • Industrial 2 of 5 • Matrix 2 of 5 • Code 128 • MSI • Code 93 • UPC-E • UPC Supplements(Bookland) • UCC-128 • Postnet • Data Matrix • Maxicode • PDF417 PN 9001073 Rev C SATO “Se” Print Engines Page B-1...
-
Page 230: Appendix B: Bar Code Specifications
Example B002100A12345B Notes You must add the appropriate (A, B, C or D) Start and Stop characters to the data string. The printer does not automatically add them when printing. PN 9001073 Rev C Page B-2 SATO “Se” Print Engines... -
Page 231: Code 39
12.7 M-8459Se 10.0 M-8460Se 10.0 M-8485Se 15.6 10.0 Example B103100*CODE 39* Notes You must add the “*” Start/Stop characters to the data stream. The printer does not add them automatically. PN 9001073 Rev C SATO “Se” Print Engines Page B-3... -
Page 232: Interleaved Two Of Five
11.3 M-8460Se 10.0 12.7 M-8485Se 14.5 10.0 Example B20310045676567 Notes To add horizontal guard bars to the top and bottom of the bar code, use the Line and Box command. PN 9001073 Rev C Page B-4 SATO “Se” Print Engines... -
Page 233: Upc-A/Ean-13
150% Notes D3 provides guide bars that extend longer than the rest of the bar code. BD3 provides guide bars and the human readable text below the symbol. Example BD30215001234567890 PN 9001073 Rev C SATO “Se” Print Engines Page B-5... - Page 234 5. Subtract the result of Step 4 from the next highest increment of i.e., 90 - 85 = 5 6. The correct Modulo 10 check digit for the 11 digit string “01234567890” is 5. PN 9001073 Rev C Page B-6 SATO “Se” Print Engines...
-
Page 235: Ean-8
1. D4 provides guide bars that extend longer than the rest of the bar code and the human readable text below the symbol. 2. The check digit is automatically calculated for EAN-8. Example BD4031001234567 PN 9001073 Rev C SATO “Se” Print Engines Page B-7... -
Page 236: Industrial Two Of Five
Character Set 0-9 (numeric only) Notes To add horizontal guard bars to the top and bottom of the bar code, use the Line and Box command. Example BD50310012345 PN 9001073 Rev C Page B-8 SATO “Se” Print Engines... -
Page 237: Matrix Two Of Five
Character Set 0-9 (numeric only) Notes To add horizontal guard bars to the top and bottom of the bar code, use the Line and Box command. Example BD60310012345 PN 9001073 Rev C SATO “Se” Print Engines Page B-9... -
Page 238: Code 128
M-8485Se 15.0 13.8 12.2 Example The following will start in Subset A for the characters “AB”, shift to Subset B for “789”, then shift to Subset C for “123456”. BG03100>GAB>B789>C123456 PN 9001073 Rev C Page B-10 SATO “Se” Print Engines... -
Page 239: Msi
Width of narrow element in dots (01-12) ccc = Bar height in dots (001-600) (data)= Bar code data (numeric); maximum of 15 digits Required check digit Character Set 0-9 (numeric only) Example BA03100123455 PN 9001073 Rev C SATO “Se” Print Engines Page B-11... - Page 240 0-9, A-Z, -, ., Space, $, /, +, % Density Table Printer Nar- Value of “X” Density Model row/Wide “bb” Dimension (char/inch) Ratio (mils) 33.3 M-8490Se 16.7 11.1 22.5 M-8459Se 10.0 11.3 M-8460Se M-8485Se Example BC03100081234ABCD PN 9001073 Rev C Page B-12 SATO “Se” Print Engines...
-
Page 241: Upc-E
M-8490Se 10.0 13.3 100% M-8459Se 10.0 M-8460Se 15.0 112% M-8485Se 20.0 150% Notes Command DE provides guide bars that extend longer than the rest of the bar code. Example DE03100123456 PN 9001073 Rev C SATO “Se” Print Engines Page B-13... -
Page 242: Bookland (Upc/Ean Supplements
0-9 (numeric only) Density Table Printer Value of “bb” Narrow Bar Magnification Model Width (mils) Factor Below Minimum M-8490Se 10.0 13.3 100% M-8459Se 10.0 M-8460Se 15.0 112% M-8485Se 20.0 150% Example BF0313021826 PN 9001073 Rev C Page B-14 SATO “Se” Print Engines... -
Page 243: Ucc-128
• If any part of the human readable text extends outside the printable area, none of it will be printed. Care should be exercised when placing the bar code to allow for any automatically created human readable text. PN 9001073 Rev C SATO “Se” Print Engines Page B-15... - Page 244 Appendix B: Bar Code Specifications Example Without incrementing BI04150101234567000000001 With incrementing BI04150101234567000000001 PN 9001073 Rev C Page B-16 SATO “Se” Print Engines...
-
Page 245: Postnet
(i.e. 5, 6, 9 or 11), the command is ignored and nothing will be printed. 4. If a “–” is included in the data stream (i.e. 84093-1565), it is ignored. Example BP94089 >BP123456 BP123456789 BP12345678901 PN 9001073 Rev C SATO “Se” Print Engines Page B-17... -
Page 246: Data Matrix
= Sequential numbering start position (001 - 999) Referenced to left side. eee = Incremented data length measured from start position (001 - 999) Print Data <ESC>DCxxx...x xx...x = Data PN 9001073 Rev C Page B-18 SATO “Se” Print Engines... - Page 247 ASCII ISO 8-bit, International (20 - FF ) 8-Bit Notes See AIM USA Technical Specification Data Matrix for information on the structure of this symbology. Example DCDATA MATRIX DATA MATRIX PN 9001073 Rev C SATO “Se” Print Engines Page B-19...
-
Page 248: Maxicode
“000000“ “000“ “000“ 91 characters fixed data fixed data fixed data alphanumeric Notes See AIM I.S.S specification for information on the structure of this symbology. Example PN 9001073 Rev C Page B-20 SATO “Se” Print Engines... -
Page 249: Pdf417
Character Set ASCII 128 character set plus PC437 Extended Character set. Notes See AIM USA Uniform Symbology Specification PDF417 for information on the structure of this symbology. Example BK0607400000021PDF417 PDF417 PDF417 PN 9001073 Rev C SATO “Se” Print Engines Page B-21... -
Page 250: Code 128 Character Table
Subset A >E FNC1 >F FNC1 >F FNC1 >F Note: When Subset C is chosen, you must specify an even number of data positions because of the interleaved encodation method. PN 9001073 Rev C Page B-22 SATO “Se” Print Engines... - Page 251 Appendix B: Bar Code Specifications Code 128 Character Table PN 9001073 Rev C SATO “Se” Print Engines Page B-23...
- Page 252 Appendix B: Bar Code Specifications Code 128 Character Table (cont’d) PN 9001073 Rev C Page B-24 SATO “Se” Print Engines...
-
Page 253: Appendix C: Custom Characters And Graphics
16 dot x 16 dots 24 dots by 24 dots 2. Lay out a grid and draw the image on the grid. Each square represents one dot Blacken squares for each printed dot PN 9001073 Rev C SATO “Se” Print Engines Page C-1... - Page 254 “F” and “F”. To send binary characters using BASIC, the expression “CHR (&HFF) will send the binary equivalent of FF (i.e., 11111111). PN 9001073 Rev C Page B-2 SATO “Se” Print Engines...
- Page 255 Appendix C: Custom Characters and Graphics 6. To recall the custom character from memory, send the following code to the printer: The printer output for both the hexadecimal and binary format examples is: PN 9001073 Rev C SATO “Se” Print Engines Page C-3...
-
Page 256: Custom Graphics Example
(48 x 48). 2. Lay out a grid and draw the image on the grid. Each square represents one dot Blacken squares for each printed dot PN 9001073 Rev C Page C-4 SATO “Se” Print Engines... - Page 257 Appendix C: Custom Characters and Graphics 3. Transfer the image into a bit map representation and then into hexadecimal format: PN 9001073 Rev C SATO “Se” Print Engines Page C-5...
- Page 258 “CHR$ (&HC0)” which sends the hexidecimal value of “C0” as binary data (11000000). The BASIC program listing for sending this graphic to the printer (using the RS232 port) in binary format is: PN 9001073 Rev C Page C-6 SATO “Se” Print Engines...
- Page 259 Appendix B: Bar Code Specifications The printer output for both the hexadecimal and binary format example is: PN 9001073 Rev C SATO “Se” Print Engines Page B-7...
-
Page 260: Pcx Graphics Example
The following basic program will send and print this file: The printer output for this program is: PN 9001073 Rev C Page C-8 SATO “Se” Print Engines... -
Page 261: Appendix D: Optional Accessories
Instructions for installing the Memory Card Option are included with the installation kit. Error Handling Memory Card error conditions are indicated to the operator using a combination of the ERROR LED on the front panel and the audible indicator. PN 9001073 Rev C SATO “Se” Print Engines Page D-1... -
Page 262: Expanded Flash Rom Memory
WARNING: Never connect or disconnect interface cables (or use a switch box) with power applied to either the host or the printer. This may cause damage to the interface circuitry and is not covered by warranty. PN 9001073 Rev C Page D-2 SATO “Se” Print Engines... - Page 263 5. Replace the two Interface Card Retaining Screws. 6. If the new Interface Module is for a serial interface, set DSW1 for the proper operation. 7. Connect the interface cable to the connector. PN 9001073 Rev C SATO “Se” Print Engines Page D-3...
- Page 264 Appendix D: Optional Accessories This page left intentionally blank. PN 9001073 Rev C Page D-4 SATO “Se” Print Engines...
-
Page 265: Appendix E: Custom Protocol Command Codes
PARAMETER STANDARD SETTING ALTERNATE SETTING (DEFAULT) OFFLINE h (Auto ONLINE) 0 = YES 1 = NO i (Zero Slash) 0 = YES 1 = NO j j (Eurocharacter) User Defined PN 9001073 Rev C SATO “Se” Print Engines Page E-1... -
Page 266: Reset
7. If the printer does not beep and print a setting label, turn the printer off, check your download command stream for errors and start the download process over at step 1. PN 9001073 Rev C Page E-2 SATO “Se” Print Engines... - Page 267 If they are incorrect, turn the unit off without pressing the FEED key and begin the download process again at step 1. STX = XX ETX=XX Custom Code Printout Label ESC=XX ENQ=XX CAN=XX NULL=XX AUTO ONLINE=YES ZERO SLASH=YES PN 9001073 Rev C SATO “Se” Print Engines Page E-3...
- Page 268 Appendix E: Custom Protocol Command Codes This page left blank intentionally. PN 9001073 Rev C Page E-4 SATO “Se” Print Engines...