Table of Contents
Advertisement
Quick Links
Advertisement
Table of Contents

Related Manuals for Hoover H7W4 48MBC-S


Summary of Contents for Hoover H7W4 48MBC-S
- Page 2 Thank Y Thank you for purchasing a Hoover Product. Please read these instructions carefully before using this appliance. The instructions contain important information which will help you get the best out of the appliance and ensure safe and proper installation, use and maintenance.
-
Page 3: Table Of Contents
Content 1- Safety information ......................... 4 2- Installation ............................7 3- Practical hints ..........................11 4- Product description ........................13 5- Control panel ..........................14 6- Programmes ..........................21 7- Consumption ..........................24 Daily use ............................... 25 Remote control (WI-FI) .... -
Page 4: 1-Safety Information
1-Safety information 1-Safety information Before switching on the appliance for the first time read the following safety hints! WARNING! Daily use This appliance is intended to be used in household and similar applica- ► tions such as: - Staff kitchen areas in shops,offices and other working environmen- - Farm houses;... - Page 5 1-Safety information Only use the hose-sets supplied with the appliance for the water supply ► connection (do not reuse old hose-sets). Water pressure must be between 0.03 MPa and 1 MPa. ► Make sure carpets or rugs do not obstruct the base or any of the ►...
- Page 6 1-Safety information Intended use This appliance is intended for washing machine-washable laundry only. Anytime follow the instructions given on the label of each garment label. It is designed exclusively for domestic use inside the house. It is not intended for commercial or industrial use. Changes or modifications to the device are not allowed.
-
Page 7: 2-Installation
2-Installation 2-Installation 2.1 Preparation Make sure there is no transport damage. Make sure all transport bolts are removed. Handle the appliance always with at least two persons because it is heavy. Take the appliance out of the packaging. Remove all packaging material including protecting film on cabinet, polystyrene ... - Page 8 2-Installation Note: Keep in safe place Keep all parts of the transport protection in a safe place for later use. Whenever the appliance is to be moved at first reinstall the protection parts. 2.4 Moving the appliance If the machine is to be moved to a distant location, replace the transportation bolts removed before installation to prevent damage: The assembly takes place in reverse order.
- Page 9 2-Installation Following connections are possible: 2.6.1 Drain hose to sink Hang the drain hose with the U-support over the edge of a sink with adequate size (Fig. 2-5). Protect the U-support sufficiently against slip- ping. 2.6.2 Drain hose to waste water connection The internal diameter of the stand pipe with ...
- Page 10 2-Installation 2.8 Electrical Connection 2-10 Before each connection check if: power supply, socket and fusing are appropriate to the rating plate. the power socket is earthed and no multi-plug or extension are used. the power plug and socket are strictly according. ...
-
Page 11: 3-Practical Hints
3-Practical hints 3-Practical hints 3.1 Load tips When sorting laundry, make sure: - have eliminated metallic objects such as hair clips, pins, coins, from laundry; - to have buttoned pillow cases, closed zips, tied loose belts and long robe ribbons; - to have removed rollers, hooks or clips from curtains;... - Page 12 3-Practical hints the manufacturer’s instructions every time: correctly using the appliance with the right dose allow you to avoid waste and to reduce the environmental impact. When washing heavily soiled whites , we recommend using cotton programs of 60°C or above and a normal washing powder (heavy duty) that contains bleaching agents that at medium/high temperatures provide excellent results.
-
Page 13: 4-Product Description
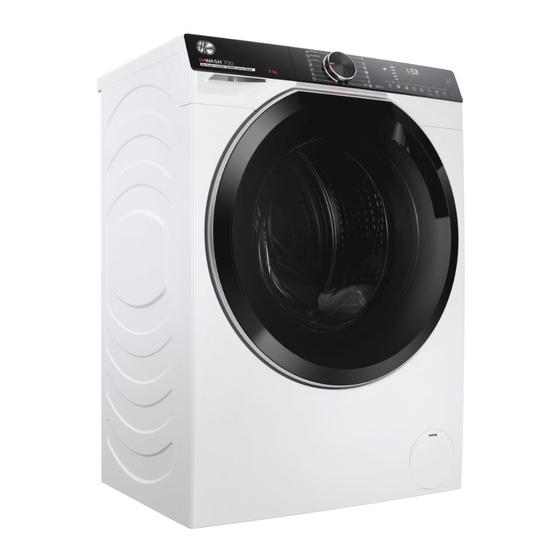
4-Product description 4-Product description Note: Due to technical changes and different models,the illustrations in the following chapters may differ from your model. 4.1 Picture of appliance Front (Fig. 4-1): Rear side (Fig. 4-2): 1 Detergent / Softener 5 Washer door 1 Transportation bolts (T1-T4) drawer 6 Service flap... -
Page 14: 5-Control Panel
5-Control panel 5-Control panel 3 Detergent /Softener drawer 5 "Start/Pause" button 1 Programme selector 4 Function buttons 2 Display Note: Acoustic signal The acoustic signal can be selected or canceled if necessary;see DAILY USE (see P29 8.13). 5.1 OFF Turn the knob to any position (except OFF) to start the machine. - Page 15 Note: Factory settings To get best results in each programme Hoover has well defined specific default settings. If there is no special requirement default settings are recommended. 5.5.1 Function button " "...
- Page 16 5-Control panel 5.5.3 Function button " " Thanks to Eco Doser (Fig.5-9), the appliance is able to suggest the optimal amount of washing detergent to pour into the drawer based on the actualload. This smart suggestion can only be activated in certain program- mes in the following way: - Place the laundry in the drum and close the door.
- Page 17 5-Control panel 5.5.6 Function button " " 5-12 This button (Fig.5-12) allows you to choose between three different options: - PREWASH This option allows you to make a prewash and it is particularly useful for heavily soiled loads (can be used only on some progr- ammes as shown in the table of programmes).
- Page 18 5-Control panel -STEAMLEVEL 5-13 After selecting the STEAM CARE PRO programme, you can use this button to choose between three steam treatments of different intensities, designed only for dry garments and depending on the type of fabric: (default selection) -COTTON This programme is used for cotton garments.
- Page 19 5-Control panel We recommend a bucket self-cleaning after using the washing machine for 50 times. When using this program,please do not put any clothes deter- gent or washing machine cleaner. Note: These options must be selected before pressing the START/PAUSE button. If an option is selected that is not compatible with the selected programme then the option indicator light goes off.
- Page 20 5-Control panel 5.6.2 Change the language If you want to change the setting language you will have to press simultaneously "Delay" and "Option" buttons for about 5 seconds, the language choose last time will appear on display,and you will be able to choose a new language (by pressing button “speed” or ”temperature”...
-
Page 21: 6-Programmes
6-Programmes Detergent compartment for; Detergent Optional Softener or care product Prewash MAX KG 1 2 3 1000 1000 AUTO CARE 10 12 ALL IN ONE 49′ RAPID CARE 14′ RAPID CARE 30′ RAPID CARE 44′ ALLERGY CARE PRO STEAM CARE PRO SOFT CARE FITNESS CARE... - Page 22 6-Programmes 6-Programmes Description of programmes To clean different types of fabrics and various levels of dirt, the washing machine has specific programs to meet every need of washing (see table of programmes). Choose programme in accordance with the laundry instructions appearing on labels, especially the maximum recommended temperature.
- Page 23 6-Programmes RINSE This program performs 2 rinses with an intermediate spin (which can be reduced or excluded by using the appropriate button). It is used for rinsing any type of fabric, for example after a wash carried out by hand. REMOTE CONTROL (Wi-Fi) Position that you have to select when you want to enable / disable remote control through the App, via Wi-Fi.
-
Page 24: 7-Consumption
7-Consumption Scan QR code on energy label for energy consumption information. 7-Daily use The actual energy consumption may differ from the declared one according to local conditions. Indicative information(as per Commission Regulation (EU) 2019/2023): M ax Effective Rated Programme Tem perature Speed Capacity Residual... -
Page 25: 8-Daily Use
8-Daily use 7-Daily use 8.1 Power supply Connect the washing machine to a power supply (220V to 240V~/50Hz; Fig. 8-1). Please refer also to section INSTALLATION (see P10). 8.2 Water connection Before connecting check the cleanliness and cla- rity of the water inlet. Turn on the tap (Fig.8-2). - Page 26 8-Daily use Care chart Washing Washable up to 95°C Washable up to 60°C Washable up to 60°C normal process normal process mild process Washable up to 40°C Washable up to 40°C Washable up to 40°C normal process mild process very mild process Washable up to 30°C Washable up to 30°C Washable up to 30°C...
- Page 27 8-Daily use 8.5 Selecting detergent Washing efficiency and performance is determined by used detergent quality. Use only machine wash approved detergent. If needed use specific detergents, e.g for synthetic and woolen fabric. See tips for countertop detergent stickers. ...
- Page 28 8-Daily use 8.6 Adding detergent 1. Slide out the detergent drawer. 2. Put the required chemicals into corresponding compartments (Fig. 8-4). 3. Push back the drawer gently. Note: Remove detergent residues before next wash cycle from the detergent drawer. Do not overuse detergent or softener.
- Page 29 8-Daily use 8.10 Start wash programme Touch "Start/Pause" button (Fig. 8-7) to start. Appliance operates according to present settings. Changes are only possible by cancelling the programme. 8.11 Interrupt / cancel wash programme To interrupt a running programme press gently "Start/Pause". The LED above the button is flashing.
-
Page 30: 9-Remote Control (Wi-Fi)
9-Remote control (WI-FI) 8-Remote control (WI-FI) 9.1 General This appliance is equipped with Wi-Fi technology that allows you to control it remotely via App. 9.2 Requirements 9.3 Download and installation of hOn APP Download the... - Page 31 9-Remote control (WI-FI) 9.4 Appliance pairing (on app) 1.The App is available for devices running both Android and iOS, both for tablets and for smartphones. 2.Get all the details of the Wi-FI functions by browsing the App in DEMO mode. 3.The frequency of the home Wi-Fi network has to be set on the 2.4 GHZ band.
-
Page 32: 10-Care And Cleaning
10-Care and cleaning 9-Care and cleaning 10.1 Cleaning the detergent drawer 10-1 Take always care there are no detergent residues. Clean the drawer regularly (Fig. 10-1): 1. Pull out the drawer until it stops. 2. Press the release button and remove the drawer. 3. - Page 33 10-Care and cleaning 10.5 Long periods of disuse 10-7 10-6 If the appliance is left idle for a longer period: 1. Pull out the electrical plug (Fig. 10-6). 2. Turn off water supply (Fig. 10-7). 3. Open the door to prevent formation of moisture and odours.
- Page 34 10-Care and cleaning 10-14 10-15 9. Clean carefully pump filter, e.g. using running water (Fig. 10-14). 10. Refix it thoroughly (Fig. 10-15). 11. Close service flap. CAUTION! Pump filter sealing has to be clean and unhurt. If the lid is not full tightened, water can escape.
-
Page 35: 11-Troubleshooting
11-Troubleshooting 10-Troubleshooting Many occuring problems could be solved by yourself without specific expertise. In case of a problem please check all shown possibilities and follow below Instructions before you contact an after sales service. See CUSTOMER SERVICE. WARNING! Before maintenance, deactivate the appliance and disconnect the mains plug from the mains socket. - Page 36 11-Troubleshooting Problem Cause Solution • Contact the After sales service. • Temperature sensor error. • Contact the After sales service. • Heating error. • Contact the After sales service. • Motor error. • Contact the After sales service. • Water level sensor error. FC0,FC1 or •...
- Page 37 11-Troubleshooting Problem Cause Solution • Check detergent recommendat- Excessive foam • Detergent is not appropriate. ions. floats drum and/or • Excessive use of detergent. • Reduce amount of detergent. detergent drawer. • This is normal and doesn’t affect Automatic • Washing programme duration will be functionality.
-
Page 38: 12-Technical Data
12-Technical data 11-Technical data 12.1 Additional technical data H7W 449* H7W 610* H7W 69* H7W 412* H7W 448* Voltage in V 220-240 V~/50Hz Current in A Max power in W 1900 Water pressure in MPa 0.03≤P <1 Net weight in kg 12.2 Product dimensions FRONT VIEW WALL... -
Page 39: 13-Customer Service
If you cannot find a solution there, please contact: your local dealer. the Assistence Area on the Hoover website where you can find information on Warranties, Accessories and Spare Parts and Contact numbers. To contact our Service, ensure that you have the following data available. - Page 40 - H7W -...