Table of Contents
Advertisement
Quick Links
Advertisement
Table of Contents

Related Manuals for Martin Audio CDD-LIVE! Series


Summary of Contents for Martin Audio CDD-LIVE! Series
-
Page 1: User Guide
CDD-LIVE! Series User Guide THE SOUND OF THINGS TO COME... -
Page 2: Electrical Safety
CDD‐LIVE USER GUIDE Safety Information UNPACKING THE UNITS After unpacking the unit, please check it carefully for any damage. If any is found, immediately notify the carrier concerned ‐ you, the consignee, must instigate any claim. Please retain all packaging in case you need to return the unit. . Please think of our environment When the product has reached the end of its useful life, please dispose of it responsibly through a recycling centre. Electrical Safety ! READ THIS FIRST! IMPORTANT SAFETY INSTRUCTIONS Read these Instructions. Keep these instructions. Heed all warnings. Follow all instructions. Do not block any ventilation openings; Install in accordance with the manufacturer’s instructions. Do not install near any heat source such as radiators, heat registers, stoves, or other such apparatus that produce heat. Do not defeat the purpose of the grounding type plug, a grounding plug has two blades and a grounding prong, the third prong is provided for your safety. If the provided plug does not fit your outlet consult an electrician for a replacement type. ... -
Page 3: Approvals
CDD‐LIVE USER GUIDE Approvals SAFETY IEC60065:2002 + A1:2006 Environmental IP24 When factory supplied and with appropriate cowls, and used with IP rated mains connectors Country of origin United Kingdom EMC EMISSION EN55103‐1:2009 + A1:2012 EMC IMMUNITY EN55103‐2:2009 FCC CFR47 PART 15B‐2015 ICES‐003:2012 This is a class A product. In a domestic environment this product may cause radio interferences in which case the user may be required to take adequate measures. Safety Rules • This CDD‐Live product must be powered exclusively by an earth connected mains socket in electrical networks compliant to the IEC 364 or similar local rules. It is absolutely vital that the user verifies this ... -
Page 4: Lire Avant De Commencer
CDD‐LIVE USER GUIDE LIRE AVANT DE COMMENCER! CONSIGNES DE SÉCURITÉ IMPORTANTES Lire ces consignes. Conserver ces instructions. Observer tous les avertissements. Suivre toutes les consignes. Ne pas utiliser cet appareil à proximité de l'eau. Nettoyer uniquement avec un chiffon sec. Ne pas installer à proximité d'une source de chaleur telle qu'une flamme nue, un radiateur, une bouche de chaleur, un poêle ou d'autres appareils (dont les amplificateurs) produisant de la chaleur. Ne pas détériorer la sécurité de la fiche polarisée ou de la fiche de terre. Une fiche polarisée comporte deux lames dont l'une est plus large que l'autre. Une fiche de terre comporte deux lame et une troisième broche de mise à la terre. La lame la plus large ou la troisième broche assure la sécurité de l'utilisateur. La fiche fournie ne s'adapte pas à la prise électrique, demander à un électricien de remplacer la prise hors normes. Protéger le cordon d'alimentation afin que personne ne marche dessus et que rien ne le pince, en particulier au niveau des fiches des prises de courant et du point de sortie de l'appareil. Utiliser uniquement les accessoires spécifiés par le fabricant. Utiliser uniquement avec un chariot, un trépied, un support ou une table spécifiée par le fabricant ou vendu avec l'appareil. Si un chariot est utilisé, déplacer l'ensemble chariot‐appareil avec précaution afin de ne pas le renverser, ce ... -
Page 5: Table Of Contents
CDD‐LIVE USER GUIDE Contents Safety Information .................................... 1 UNPACKING THE UNITS ................................ 1 Electrical Safety .................................... 1 IMPORTANT SAFETY INSTRUCTIONS ............................ 1 CAUTION ....................................... 1 Approvals ...................................... 2 Safety Rules .................................... 2 LIRE AVANT DE COMMENCER! ................................. 3 CONSIGNES DE SÉCURITÉ IMPORTANTES ............................. 3 Introduction ...................................... 7 ... - Page 6 CDD‐LIVE USER GUIDE Preset 1 .................................... 22 Preset 2 .................................... 22 Preset 3 .................................... 22 Meter Mode .................................... 22 Cabinet Configuration .................................. 23 GRILL REMOVAL .................................. 23 BADGE ROTATION .................................. 25 ROTATING DRIVER .................................. 25 Dante ...................................... 27 ...
- Page 7 CDD‐LIVE USER GUIDE CDD‐Live 15 .................................... 75 CSX‐Live 118 .................................... 76 CSX‐Live 218 .................................... 77 Technical Drawings .................................. 78 CDD‐Live 8 .................................... 78 CDD‐Live 12 .................................... 78 CDD‐Live 15 .................................... 79 CSX‐Live 118 .................................... 79 CSX‐Live 218 .................................... 80 Warranty ...................................... 81 CDD‐LIVE User Guide V1.0 ...
-
Page 8: Introduction
CDD‐LIVE USER GUIDE Introduction Most self‐powered portable loudspeakers have been underpowered, light‐duty systems or very high‐end systems out of reach of many users. Now, with the multi‐purpose CDD‐LIVE! Series, Martin Audio brings everything rental companies, system integrators and musicians require from a self‐powered loudspeaker into sharp focus. Comprising three full‐range models and two subwoofers, CDD‐LIVE! Covers practically all professional stand‐alone and distributed applications — from sound reinforcement and monitoring for live bands, DJ’s and corporate events, to installations ... - Page 9 CDD‐LIVE USER GUIDE Setting up a Dante network is simple — even complex networks can be configured easily and quickly, with all devices discovered and displayed in the Dante Controller software. Once setup, the computer running Dante Controller can be removed from the network if desired, with system settings stored in the devices themselves and automatically restored when a device is power‐ cycled. Switching between XLR analogue inputs to Dante on CDD‐LIVE! enclosures is automatic if a digital stream is present, unless the user selects the XLR option in VU‐NET. This offers the option of running both Dante digital and analogue simultaneously with the analogue feed acting as a redundant back‐up to seamlessly take over in the event of a failure in the Dante feed up‐stream of the CDD‐Live speaker. CDD‐LIVE User Guide V1.0 ...
-
Page 10: Quick Start
CDD‐LIVE USER GUIDE Quick Start CDD‐Live can be set up extremely quickly and easily using a standard analogue audio connection and selecting the correct preset. This diagram shows the wiring for a basic system;‐ To configure the system, these are the necessary steps;‐ Connect a mains cable from a nearby mains outlet to the PowerCon True1 mains inlet on all CDD‐Live cabinets. (See the chapter on wiring PowerCon True1 cables for more details) Do not yet turn on power at the socket. Connect an XLR Cable from our audio source; mixer or similar into the CSX‐Live sub if used. One cable will be required for left and another for right for a stereo speaker array. If a subwoofer is not used connect straight to the CDD‐Live cabinet. Connect a short XLR cable from each CSX Sub to the corresponding CDD‐Live cabinet. Turn on your mixing console Turn on your CDD‐Live speakers Select the correct Preset on the back of the CSX and CDD‐Live speakers as follows;‐ CDD‐Live 8, 12, 15 full range (no subwoofer) Preset 1 CDD‐Live 8, 12, 15 with Subwoofer Preset 2 CDD‐Live 8, 12, 15 stage monitor mode (see chapter on rotating driver) Preset 3 ... -
Page 11: Cdd-Live Range
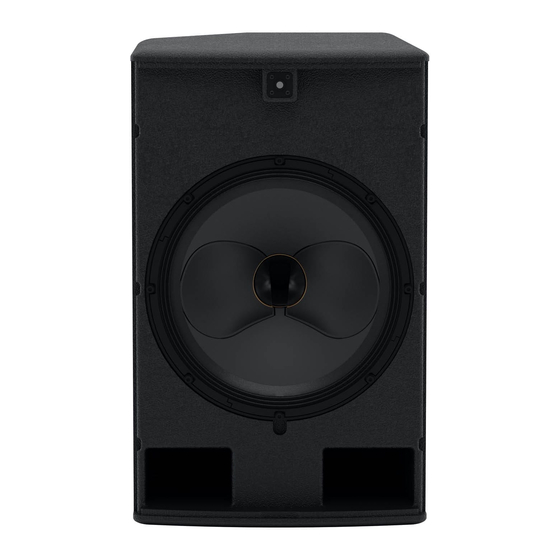
CDD‐LIVE USER GUIDE CDD‐Live Range The CDD‐Live range consists of three full‐range models and two sub woofers (CSX‐Live). CDD‐Live 8 Ultra‐compact featuring an 8" low frequency element and a coaxial 1" compression driver. Two channels of Class D amplification deliver 1000W peak to the LF and 300W peak to the HF. CDD‐Live 12 High performance featuring a 12" LF driver with coaxial 1" compression driver. The on‐board Class D amplification delivers 2000W peak to the LF and 500W peak to the HF. CDD‐Live 15 Very high output system with a 15" low frequency and 1.4" Compression Driver. Amplification is 2000W peak to the LF and 500W peak to the HF. ... -
Page 12: The Range In Detail
CDD‐LIVE USER GUIDE The Range in Detail CDD‐LIVE 8 The CDD‐LIVE 8 is an ultra‐compact two‐way system featuring an 8” (200mm) LF/1” (25mm) exit HF Coaxial Differential Dispersion driver which can be easily rotated for horizontal or vertical orientation. It's very small size gives no indication of its high output capability. As a stand‐alone loudspeaker, it has a multitude of professional applications — from distributed sound reinforcement, HoW and AV events to front fill/infill and use as a micro stage monitor. Its two‐channel on‐board Class D amplifier module delivers 1000W LF + 300W HF peak output to the drivers and its sophisticated DSP section performs EQ, crossover and limiter functions as well as driver optimisation. CDD‐Live 8 Accessories CDDWB6/8B Wall Mount Installation bracket CDDCB6/8B Ceiling Mount Bracket (landscape mode only) CDDLUB8B Universal Bracket Assembly CDDLYA8B Yoke Assembly ASF20071 Wind‐up distance pole (for use in conjunction with the CSX‐Live 118) ASF20045 35mm Stand Adaptor (for use with the Universal Bracket) HTK00003 8mm Shouldered Eye Bolt ... -
Page 13: Cdd-Live 12 Accessories
CDD‐LIVE USER GUIDE CDD‐LIVE 12 The CDD‐LIVE 12 is a high‐performance system designed for professional applications that require high output levels from a very compact enclosure. Its high‐specification 12” (300mm) LF/1” (25mm) exit HF Coaxial Differential Dispersion driver delivers perfect sound across the audience over medium‐throw distances. The LF driver has a 2.5” (65mm) voice coil and efficient motor with an aluminium demodulating ring to minimise distortion, while the HF driver utilises a 1.75” (44mm) polyimide diaphragm and features a low‐compression phase plug to reduce non‐linearity. The on‐board fan‐cooled, two‐channel Class D amplifier module delivers a total of 2500W peak output to the LF and HF drivers. ... -
Page 14: Cdd-Live 15 Accessories
CDD‐LIVE USER GUIDE CDD‐LIVE 15 Ideal for medium‐to‐large rooms, the CDD‐LIVE 15 is a very high‐power, self‐powered two‐way system designed for professional live applications and installations that demand the ultimate in sonic performance from a single enclosure. It combines very high output capability with exceptional fidelity and coverage consistency. Its Coaxial Differential Dispersion driver comprises a powerful 15” (380mm)/3” (75mm) voice coil LF driver and a 1.4” (35mm) exit HF compression driver with a 3” (75mm) pure titanium diaphragm. Its fan‐cooled Class D amplifier delivers 2000W LF + 500W HF peak output to the drivers and on‐board DSP and Dante networking enhances system performance, flexibility and control. CDD‐Live 15 Accessories ASF20048 Universal Bracket Assembly CDDLYA15B Yoke Assembly ASF20071 ... -
Page 15: Csx-Live 118
CDD‐LIVE USER GUIDE CSX‐LIVE 118 The CSX‐LIVE 118 is a compact, high performance subwoofer that extends the low frequency operating range of the combined system to 35Hz and provides exceptional low frequency impact. An ideal partner for the CDD‐LIVE 8 and 12, it features a long excursion 18” (460mm)/4” (100 mm) voice coil driver with a water‐resistant cone and triple roll surround in a compact reflex enclosure. The design of the 18” driver maximises output while minimising power compression and distortion, and the four reflex ports have a large frontal area to reduce turbulent air noise at very high levels. The enclosure is constructed from multi‐laminate birch ply, finished with a durable polyurethane coating and equipped with a steel grille, twin grab handles, skids, flying inserts and a threaded pole socket. A twin‐fan Class D power module delivers 2000W peak output to the driver, and crossover, EQ, and control functions are provided by the on board DSP section. CSX‐Live 118 Accessories ASF20071 Wind‐up distance pole HTK00004 10mm Shouldered Eye Bolt CDDLTC118 CSX‐LIVE 118 Transit Cover CDD‐LIVE User Guide V1.0 ... -
Page 16: Csx-Live 218
CDD‐LIVE USER GUIDE CSX‐LIVE 218 The CSX‐LIVE 218 achieves the ultimate in subwoofer performance for the most demanding professional applications – delivering very high output levels and superb transient performance with minimal distortion. With an operating range of 35Hz‐ 150Hz ± 3dB, it houses dual 18” long‐excursion (460mm)/4” (100mm) voice coil drivers with water‐resistant cones and triple roll surrounds. The enclosure is constructed from multi‐laminate birch ply and coated with hardwearing textured paint. Eight reflex ports provide a large frontal area to reduce turbulent air noise, and a perforated steel grille protects the drivers from damage with ... -
Page 17: Connections
CDD‐LIVE USER GUIDE Connections The rear panel is virtually identical on all models in the range and features all connections required in addition to the preset selection button. Mins input is via a Neutrik PowerCon True1. There is a female 3‐pin XLR for analogue audio input with a parallel connected male outlet to enable easy daisy‐chaining of an audio feed between cabinets. There are two Ethernet ports which allow PC connection for both control using Martin Audio's View‐Net platform and for digital audio networking using Dante. MAINS The mains inlet is a Neutrik® PowerCon True1 socket and a mating connector is supplied with each CDD‐Live speaker. The True 1 is the latest version of Neutrik's PowerCon range and is a small, light, rugged, inexpensive latching mains connector rated for use up to 240V at 16A. It is rated with a breaking capacity according to IEC60320 and VDE0625 meaning that it can be connected and disconnected without first turning off the power feed. This has the advantage of being very convenient but also makes a power switch unnecessary as it is easy to turn the speaker off by activating the latch and turning the connector anticlockwise which will disconnect the power whilst leaving the plug in place in the socket so it can be quickly rotated clockwise to restore the power connection when required CDD‐LIVE User Guide V1.0 ... -
Page 18: Wiring Instructions
CDD‐LIVE USER GUIDE Wiring Instructions Wiring instructions for the Neutrik® PowerCon True1 are as follows. Note that all mains wiring should be carried out by a competent, trained technician. If a suitable technician is not available Martin Audio would recommend purchasing one of the range of pre‐made mains cables available as optional accessories. These feature the PowerCon True1 connector on a flexible cable of either 2.15m (part number ASF12024) or 5m (part number ASF12023) in length and are terminated in a 16A male Ceeform connector. Both cables are rated to IP67. ... - Page 19 CDD‐LIVE USER GUIDE Place chuck over the cable C Wire the connector Using a Torx T8 driver, the fixing screws should be tightened to a torque value of 0.7 Nm Live black brown ...
-
Page 20: Audio
CDD‐LIVE USER GUIDE E Tighten the cable clamp Slide the cable clamp up the cable and tighten. To wire the connector to IP65, the cable clamp needs to be tightened to a torque value of 2.0Nm ... - Page 21 CDD‐LIVE USER GUIDE will self‐assign an IP address in the same range as the PC‐ this takes around 1 minute and after that it will be possible to connect to the cabinet via Vu‐Net (see the chapter on Vu‐Net for more details). You CANNOT daisy chain more CDD‐Live cabinets in this configuration, it can only be used with a single cabinet so its use is limited to simple checks or firmware updates. ...
-
Page 22: Preset Operation
CDD‐LIVE USER GUIDE Preset Operation All systems in the CDD and CSX Live range have a preset option for quick plug‐and‐play operation. The preset switch is on the connector panel on the back of the cabinets. Pressing the switch cycles through the presets circling back to preset 1 after preset 4. The selected preset is indicated by the corresponding Preset LED. CDD‐LIVE 8, CDD‐LIVE 12, CDD‐LIVE 15 All full range systems in the CDD‐Live range have four presets as follows;‐ Preset 1 Full range operation for a pole or stand‐mounted configuration Preset 2 High‐pass mode when used in partnership with either of the CSX‐Live subwoofers. Preset 3 Full range operation in stage monitor mode. The driver must be rotated 90°, see the chapter on grill removal and driver rotation. ... -
Page 23: Csx-Live 118, Csx-Live 218
CDD‐LIVE USER GUIDE CSX‐LIVE 118, CSX‐LIVE 218 The four presets for the CSX‐Live subwoofers are as follows, the LED indication is slightly different to reflect the cardioid modes;‐ Preset 1 Sub used in conjunction with the CDD‐Live12 or 15 Preset 2 Sub used in conjunction with the CDD‐Live 8 Preset 3 Sub used with the CDD‐Live 12 or 15 in Cardioid mode (rear facing) Preset 4 Sub used with the CDD‐Live 8 in Cardioid mode (rear facing) Note that the selected preset is retained after powering down the CDD or CSX‐Live speaker. The same preset will still be selected when you next power‐up the cabinet. Note that when a system is connected to Vu‐Net via the Ethernet ports the preset LEDs will be extinguished to show that the system settings may have been changed. To restore the preset once Vu‐Net is disconnected press the preset button until it has cycled round to the preset you require, any changes made in Vu‐Net will be overwritten with the factory setting. Meter Mode An additional feature is Meter mode which is selected by pressing and holding the Preset select button for two seconds. In this mode the LEDs which normally indicate which preset has been selected, become an input level bargraph to show level applied to the speaker. To return to normal Preset selection, press and hold again for two seconds. CDD‐LIVE User Guide V1.0 ... -
Page 24: Cabinet Configuration
CDD‐LIVE USER GUIDE Cabinet Configuration The CDD‐Live range is designed to be used in one of three modes, "portrait" or upright either on a speaker stand, distance pole, wall bracket (CDD‐Live 8 and CDD‐Live 12), yoke or flown using the Universal bracket in conjunction with a scaffold clamp, or flown using shouldered eye bolts. They can be used in "landscape" mode horizontally using a yoke or universal bracket or eye bolts and finally as a stage monitor using the multi‐angle cabinet shape. All products are supplied by default in portrait mode, when used horizontally either flown or as a stage monitor it is vital to rotate the CDD driver to maintain the correct dispersion for your application. GRILL REMOVAL Grilles on CDD Series cabinets are designed to be easy to remove to facilitate driver rotation. No screws are used to hold them in place; they are manufactured with a natural spring which holds them in place in slots in each side of the cabinets. The grilles have two or three gaps in the sides depending on the model into which an appropriately‐sized flat‐bladed screwdriver can be inserted to assist in removal. Insert the screwdriver blade into one of the gaps ‐ either at the top or bottom of the cabinet (don't start in the middle). CDD‐LIVE User Guide V1.0 ... - Page 25 CDD‐LIVE USER GUIDE Push the handle down a little first. This will ease the grille out of the slot. Now lift the handle up; this will ease the grille forward slightly to prevent the return on the grill dropping straight back into the slot: CDD‐LIVE User Guide V1.0 ...
-
Page 26: Badge Rotation
CDD‐LIVE USER GUIDE Repeat this process for the remaining gaps in the grille to ease it out of the slot all the way up one side of the cabinet; when you get to the final gap the grill should pop out and away from the front of the cabinet. To replace the grille, first insert one side into the slot on one side of the cabinet. Make sure the return on the grille is completely engaged in the slot. Push on the front of the grille with the flat of your hand, which will encourage the other edge of the grille to locate on the side of the cabinet close to the slot. Now push the edge of the grille back starting at the top or the bottom to engage the return in the slot; you may need to do this a little at a time, working down the length of the grille until it pops into place. BADGE ROTATION The badge can also easily be rotated to match the orientation of the cabinet. The fixing point is spring loaded so it is simply a case of pulling the badge slightly forward and rotating it to the required position. ROTATING DRIVER With the grille removed the driver mounting screws are accessible. There are four screws for the CDD‐Live 8 and four for the CDD‐Live 12 and eight for the CDD‐Live 15. The screws are hex head, the Hex key sizes are as follows;‐ CDD‐Live 8 5mm CDD‐Live 12 5mm CDD‐Live 15 6mm Fully unscrew all mounting screws, the driver can be carefully raised using a small flat‐blade screwdriver inserted into the recess at the bottom of the cabinet CDD‐LIVE User Guide V1.0 ... - Page 27 CDD‐LIVE USER GUIDE Be careful not to push the screwdriver in to far which could easily damage the cone suspension. Lever the driver up enough to get your fingers under the edges of the driver. Lift it up just enough to get a firm grip, do not put any strain on the connecting wired. Rotate the driver through 90° either clockwise or anticlockwise depending on your application. Check that the driver is at the correct orientations as shown below;‐ Re‐fit all driver mounting screws tightly, rotate the badge as mentioned above and replace the grille as previously described. CDD‐LIVE User Guide V1.0 ...
-
Page 28: Dante
CDD‐LIVE USER GUIDE Dante Based on industry standards, Audinate Ltd created Dante, an uncompressed, multi‐channel digital media networking technology, with near‐zero latency and synchronization. Dante is the preferred audio networking solution that has been adopted by more pro‐audio AV manufacturers than any other networking technology. Interoperability is not a dream of the future, but a reality today. Hundreds of Dante‐enabled products are available from the world’s leading manufacturers, enabling you to mix devices from multiple manufacturers. One cable does it all. Dante does away with heavy, expensive analogue or multicore cabling, replacing it with low‐cost, easily‐ available CAT5e, CAT6, or fibre optic cable for a simple, lightweight, and economical solution. Dante integrates media and control for your entire system over a single, standard IP network. Dante systems can easily scale from a simple pairing of a console to a computer, to large capacity networks running thousands of audio channels. Because Dante uses logical routes instead of physical point‐to‐point connections, the network can be expanded and reconfigured at any time with just a few mouse clicks. Since audio is transmitted digitally, you don’t have to worry about the common analogue challenges of interference from other electrical equipment, crosstalk between cables, or signal degradation over long cable runs. Setting up Dante networks couldn’t be easier. You no longer have to shudder when considering the deployment of an audio ... -
Page 29: Dante Controller
CDD‐LIVE USER GUIDE DANTE CONTROLLER Dante Controller software can be downloaded from the Audinate website;‐ https://www.audinate.com/products/software/dante‐controller Devices are connected together on a single network and the software will find and identify all Dante enabled devices present. They are presented on a very straightforward Matrix with all Dante transmitters such as digital mixing consoles and system processors on one axis and Dante receiver‐ such as the CDD‐Live and CSX‐Live range‐ on the other. Routing transmitters to any or all of the receivers is a simple click on the appropriate node or nodes on the matrix. For more details visit the Audinate website which has a host of support material including demo and tutorial videos, an FAQ page and PDF User Guides. ... -
Page 30: System Wiring Examples
CDD‐LIVE USER GUIDE System Wiring Examples With such a versatile system it is impossible to demonstrate every possibly wiring configuration but we will show examples of a variety of different systems to show how the options can be used to integrate the CDD‐Live range with the requirements for a huge number of system designs. 1. Basic System This illustrates the simplest deployment of a stereo CDD‐Live system. Analogue Audio from your source is routed to left and right, it is connected to the CSX‐Live 118 subs, the parallel out is used to link up to the CDD‐Live 12s. In this example Preset 2 would be selected on the CSX‐Live 118 and Preset 3 on the CDD‐Live 12. All crossovers and equalisation is taken care of by the internal DSP using the selected presets. CDD‐LIVE User Guide V1.0 ... -
Page 31: System With Vu-Net Control
CDD‐LIVE USER GUIDE 2. System with Vu‐Net Control With this system the audio feed remains exactly as with the basic system sending a stereo analogue audio feed to the cabinets. Control over the system has been enhanced by adding a network. An Ethernet feed from a PC running Martin Audio's Vu‐Net connects to an Ethernet router (Note that the router must support DCHP) with a feed from a second port on the router to the first of the CDD‐Live cabinets and the on‐board 2‐port Ethernet switch is used to daisy‐chain between all cabinets to extend the network (maximum 8 speakers). Note that if the router and your PC are wi‐fi equipped you can connect to the system over wi‐fi making the Cat 5 cable from the PC to the router unnecessary. With Vu‐Net you now have a high level of control over the system, you can mute, adjust gain, delay and equalisation and also have the option of storing the settings to the user memory location which can be recalled in future using the rear panel switch. If for example you are using the system in a venue that you visit regularly, you can store the settings making it unnecessary to connect the network and PC at subsequent visits. Be aware that the preset LEDs on the back of each CDD‐Live cabinet will be off due to the Vu‐Net connection, you should however see the Ethernet LEDs illuminated, the green will show a good network connection and the yellow LED will flash to show communication speed. ... -
Page 32: System With Audio Via Dante
CDD‐LIVE USER GUIDE 3. System with Audio via Dante This system demonstrates the simplest implementation of Dante. The analogue audio connections to each cabinet are no longer required, a Dante feed is derived from your audio source using one of the hundreds of Dante enabled devices. The diagram shows an analogue mixing console routed to a Dante interface such as the Focusrite RedNet range however this could be a digital mixing console, a great many of which have Dante outputs either as standard or as an option. The Dante feed is routed to an Ethernet router (Note that the router must support DCHP) along with an Ethernet feed from the PC and an Ethernet cable out to the first CDD‐Live speaker. As before the Ethernet connections are daisy‐chained between all speakers using the 2‐port interface in each CDD‐Live speaker to a maximum of 8 speakers. The PC can run Dante Controller and Vu‐Net simultaneously to control both the Dante routing and all DSP parameters. Once the Dante routing is taken care of and any adjustment of the CDD‐Live speakers is completed in Vu‐Net the PC can be disconnected and all routing and speaker parameters will be stored, even after disconnecting and reconnecting power. Be aware that the preset LEDs on the back of each CDD‐Live cabinet will be off due to the Vu‐Net connection, you should however see the Ethernet LEDs illuminated, the green will show a good network connection and the yellow LED will flash to show communication speed. ... -
Page 33: Network Control With Star Configuration
CDD‐LIVE USER GUIDE 4. Network Control with Star Configuration As with our example number two, analogue audio is routed to our left and right speakers and we can control the parameters in depth using Vu‐Net, in this example however, the network connection to each cabinet is made with an individual Ethernet cable from an Ethernet router (note that the router must support DHCP). This may be a more convenient wiring solution particularly for a fixed installation and would have to be used if more than eight speakers from the CDD‐Live range are in use as that is the maximum recommended for a daisy‐chain configuration. You can however run a system with mixed star configuration and daisy‐chained cabinets, any of the cabinets routed directly to the Ethernet switch can have up to seven cabinets daisy‐chained from their second Ethernet port making huge systems possible. Be aware that the preset LEDs on the back of each CDD‐Live cabinet will be off due to the Vu‐Net connection, you should however see the Ethernet LEDs illuminated, the green will show a good network connection and the yellow LED will flash to show communication speed. ... -
Page 34: Dante Control With Star Configuration
CDD‐LIVE USER GUIDE 5. Dante Control with Star Configuration With this system the audio is again derived from a Dante Source and routed to an Ethernet router as with example 3. The control PC is connected to the same router and runs Dante Controller to route the digital signal from the source to the CDD‐Live cabinets as required over the Ethernet network. In this case however in similar fashion to example 4 the Ethernet connection to each CDD‐Live speaker is made individually to a separate port on the Ethernet router (note that the router must support DHCP). As with example 4 this wiring configuration may be preferred particularly for installed systems. It has the advantage over a daisy chained system in that should power fail to a single cabinet it will not have any effect on the remaining CDD‐Live speakers in the system. Be aware that the preset LEDs on the back of each CDD‐Live cabinet will be off due to the Vu‐Net connection, you should however see the Ethernet LEDs illuminated, the green will show a good network connection and the yellow LED will flash to show communication speed. ... -
Page 35: Integrating With An Mla System
CDD‐LIVE USER GUIDE 6. Integrating with an MLA System CDD‐Live is ideally suited to being integrated with a Martin Audio Multicellular system, the entire system can be managed via a single Vu‐Net project. Connection to an MLA System is via the Merlin System controllers which are connected over Ethernet so it is very straightforward to make the connection via a single Ethernet router which can include the Package switch supplied in an MLA Master rack. An Ethernet Connection is fed out to all CDD‐Live cabinets either individually or daisy chaining up to eight speakers Ethernet from the PC to the switch can be wired or wireless if remote configuration is required. This can be the Ruckus Wi‐Fi system and Tablet PC supplied with an MLA or MLA Compact system, or your own wi‐fi infrastructure in an installed system as long as the network supports DHCP. An MLA Mini system can be connected either directly to the PC via a USB cable to one of the MSX Subs or also via a Merlin Controller making use of the U‐Net ports on the MSX. The Merlin must be configured for Dynamic IP. An all cases, when running Device Discovery in Vu‐Net all devices will be found regardless of the connection method employed. CDD‐LIVE User Guide V1.0 ... -
Page 36: Mla Mini With Additional Csx 218 Subwoofers
CDD‐LIVE USER GUIDE 7. MLA Mini with additional CSX 218 subwoofers As mentioned in option 6, CDD‐Live speakers can easily be integrated with MLA Mini systems. A practical example might be to use a pair of CSX‐Live 218 subwoofers to extend the low frequency response of an MLA Mini system in larger venues. The MLA Mini system is set up in the usual manner with a USB connection from the PC to the first MSX and a pair of U‐Net cables link the two MSX creating a closed loop to provide redundancy. An Ethernet connection runs from the same PC to an Ethernet router (note that the router must support DHCP) and then to the first CSX‐Live 218 subwoofer and daisy‐chains over to the second sub using Ethernet Port 2 on the sub. Analogue Audio is fed from the mixing console to left and right, connecting first to the CSX‐Live 218 then using the parallel out to link to the input on the MSX Sub. Vu‐Net is run on the PC to control the system, Device Discovery will find the two MLA Mini arrays and the two CDD‐Live 218's, these can all be configured for the optimum parameters for a combined system, all from a single PC platform. The only minor drawback with the configuration above is that you would not be able to configure the system for AES/EBU digital. One option is to connect directly from a digital AES source to the MSX's and then route Dante digital to the CSX‐Live 218s over the network cables already in place. CDD‐LIVE User Guide V1.0 ... -
Page 37: Mla Compact Combined With Csx-Live 218
CDD‐LIVE USER GUIDE 8. MLA Compact Combined with CSX‐Live 218 In this example the CSX‐Live 218 subs have been deployed with an MLA Compact system as a lower cost alternative to the DSX or MLX subwoofer. Much of the infrastructure is based around the standard MLA compact system components. Analogue audio is routed from the mixing console to left and right first connected to the CSX‐Live 218 Subs linking between each sub using the parallel output XLR before linking up to the MLA Compact array and using short XLR links between each MLA Compact Cabinet. It would of course be perfectly acceptable to send an independent sub feed from the console which is a common practice. ... -
Page 38: Vu-Net
CDD‐LIVE USER GUIDE Vu‐Net Vu‐Net is Martin Audio's proprietary application for control of monitoring of network controlled powered products. Introduced as the control platform for the award winning Multicellular products MLA, MLA Compact and MLA Mini, a number of products have been added to Martin Audios portfolio that can be incorporated into a single project and configured using Vu‐Net. CDD‐ Live is the latest product to be integrated into the platform. Basic operation is reasonably straightforward however it is beyond the scope of this User Guide to explain the finer points of the software so for full operation guidelines please download the Vu‐Net User guide from www.martin‐audio.com/software. You can also download the application from this location. Introduction Vu‐Net is the application used to connect to a U‐Net enabled device such as the multicellular family of products, the DD12, PSX, CDD‐Live or Merlin processor. Connection to the cabinets is achieved either using the U‐Net network protocol, USB in the case of the MLA Mini, DD12 and PSX and Ethernet for the CDD‐Live range. Vu‐Net is used to monitor and control the system, EQ optimisations for multicellular arrays are uploaded from the program and cabinet firmware is checked and updated. Before running Vu‐Net you need to make sure that all CDD‐Live cabinets have been connected to an Ethernet network using one of the options shown in the System Wiring examples. Once this has been completed, you can run Vu‐Net. When Vu‐Net opens you will see the following Window;‐ This is a blank screen with only ‘New Project’ and ‘Open Project’ active prompting you to start by using one or the other. Start by clicking on ‘New Vu‐Net project. You will see the following window;‐ CDD‐LIVE User Guide V1.0 ... - Page 39 CDD‐LIVE USER GUIDE Type a name for your project and select a suitable file location. Once you have selected an appropriate name and file location click finish and a new project will be created;‐ CDD‐LIVE User Guide V1.0 ...
-
Page 40: Device Discovery
CDD‐LIVE USER GUIDE You will notice that the top left of the main window has your project name and a number of options on the toolbar are now available. Device Discovery The normal method for operating a system following completing the system rigging and connection is to open Vu‐Net and to run Device Discovery. It is good practice to check your network connectivity, first by using the network icon on the PC task bar which should show connection to your system (it will flag that there is no internet connectivity which can be ignored). If all is ok you can proceed by clicking on the Discover Devices button;‐ Assuming everything is OK with your network connection you will see the following window;‐ The meter bar will gradually move across until it is completely green and all devices have been found. This may take a few seconds on bigger systems with many cabinets. CDD‐LIVE User Guide V1.0 ... - Page 41 CDD‐LIVE USER GUIDE There are no array configuration options so clicking on 'Run Wizard' simply synchronises the cabinets with Vu‐Net so that what is displayed in the application is exactly the configuration of the connected cabinets;‐ Once discovered the range will appear in Vu‐Net like this;‐ CDD‐LIVE User Guide V1.0 ...
- Page 42 CDD‐LIVE USER GUIDE Each CDD‐Live device will be shown as an icon which includes the front grille LED. If you click on the cabinet to select it you can then click on the LED which will illuminate on the icon and on the speaker to make it easy to identify which cabinets you re controlling, useful particularly when you are arranging the overview screen in Vu‐Net to represent the physical positioning of the system;‐ Right clicking on any of the speakers brings up a number of menu options;‐ CDD‐LIVE User Guide V1.0 ...
- Page 43 CDD‐LIVE USER GUIDE 'Open' has exactly the same function as double clicking on the speaker icon to open the full control window. 'Load Snapshot' opens the Snapshot window allowing you to recall any of the three Factory Snapshots or the fourth User Snapshot;‐ 'Save Snapshot' is the function used to store parameters that you have edited to the User Location "U". This location can be recalled using the Load Snapshot command or by selecting Snapshot 4 using the button on the speaker connector panel. To store a Snapshot once you have made all the parameter changes that you need, select 'Save Snapshot', you will see this window;‐ Click 'Save' and your setting are now stored and can be recalled when required. CDD‐LIVE User Guide V1.0 ...
-
Page 44: Overview
CDD‐LIVE USER GUIDE 'Synchronise' is a manual synchronise that duplicates the automatic synchronise that occurs when CDD‐Live is discovered to ensure that what is displayed in Vu‐Net matches exactly the parameters stored within the cabinet DSP. 'Disconnect/Reconnect' allows you to disconnect and individual cabinet which will turn red once disconnected;‐ Selecting the same function will reconnect the cabinet and it will revert to the standard appearance. 'Rename' allows you to give the cabinet a name of your choice up to 30 characters, this can also be accessed by selecting the speaker and using the keyboard shortcut F2;‐ ‘Select All’ selects all devices in the system Diagram, the keyboard shortcut for this is Ctrl + A. ‘Delete’ removes the selected CDD‐Live speaker. You will be prompted with the following Window to confirm the delete;‐ If you selected Delete accidentally or have changed your mind, click ‘Cancel’, otherwise click ‘OK' and the speaker will be removed from the project. Overview Either double clicking or right clicking and selecting Open will bring up the overview option for the CDD‐Live which shows all CDD‐Live speakers in the project, a separate overview shows all CSX‐Live subs;‐ CDD‐LIVE User Guide V1.0 ... - Page 45 CDD‐LIVE USER GUIDE This is the CSX‐Live Overview:‐ This gives an overview of the state of all CDD and CSX Live speakers allowing comprehensive monitoring of the system. The box at the top will show any names that have been assigned to the cabinets by right clicking and selecting rename (or selecting and pressing F2 in the System Diagram;‐ CDD‐LIVE User Guide V1.0 ...
- Page 46 CDD‐LIVE USER GUIDE The gain fader allows gain adjustment from ‐40 to +15dB. Precise values can be entered by typing directly in the box below the fader or values can be scrolled up or down using the up/down buttons. The increments that the up/down buttons will step is determined in the Preferences section, by default it will be 0.25dB. The mute button will mute the cabinet irrespective of the position of the gain fader and will turn red when active. There is comprehensive metering available. The bargraph to the left of the fader shows input level up to the maximum before input clip of +18dBu. The smaller meters to the right show the amplifier output levels for both the low frequency amplifier driving the LF driver and the high frequency amplifier driving the compression driver and show level prior to limit. If the levels reach the yellow segment you have reached the limiter threshold. A red segment indicated 3dB of gain reduction in the limiter. There is also a temperature read out showing the temperature of the DSP and amplifier module;‐ There is delay available which is very useful for time aligning CDD‐Live when used as an extra fill with a larger main system. The maximum delay available is 1 second. Values can either be typed directly into the Delay field or scrolled up and down using the arrow buttons. These increase or decrease the delay in increments of 10µs. The Input allows the connection mode to be changed from the default which is Auto to Analogue or Dante. This can either be done individually for each CDD or CSX Live or globally using the Input switch at the bottom of the overview Window. A global change will bring up the flowing window;‐ CDD‐LIVE User Guide V1.0 ...
- Page 47 CDD‐LIVE USER GUIDE Click ‘Cancel’ if you have changed your mind or ‘OK’ to accept the change of input mode. All CDD or CSX‐Live will display the new input selection. The Snapshot button acts in the same way as the Load Snapshot function which is available from the right‐click menu in the Project System Diagram. It will bring up the Snapshot Menu with the currently active Snapshot shown highlighted in green;‐ Clicking on a new Snapshot number or letter will prompt you to confirm your selection;‐ Clicking ‘OK’ will confirm the selection and the preset will load. The Preset select window can be closed. The currently active Snapshot is displayed on the Snapshot button;‐ CDD‐LIVE User Guide V1.0 ...
- Page 48 CDD‐LIVE USER GUIDE Polarity will invert the phase of the cabinet. If in Show Mode a confirmation window will appear;‐ On clicking ‘OK’ the phase will be inverted and the Polarity button will turn green;‐ Clicking the LED button will illuminate the front grille LED to help identify the DD12 under control in multiple deployment applications. This can be done individually for any cabinet;‐ Or globally using the LED controls at the bottom of the CDD or CSX‐Live Overview window;‐ Pressing the “play" arrow will make the LEDs of all CDD‐Live illuminate in sequence, cycling round continually until you click on the stop button ...
- Page 49 CDD‐LIVE USER GUIDE The window has three sections, the buttons along the top, the graphic display window and the controls on the right of the window. First we will look at the buttons along the top. First there are ten parametric EQ buttons plus the high pass filter;‐ As you can see there are a number of colour variations for these buttons. Unused bands are pale blue until they are selected for editing by clicking on them in which case the colour goes to a brighter blue and the image shows the button depressed. Unused is defined as the gain left at 0dB. Green buttons indicate a band that has either cut or boost applied, these will go a pale green when selected. Note that the high pass filter is always active so will always appear green. The graphic view of the equalisation is a relatively standard frequency response graph;‐ ...
- Page 50 CDD‐LIVE USER GUIDE First there are two traces, one red, and the other white. The red trace is the response of the band that is currently selected; the white trace is the overall response of the entire PEQ. Each small red circle represents the position of each of the ten bands plus the high pass. For all of the EQ bands the position on the horizontal represents the EQ centre frequency, the vertical position is the cut or boost applied. A solid red circle is the currently selected band, any greyed‐out band indicates that an EQ has been bypassed. The circle labelled "HP" identifies the cut‐ off frequency of the highpass filter. In the right corner is this icon;‐ This is used to cycle between standard and daylight modes. In daylight mode the display changes to look like this;‐ ...
- Page 51 CDD‐LIVE USER GUIDE This shows all properties of the selected band. At the top is a flat button;‐ This will zero the gain of the selected filter. Next is a Filter type. Click on this and the drop down shows the options for each filter band;‐ The default is Parametric, the other otions are Low and High Shelf filters. The High Pass Filter has the following options for filter type and slope;‐ Below are the three principal faders for adjusting the filter parameters;‐ CDD‐LIVE User Guide V1.0 ...
-
Page 52: Zones
CDD‐LIVE USER GUIDE Parameters can be changed on the properties panel in three ways. The faders can be drag and dropped to a new value, the value can be scrolled up or down using the up/down buttons to the right of the value windows, and finally values can be directly typed into the value windows. The response graph will adjust according to the new values and vice versa, adjustments in the graph window will be reflected in the fader positions and values in the properties panel. To summarise, there are four ways to adjust filter parameters;‐ Click and drag on the graph Click and drag the properties faders Use the up/down value buttons in the properties section Directly type values into the value boxes. Whilst this might seem over‐versatility, it is intended to offer several options to suit the way that the system is being operated. If adjustments are being made with using a wireless tablet PC with a stylus whilst walking around a venue, certain options may be easier to use than if you were sitting at a desk with a mouse plugged in to the PC. Zones Any cabinet can be a member of any (or none) of the twenty zones available which are labelled A to T which will gang together all parameters for every cabinet in the zone. Note that all gain and delay parameters are offset ganged. If there is already a value entered before adding a CDD‐Live cabinet to a zone this will be retained and subsequent changes to a value for any gain or delay to any cabinet in the same zone will increase or decrease all values according to any edits you make but will retain the offset between all values. To select a zone click on the Zone button at the top of the Overview page;‐ CDD‐LIVE User Guide V1.0 ... - Page 53 CDD‐LIVE USER GUIDE Click on the desired zone and it will be displayed on the zone button. The zones are colour coded to make it instantly obvious which cabinets are on the same zones. Colours are as follows;‐ A is Blue K is Lavender B is Red L is Brown C is Green M is Turquoise D is Yellow N is Dark Brown E is Black O is Flesh F is Teal P is Light Green G is Deep Purple Q is Violet H is Moss Green R is Sand I is Pink S is Crimson J is Dull Green T is Azure All functions on cabinets in the same zone will be duplicated regardless of which cabinet in the zone is used to make adjustments. Note that all gain and delay parameters are offset ganged. If there is already a value entered before adding a CDD‐Live to a zone this will be retained and subsequent changes to gain or delay to any cabinet in the same zone will increase or decrease all values according to any edits you make but will retain the offset between all values;‐ CDD‐LIVE User Guide V1.0 ...
-
Page 54: Pink Noise
CDD‐LIVE USER GUIDE Pink Noise CDD and CSX‐Live have a built‐in Pink Noise generator than can be activated in Vu‐Net. This is a global control which will activate Pink Noise in all connected speakers. By default the generator is disabled and the level set to ‐120dB so even if accidentally enabled it will be inaudible. The level can be adjusted either by using the up and down arrows or directly typing a value in the Gain window. Once enabled the button will turn green;‐ CDD‐LIVE User Guide V1.0 ... -
Page 55: System Deployment
CDD‐LIVE USER GUIDE System Deployment There are a host of mounting options for CDD‐Live making the system extremely versatile for a wide range of applications both fixed installations and portable use. The wide range of accessories that are available for the range are used to implement the various system deployment options. Safety It is vital that good health and safety practice is observed in all cases when deploying any products from the CDD‐Live range. When using speakers with a pole mount or speaker stand, particularly with the larger cabinets in the range, they must be lifted into position with two people. Flown systems must only be deployed by a trained, experienced rigger observing all local safety regulations both while the system is being rigged and during use. All flying points must have a working load sufficient to bear the weight of the CDD‐Live speaker and secondary safety bonds should be used in all cases. Fixed installation should always use fixing methods appropriate to the material into which they are fitted. Pole Mount All three CDD‐Live speakers incorporate a standard speaker stand "top hat" fitting on the base of the cabinet to allow use with a standard 35mm diameter speaker stand or pole. The ASF20071 Wind‐up pole is available as an optional accessory and can be used with either of the CSX‐Live subs to mount and of the CDD‐Live cabinets. CDD‐LIVE User Guide V1.0 ... - Page 56 CDD‐LIVE USER GUIDE The pole has an M20 threaded base which screws securely into the mounting plate on top of either the CSX‐Live 118 or CSX‐Live 218 sub. The top of the pole is a standard 35mm diameter fitting enabling any of the CDD‐Live cabinets to easily fit on top. The pole is then wound up to the desired height using the crank handle whilst keeping the safety button depressed. CDD‐LIVE User Guide V1.0 ...
- Page 57 CDD‐LIVE USER GUIDE Once at the desired height the handwheel is tightened to secure the pole in position and the crank handle can be folded away CDD‐LIVE User Guide V1.0 ...
-
Page 58: Wall Mounting
CDD‐LIVE USER GUIDE Wall Mounting CDD‐Live 8 and CDD‐Live 12 may be wall mounted either in portrait or landscape modes using the same wall brackets introduced for the CDD installation range. The CDD‐Live 8 uses part number CDDWB6/8B and CDD‐Live 12 uses part number CDDWB10/12B;‐ Do not forget that it is vital to rotate the driver through 90° when using a CDD‐Live cabinet in landscape mode, please see the chapter on driver rotation for details on how this is achieved. Installation is a two part process in common with standard first fix / second fix procedures, installation using both sizes of brackets is identical, the CDD‐Live 12 bracket is just larger than the CDD‐Live 8 version. The first step is to separate the two halves of the bracket. The vertical adjustment grub screw needs to be screwed in to allow the collar section to lift clear of the mounting spigot. First fix is to secure the wall section of the bracket. This is the part with four mounting holes, a large hole for cable entry and a vertical spigot which is what the cabinet section fits over. Use appropriate wall ... - Page 59 CDD‐LIVE USER GUIDE Next step is to attach the cabinet section of the bracket to the CDD‐Live. This is the two part section with the collar that mounts onto the wall section which in turn is hinged to allow vertical adjustment onto the cabinet bracket. The rear of the cabinet has six countersunk bolts fitted in the amplifier module heatsink designed for use with the mounting brackets. For portrait mode remove the lower 4 bolts, for landscape mode remove the middle four;‐ Position the bracket over the required holes orientated to suit the orientation that is being used and screw into place tightly using the bolts supplied with the bracket (note that you cannot use the bolts removed from the heatsink as they are too short). CDD‐LIVE User Guide V1.0 ...
- Page 60 CDD‐LIVE USER GUIDE You are now ready to fit the speaker to the wall. Offer the speaker up to the bracket so you can hook the collar onto the spigot. Make sure that you follow appropriate safety measures if you are working at height such as using a scaffold tower or lifting platform which allows you to safely use both hands for this. Once the bracket is hooked together and taking the weight of the cabinet you can make final adjustments. Horizontal (pan) adjustment is available by rotating the collar on the spigot. When you’re happy with the angle, the collar securing bolt can be tightened with an M6 hex key (CDDWB8/6) or an M8 hex key (CDDWB10/12) to lock the position. Vertical (tilt) adjustment is made by adjusting the grub screw: CDD‐LIVE User Guide V1.0 ...
- Page 61 CDD‐LIVE USER GUIDE CDD‐LIVE User Guide V1.0 ...
-
Page 62: Ceiling Mount
CDD‐LIVE USER GUIDE Ceiling Mount The CDD‐Live 8 may be mounted on the ceiling (in landscape mode only) using the Ceiling Mount Bracket part number CDDCB6/8B Do not forget that it is vital to rotate the driver through 90° when using a CDD‐Live cabinet in landscape mode, please see the chapter on driver rotation for details on how this is achieved. The first step is to disassemble the bracket, unscrewing the cabinet section from the ceiling arm using an M6 hex key to undo the securing bolt. CDD‐LIVE User Guide V1.0 ... - Page 63 CDD‐LIVE USER GUIDE Fix the ceiling bracket assembly to the ceiling. There are three 6.5 mm holes and a central 13 mm hole in the bracket for this purpose. It is essential that appropriate fixings are used to allow safe and secure attachment to the ceiling material, particularly as these may be fitted overhead public areas. The fixings to be used will depend on the ceiling construction. Use the larger central 13 mm hole as the principal fixing initially: this lets you adjustment the bracket to obtain the correct horizontal coverage by pivoting it on the single mounting. When the position is correct, tighten it, and add further fixings to the other three holes to ensure a safe and secure mounting. Second stage is to fit the cabinet bracket in place. The bracket is attached orientated as shown by removing four screws in the rear heatsink with an M4 hex key and attaching the bracket with the same screws. The 4 screws in the middle of the cabinet must be used to allow fitting in landscape. Offer the cabinet up the ceiling bracket arm and mate the cabinet bracket section with the ceiling bracket arm by threading the M6 bolt with spring washer through the cabinet bracket as shown below. Do not fully tighten the bolt at this stage, leave a little play so the vertical dispersion can be adjusted. CDD‐LIVE User Guide V1.0 ...
- Page 64 CDD‐LIVE USER GUIDE The vertical dispersion can be adjusted using the grub screw accessed from the rear of the bracket: CDD‐LIVE User Guide V1.0 ...
-
Page 65: Universal Bracket
CDD‐LIVE USER GUIDE Universal Bracket The universal bracket is a highly flexible bracket that allows a host of mounting options. It can be used for flown applications either in portrait or landscape mode. This could be a permanent installation by bolting the bracket to a suitable surface using the central mounting hole, or a portable system using a scaffold clamp to attach to a pole or truss. (Note that the scaffold clamp is not supplied);‐ By adding a pole mount adaptor, part number ASF20045 which is available as an optional accessory, the universal bracket can be used for speaker stand or pole mounted applications giving the added benefit of having adjustment available for up or down tilt;‐ CDD‐LIVE User Guide V1.0 ... -
Page 66: Fitting The Cddlub8B Universal Bracket
CDD‐LIVE USER GUIDE There are dedicated Universal Brackets for each of the CDD‐Live speakers, part numbers are as follows;‐ CDD‐Live 8 CDDLUB8B CDD‐Live 12 ASF20046 CDD‐Live 15 ASF20048 There is a slight difference in the design and fitting of the CDD‐Live 8 Universal Bracket so we will look at fitting that model first. Fitting the CDDLUB8B Universal Bracket The only tool required to fit the Universal Bracket is an M5 Hex (Allen) Key. First remove the two M8 bolts that will be used to fit the bracket on one of the three possible orientation. These are the screws that need to be removed;‐ Position the universal Bracket and screw in place using the screws removed from the cabinet, ensure that they are fully tightened. If fitting to the side of the cabinet note that you attach through the central hole in the bracket and the one at the back, fitting to the top and bottom the holes at the front and back are used, the central hole is not used. If you are using the universal bracket on the side of the cabinet don't forget to change the orientation of the driver, please see the chapters on removing the grill and rotating the driver and badge. CDD‐LIVE User Guide V1.0 ... -
Page 67: Fitting The Asf20046 Or Asf20048 Universal Bracket
CDD‐LIVE USER GUIDE If required attach the scaffold clamp or pole mount adaptor and the cabinet is ready to be used. Once fitted in position the Handwheel is loosened and the cabinet freely angled up or down, the bracket will slide on the carriage. Once you have established the desired cabinet angle tighten the Handwheel. The Universal Bracket is asymmetrical and can be used wither way round. It allows tilt of up to 20° in one direction and 23° in the other. Fitting the ASF20046 or ASF20048 Universal Bracket The ASF20046 and ASF20048 Universal Brackets are used with the CDD‐Live 12 and Live 15 respectively. They are identical in design but scaled accordingly to suit the size of each cabinet. Fitting them is the same for each but is slightly more involved than the procedure for the CDD‐Live 8. As with the CDD‐Live 8 the bracket can be fixed on the top, bottom or side of the cabinet, the first step is to remove the screws at the mounting position once you have decided which orientation you are use. These are the screw mounting positions;‐ ... - Page 68 CDD‐LIVE USER GUIDE Position the bracket and attach with the M8x35mm screws and fully tighten;‐ The Universal Bracket has two fixing positions for a scaffold clamp, pole mount adaptor or other fixing method. These change the available angles for up and down tilt. The top fixing position is the default and should always be used for pole mount applications, the alternative angle fixing point towards the rear gives an additional 30° of down‐tilt for flown applications. Also supplied with the Universal bracket is an aluminium spacer block. This may be used on the angle fixing position when attaching a scaffold clamp to allow greater horizontal rotation if required. The Universal Bracket should be fitted in position, suspended or mounted on a pole as required. To adjust the angle the plungers are pulled out each side and rotated 90° to temporarily hold them in an unlocked position. The cabinet is then tilted up or down ...
-
Page 69: Yoke Mounting
CDD‐LIVE USER GUIDE Yoke Mounting Yokes are available for all three CDD‐Live full range cabinets, the product numbers are as follows;‐ CDD‐Live 8 CDDLYA8B CDD‐Live 12 CDDLYA12B CDD‐Live 15 CDDLYA15B These allow a number of options for both portable and permanent installations. They can be wall mounted vertically allowing horizontal adjustment of coverage, wall or ceiling mounted horizontally with vertical adjustment available, and by using a scaffold clamp or pole mount adaptor in the 13mm central fixing hole, they can be used in horizontal mode either flown or mounted on a speaker stand. CDD‐LIVE User Guide V1.0 ... - Page 70 CDD‐LIVE USER GUIDE All three models are essentially the same design, just scaled to the appropriate size for each cabinet. Fitting is identical for all three versions. A 5mm Hex (Allen) key and 13mm or adjustable Spanner (wrench) are required. The yokes attach to the cabinet top and bottom (relative to portrait orientation). One arm of the yoke carries a 35mm spigot which located in the speaker mount top hat fitting in the bottom of the cabinet, the other arm has a fixing plate which is bolted to the central M8 insert on the top of the cabinet. Attachment to the top of the cabinet is with either the M8 handwheel or M8 x 40 bolt supplied with the yoke;‐ The handwheel is for portable applications where adjustment is necessary once the speaker is in position, the M8 x 40mm bolt is for permanent installations where the tilt adjustment needs to be tightened off permanently. The first step is to remove the M8 bolt from the centre of the top of the cabinet using the 5mm Allen key To fit the yoke first the upper arm needs to be pivoted upwards so there is enough room to locate the spigot into the speaker top hat. The upper arm is attached with two M8 bolts, the bolt in the corner acts as a pivot and the second bolts approximately 60mm along the upper arm from the corner locks the arm in place to prevent it from pivoting so this screw needs to be temporarily removed using the 13mm spanner;‐ ...
- Page 71 CDD‐LIVE USER GUIDE Slot the spigot into the top hat fitting on the base of the cabinet;‐ Then attach the upper arm to the top of the cabinet through the central M8 insert from which the M8 screw was removed. Use wither the M8 handwheel or the M8 x 40mm bolt. Use the spring washer (first) then the plain washer (second) onto whichever fixing you are using, pass it through the hole in the mounting plate and into the cabinet insert. Tighten it sufficiently to make handling easy but allow for final adjustment. Finally replace the M8 x 70mm bolt in the yoke upper arm to fix it in place and tighten CDD‐LIVE User Guide V1.0 ...
- Page 72 CDD‐LIVE USER GUIDE Note that for portable use it is advisable to fit the scaffold clamp or pole mount adaptor before attaching the yoke to the cabinet. For fixed installations the yoke would be attached to the wall or ceiling using appropriate fixings and then the cabinet fitted to the yoke. CDD‐LIVE User Guide V1.0 ...
-
Page 73: Eye Bolt Mounting
CDD‐LIVE USER GUIDE Eye Bolt Mounting All CDD‐Live and CSX‐Live systems have threaded inserts rated for flown applications. All CDD‐Live enclosures have M8 threaded inserts and both CSX‐Live have M10 inserts. Most commonly these are used in conjunction with shouldered eye bolts for suspending the cabinets using appropriately rated chain or steel wire. Martin Audio's HTK00003 (M8) and HTK00004 (M10) are rated for use in flown applications. Note that if you plan to use alternative eye bolts these must be shouldered cast steel NOT formed steel types commonly available from DIY stores. They must have a safe working load rating compatible with the weight of the cabinets. The CDD‐Live enclosures can be flown in 'Portrait' or 'landscape' format, note that the driver must be rotated when the cabinet is used in landscape mode, please see the chapter on grille removal and driver rotation. We recommend using a minimum of four eye bolts with which to suspend the cabinet irrespective of which orientation is used. In most applications two eye bolts are used as the primary support left and right. A third attaches to the rear of the cabinet and is used to adjust the down‐tilt of the cabinet as required. The fourth eye bolt is used to attach a secondary safety line which ... -
Page 74: Specifications
CDD‐LIVE USER GUIDE Specifications CDD‐Live 8 Acoustics Ultra-compact, Coaxial Differential Dispersion powered two-way system TYPE 70Hz – 20kHz ±3dB, -10dB @ 50Hz FREQUENCY RESPONSE (1) LF: 8” (200mm)/2” (50mm) voice coil, long excursion, shared ferrite motor system with HF ... - Page 75 CDD‐LIVE USER GUIDE CDD‐Live 12 Acoustics Compact, Coaxial Differential Dispersion powered two-way system TYPE 62Hz – 20kHz ±3dB, -10dB @ 50Hz FREQUENCY RESPONSE (1) LF: 12” (300mm)/2.5” (63.5mm) voice coil, long excursion, shared ferrite motor system with HF ...
- Page 76 CDD‐LIVE USER GUIDE CDD‐Live 15 Acoustics High-output, Coaxial Differential Dispersion powered two-way system TYPE 55Hz – 20kHz ±3dB, -10dB @ 45Hz FREQUENCY RESPONSE (1) LF: 15” (380mm)/3” (75mm) voice coil, long excursion, shared ferrite motor system with HF ...
- Page 77 CDD‐LIVE USER GUIDE CSX‐Live 118 Acoustics Compact, direct radiating powered subwoofer TYPE 47Hz – 150Hz ±3dB, -10dB at 41Hz FREQUENCY RESPONSE (3) 18” (460mm)/4” (100mm) voice coil, long excursion, ferrite magnet, waterproof cone ...
-
Page 78: Csx‐Live 218
CDD‐LIVE USER GUIDE CSX‐Live 218 Acoustics Dual-driver, direct radiating powered subwoofer TYPE 35Hz – 150Hz ±3dB, -10dB @ 30Hz FREQUENCY RESPONSE(3) 2x 18” (460mm)/4” (100mm) voice coil, long excursion, ferrite magnet, waterproof cone ... -
Page 79: Technical Drawings
CDD‐LIVE USER GUIDE Technical Drawings CDD‐Live 8 CDD‐Live 12 CDD‐LIVE User Guide V1.0 ... -
Page 80: Cdd-Live 15
CDD‐LIVE USER GUIDE CDD‐Live 15 CSX‐Live 118 CDD‐LIVE User Guide V1.0 ... -
Page 81: Csx-Live 218
CDD‐LIVE USER GUIDE CSX‐Live 218 CDD‐LIVE User Guide V1.0 ... -
Page 82: Warranty
CDD‐LIVE USER GUIDE Warranty Martin Audio CDD‐Live and CSX‐Live Loudspeaker Systems are warranted against manufacturing defects in materials or craftsmanship over a period of 5 years from the date of original purchase. Martin Audio CDD‐Live and CSX‐Live Amplifier modules are warranted against manufacturing defects in materials or craftsmanship over a period of 1 year from the date of original purchase. ... - Page 83 CDD‐LIVE USER GUIDE Martin Audio Limited Century Point Halifax Road Cressex Business Park ...