Ingenico IWL220 Manual
Bluetooth/gprs terminal
Hide thumbs
Also See for IWL220:
- User manual (101 pages) ,
- Technical manual (60 pages) ,
- Quick reference manual (43 pages)
Table of Contents
Advertisement
Contents
1.
2.
3.
4.
5.
6.
7.
8.
9.
10.
11.
12.
13.
14.
15.
16.
17.
18.
19.
20.
21.
22.
Refund with Gratuity
23.
Pre-Authorisation
24.
Key Entering Card Details and Mail Order Transactions
25.
Reversal
26.
Verify Account
27.
PIN Entry Failure
28.
Cancelling Transactions
29.
Clearing Mistakes
30.
Printing Duplicate Receipts
31.
X and Z Totals
32.
Waiter Totals
33.
End of Day Banking
34.
Entering Function Codes
35.
Waiter IDs (Restaurants)
36.
How to Change the Date and Time
37.
How to Set Sleep Parameters
38.
How to Print a Transaction Log
39.
How to Assign a Terminal to a Base Unit
40.
How to Change a Paper Roll
41.
GSM Network
42.
Insuring the Terminal
43.
Security Warning Notice
44.
Helpful Hints
45.
Miscellaneous Prompts
Please note: some functions may not be supported on your terminal, please speak to your
acquirer for more details.
2
3
5
7
7
8
8
9
9
10
11
12
12
15
16
17
18
18
19
19
20
21
22
23
26
26
26
27
27
28
28
28
29
30
30
32
33
33
34
35
36
36
36
36
37
Advertisement
Table of Contents

Related Manuals for Ingenico IWL220


Summary of Contents for Ingenico IWL220
-
Page 1: Table Of Contents
Contents Introduction Important Safety Instructions Standards Installing the Bluetooth Terminal Installing the GPRS Terminal Using the Terminal Battery & Display Information Signal Information for GPRS Connection to Base and Radio Connection for Bluetooth Using the Menus Using a Payment Card Starting a Transaction Sale Transactions Voice Referrals... -
Page 2: Introduction
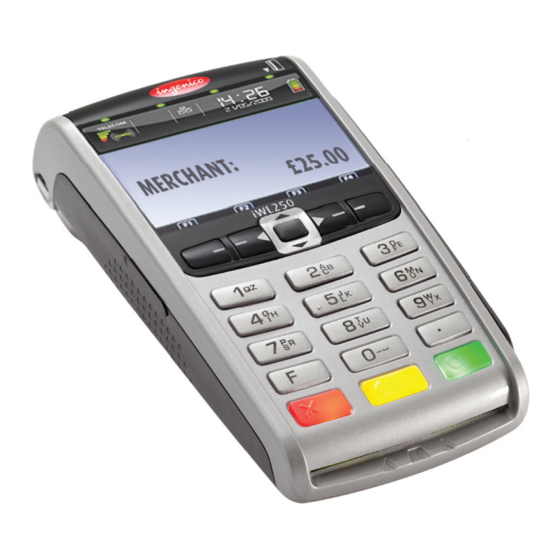
Introduction This guide will detail how you install and use your IWL220/250 Bluetooth/GPRS terminal, including Safety Instructions and instructions on transaction processing, printing reports and general maintenance of the terminal. Base Unit and Handset Placement for Bluetooth Terminals PLEASE READ THIS VERY IMPORTANT INFORMATION BEFORE PLACING YOUR BASE UNIT AND HANDSET The Ingenico iWL220/250 is a portable product that uses Bluetooth Short Range Radio to communicate between the handset and the base. -
Page 3: Important Safety Instructions
(no bars) or ‘no power’ then you should return the handset to the base to charge the battery. Important Safety Instructions Powering down the iWL220/250 base Disconnect the iWL220/250 power supply block adapter from the electrical mains network. Lithium cell (Backup battery) The iWL220/250 is fitted with an internal lithium cell which can only be accessed by a qualified technician. - Page 4 Copyright © 2012 Ingenico UK Ltd ALL RIGHTS RESERVED You have an urgent call to make while the iWL220/250 is occupying the line. In order to get a dial tone quickly: Place the handset in the hang up position pressing the red key (=cancel) or Date: August 2012 disconnect the base power supply from the mains network or disconnect the iWL220/250 Released for UT4.13.11 Page 4 Page 37...
-
Page 5: Standards
Keep your Supervisor card in a secure place. Anyone with access to this card may perform unauthorised refunds. The SAR values found for the IWL220/250G GSM/GPRS Point of sale terminal are below the maximum recommended levels of 1.6 W/Kg as averaged over any 1 g tissue according to the FCC Financial Tips rule §2.1093, the ANSI/IEEE C 95.1:1999, the NCRP Report Number 86 for uncontrolled environment,... - Page 6 To ensure that the product is collected and recycled with respect to the environment, you must con- tact your supplier (contact the Ingenico local office or the commercial head office in charge of your 3. Holding the free end of the paper and the terminal, country on www.ingenico.com <<contact us>>...
-
Page 7: Installing The Bluetooth Terminal
Installing the Bluetooth Terminal 4. Press the GREEN button again and the transaction log for Print Transaction Log that acquirer will be printed. It will show the previous 20 Continue? transactions for that acquirer. Step 3 and 4 will repeat for •... -
Page 8: Using The Terminal
Now switch on the mains supply. SET DATE/TIME 4. The current time will be displayed. Re-key the correct Enter Current Time 1. Key in your merchant number and press the GREEN time and press the GREEN button. dd/mm/yy Terminal Installation button. -
Page 9: Signal Information For Gprs
1. To change a Waiter Name, key in the Code of the Waiter One of these Battery Status Symbols will be displayed depending on the charge in the battery and CHANGE Name that requires change and then press the GREEN button. whether the handset is on the base. -
Page 10: Using The Menus
10. Using the Menus Adding an Individual Waiter ID Your terminal can be configured to recognise individual Waiter ID’s. These make it possible to The Transaction Menu enables you to perform a transaction identify which staff member has dealt with the transaction. The Waiter ID will be printed on the on the terminal. -
Page 11: Using A Payment Card
numbers or letters have been removed. Then re-key the correct entry. End-of-Day Banking 6. You will now be shown a list of the individual acquirers. Bank <aquirier> Press the GREEN button to reconcile an acquirer or press Once all the numbers or letters have been entered press the GREEN button to accept the entry. the YELLOW button if you do not want to reconcile a Enter=YES Clear=NO... -
Page 12: Starting A Transaction
Where a contactless transaction is allowed, the terminal 2. Use the arrow buttons to view the available op- TOTALS MENU display will show the contactless symbol. tions and press the GREEN button when the Waiter Z-Totals Totals option is highlighted. X-Totals Present, insert £9.50... - Page 13 30. Printing Duplicate Receipts 1. Your terminal may be configured to allow Cashback, if SALE so press the GREEN button to select this option. Cashback? 1. At the READY prompt press the MENU button. Use the Enter=YES Clear=NO TRANSACTION MENU arrow keys to view the available options and press the Refund GREEN button when the Duplicate Receipt option is...
- Page 14 presents a card which supports multiple card schemes you may be required to chose which card Once all the re-try attempts have been used the terminal PIN TRIES EXCEEDED scheme to use. will display the message: ‘PIN TRIES EXCEEDED’ Contact Card Issuer RETURN TERMINAL 4.
-
Page 15: Voice Referrals
25. Reversal 2. The cardholder should present their card against the Contactless symbol on the terminal display. Present, insert £9.50 You can reverse the last previously authorised Sale or Refund transaction provided the reversal is or swipe card carried out within 30 seconds of completing the original transaction. 1. -
Page 16: Setting The Referral Password
Once you have spoken to the Authorisation Centre press IF YOUR TERMINAL IS CONFIGURED FOR CSC/AVS (A SALE the GREEN button to continue with the transaction or, if CARDHOLDER VERIFICATION SERVICE) PROCEED AS FOLLOWS. Authorisation given? authorisation is declined, press the YELLOW button. If you see this prompt, key in the 3 digit security code, ENTER=YES CLEAR=NO... -
Page 17: Refund
1. At the READY prompt press the MENU button. Use the Selecting the YELLOW button will return the terminal to TRANSACTION MENU arrow keys to view the available options and press the the READY prompt. Refund GREEN button when the required option is highlighted. Sale If this is the first time the Password has been set please Purch. -
Page 18: Contactless Refunds
17. Contactless Refunds Completion To perform a Contactless Refund “Amount Entry First” must be enabled; the card scheme must be The following procedure will complete a pre-authorised transaction when the final account is configured to allow it and the transaction amount must be below the maximum contactless confirmed with the customer. -
Page 19: Cash Advance
4. If a gratuity has been added, press the GREEN button. If The transaction will now continue as a normal sale transaction. Please refer to Section 13 of this REFUND no gratuity has been added, press the YELLOW button. guide for how to complete a Sale transaction. Gratuity Added? PLEASE NOTE: Only the last four digits of the card number will be printed on the customer’s receipt. -
Page 20: Purchase With Gratuity (Restaurants)
Cardholder to Confi rm Gratuity Percentage If gratuity with percentage is enabled the following screen 6. The customer may then be prompted to confirm the Total 60.00 will be displayed: total transaction amount. 10 % Press ENTER to Accept or CLEAR to Reject 15 % 20 % Other...