Sign In
Upload
Manuals
Brands
Panasonic Manuals
Projector
PT-D10000E
Panasonic PT-D10000E Manuals
Manuals and User Guides for Panasonic PT-D10000E. We have
4
Panasonic PT-D10000E manuals available for free PDF download: Service Manual, Operating Instructions Manual, Specifications
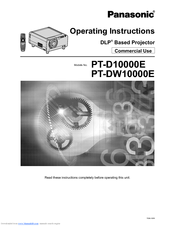
Panasonic PT-D10000E Operating Instructions Manual (122 pages)
DLP Based Projector Commercial Use
Brand:
Panasonic
| Category:
Projector
| Size: 27 MB
Table of Contents
Operating Instructions
1
Dear Panasonic Customer
2
Table of Contents
3
Important Safety Notice
4
Precautions with Regard to Safety
6
Before Using
10
Remote Control Unit
12
Location and Function of each Part
12
Connection Terminals
16
Effective Range of Remote Control Operation
17
Loading Batteries
17
Using the Remote Control Unit
17
Setting Projector ID Number to Remote Control
18
Using a Wired Remote Control
18
Examples of System Expansion
19
Installation
19
Installation Geometry
20
Projection Scheme
20
Adjusting the Feet
20
Projection Distances by the Type of Projection Lenses (Optional)
21
Calculation Formulas for Projection Distance by Lens Types
23
Before Starting Connection
24
Connection
24
Example of Connecting with VIDEO Devices
25
Example of Connecting with Personal Computers
26
Installing the Input Module
27
Installation of Input Module (Optional)
27
Procedure of Installation
28
Connecting Signals to the Input Module
29
Connecting the Signal to the SD-SDI Input Module
30
Connecting the Signal to the HD/SD-SDI Input Module
31
Connecting Signals to the DVI-D Input Module
32
How to Install and Remove the Projection Lens (Optional)
33
Terminal of the Projector
34
Projection
34
Powering up the Projector
35
Making Adjustment and Selection
35
Powering off the Projector
36
How to Adjust the Focus, Zoom and Shift
37
How to Adjust the Lens
37
How to Adjust the Lens for Addressing Unevenness of Focusing
39
Automatic Adjustment (AUTO SETUP)
39
Registration of Input Signal Data
40
Clearing the Data of Registered Signals
41
Sub Memory
41
Switching the Input Signal
43
On-Screen Display Function
43
Basic Operations Using the Remote Control
43
Changing the Picture Aspect Ratio
45
On-Screen Menus
46
Resetting to the Factory Default
48
Using the Menu Screens
48
Menu Items Setting
48
Returning to the Previous Screen
48
Press Menu
48
Switching the Picture Mode
49
Adjusting the Picture
49
Adjusting Contrast
50
Adjusting Colour
50
Adjusting Brightness
50
Adjusting Tint
51
Adjusting the Colour Temperature
51
Sharpness Setting
52
Gamma Setting
52
Noise Reduction Setting
53
Dynamic Iris Setting
53
Shift Adjustment
56
Adjusting the Position
56
Adjusting the Aspect Ratio
57
Clock Phase Adjustment
58
Adjusting the Zoom Ratio
58
Digital Cinema Reality
60
How to Use ADVANCED MENU
60
Adjusting the Clamp Position
62
Edge Blending Adjustment
62
Frame Delay
64
Raster Position
65
Changing the Display Language
66
Setting the DISPLAY LANGUAGE
66
Adjusting Colour Matching
67
Option1 Settings
67
Adjusting the Colour Matching Using a Colorimeter
68
Large Screen Correction
69
Auto Signal
70
Back Colour
71
Setting FUNC1
73
OSD Memory
74
Position of On-Screen Indications
74
Setting a Projector ID
75
Option Settings
75
Installation Setting
76
Lamp Select
78
Communication Conditions
79
Lamp Relay
79
System Information
80
Cleaning the Air Filter
80
Displaying the Internal Test Pattern
83
Initial Setting of Network Function
84
How to Use Network Function
84
Network Connections
86
Web Browser
87
Basic Control Page
88
Monitor Information Page
89
Detail Control Page
89
Error Information Page
90
Ping Test Page
94
Contents of Mail Sent
95
Network Config Page
96
Supported Commands
98
Using the Pjlink™ Protocol
98
Setting the Password
99
Setting the Security
99
Setting the Text
100
Changing the Password
100
Changing the Text
101
Using the Serial Terminals
102
Pin Assignments and Signal Names
103
Single Projector
103
Basic Format
104
Control Commands
104
Cable Specifications
105
Using the Remote Terminal
106
Indication of Monitor Lamp
107
Procedure of Cleaning
108
Cleaning and Replacement of Air Filter
108
Precautions on Lamp Unit Replacement
110
Timing of Lamp Unit Replacement
110
Replacement of Lamp Unit
110
Procedure of Lamp Unit Replacement
111
Installation Procedure
112
Notes When Installing the Ceiling Mount Bracket
112
Before Asking for Service
113
Self-Diagnosis Display
114
Specifications
116
Appendix
118
Outside Dimensions
120
Installation Dimensions Diagram
120
Dimensions
120
The "Precautions with Regard to Safety". (Pp
121
Index
121
Advertisement
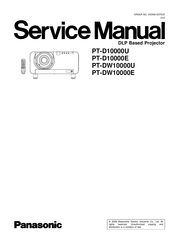
Panasonic PT-D10000E Service Manual (202 pages)
Brand:
Panasonic
| Category:
Projector
| Size: 19 MB
Table of Contents
Table of Contents
3
1 Safety Precautions
5
2 Specifications
6
3 Function for Safety
8
4 Serviceman Mode
9
Setting to Serviceman Mode
9
Resetting to User Mode
10
5 Self-Diagnosis Display
14
6 Using the Serial Terminals
17
Pin Assignments and Signal Names
18
Control Commands
19
7 Using a Wired Remote Control
21
8 Support for Service
22
10 Parts Location
23
11 Replacement of Lamp Unit
24
Indication of Lamp Monitor
25
12 Disassembly Instructions
26
Removal of Upper Case
27
Removal of A-P.C.board
28
Removal of FH-Module
29
Removal of J-P.C.board
31
Removal of L1-/L2-/L3-/L4-P.C.board
32
Removal of NN-Module
33
Removal of R2-P.C.board
34
Removal of R3-P.C.board
35
Removal of SL-P.C.board
36
Removal of PF-Modele
39
Removal of Projection Lens
41
Removal of Iris Unit
42
Removal of Analysis Block
43
Removal of Color Prism Block
46
Removal of Analysis Mirror
48
Troubleshooting
49
Interconnection Block Diagram
69
Interconnection Block Diagram (4/4) (PT-D10000U/E)
72
15 Block Diagram
75
Power Supply (2/2)
76
Signal Processing (1/2)
77
Signal Processing (2/2) (PT-D10000)
78
Control and Driving System (1/2)
80
16 Schematic Diagram
83
P.C.board (1/11)
84
P.C.board (7/11)
90
P.C.board (2/5)
96
J2/J3/L1/L2/L3/L4-P.C.board
101
R2/R3/SL/CL-P.C.board
102
P.C.board
103
Module (1/2)
104
Panasonic PT-D10000E Operating Instructions Manual (132 pages)
Brand:
Panasonic
| Category:
Projector
| Size: 11 MB
Table of Contents
Table of Contents
3
Important Safety Notice
4
Precautions with Regard to Safety
6
Before Using
10
Location and Function of each Part
12
Using the Remote Control Unit
17
Installation
19
Connection
24
Installation of Input Module (Optional)
27
How to Install and Remove the Projection Lens (Optional)
33
Projection
34
How to Adjust the Lens
37
Automatic Adjustment (AUTO SETUP)
39
Registration of Input Signal Data
40
Basic Operations Using the Remote Control
43
On-Screen Menus
46
Adjusting the Picture
49
Adjusting the Position
56
How to Use ADVANCED MENU
60
Setting the DISPLAY LANGUAGE
66
Option1 Settings
67
Option2 Settings
75
Displaying the Internal Test Pattern
83
How to Use Network Function
84
Using the Pjlink™ Protocol
98
Setting the Security
99
Using the Serial Terminals
102
Using the Remote 2 Terminal
106
Indication of Monitor Lamp
107
Cleaning and Replacement of Air Filter
108
Replacement of Lamp Unit
110
Notes When Installing the Ceiling Mount Bracket
112
Before Asking for Service
113
Try to Check the Following Points Again
113
Self-Diagnosis Display
114
Specifications
116
Appendix
118
Dimensions
120
Index
121
Français Information
123
Advertisement
Panasonic PT-D10000E Specifications (6 pages)
3-chip DLP Projector
Brand:
Panasonic
| Category:
Projector
| Size: 0 MB
Table of Contents
High Reliability
4
Universal Design
5
Other Features
5
Optional Accessories
5
Specifications
6
Notes on Use
6
Projection Distance
6
Advertisement
Related Products
Panasonic DLP PT-D12000U
Panasonic DLP PT-D12000E
Panasonic PT-D10000 Series
Panasonic PT-D12000
Panasonic PT-D1000
Panasonic PT-D10000U
Panasonic PT-DZ6710U
Panasonic PT-D5000ELS
Panasonic PT-DZ6710UL
Panasonic PT-DX500
Panasonic Categories
Air Conditioner
Camcorder
TV
Digital Camera
Cordless Telephone
More Panasonic Manuals
Login
Sign In
OR
Sign in with Facebook
Sign in with Google
Upload manual
Upload from disk
Upload from URL